DIY Home Decor Categories

“Why would I use Annie Sloan Paint on my Kitchen Cabinets”

“I’m planning to paint my kitchen cabinets. Why would I use Annie Sloan paint and wax vs a high quality paint with polyethylene? Seems like a multi step process and it intimidates me.”

kitchen after pin

This is a GREAT Question…and a real one from on of our followers on our knot too shabby Painters page on Facebook. The answer, in and of itself is a bit long for a facebook post, but definitely blog worthy!

Let me start by stating that I have painted multiple kitchen cabinets. I’ve used traditional latex way back in the day on my parents cabinets, and more recently I used Chalk Paint® on my own kitchen cabinets.

About fifteen years ago, when we painted my mom and dad’s kitchen, it took the ENTIRE family about two weeks. My husband helped out (before we were married…that’s commitment I tell ya’), my sister helped, mom and day obviously were helping and then I was there to help out, too. The process went something like:

  • Remove Cabinets
  • Set up a work station outside with folding tables and saw horses
  • Aggressively clean cabinets using highly toxic TSP type of chemicals
  • Sand original finish…but don’t breathe because sanding dust will be EVERYWHERE
  • Clean…again
  • Prime one or two thin coats
  • Paint two coats
  • Reattach cabinetsThat process took somewhere in the vicinity of 200 man-hours. It was extremely labor intensive. But, the end result looked clean and sleek (not so much anymore…it has been 15+ years, after all).

I have nothing against latex or oil based paints. When applied correctly, they offer great finishes. But, as I said, it’s labor intensive.

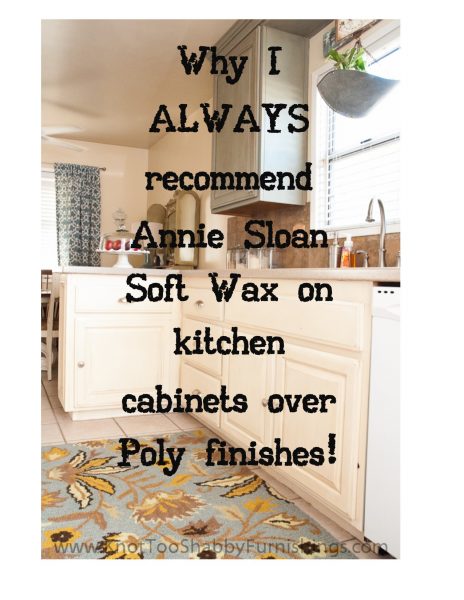
So, the real question is WHY DID I USE ANNIE SLOAN PAINT when I painted my kitchen cabinets instead of latex with poly…and why will I (almost) ALWAYS recommend Chalk Paint® for your kitchen cabinet makeover?

MonroviaWorkshop-28

  1.  The prep work is minimal by comparison to other paint products.
    YES! You have to clean.
    YES! You do have to do MINIMAL prep work. Minimal being the operative word.I recommend a thorough cleaning using soap and water. Dish soap on a sponge, Simple Green, Fabuloso…whatever your cleaning product of choice works well to clean off dirty finger prints, grease build-up, oil stains, food spills, etc. Heck, you might decide after you clean the cabinets that they don’t need to be painted after all (Don’t laugh…I’ve heard of that happening)!Once your cabinets are clean, use Denatured Alcohol and a soft cloth to wipe down all of the surfaces. Denatured Alcohol is a natural deglosser and cuts through that last bit of grease and residue left behind while giving you a great surface to start painting.Finally, finish off with a clean water rinse to remove any residual cleaner left behind!CHALK PAINT® HAS GREAT ADHESION AND WILL BOND TO MOST ANY FINISHES…EVEN GREASY, DIRTY OILY FINISHES. BUT, WHEN THE GREASE GETS WIPED OFF OR DIRT RESIDUE IS SCRUBBED DOWN, IT WILL TAKE THE CHALK PAINT® ALONG WITH IT. THAT’S WHY IT IS IMPORTANT TO CLEAN YOUR SURFACE PRIOR TO PAINTING!

    KitchenBefore-3

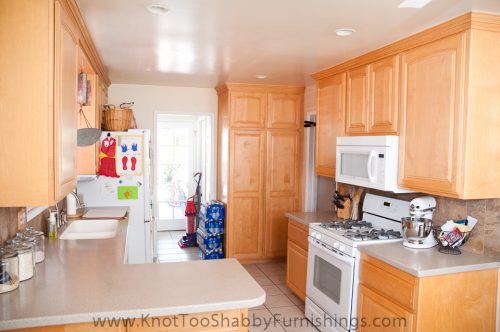
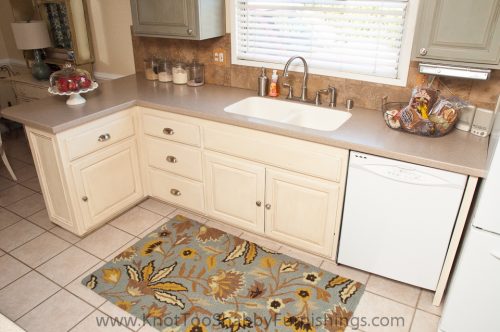
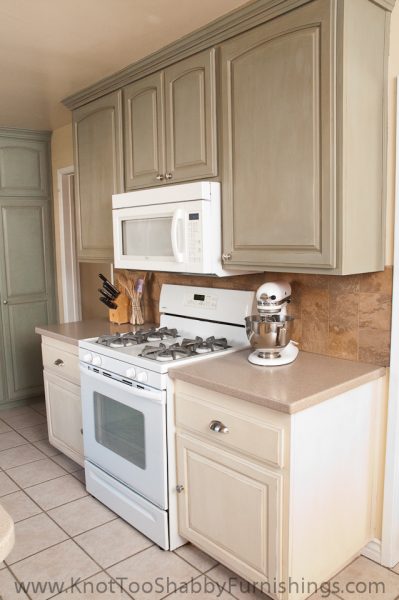
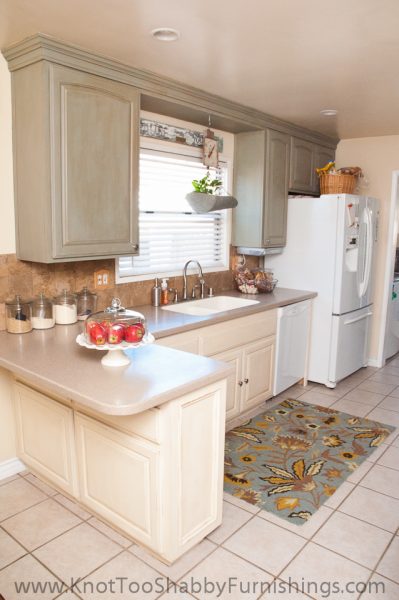
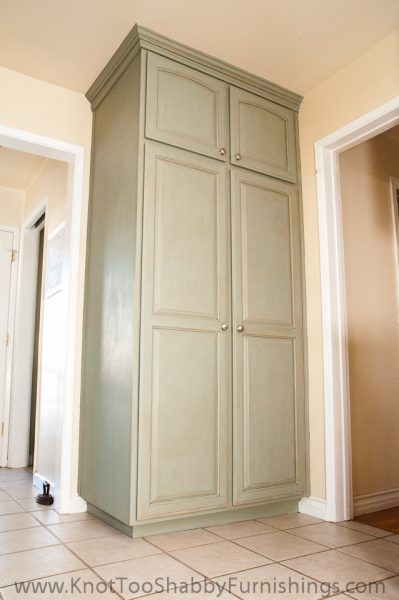
    My kitchen cabinets before

  2. I was able to paint my cabinets in the comfort of my own home without having the mess of sanding or the aggravation of priming.Not only the ease of use made Chalk Paint® ideal, but because it is water based and VERY EASY to clean, I only had to do minimal prep-work related to taping and covering surfaces. I wasn’t worried about covering the floor or counters with paper because any spilled paint could be wiped off with nothing more than a damp wash cloth…even after it dried.The natural ingredients in Chalk Paint® and zero detectable VOC’s meant that I could paint inside without worrying about my family being exposed to a plethora of paint fumes.I painted the cabinet doors in place. I didn’t have to clean out cabinets and drawers or remove hinges. (Read the original post about how I tackled this project over a 5-day timeline)Kitchen-After-41
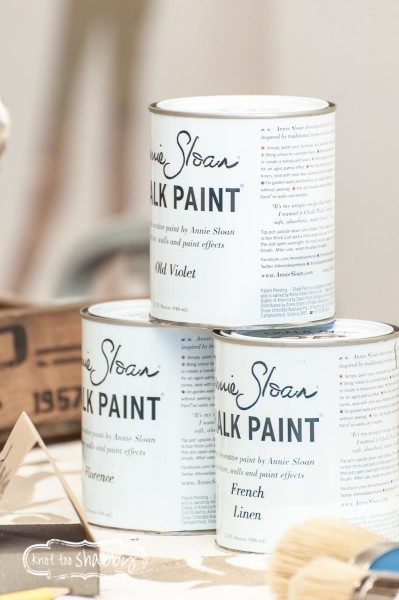
  3. Chalk Paint® is highly pigmented which allows for superior coverage as compared to other paint brands.The high pigmentation in many of the Chalk Paint® colors provide that you only need one coat to cover. I picked a color that I knew would provide superior coverage to save on time and effort.Even if you go with a traditional white finish, you’ll only need two coats (occasionally a third depending on the type of brush you use or the original finish) as compared with four+ coats using a latex and primer. I also have some time-saving and cost-saving tips on painting with white paint that applies to any piece you select to paint white (perhaps a separate blog post for a later date).Kitchen-After-47
  4. It’s all about the WAX!THERE IS NOTHING BETTER FOR KITCHEN CABINETS THAN ANNIE SLOAN SOFT WAX!!!Let me tell you why. 


    Kitchen-After-31Wax breaks down over time…this is where I get gasps and wide eyes.

    “What do you mean wax breaks down? I don’t want wax. I need something durable. (insert panic here)”

    The mere fact that wax breaks down with heavy use is its singular greatest benefit when applied to kitchen cabinets because it is a fixable product, whereas polyurethanes and other liquid sealers can not be fixed…they can only be re-applied (after sanding, re-painting and re-sealing).

    Think stains from Crayola markers, Sharpies, blueberries, spaghetti sauce, scuff marks from shoes, dings from careless kids/pets/spouses, etc., etc. etc. Life happens in kitchens! Messes happen! With a wax top coat, your mess can be easily removed with nothing more than a very light sanding and quick reapplication of soft wax. The wax, literally removes stains, markers and scuff marks. This is of course, only necessary if your sponge or washcloth doesn’t clean it out.

    BECAUSE the wax breaks down with use and kitchens get used a lot, you’ll want to mitigate how often you re-wax. I always recommend applying three coats of clear wax on kitchen cabinets over the course of 2-3 weeks. If you build up a nice, durable wax finish from the start, you will likely not have to re-wax your kitchen cabinets for at least a few years!

    Kitchen-After-45

It’s been over four years since I first painted my kitchen cabinets with Annie Sloan Paint. I can attest first hand to the durability of paint and wax and the ease of cleaning them with a houseful of messy kids and large pets!

Is painting kitchen cabinets intimidating? Heck Yeah! Kitchens are important rooms of the house and if you aren’t intimidated by the sheer size of the project, please call and tell me your special secret. Intimidating or not, DIY painted kitchen cabinets are totally doable! And, following the right steps, pretty easy, albeit time consuming.

I want to see your cabinet makeovers! Share before and/or after pictures of your Chalk Paint® cabinet makeovers on our knot too shabby PAINTERS facebook page!


4 Miss Mustard Seed’s Milk Paint Tips for Busy Moms

School  has started. Fall sports are starting within weeks. Homework. Orthodontic appointments. Piano Lessons. Awana. Sunday School. More homework. Chores. That’s just what my kids are committed to during the week. How in blazes does any mom find the time to finish their own projects amidst a busy life?

I can’t even pretend to know what you’re schedules look like, but I can offer a few bits of advice on how you can manage to find the time to work in a little Miss Mustard Seed’s Milk Paint DIY amidst your busy schedules.

busy moms

1. Have an idea of what you want your project to look like BEFORE you come shop for supplies


Let me start by saying that I love engaging with customers about their projects. We explore colors, fabric swatches, iPhone photos of their rooms and pieces (and occasionally photos of other…how should I say it…things…which is why I will NEVER look at your phone while you scroll through photos. It just saves us both from a potentially embarrassing moment).

45-60 minutes later, after waffling over this color and that color, they leave with a few bags of supplies and a heap of information (and I have the picture of you know who’s you know what forever burned into my memory…sobs).

If you are a busy mom and you only have 30-45 minutes to stop by and pick up your project supplies, know before you head on over what it is you want your project to look like. Believe me…I’m not that interesting and you don’t want to be spending your morning or afternoon with me talking your ear off about the finer subtleties of light vs. medium distressing, color theory or the differences between antiquing finishes and industrial finishes.

Bring photos of the piece(s) that you are painting along with your Pinterest images of the inspiration pieces you are trying to replicate. If I can see what you are painting and what you want it to look like, it is super easy and quick for me to point you to the right color, determine whether you need bonding primer, should seal it with wax or hemp oil or may achieve a sweet look with a wax puck.  You’ll be in and out in a jiffy and on to the next errand!

2. Understand your substrate


Substrate generally describes the base material that you are painting. For example, most furniture substrates are either waxed wood, varnished wood or raw wood. Knowing the difference will help you to determine not only the best product to use, but the best process. When using MMSMP, understanding the different substrates may be the difference between a project that takes a couple of hours or one that ends up taking a couple of days because you didn’t understand the type of surface you were painting, therefore requiring a total project redo.

When I teach MMSMP Workshops, I use the phrase, “more shine, more prime.” In a nutshell, the shinier your substrate is, the more bonding primer you’ll need to add to your paint for good adhesion. The less shiny…or the more raw or worn the substrate is, the less likely you will need any bonding primer.  This is a really simplistic way of looking at it and there are a dozen and one variables that may need to be considered, but it’s a good rule of thumb to start with if you are new to milk paint.

3. Organize your project into smaller and manageable chunks of time

I know that I could never get my own kids to leave me alone for the solid 3-4 hours that it takes to see a project to completion…at least not without duct taping them to a chair and sticking them three feet from cartoons. But, that’s not how I roll (or is it….mwahahahah).

But, I usually can count on them being occupied by a task for at least 45 minutes. That’s all I need to get a decent start! And, if you’re kids don’t absolutely drive you batty when they try to “help,” give them a simple task that will assist you with the project. For example, mine were satisfied with taking off knobs and handles. They thought they were cool stuff getting to use high tech equipment like a screwdriver.

So, here’s how I divide my project into mini-tasks that each take about 30-45 minutes each (depending on the size of the piece you are tackling):

Prep Time
-Set up your designated work station, preferably someplace that can keep your piece of furniture and supplies handy for a day or two.
-Clean your piece well to remove any grease and grime
-Lightly sand the surface to give your piece more tooth for the milk paint to grab on (if you are painting raw wood, you won’t need to sand at all).
-Rinse off any residual cleaner and sanding dust with a damp cloth.
-If you need to tape off any areas like glass doors or mirrors, do that step now
-Remove hardware (set aside in a small bowl to keep them together…says every person who has ever lost the last knob or it’s screw…mmmhmm…it happens!)
-Clean up the prep mess
-Set aside all of the supplies needed for the actual painting (i.e., paint, pitcher of water, mini whisk or mixer, clean brushes, paper towels or rags, spoon to scoop paint, and container to mix paint).

Paint Time
-Mix up your batch of paint (about equal parts powder to water)
-Go fold a load of laundry or empty the dishwasher, take out the trash…something that will take you about 15-20 minutes. You want that time set aside for the powder to dissolve into the water. If you neglect to let your paint “set-up,” you’ll be painting with a chunky batch and likely to see color variation throughout your piece of furniture.
-Paint your piece. Milk Paint dries quickly. Chances are, by the time you are finished with your first coat, you’ll be ready to start the second coat if needed.
-Don’t forget to mix your paint as you go to keep all of the ingredients equally distributed throughout your mixture.

Finishing Details and Clean Up
-Once the paint is dry, lightly sand to add light distressing, remove any chippng paint and to smooth the paint finish.
-Add your top coat; if your substrate was a more worn or dry finish, hemp oil is an ideal top coat. If you were painting over a shinier surface, then I recommend sealing with beeswax or Tough Coat (as a reminder, you never wanted to put Tough Coat over a wax finish).
-Let the wax harden for about 30 minutes, or allow the oil to soak in or the Tough Coat to dry. While that is happening, begin cleaning your work space and supplies.
-When your space is clean, lightly buff your piece with a soft cloth…old t-shirts and socks work well.

4. Give your freshly painted piece time and space to fully cure

In simple terms, curing is a chemical process that the paint and wax undergo over a period of about 21-30 days. During that time, the various ingredients and vapors or being released and the paint finish is becoming more durable. That being said, you want to be gentle while it’s curing. There is no top coat that is impenetrable to the goings on of rough kids, sloppy spouses, house pets and day to day life. BUT, if you allow your piece to fully cure before you use it regularly, the chances of it withstanding all that life throws its way increases dramatically.


Painting is fun and seeing transformation in your house is rewarding. But, it can be stressful amidst the craziness of day-to-day life. Hopefully, these simple tips help you to organize your projects to make the most of your time!

Now, go out and have some fun with the kids! ?

20+ Ways to Use Shelf Brackets That You’ve Never Thought Of

(Image credit: Yellow Brick Home)

Shelf brackets’ primary purpose is well known and documented: prop up and secure boards to create wall storage. But did you know that there’s an entire outlaw gang of brackets that went rogue? They shrugged off society’s expectations about their usefulness and devised entirely new roles for themselves within households and workspaces everywhere.

READ MORE »

The Ultimate Happy Place: Whimsical DIYs You Probably Never Thought to Try

(Image credit: Marisa Vitale)

You may have caught a look at Amina and Salvatore’s incredible house tour and if not, seriously, how could you miss it? It’s what all your rainbow and unicorn and glitter dreams are made of! What was so surprising, aside from the sheer amount of color packed into 650 square feet of rental space, was the amount of projects they created themselves. As avid DIYers and creative entrepreneurs, the label of “rental” didn’t stop them from creating the ultimate happy-place-heaven for the two of them and their adorable dogs.

Hold on to your faux flower crowns – you’re about to be blown away by all these eye-popping, jaw-dropping DIYs.

READ MORE »

4 Ways to Fight Cabin Fever

Winter is here, and cabin fever is setting in. Feeling a little S.A.D.?  There’s a reason. Seasonal Affective Disorder is a real thing, probably known best by its other name, the “winter blues.” The best way to chase away your funk is by getting started on brightening your space for spring. Read on for five home decorating ideas that will help you fight your cabin fever.

section02_header

1. Color Play

Want to make the gray skies go away? Bring in some color play! A surefire way to elevate your mood is to surround yourself with home accents in a variety of bright and cheerful hues.

section02_products

  1. Orange Tear Drop Finial
  2. Lime London Studded Accent Chair
  3. Aqua Blue Glass Geometric Lantern

section03_header

2. Lighting

Winter days are especially short, and all the extra darkness sure is a bummer. Swapping out your old lamps for new, stylish lighting can help uplift your room’s vibe and give it a new look.

section03_products

  1. Antique Cream Spindle Floor Lamp
  2. Silver Mosaic Uplight
  3. Silver Mercury Glass Table Lamp (shade sold separately)

section03_protip

section04_header

3. Greenery

Being forced to stay indoors keeps us from experiencing nature, which can really kick start the winter blues. Since spring won’t be here for a few more months, bring some greenery indoors with gorgeous faux succulents and spring and summer floral.

section04_products

  1. Succulent in White Pot
  2. Hanging Succulent in Glass Ornament
  3. Mixed Succulents in Concrete

section05_header-2

4. Florals

There’s nothing like a little flower power to kick you out of the winter doldrums. Iconic floral prints invoke the feeling of spring while refreshing any room.

section05_products

  1. Rosie Lagoon Throw Pillow
  2. Forest Bird Comforter King Set- 8-Piece
  3. Red & Teal Floral Area Rug

section05_protip

Did your recent home refresh cure your case of cabin fever? Be sure to show us using #AtHomeStores.

The post 4 Ways to Fight Cabin Fever appeared first on At Home Blog.

Comparing Linoleum and Vinyl Flooring

Buy Vinyl Flooring | Laminate Vs Hardwood Floor

Busy homes need durable flooring, and carpet may not cut it in high-wear areas. At the same time, many homeowners can’t afford or don’t want hardwood or engineered flooring. So they start looking at linoleum and vinyl flooring, but don’t understand the similarities or differences. Let’s look at these two flooring types and compare them.

buy hardwood floors

How they are produced — Linoleum is produced by combining linseed oil with solid fillers such as cork or wood dust. Vinyl is produced by combining synthetic materials including polyvinyl chloride, or PVC.

Ongoing maintenance — Cleaning and maintenance are similar to the two products, but linoleum requires a sealing coat when installing because unsealed linoleum is not waterproof and can be damaged by liquid spills. Vinyl flooring is chemically waterproof, so no sealing step is required.

Appearance and effects of time — Linoleum flooring have an appearance that is unique to the product, and over time will take on different colors and patterns with the natural wear and tear which occurs on all floors. Vinyl is typically manufactured to mimic other products, such as hardwood floors, and wear won’t create any positive changes in the look.

In summary, if you are looking for a natural product that takes on a unique character over the years, linoleum flooring may be your best choice. If ease of maintenance using a man-made product is preferred, then vinyl flooring may be your best bet.

Regardless of your choice, come to Flooring.org first to have access to a wide selection of flooring materials. We have a huge selection of vinyl flooring materials, as well has hardwoods floors, engineered flooring, and renewable materials such as bamboo and cork. We have excellent prices and a knowledgeable staff who can help answer all your questions about choosing the right flooring for your needs.

Different Types Of Bathroom Vanity Tops You Should Consider

It doesn’t matter if it’s a tiny powder room or a luxury master bath, when you step into a bathroom for the first time, what’s one of the first things you notice? The vanity. Bathroom vanities tend to be focal points in bathrooms, housing the sinks and usually some counter and/or storage space. What’s more, as part of the overall look of a bathroom, vanities and vanity tops can provide an attractive design component, showcasing a desired style.

When you’re building or remodeling a home, make the most of the bathrooms by choosing just the right vanities for each space. In order to select the style that’s right for you, here’s a look at some of the different types of vanity tops available today:

  1. Stone: If it’s bathroom beauty you’re after, it’s hard to beat the look of granite or marble countertops. Available in various colors and patterns, stone countertops are trendy yet timeless. Using them is a sure sign of luxury — and a great pick for resale value. Just note these options are also on the more expensive end of bathroom vanities, ranging between $125 and $250 per linear foot.
  2. Tile: Durable and attractive, tile is a long-beloved bathroom choice. It comes in all kinds of designs, can be laid in various patterns, and is made to last. While the grout between tiles traditionally is a magnet for mildew over time, some of the new products on the market work against this issue. Prices for tile can vary from $10 to $40 per linear foot.
  3. Laminate: Low maintenance, durable and inexpensive, laminate countertops offer incredible value. You can find laminate in a wide range of patterns and colors, with textures from mottled to super glossy and smooth. Prices are usually anywhere from $24 to $50 per linear foot.
  4. Solid Surface: To enjoy the beauty of stone with less of the downsides, consider solid surface (i.e., quartzite) countertops. Created from an acrylic resin, this material is resistant to scratches, cuts and burns. It’s an option that’s low maintenance, durable and available in a wide range of colors.
  5. Wood: It’s as true for bathroom vanities as it is for living room floors: Wood is a timeless, natural, traditional choice. In bathrooms, it’s attractive and easy to install; however, wood counters are also vulnerable to water damage, so they have to be well sealed.

Choosing the right vanities for your bathrooms is a matter of knowing your personal preferences and tastes. Explore options online to get a feel for the look you like best, and use the information above to guide your decision. At Modern Bathroom, we’re proud to offer a wide range of bath vanities, from modern to antique, with various sink styles and sizes available. Click here to view vanities and learn more!

5 Ways to Get This Thyme-ly Trend

Spring has sprung, and it’s a great time to get your backyard decorated for all the season’s outdoor parties and get-togethers. Not sure what style suits you? We recommend this trending look that combines vintage, farmhouse-inspired pieces with the year’s hottest color to create the perfect patio space.

Greenery with Envy

Section01_Header

Greenery, the PantoneÒ 2017 Color of the Year, is the shade that defines this style. Incorporate it using textiles, like outdoor pillows and linens, or tabletop accents to bring the colors of the garden into this look.

Section01_Products


  1. Green Square Pillow
  2. Moss Bird Figurine
  3. 4-Pack Madison Sage Green Placemats


Rustic Textures

Section02_Header

This garden style gives a nod to farmhouse décor by using galvanized metal and distressed woods to create a rustic vibe. Try picking planters or unique pieces, like this mirror, to layer these textures in to your patio.

Section02_Products

  1. Wooden House with Three Planters Wall Art
  2. 3-Tier Metal Basket Wood Ladder
  3. 31″X23″ Rustic Wood Framed Mirror


Herb Appeal

Section03_Header

You’ll find plenty of herbs in this garden! Place these plants throughout your patio for a fresh feel and the convenience of having fresh herbs to use in your kitchen. Plus, add in charming wall art featuring your favorite herbs for another way to bring this look to life.

Section03_Products

  1. Rosemary Galvanized Metal Wall Art
  2. Maidenhair & Mini Bamboo Mixed Greenery
  3. Herb on Burlap Wall Art


Vintage Charm

Section04_Header

Top off your Garden Thyme style with charming vintage accents. A clever hanging sign or cute metal piece will be the cherry on top of this stylish cake.

Section04_Products

  1. Flower Linen Scroll
  2. Metal 3-Faucet Garden Planter
  3. I’m in the Garden Wall Sign


Entertainment Ready

Section05_Header

Now that your patio is perfectly styled, show it off when you entertain guests at your next outdoor gathering! Combine sleek white dinnerware and natural elements, like woven placemats, to create the perfect complement to the surrounding rustic pieces. Don’t forget to finish things off with a statement centerpiece!

Section05_Products

  1. 16-Piece White Dinnerware Set
  2. Outdoor Woven Placemat
  3. 36” Olive Tree in Jardin Pot


What trends are making an appearance on your patio this season? Share your style with us using #AtHomeStores, or find even more inspiration when you like us on Facebook or follow us on Instagram!


The post 5 Ways to Get This Thyme-ly Trend appeared first on At Home Blog.

One Stencil, One Home, Four Decor Projects

Four stenciled home decor projects using the Kerry Damask pattern from Cutting Edge Stencils. http://www.cuttingedgestencils.com/wall-damask-kerry.html

Cutting Edge Stencils Shares How One Stencil Can Create Multiple Home Decor Projects

Happy Friday, my little DIY darlings! Cutting Edge Stencils hopes everyone is recovering from their candy coma this morning because we have a stencil story that will absolutely blow your creative little minds!  Start out by envisioning your home completely covered, from bedroom to bathroom, in stencils! No, no this is not some sort of spooky Halloween nightmare that we want you to visualize. Instead today we’re going to show you how reusable our stencils can be!  Are you ready to see how you can use one stencil in multiple rooms of your home without creating a stenciling nightmare? You’re ready? Then let’s begin!

Four stenciled home decor projects using the Kerry Damask pattern from Cutting Edge Stencils. http://www.cuttingedgestencils.com/wall-damask-kerry.html

We’d like to introduce you to Gina, the creative DIYer, interior designer, and frugalista all wrapped up into one great blog called A Sense of Design.  A couple of years ago she bought a cute little cottage on the coast of Sydney and since then she’s been transforming one space at a time on a super tight budget.  Gina has also managed to make FOUR home decor projects using ONE stencil! Yup, you read that right!

Four stenciled home decor projects using the Kerry Damask pattern from Cutting Edge Stencils. http://www.cuttingedgestencils.com/wall-damask-kerry.html

Kerry Damask Stenciled Master Bedroom

Her fab stenciling craze all began when she ordered the Kerry Damask Stencil (size small) to create an accent wall in her bedroom.  Gina was looking to create a subtle backdrop behind her bed so she mixed a beige pearlescent with a turquoise hue to get the perfect stencil color.  She says, “I love the subtle sheen of the pearlescent paint, it adds a little sparkle to the room.”  Doesn’t Gina’s stenciled bedroom look awesome?  We think it does!

Stenciled bedroom featuring the Kerry Damask pattern from Cutting Edge Stencils. http://www.cuttingedgestencils.com/wall-damask-kerry.html

Kerry Damask Stenciled Wall Art

In about a week, Gina was back to stenciling and this time she was creating custom wall art.  See, once the accent wall in the master bedroom was crossed off the list, she noticed the lovely red tiles hanging above her desk no longer worked with her turquoise and warm beige walls.  So she grabbed some blank canvas boards that she had laying around the house and painted them the same turquoise hue she had stenciled on her accent wall.  Then re-using her Kerry Damask Stencil, Gina painted the pattern a beige pearlescent color.  She says, “I am really happy with the end result.”  So far she’s created two awesome projects using one stencil!

Stenciled wall art featuring the Kerry Damask pattern from Cutting Edge Stencils. http://www.cuttingedgestencils.com/wall-damask-kerry.html

Kerry Damask Stenciled Bathroom

Next up was the bathroom.  Gina happened to have some spare time one weekend and because of that, her bathroom got a mini makeover.  First she painted some off-white stripes and then she stenciled her Kerry Damask in a soft beige.  Her goal was to make this bathroom calm and peaceful.  We think she totally succeeded!

Stenciled bathroom featuring the Kerry Damask pattern from Cutting Edge Stencils. http://www.cuttingedgestencils.com/wall-damask-kerry.html

Kerry Damask Stenciled Table Cloth

Can you tell that Gina is on a stenciling roll?  For her fourth stencil project, Gina wanted to create a new table cloth for the Holidays.  Her holiday theme was black and silver.   First she purchased some black Hessian cloth, which is rather inexpensive.  Then she stenciled her Kerry Damask pattern in a metallic silver using acrylic craft paint. Simple and elegant! Her newly designed table cloth is perfect for a holiday gathering.

Stenciled table cloth using the Kerry Damask pattern from Cutting Edge Stencils. http://www.cuttingedgestencils.com/wall-damask-kerry.html

Have you ever purchased a stencil and used it for more than one project? Leave us a comment below, we’d love to read your thoughts!

Haven’t had enough stenciling fun?

Thanks for reading, and happy stenciling!
Michelle and the Cutting Edge Stencils Crew

Decorate Your Table With A Stenciled Tablecloth

Learn how to stencil a tablecloth using the Sari Paisley Medium wall stencil in four easy steps. http://www.cuttingedgestencils.com/wall-stencil-paisley.html

Learn How To Create A Stenciled Tablecloth In Four Easy Steps

Good morning, my DIY home decorators!  It was just this past Friday that Cutting Edge Stencils shared a post by Gina from A Sense of Design that featured our Kerry Damask stencil painted across a black tablecloth.  So pretty, right?

Stenciled table cloth using the Kerry Damask pattern from Cutting Edge Stencils. http://www.cuttingedgestencils.com/wall-damask-kerry.html

Then over the weekend one of our talented fans, Tea, sent us these gorgeous pictures of stenciled tablecloths that she painted for her home using our Zinnia Grande Stencil

A pink stenciled tablecloth using the Zinnia Grande flower pattern from Cutting Edge Stencils. http://www.cuttingedgestencils.com/flower-stencil-zinnia-wall.html

She also created this blue-tiful version using the same stencil. We love it!

A blue stenciled tablecloth using the Zinnia Grande flower pattern from Cutting Edge Stencils. http://www.cuttingedgestencils.com/flower-stencil-zinnia-wall.html

With the holidays just around the corner, stenciled tablecloths are certainly on the rise.  Look at this gorgeous creation by GingerSnap Crafts using our Turkish Tulip pattern.  We’d love to be invited to this luncheon!

Stencil a tablecloth using the Turkish Tulip pattern from Cutting Edge Stencils. http://www.cuttingedgestencils.com/moroccan-stencil-tulip.html

Do all these stenciled tablecloths have you planning your next gathering?  We knew you’d love this stencil project!  Before you send out the invites, we want to make sure you have the step-by-step instructions on how to create your own stenciled tablecloth.

We’d like to say hello to Jessica, the crafty DIYer and blogger behind Lemon Tree Creations.  She was looking to add some flattering table decor to her dining room.  She found this adorable polka dot fabric at her local thrift store but it needed something.  She put her crafty thinking cap on and decided to give it a paisley touch by adding our Sari Paisley Wall Stencil in a vibrant blue.  We think it’s totally awesome.  Now let’s take a look at how she crafted it!

Here is the scoop on how to stencil a tablecloth (this project comes from Lemon Tree Creations):

Learn how to stencil a tablecloth using the Sari Paisley Medium wall stencil. http://www.cuttingedgestencils.com/wall-stencil-paisley.html


First you’re gonna need this stuff listed below:

1. Gather Materials: Start the stencil project by gathering all of the materials listed above.  If it’s needed, iron the drop cloth or fabric to remove any wrinkles.  For this project, Jessica used a piece of polka dot fabric that she found at a local thrift store.  You could easily use a drop cloth to create a whole tablecloth similar to the one shown above by GingerSnap Crafts.

2. Secure The Stencil: Position the stencil design on the piece of fabric. Then you can secure the stencil in place using painter’s tape.

A stenciled tablecloth using the Sari Paisley Medium wall stencil. http://www.cuttingedgestencils.com/wall-stencil-paisley.html

3. Start Stenciling:  Pour your craft paint onto a plate or paint tray.  Mix up the paint with the fabric medium (2 parts paint to 1 part medium).  Then dip your stencil brush into the paint. Blot off the excess paint onto your folded paper towel until the brush looks almost dry.  The key to stenciling is using as little paint as possible.  Too much paint will cause the design to bleed and smudge.  Next you will paint the design onto the canvas square with the stencil brush using a dry brush (stippling) technique.  Stippling is when you tap the brush repeatedly over the stencil opening.

A stenciled tablecloth using the Sari Paisley Medium wall stencil. http://www.cuttingedgestencils.com/wall-stencil-paisley.html

4. Complete the Pattern:  If you are stenciling a tablecloth then you may need to reposition the stencil so you can continue to paint the pattern on the entire surface. Let the paint dry for two hours.

Now let’s position it on our table and presto chango, we have a gorgeous tablecloth!   Oh, and this project is so easy that even a first time stenciler could get the hang of it.  Jessica had this to say about her stencil project, “I was able to bring out a unique and inviting style to my now “not so shabby” little nook! (which I simply can’t take my eyes off of!)”  Great job, Jessica!

A stenciled tablecloth using the Sari Paisley Medium wall stencil. http://www.cuttingedgestencils.com/wall-stencil-paisley.html

Would you consider stenciling a tablecloth for your next gathering? Leave us a comment below!

Haven’t had enough stenciling fun?:

Thanks for reading, and happy stenciling!
Michelle and the Cutting Edge Stencils Crew

Warm & Feminine Apartment Bathroom Makeover

Apartment Budget Bathroom Makeover Asian decor batik pink fuchsia double panel shower curtain linen vanity sink skirt neutral windchimes wall art fresh flowersThe Decor Guru

Sometimes I feel like completing a room makeover is like waiting for a Kardashian to fall into a black hole of anonymity. As much as you want it to happen, it doesn’t look like it will anytime soon.

But hot damn, this bathroom makeover is finally done! Read along to find out what challenges I overcame during this makeover and how I transformed my boring apartment bathroom into a warm, soft space.

Before I decorate/make over a room, I create a moodboard (check it out here). The goal for this bathroom makeover was to create a nature-inspired, zen room. However, I ran into my first challenge not long after I started—myself.

The original vision was a neutral, romantic bathroom with touches of Asian & vintage decor. As much as I like the look of all-neutral rooms, though, I came to realize they’re just not for me.

I LOVE color, always have, and need it in my life! So this is what I instead came up with, a mostly neutral space with a bit of warm color. This was a perfect compromise by using some bright color but not too much that it overpowers this small room. It’s sweet, but not too sweet… much like myself. ?

Apartment Budget Bathroom Makeover Asian decor batik pink fuchsia double panel shower curtain octagon pearl shell mirrror neutral The Decor Guru

Apartment Budget Bathroom Makeover Asian decor batik pink fuchsia double panel shower curtain linen vanity sink skirt neutral The Decor Guru

Apartment Budget Bathroom Makeover Asian decor batik pink fuchsia double panel shower curtain linen vanity sink skirt neutral windchimes wall art fresh flowersThe Decor Guru

Apartment Budget Bathroom Makeover Asian decor batik pink fuchsia double panel shower curtain linen vanity sink skirt neutral windchimes wall art fresh flowersThe Decor Guru

The current shower curtain is actually the second curtain I sewed for the bathroom. (The first one is shown below, in the middle). I adored the cherry-blossom inspired pattern of the first shower curtain, but it just felt so bland in the room. I also wasn’t feeling the length, although it’s standard shower curtain length.

For the new one, I used a batik I’d used in my bedroom makeover months last year. Sewing the new shower curtain into two floor-length panels gives the bathroom a more tailored, chic feel. Symmetry for the win! I also added wood window curtain rings to infuse some natural energy into the room.

Apartment Budget Bathroom Makeover before after homemade personalized shower curtain panels linen vanity sink skirt neutral The Decor GuruThe second challenge? Having a funky apartment bathroom with an even funkier, mismatched vanity. My solution: utilize a palette that complements the beige walls and disguise the vanity with a faux linen (Osnaburg) sink skirt.

Apartment Budget Bathroom Makeover Asian decor batik pink fuchsia double panel shower curtain fresh flowers linen vanity sink skirt neutral The Decor GuruTo attach the skirt, I applied adhesive velcro onto the vanity and sewed the remaining velcro onto the fabric. This way, I can easily remove the skirt to wash it, and then easily reapply it. I removed the vanity doors for easy access.


Apartment Budget Bathroom Makeover linen DIY velcro vanity sink skirt neutral The Decor Guru

The final challenge in this makeover was my budget. It’s always my MO to decorate on a modest budget, but this time around I had to spend less usual. I prioritized my shopping, spending more money on the items that mattered most (textiles). I also repurposed some things into bath decor/accessories and “shopped my home” with items from other rooms.

For instance, this soap dish is actually a piece of dinnerware. I replaced the standard towel rack with a vintage kitchen towel rack I borrowed kept from an old apartment. Using mostly glass and translucent accessories keeps the room feeling light and uncluttered.

Apartment Budget Bathroom Makeover Asian decor sink bath accessories toiletries floating wall shelves neutral The Decor Guru

I repurposed these windchimes (scored on clearance) into wall art above the toilet. The candle tray was created by gluing bamboo reeds into a ceramic serving platter. (They’re also sealed with Mod Podge for protection from the humidity.)

Apartment Budget Bathroom Makeover Asian decor batik pink fuchsia double panel shower curtain fresh flowers bamboo serving candle tealight tray neutral The Decor Guru

Apartment Budget Bathroom Makeover Asian decor bamboo serving candle tealight tray neutral The Decor Guru

The bathroom came with two mismatched bath towel bars, hung in different spots. I decided not to buy new ones and mounted them side by side in a “his and hers” fashion. (You hardly notice they don’t match.)

Above the towels, I brought in a mirror from another room. This was a thrift store score  that I’d previously painted a pearly shade and glued shell beads onto.

Apartment Budget Bathroom Makeover curtain octagon pearl shell mirrror neutral decor The Decor Guru

Apartment Budget Bathroom Makeover curtain octagon pearl shell mirrror neutral decor The Decor Guru

Sources:

Fabric (shower curtains and sink skirt): Joann Fabrics

Wind chimes, Buddha tealight holder, bathmat, and “soap dish:” World Market

Serving tray: Home Goods

Wood curtain rings and toilet paper stand: Home Depot

Floating wall shelves, pink soap dispenser and tumbler: Target

Towels: IKEA

For as long as the makeover took, I’m very pleased with the outcome. I was able to transform this bathroom into a feel-good place, not a boring place I couldn’t stand to look at. It may have taken more time to be creative with the decor, but my bank account can testify it was well worth the wait. And we all know when the bank account is happy, everyone’s happy.

Thanks for visiting! Let’s stay connected!

Featured on:

A Stroll Thru Life: Inspire Me Tuesday

Linked to:

Home Stories A to Z: Tutorials & Tips Link Party

The Stitchin’ Mommy: Tuesday PIN-spiration Link Party

A Stroll Thru Life: Inspire Me Tuesday

Domestically Speaking: Inspire Me Monday

VMG206: Brag About It Tuesday Linky Party

Ginger Snap Crafts: Wow Me Wednesday

DIY by Design: It’s a Party

Craft Dictator: Craft Frenzy Friday

The Pin Junkie: Friday Link Party

Reasons To Skip The Housework: Skip the Housework Saturday

2 Crochet Hooks: Snickerdoodle Sunday

House of Hipsters: Found and Foraged Linky Party

DIY Show Off: That DIY Party

Redhead Can Decorate: Inspiration Monday

Huckleberry Love: Much Ado About Monday

Rae Gun Ramblings: Block Party

Kitchen Table Art: Making Monday

A Bowl Full of Lemons: One Project At A Time

Coastal Charm: Show & Share

 Ladybug Blessings: Handmade Tuesdays

Up to Date Interiors: The Creative Circle

Filed under: Bathroom, DIY, Rental Decorating, Repurposing, Reveals + Makeovers