DIY Home Decor Categories

4 Miss Mustard Seed’s Milk Paint Tips for Busy Moms

School  has started. Fall sports are starting within weeks. Homework. Orthodontic appointments. Piano Lessons. Awana. Sunday School. More homework. Chores. That’s just what my kids are committed to during the week. How in blazes does any mom find the time to finish their own projects amidst a busy life?

I can’t even pretend to know what you’re schedules look like, but I can offer a few bits of advice on how you can manage to find the time to work in a little Miss Mustard Seed’s Milk Paint DIY amidst your busy schedules.

busy moms

1. Have an idea of what you want your project to look like BEFORE you come shop for supplies


Let me start by saying that I love engaging with customers about their projects. We explore colors, fabric swatches, iPhone photos of their rooms and pieces (and occasionally photos of other…how should I say it…things…which is why I will NEVER look at your phone while you scroll through photos. It just saves us both from a potentially embarrassing moment).

45-60 minutes later, after waffling over this color and that color, they leave with a few bags of supplies and a heap of information (and I have the picture of you know who’s you know what forever burned into my memory…sobs).

If you are a busy mom and you only have 30-45 minutes to stop by and pick up your project supplies, know before you head on over what it is you want your project to look like. Believe me…I’m not that interesting and you don’t want to be spending your morning or afternoon with me talking your ear off about the finer subtleties of light vs. medium distressing, color theory or the differences between antiquing finishes and industrial finishes.

Bring photos of the piece(s) that you are painting along with your Pinterest images of the inspiration pieces you are trying to replicate. If I can see what you are painting and what you want it to look like, it is super easy and quick for me to point you to the right color, determine whether you need bonding primer, should seal it with wax or hemp oil or may achieve a sweet look with a wax puck.  You’ll be in and out in a jiffy and on to the next errand!

2. Understand your substrate


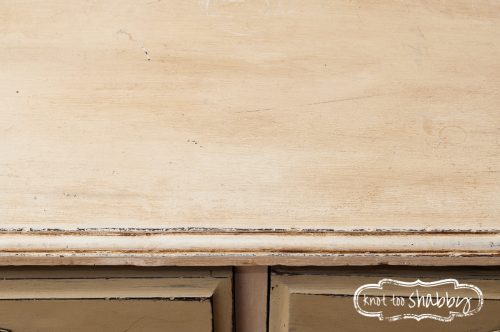
Substrate generally describes the base material that you are painting. For example, most furniture substrates are either waxed wood, varnished wood or raw wood. Knowing the difference will help you to determine not only the best product to use, but the best process. When using MMSMP, understanding the different substrates may be the difference between a project that takes a couple of hours or one that ends up taking a couple of days because you didn’t understand the type of surface you were painting, therefore requiring a total project redo.

When I teach MMSMP Workshops, I use the phrase, “more shine, more prime.” In a nutshell, the shinier your substrate is, the more bonding primer you’ll need to add to your paint for good adhesion. The less shiny…or the more raw or worn the substrate is, the less likely you will need any bonding primer.  This is a really simplistic way of looking at it and there are a dozen and one variables that may need to be considered, but it’s a good rule of thumb to start with if you are new to milk paint.

3. Organize your project into smaller and manageable chunks of time

I know that I could never get my own kids to leave me alone for the solid 3-4 hours that it takes to see a project to completion…at least not without duct taping them to a chair and sticking them three feet from cartoons. But, that’s not how I roll (or is it….mwahahahah).

But, I usually can count on them being occupied by a task for at least 45 minutes. That’s all I need to get a decent start! And, if you’re kids don’t absolutely drive you batty when they try to “help,” give them a simple task that will assist you with the project. For example, mine were satisfied with taking off knobs and handles. They thought they were cool stuff getting to use high tech equipment like a screwdriver.

So, here’s how I divide my project into mini-tasks that each take about 30-45 minutes each (depending on the size of the piece you are tackling):

Prep Time
-Set up your designated work station, preferably someplace that can keep your piece of furniture and supplies handy for a day or two.
-Clean your piece well to remove any grease and grime
-Lightly sand the surface to give your piece more tooth for the milk paint to grab on (if you are painting raw wood, you won’t need to sand at all).
-Rinse off any residual cleaner and sanding dust with a damp cloth.
-If you need to tape off any areas like glass doors or mirrors, do that step now
-Remove hardware (set aside in a small bowl to keep them together…says every person who has ever lost the last knob or it’s screw…mmmhmm…it happens!)
-Clean up the prep mess
-Set aside all of the supplies needed for the actual painting (i.e., paint, pitcher of water, mini whisk or mixer, clean brushes, paper towels or rags, spoon to scoop paint, and container to mix paint).

Paint Time
-Mix up your batch of paint (about equal parts powder to water)
-Go fold a load of laundry or empty the dishwasher, take out the trash…something that will take you about 15-20 minutes. You want that time set aside for the powder to dissolve into the water. If you neglect to let your paint “set-up,” you’ll be painting with a chunky batch and likely to see color variation throughout your piece of furniture.
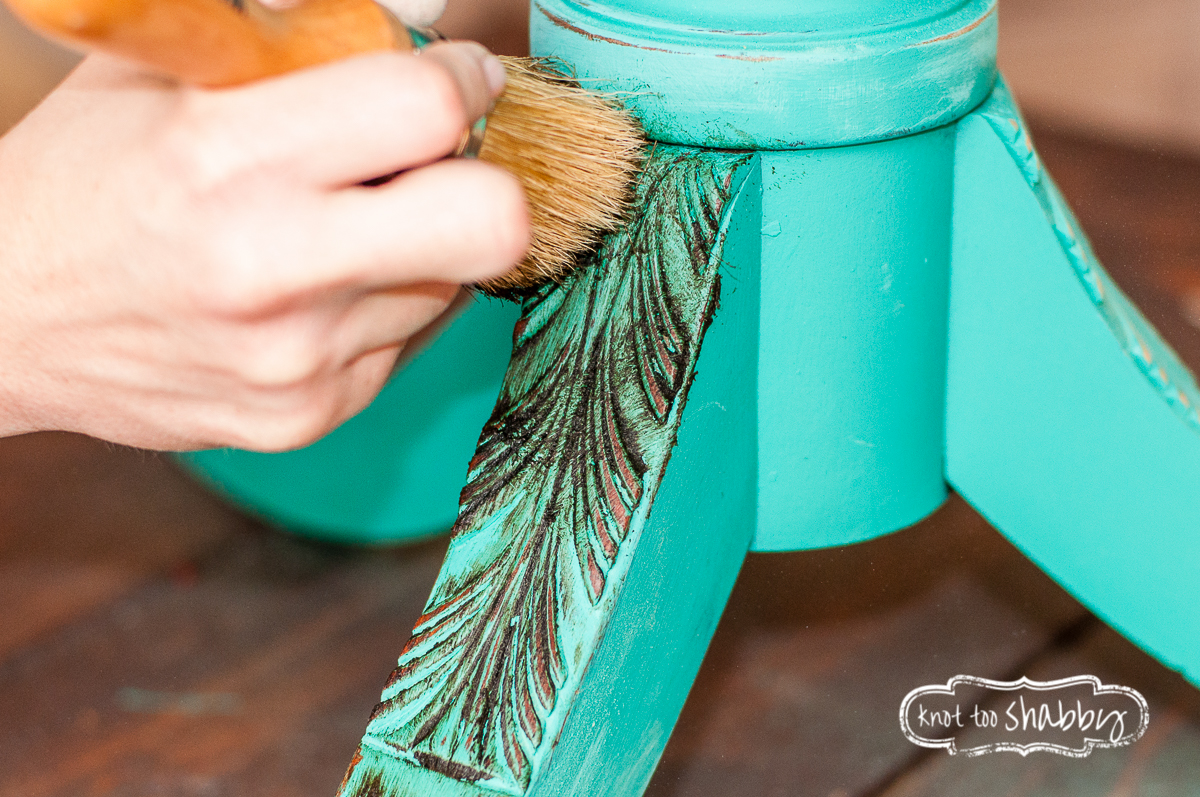
-Paint your piece. Milk Paint dries quickly. Chances are, by the time you are finished with your first coat, you’ll be ready to start the second coat if needed.
-Don’t forget to mix your paint as you go to keep all of the ingredients equally distributed throughout your mixture.

Finishing Details and Clean Up
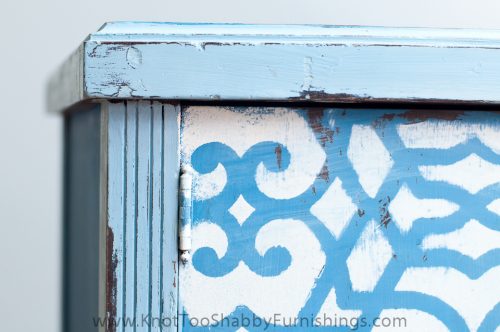
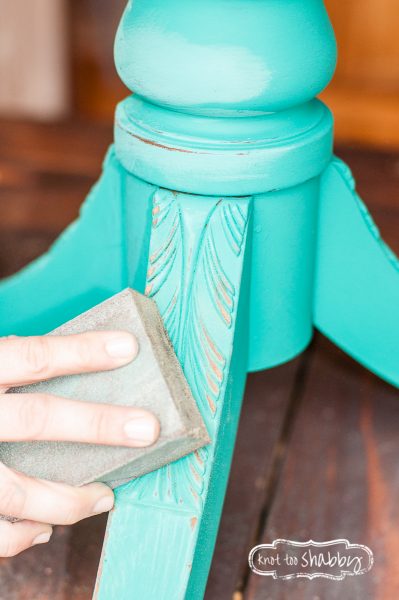
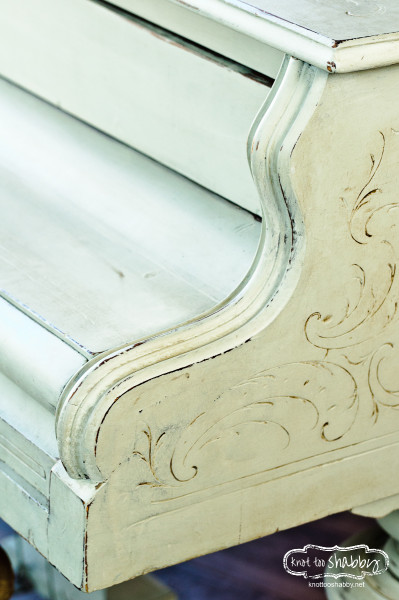
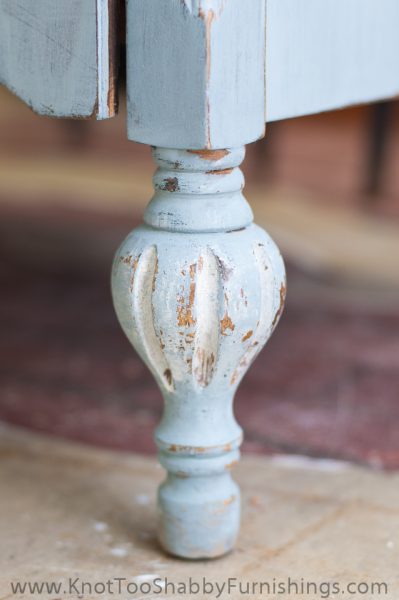
-Once the paint is dry, lightly sand to add light distressing, remove any chippng paint and to smooth the paint finish.
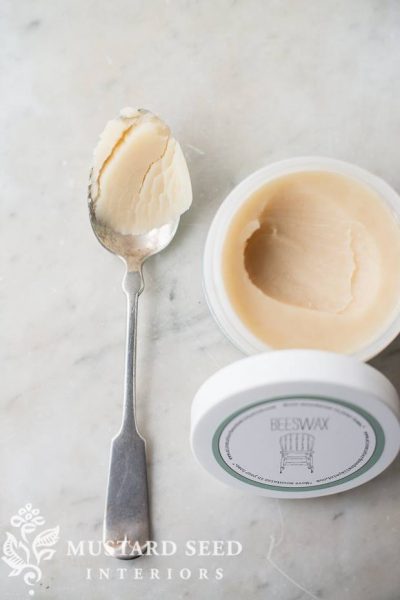
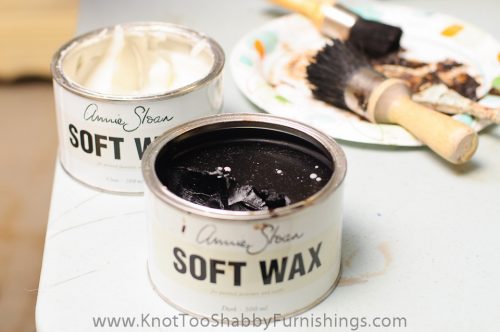
-Add your top coat; if your substrate was a more worn or dry finish, hemp oil is an ideal top coat. If you were painting over a shinier surface, then I recommend sealing with beeswax or Tough Coat (as a reminder, you never wanted to put Tough Coat over a wax finish).
-Let the wax harden for about 30 minutes, or allow the oil to soak in or the Tough Coat to dry. While that is happening, begin cleaning your work space and supplies.
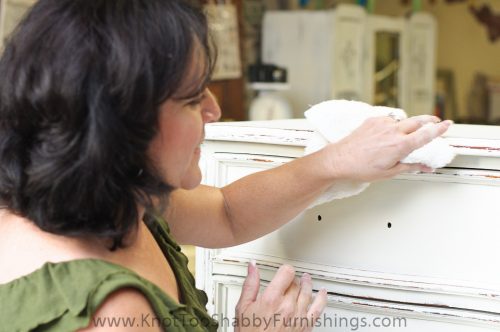
-When your space is clean, lightly buff your piece with a soft cloth…old t-shirts and socks work well.

4. Give your freshly painted piece time and space to fully cure

In simple terms, curing is a chemical process that the paint and wax undergo over a period of about 21-30 days. During that time, the various ingredients and vapors or being released and the paint finish is becoming more durable. That being said, you want to be gentle while it’s curing. There is no top coat that is impenetrable to the goings on of rough kids, sloppy spouses, house pets and day to day life. BUT, if you allow your piece to fully cure before you use it regularly, the chances of it withstanding all that life throws its way increases dramatically.


Painting is fun and seeing transformation in your house is rewarding. But, it can be stressful amidst the craziness of day-to-day life. Hopefully, these simple tips help you to organize your projects to make the most of your time!

Now, go out and have some fun with the kids! ?

20+ Ways to Use Shelf Brackets That You’ve Never Thought Of

(Image credit: Yellow Brick Home)

Shelf brackets’ primary purpose is well known and documented: prop up and secure boards to create wall storage. But did you know that there’s an entire outlaw gang of brackets that went rogue? They shrugged off society’s expectations about their usefulness and devised entirely new roles for themselves within households and workspaces everywhere.

READ MORE »

The Ultimate Happy Place: Whimsical DIYs You Probably Never Thought to Try

(Image credit: Marisa Vitale)

You may have caught a look at Amina and Salvatore’s incredible house tour and if not, seriously, how could you miss it? It’s what all your rainbow and unicorn and glitter dreams are made of! What was so surprising, aside from the sheer amount of color packed into 650 square feet of rental space, was the amount of projects they created themselves. As avid DIYers and creative entrepreneurs, the label of “rental” didn’t stop them from creating the ultimate happy-place-heaven for the two of them and their adorable dogs.

Hold on to your faux flower crowns – you’re about to be blown away by all these eye-popping, jaw-dropping DIYs.

READ MORE »

Comparing Linoleum and Vinyl Flooring

Buy Vinyl Flooring | Laminate Vs Hardwood Floor

Busy homes need durable flooring, and carpet may not cut it in high-wear areas. At the same time, many homeowners can’t afford or don’t want hardwood or engineered flooring. So they start looking at linoleum and vinyl flooring, but don’t understand the similarities or differences. Let’s look at these two flooring types and compare them.

buy hardwood floors

How they are produced — Linoleum is produced by combining linseed oil with solid fillers such as cork or wood dust. Vinyl is produced by combining synthetic materials including polyvinyl chloride, or PVC.

Ongoing maintenance — Cleaning and maintenance are similar to the two products, but linoleum requires a sealing coat when installing because unsealed linoleum is not waterproof and can be damaged by liquid spills. Vinyl flooring is chemically waterproof, so no sealing step is required.

Appearance and effects of time — Linoleum flooring have an appearance that is unique to the product, and over time will take on different colors and patterns with the natural wear and tear which occurs on all floors. Vinyl is typically manufactured to mimic other products, such as hardwood floors, and wear won’t create any positive changes in the look.

In summary, if you are looking for a natural product that takes on a unique character over the years, linoleum flooring may be your best choice. If ease of maintenance using a man-made product is preferred, then vinyl flooring may be your best bet.

Regardless of your choice, come to Flooring.org first to have access to a wide selection of flooring materials. We have a huge selection of vinyl flooring materials, as well has hardwoods floors, engineered flooring, and renewable materials such as bamboo and cork. We have excellent prices and a knowledgeable staff who can help answer all your questions about choosing the right flooring for your needs.

5 Tips for Cleaning Hardwood Floors

Discount Hardwood Flooring | Buy Bamboo Floors

Hardwood floors may not be as easy to maintain as you think. Hardwood flooring requires attention to detail, so be sure you’re meticulously caring for your flooring. To keep your hardwood floors looking polished, clean and like new, check out the following information provided by Reader’s Digest. The guide below contains five tips for cleaning hardwood floors.

buy hardwood floors

  1. Vacuum every week
  2. Believe it or not, dust contains fine grit that acts like sandpaper on hardwood flooring. This dust can wear through your floor’s finish, so be sure to perform a good vacuuming every week to protect your floors and keep them clean.

  3. Keep rain away
  4. Water is damaging to hardwood flooring, so, if rain is in the forecast, keep your windows closed. Accidentally keeping your windows open, or allowing moisture to come in contact with your hardwood flooring, can damage your floors. You should also be sure you have trays under potted houseplants, and wipe up any water that may drip on your flooring right away.

  5. Use no-wax wood floor cleaner
  6. If residue accumulates on your flooring, keep a no-wax cleaner on hand. Liquid-based cleaners are damaging to hardwood, but wiping up spills, dirt and debris with a no-wax cleaner right away can protect your flooring from damage.

  7. Know waxing rules
  8. It is possible to rejuvenate wax finished floors with more wax, but know that you should never use wax on shellac, varnish or polyurethane surfaces. These floors will become far too slippery, and the wax will interfere with the finish of the flooring.

  9. Use an extra doormat, furniture pads and area rugs
  10. Family, friends and guests should remove their shoes when walking on your hardwood floors to prevent water, dirt and salt damage. A great way to prevent this damage from occurring is having an indoor doormat, which guests can remove their shoes on. Furniture pads can also come in handy to keep your hardwood floor’s finish from wearing under the heavy legs of couches and tables. Finally, area rugs can keep your floor save in high traffic areas, such as living rooms or playrooms.

Now that you know how to care for your home’s flooring, consider purchasing hardwood floors from flooring.org. We have a wide range of flooring that can save you hundreds when you buy, so check out our website today!

The Best (and Worst) Rooms for Hardwood Flooring

Compare Hardwood Flooring | Discount Wood Floors

Yes, hardwood flooring looks chic, elegant and gives your home a royal look. But, no hardwood flooring is NOT a cure-all to increase property value. While hardwood flooring does look amazing, lasts for decades and needs little maintenance, it is not suitable for all rooms. There are certain areas in your home where hardwood installation may not be ideal. Read on to know which are the best and the worst rooms for hardwood flooring before you invest your savings in renovating your flooring.

compare hardwood flooring

Rooms You Can Install Hardwood

Living room

The living room is the most lived in a room in any house. This is the space where you meet and entertain guests. It is also that room of the house that reflects your taste, style, and personality. Do not hesitate to install hardwood floors in your living room. Hardwood can withstand heavy traffic and soak in an occasional spill without sustaining damage if promptly cleaned. You may place a doormat at the doorway to trap moisture and dirt that visitors may carry into your house.

Home office space

If you work from home, it is a good idea to install hardwood in your home office space as it is said that it can generate positivity and boosts productivity.

Master suite

Whether you want to give your master suite an elegant look or add a touch of romance, you can do so by installing hardwood. Throw in a matching rug, and restrict the amount of light that enters the room by using thick drapes, and your bedroom will be transformed into a cozy haven. The floor too will remain in immaculate condition for years to come.

Rooms You Should not Install Hardwood

Bathroom: Water is the biggest enemy of hardwood floors. The moisture and wetness will destroy the flooring before you know it. And, if you have kids, imagine potty training them in a bathroom with hardwood flooring. This spells out disaster for your hardwood flooring. Your bathroom is a big No for hardwood flooring.

Laundry room: Hardwood horror again. Your laundry room is another room in your home where there can be leaks, water puddles, and detergent spills. Unless you never hang clothes to dry or throw wet towels in, it is best you steer clear from installing hardwood in this room.

Whether you are on the lookout for solid hardwood or engineered hardwood floors, simply shop at Flooring – your one stop destination for laminate, flooring and other accessories.

Decorate every room! (MORE new collectibles and home decor)

Back in February we did a blog post called A cool new thing for each room of the house and we have so many more new items, we thought we’d do it again today.

Primitive Dolls

Kerri

HAM-E14660-Kerri-LRG

Unique collectibles

Chalkboard tags

HAM-E14880-Chalkboard-Wooden-Tag-LRG

Galvanized lazy susan organizer

PKD-21-069-Galvanized-Lazy-Susan-Organizer-LRG

Blackstone candle pillar  set

PKD-21-165-Blackstone-Candle-Pillars-Set_LRG

Bowl fillers and accents

Multicolored rag ball set

20-214-Lg-Multi-Colored-Fabric-Rag-Balls-Set_LRG

Red fabric stars, assorted sizes

23-496R-Red-Fabric-Ast-Stars-Set_LRG

Wall clocks

Black mantle clock

GM76B-Black-Mantel-Clock_LRG

Primitive Star wall clock

8W1151-Primitive-Star-Wall-Clock_LRG

Country throw blankets

Stratton woven

VHC-17994-Stratton-Woven-Jacquard-Throw-LRG

Lemon Pepper

PKD-619-22-Lemon-Pepper-Throw-Blanket-LRG

Wood River

PKD-474-22-Wood-River-Throw-Blanket-LRG

Decorative pillows

Love you to the moon and back

HAM-E15416-Moon-and-Back-Pillow-LRG

The best antiques are old friends

PKD-75-003-Best-Antiques-Pillow-LRG

Wall decor

Country wall baskets

E6377-Long-Wall-Baskets_LRG

Happy birthday wall calendar

HRS-32984-Happy-Birthday-Calendar-LRG

Chalkboards, various styles and sizes!

HAM-E15870-Small-Hanging-Chalkboard-Set-LRG

And don’t forget you have a few more days to take advantage of Labor Day savings– 10% off everything in the store! See site for details. Sale ends 9/7/15.labor day sale

Refinish or Replace: Which Is Right for Your Hardwood Floors?

Buy Hardwood Flooring | Discount Wood Floors

When it comes to refurbishing your floors, the decision to refinish or replace can be difficult. Refinishing is a technique that allows you to save your current wood flooring, but you don’t get the opportunity to have a clean slate. On the other hand, replacing your hardwood floors gives you a brand new start and fresh flooring for your home. Choosing between these two options may be difficult, but the following guide contains information that can help you make a decision.

buy hardwood flooring

The first step in deciding to refinish or replace your flooring is gauging the repairs. Sometimes making this decision comes down to how badly your floors need repairs. Minor repairs, such as stains or damaged planks, can be an easy fix, which doesn’t demand an entire replacement. However, floors with rotting or structural problems will require a lot of work, which may cost more than replacing the floors altogether.

Another step you should take in making the decision to refinish or replace is checking your budget. Choosing between the two options can come down to something as simple as cost. Refinishing floors tends to be less expensive than a total replacement, but there are some situations where this circumstance can be reversed. Determining your budget can help you decide if a refinish or replacement is best for your needs.

Finally, establish the age of your flooring. The older the floors, the more valuable they can be in your home. However, the older the floors, the more likely they are to have damage or mismatch the interior of a home. When you establish the age of your flooring you can better understand its value and aesthetic appearance in your home, which can lead to a decision in the refinish versus replacement debate.

If you decide that a flooring replacement is best for your home, consider flooring.org. Our extensive selection of unfinished flooring, prefinished flooring, parquet flooring and more can be right at home in your home. For more details on what we have to offer, give us a call at 1-800-689-9006.

What is WPC Flooring?

WPC refers to “wood plastic composite” but oddly enough, there are very few WPC floors that contain any wood at all!

So what is all the hype about this fastest growing segment of the flooring industry? The short answer is these floors perform like laminate flooring, install quickly and easily like laminate flooring (no nails or glue), and are waterproof.

WPC can go over most subfloors without much preparation.

WPC floors refer to a category of Luxury Vinyl Plank and Luxury Vinyl Tile (LVT and LVP) that are rigid. Ordinary LVT/LVP flooring is constructed of 100% virgin vinyl but does not have the rigid thermoplastic core material of WPC floors.  This rigid core material of WPC is beneficial when the existing subfloor has imperfections, so it cuts down the time and cost of subfloor preparation during installation. If a subfloor is not sufficiently smooth for ordinary LVT/LVP flooring, the imperfections could telegraph through the vinyl over time. So the bottom line difference between WPC and LVP is the ability of the rigid core to hide more subfloor imperfections.

The big advantage for WPC over laminate is that it is waterproof.

Plus the vinyl wear layer of WPC absorbs the impact sounds to make it inherently quieter than laminate (a good sound control underlayment for laminate will mitigate this difference)

Pictured is the white thermoplastic core of Mohawk’s SolidTech

So what about the most important characteristic – looks, visual realism and authenticity compared to hardwood?

WPC floors are very good and will be rapidly improving over time. But the higher end and more mature laminate flooring brands which have unique characteristics like big beveled edges and extremely realistic in-register embossing (when the surface texture follows the relief and the grain of the wood), are in our opinion, a step ahead in visual realism at this time.

You can find many new WPC floors in our Vinyl Flooring section.


Wall Art Alternative: How To Frame Vintage Clothing

(Image credit: Ashley Poskin)

Framing a garment can seem like an intimidating process, but it’s actually quite easy to do yourself. The framing pros have a lot of specialized tools and tricks (like using a tagging gun instead of hand stitching, for instance), but for us weekend warriors, it’s all about using simple tools and getting the job done so we can enjoy our completed gallery wall that much sooner. So grab your grandpa’s letter sweater or your grannies floral girdle and get to framing!

READ MORE »

Distressing then Waxing OR Waxing then Distressing?


Waxing and distressing question. I normally paint, distressed then wax. I noticed many people say they distress and sand after waxing. So last night I waxed, buffed this morning and I am now distressing. The paint is already really hard and I find it harder to sand and distress but there is much less dust which I think is why people do this. Thoughts? Do you distress before or after waxing? -Jacqueline from Chicago

This is a great question and one that comes up often enough.

Let’s start by defining furniture distressing because it often gets confused with “antiquing” or “dark-waxing.”

Both distressing and waxing are techniques that can be used to replicate the patina of old furniture. Distressing is the act of wearing down the paint finish so that the substrate of the original finish peeks through. Typically, you would use sandpaper to distress a piece.

Record Cabinet, Blue-6

Louis Blue, Greek Blue and Pure White Chalk Paint® with the edges lightly distressed

When someone wishes to “antique,” a piece they are typically looking to add dark wax to give an aged patina that has a rich depth of color among the finish.

Dresser, Old Ochre, Versailles-24

Lightly distressed edges WITH a dark wax finish to add an antiqued patina

So, do you distress BEFORE OR AFTER you wax?

Let’s review the Annie Sloan method!

Annie paints.
Annie waxes.
THEN Annie distresses.
Finally Annie re-waxes where she distressed.

How do I know this, you ask? First of all, I’ve been trained in the Annie Sloan method. Second of all, it’s in her book!!!

Quick and Easy

You can read all about how Annie distresses on pages 12-50 using a variety of methods

So, let’s talk about the advantages of distressing after you wax.

  1. It is a much cleaner process! Wax tends to hold in the dust from the sanding itself keeping an extremely limited amount of free-floating particulates in the air that would otherwise be all over the place if you distressed before you waxed.Table, Florence-2
  2. You have much more control over your distressing by doing it after you wax. Annie Sloan Paint is VERY EASY to work off. I’ve seen and heard of people who have distressed their pieces before they waxed and lamented that “too much paint came off.” When distressing after you wax, you can be much more intentional about taking off just the right amount of paint in the right places without over-doing it.PaintClass-32
  3. You have a consistent finish when distressing after you wax. Meaning, when you distress before you apply the wax, the sand paper is not only removing paint along the edges, but also smoothing out the paint finish around the distressed area. The result is an irregular paint finish that is smooth in some places and more textured in others (as a result of brush strokes). When the wax is applied and then polished off, those distressed edges will have a higher sheen than the rest of the piece. Whereas, if you distress after you wax, the end result will be less varied.Table, Florence-11

When you distress your furniture after you apply your initial coat of wax, you don’t want to wait a day or two to do so. You will have an easier time of it if you distress immediately after you paint and wax…before the paint has had a chance to thoroughly dry and begin its curing process. Distressing AFTER you wax doesn’t have to be cumbersome or “hard.” If you wait too long to distress your piece, you will have to work much harder to remove the paint.

Piano, Mint-51

Now…of course, there are other ways to do it! When I teach a workshop, we talk about wet distressing, how to distress using nothing more than a wax brush and some water, the benefits of distressing with an electric sander, course sandpaper versus fine sandpaper…and so on. You will gain an appreciation for the many varied techniques simply by playing with the paint and wax and exploring the variations of how to create a multitude of looks! And, of course invest in Annie Sloan’s amazing books. I’ll tell you a secret…you can learn EVERYTHING we teach in a workshop just by reading her books. No Joke! I hold nothing back! Hit up your local thrift store, start stocking up on cheap chairs and side tables and become your own expert in the how’s and why’s of Annie Sloan Paint!


Clearance Treasure Tuesday (new products just added!)

We’re back this morning with another edition of Clearance Treasure Tuesday! We’ve just moved some new products to the clearance area, and many of them are priced 20-50% off! Here are a few of our favorite items and biggest savings.

Christmas Past napkin and Christmas Past place mat – both 55% off!

863-01-Christmas-Past-Placemat_LRG

Keys wall sign – 47% off!

JRS-331-Keys-Wall-Sign_LRG

‘A little birdie…’ dish towel – 38% off!

PKD-82-917-A-Little-Birdie-Dish-Towel_LRG

Rooster kitchen towel – 47% off!

ETSM02-Rooster-Kitchen-Towel_LRG

Small Goodnight Santa – 25% off!

C6506-Small-Goodnight-Santa_LRG

Burlap Bird Ornament Set – 53% off!

7D3619-Burlap-Buddies-Bird-Ornament_LRG

Balsam and Berries Mantle Scarf – 43% off!

878-50-Balsam-And-Berries-Mantle-Scarf_LRG

Sir Flurry – 25% off!

C1628-Sir-Flurry_LRG

Wine Jug Lamp with Shade – 47% off!

25-300-Wine-Jug-Lamp-with-Shade_LRG

Faith Family Friends shower curtain – 46% off!

Faith Family Friends wall border IHF-321-SCB-FFF-Shower-Curtain_LRG

The Wonders of Wax

If you have spent any amount of time with me talking topcoats, you will know within 30 seconds that I am a wax girl.

I have written blog posts and gotten on my soap box during workshops and demos listing the benefits of wax. So, I don’t feel the need to rehash much of what I’ve stated so frequently (If you are interested you can read about my wax tips here, here and here).

Instead, I thought I’d talk a bit more about the differences between the colored waxes and variations in the application process now that I’ve had a chance to work with all the different shades of the new Annie Sloan waxes.

Dresser, White, Blue-3

Louis Blue and Old White Chalk Paint® with a clear and dark wax finish

We sell and regularly work with two different wax products. The first is a beeswax that we carry as part of the Miss Mustard Seed’s Milk Paint line. The second is the Annie Sloan Soft Waxes. Although they are both wax topcoats, the application and finished result is quite different. Here’s how I break it down:

Miss Mustard Seed’s Wax

Beeswax

  • MMS Wax has the consistency of very soft butter which makes the application process incredibly easy.
  • It comes in four different formulas; a clear furniture wax, a lavender scented furniture wax (that is also clear), white wax and an antiquing wax. MMS Beeswax is applied in what I typically refer to as a more traditional wax application…meaning, that you brush it on and massage it into the paint finish, allow it to set up for about 20-30 minutes and then buff it off. I make an exception when using white wax and antiquing wax and typically wipe it off right after applying it so that I can exercise more control over the color saturation.
  • There are very, VERY few circumstances that I will use a rag over a brush to apply wax. But, one of those is when I’m using MMS White Wax. I have found that there is something in the formula of the White Wax that causes it to stick in my wax brushes, even when I clean them with my awesome brush soap. I will usually opt for a disposable rag to apply white wax so that I don’t have to mess with cleaning a messy wax brush when I’m finished.
  • White Wax is pretty dramatic. If you are going for a very heavy white-washed look, it’s the way to go. But, if you want a more subtle finish with the white wax, you need to use some of the clear furniture wax to soften the look.
  • The same point holds true when using Antiquing Wax. As a stand alone wax, it will dramatically richen the look of your paint finish, but if you want a more subtle antiqued patina, a little bit of the clear furniture wax allows you to move the dark antiquing wax with more control and ease.
  • I’ve also noticed that over the years, the batches of Miss Mustard Seed’s Antiquing Wax likely use different color pigments from one batch to another so there are subtle color differences. One batch may be a bit more on the dark brown side while a previous batch may have had more grey tones.

When it’s all said and done, Miss Mustard Seed’s Wax offers a wonderfully protective finish that is very easy to apply and it has a matte look and feel.

Buffet, Chalkboard-11

Miss Mustard Seed’s Milk Paint in Shutter Gray and Ironstone with clear furniture wax

Annie Sloan Soft Wax

PaintClass-31

  • Annie Sloan Soft Wax has the consistency (and even the look) of Crisco. It’s nice and smooth to apply, but not as soft and creamy as MMS Beeswax.
  • Annie Sloan Soft Wax has a different application process from any other furniture wax that I’ve ever used. The Soft Wax is applied in sections and then immediately wiped off. You want to allow the wax to harden for several hours (I usually wait overnight) then polish it with a soft cloth.
  • The new White Wax offers a very soft and subtle white wash effect. It is not nearly as pronounced as Miss Mustard Seed’s White Wax, therefore a bit easier to manipulate as a stand alone product (meaning, you don’t need clear wax to move the white wax around or help it to blend). I love how the White Wax settles into carved details of wood furniture without being overly dramatic on the flatter surfaces. And, Annie’s White Wax is much easier to clean out of the wax brush than MMS White Wax.
  • Both Annie Sloan Dark Wax and Black Wax must be used with Clear Wax in order to prevent it from staining the paint finish (Of course, Graphite is the paint color that serves as the exception to that rule). I like to mix the Dark and Black Wax with Clear Wax when applying it, although on certain occasions I’ll put a layer of clear wax and then a layer of either dark or black. It just depends what look I’m going for and how much time I have to work on a piece. You can go for a much more subtle dark or black wax effect by using more clear with it, or vice versa.

Your furniture painted with Annie Sloan Paint and paired with her Soft Wax will have beautiful and lustrous sheen to them that can only be achieved when you pair her products together.

Dresser, Granny Smith Green-10

Clear wax mixed with paint to create a colored wax finish

Which begs the question, can you mix the product lines?

Yes…and, no.

Anytime you start mixing different product lines, you always want to test an area of what you are painting to make sure that the two products will be symbiotic. You just never know what may be in one product that compromises the integrity or finish of another product. So, as a general rule of thumb I recommend that you stick with products in the same line (On a side note, I strongly discourage using Briwax or Minwax Finishing Paste as a top coat on either of these product lines as I’ve seen some pretty dramatic negative results).

That being said, I can sometimes be a bit of rule breaker!

Table, Grey, White Wax-4

French Linen Chalk Paint® with Miss Mustard Seed’s White Wax

I have paired Annie Sloan Soft Wax as a top coat to Miss Mustard Seed’s Milk Paint and vice versa. In doing so, I was hoping to achieve a similar sheen on MMSMP as I get with Annie Sloan Paint. That wasn’t the case and I have since learned that the ONLY WAY to achieve the characteristic “Annie Sloan Look” is to pair her products.

Unlike any other product on the market, wax has the capability of not only serving a functional purpose in protecting your piece of furniture, but  also as a very decorative and artistic element.  So, the next time you are working on a piece of furniture, I challenge you to stretch your artistic abilities and find new ways to use the wax decoratively….whether you incorporate some shading, add color or mix waxes. And, if you are so inclined, we offer a two hour waxing workshop dedicated to the many finishes you can achieve using both wax products!

as and mms wax