We have actually been below in Oklahoma for nearly a year and I’m still digging via tucked away piles that I’ve pretended really did not exist for way as well long. Uggggh.
This might be among my favorite DIY tasks to this day … since ahhhhhhhhh, it resembles a great deal of mess was just removed from my life when we created this Clothes hamper Coordinator! As well as we developed it right in, like it has existed the whole time! SO say goodbye to complaining concerning our washing space … due to the fact that currently there’s so much even more space and it functions like a desire!
MY LATEST VIDEOS.
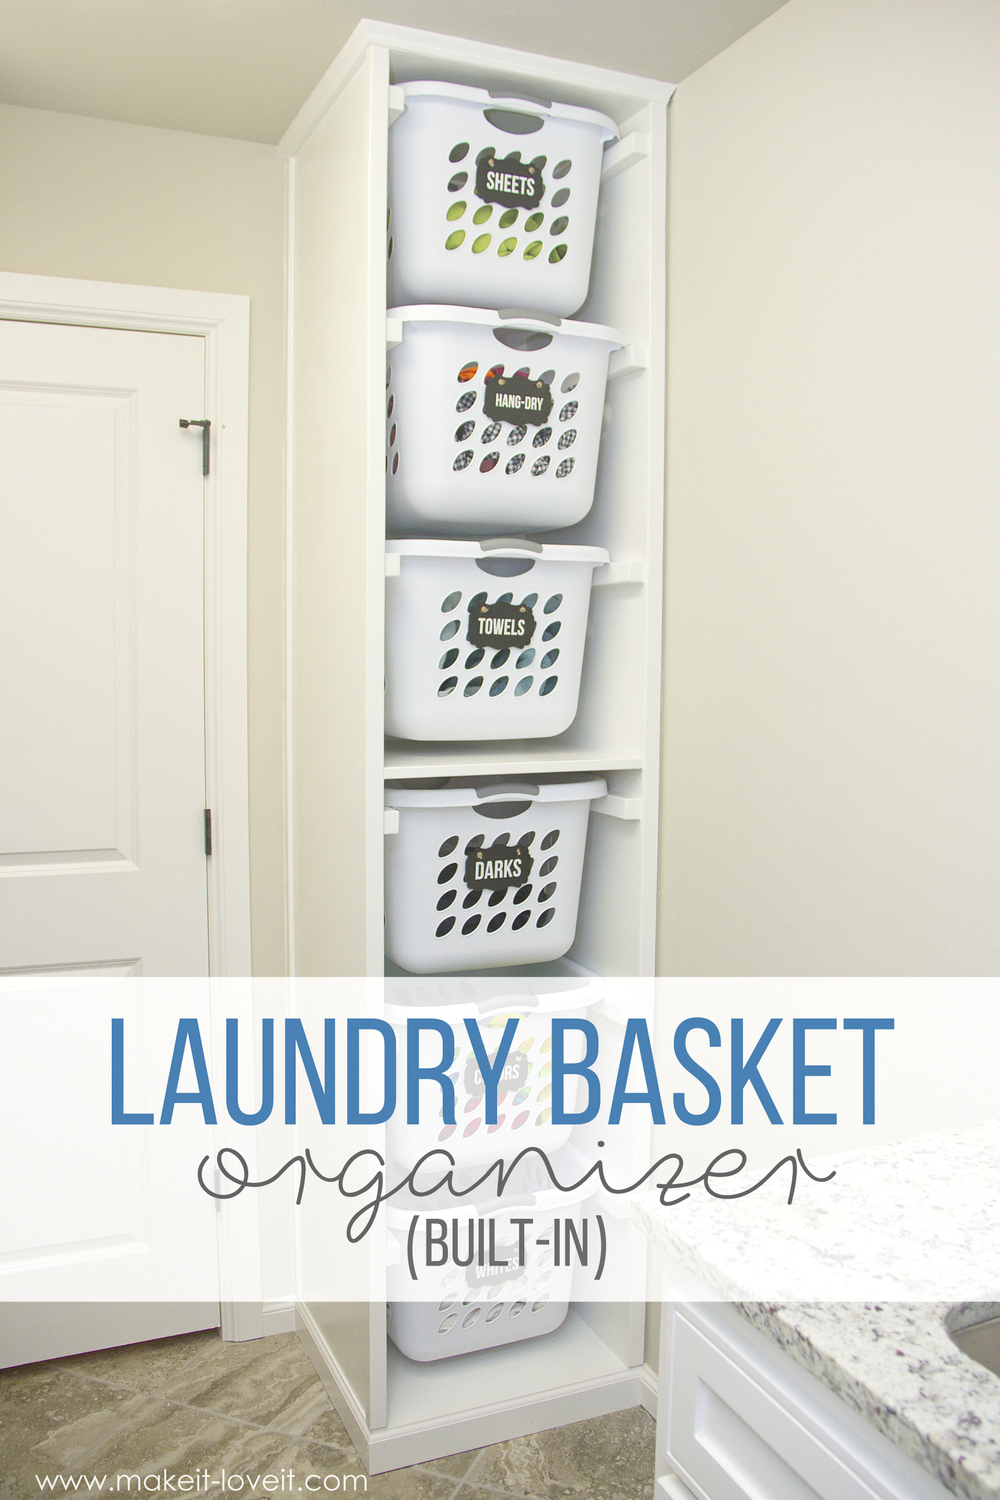
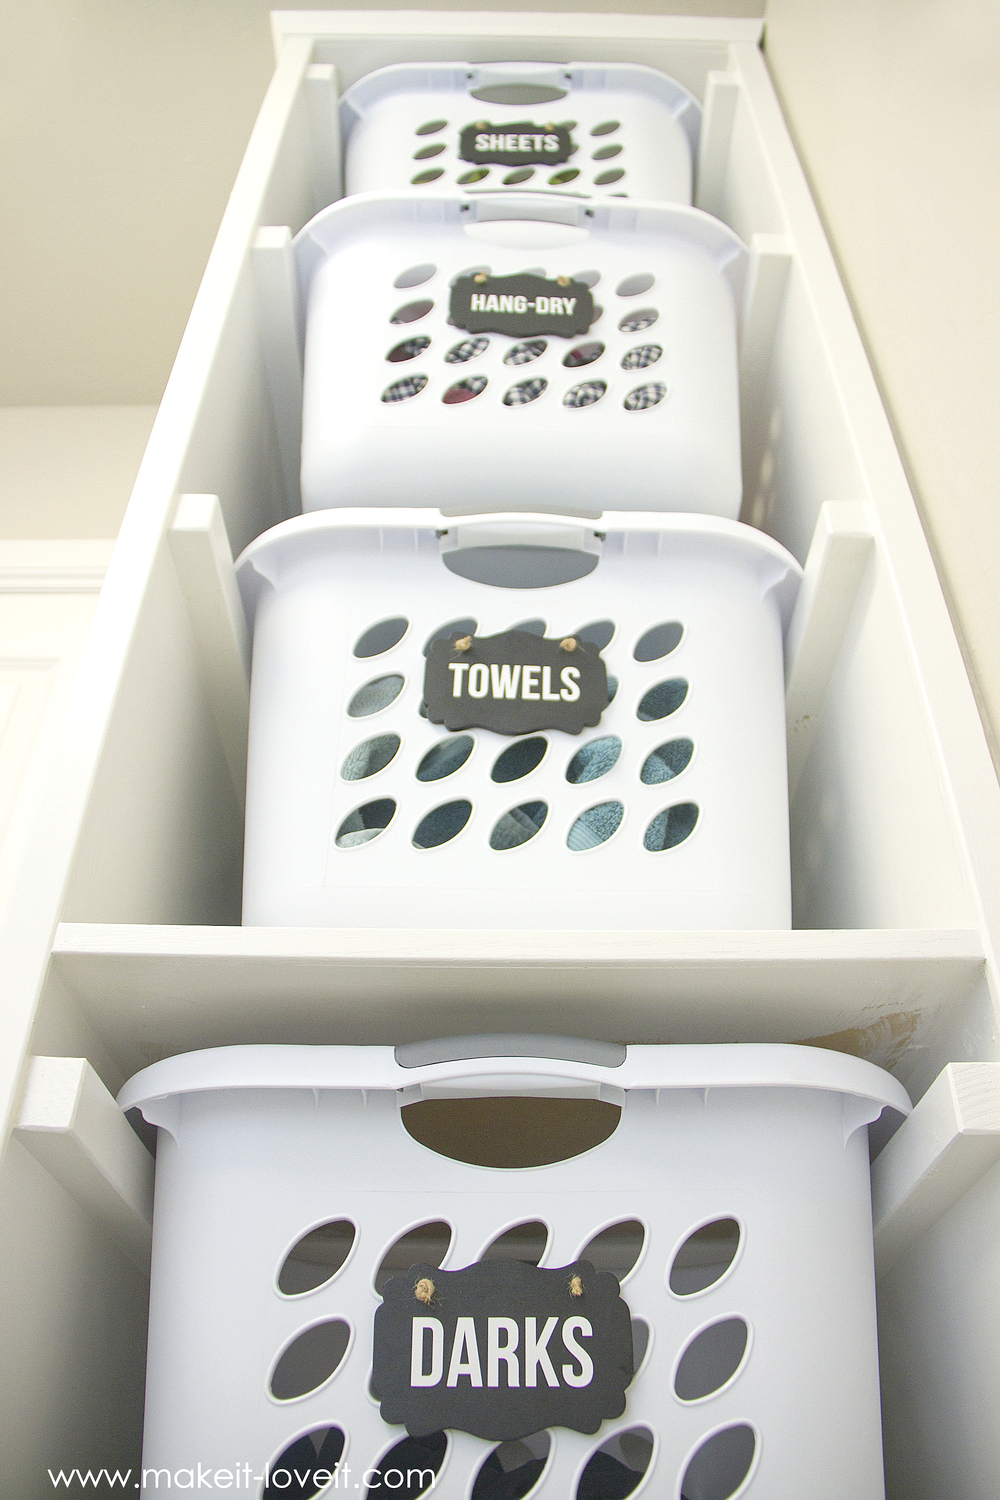
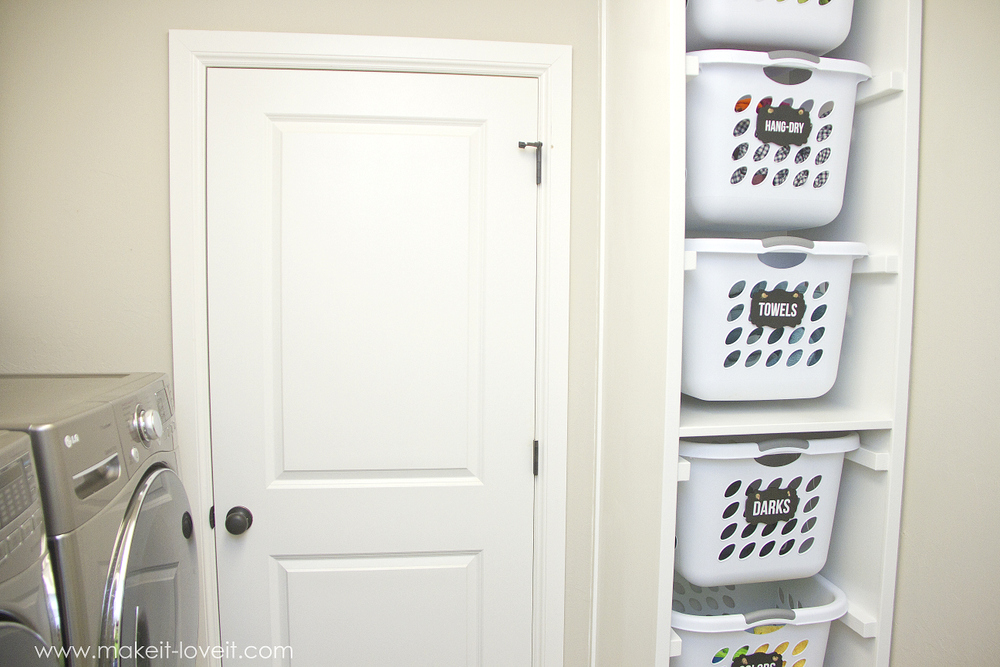
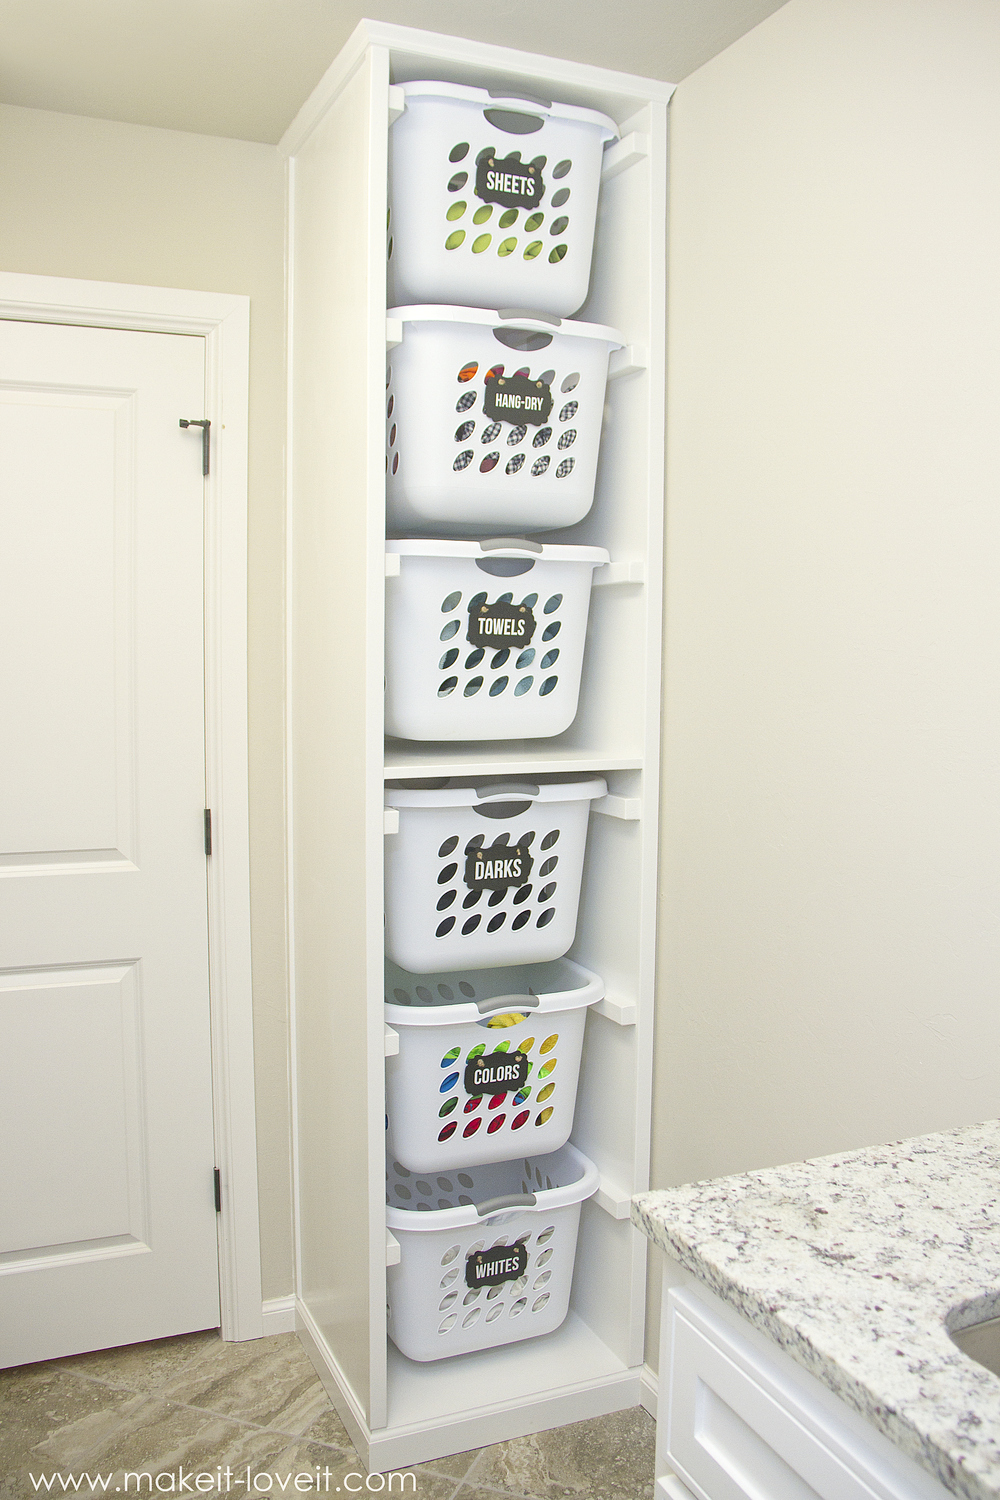
 Currently we can fit 6 baskets in the utility room, all at the same time … yahoo! And also each has their very own little room within this upright unit.
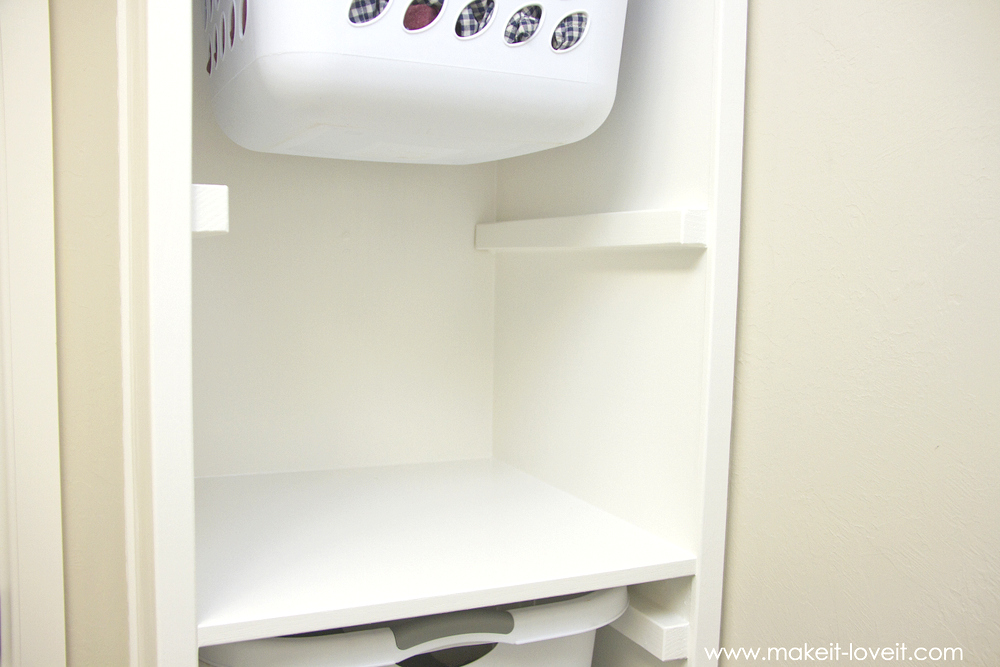
We maintained points easy as well as instead of making complete racks, just made little walks for the edge of the baskets to relax on …
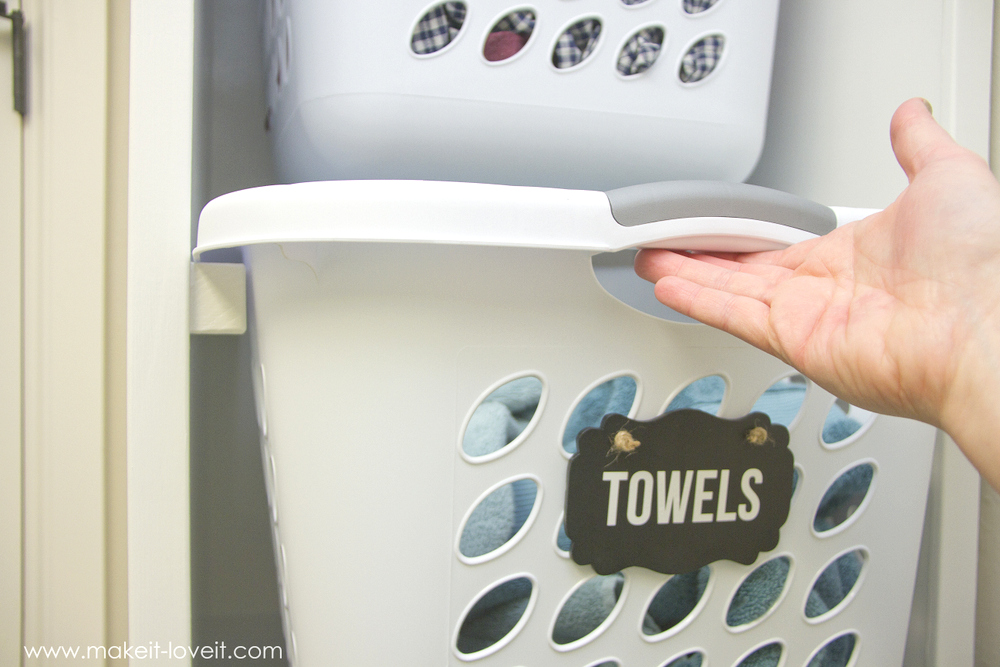
… as well as very easy as that, they move in and out.
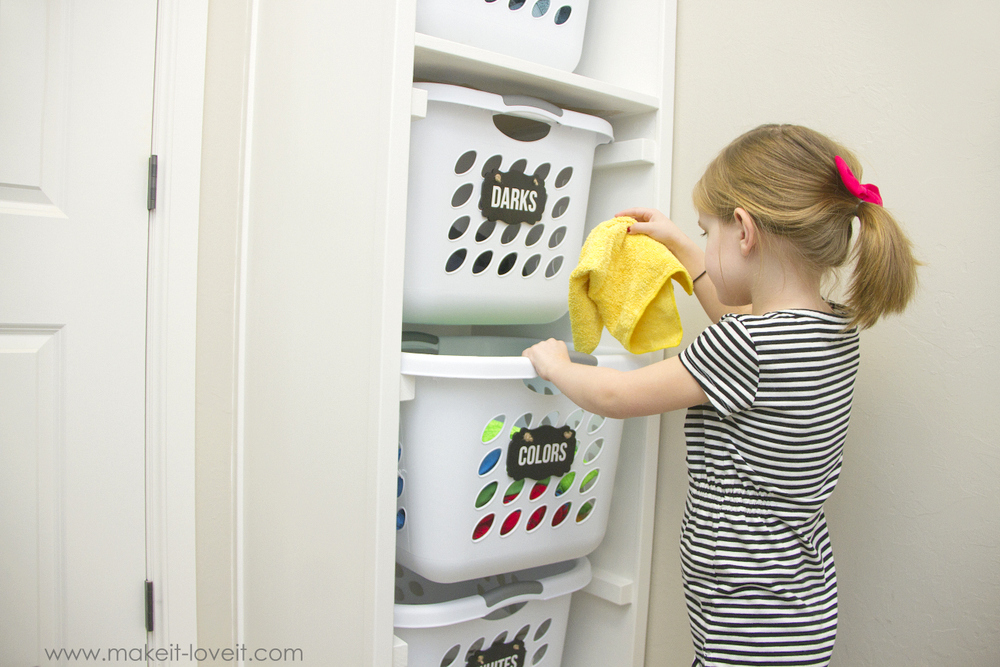
The most frequently soiled items get on all-time low of the coordinator …
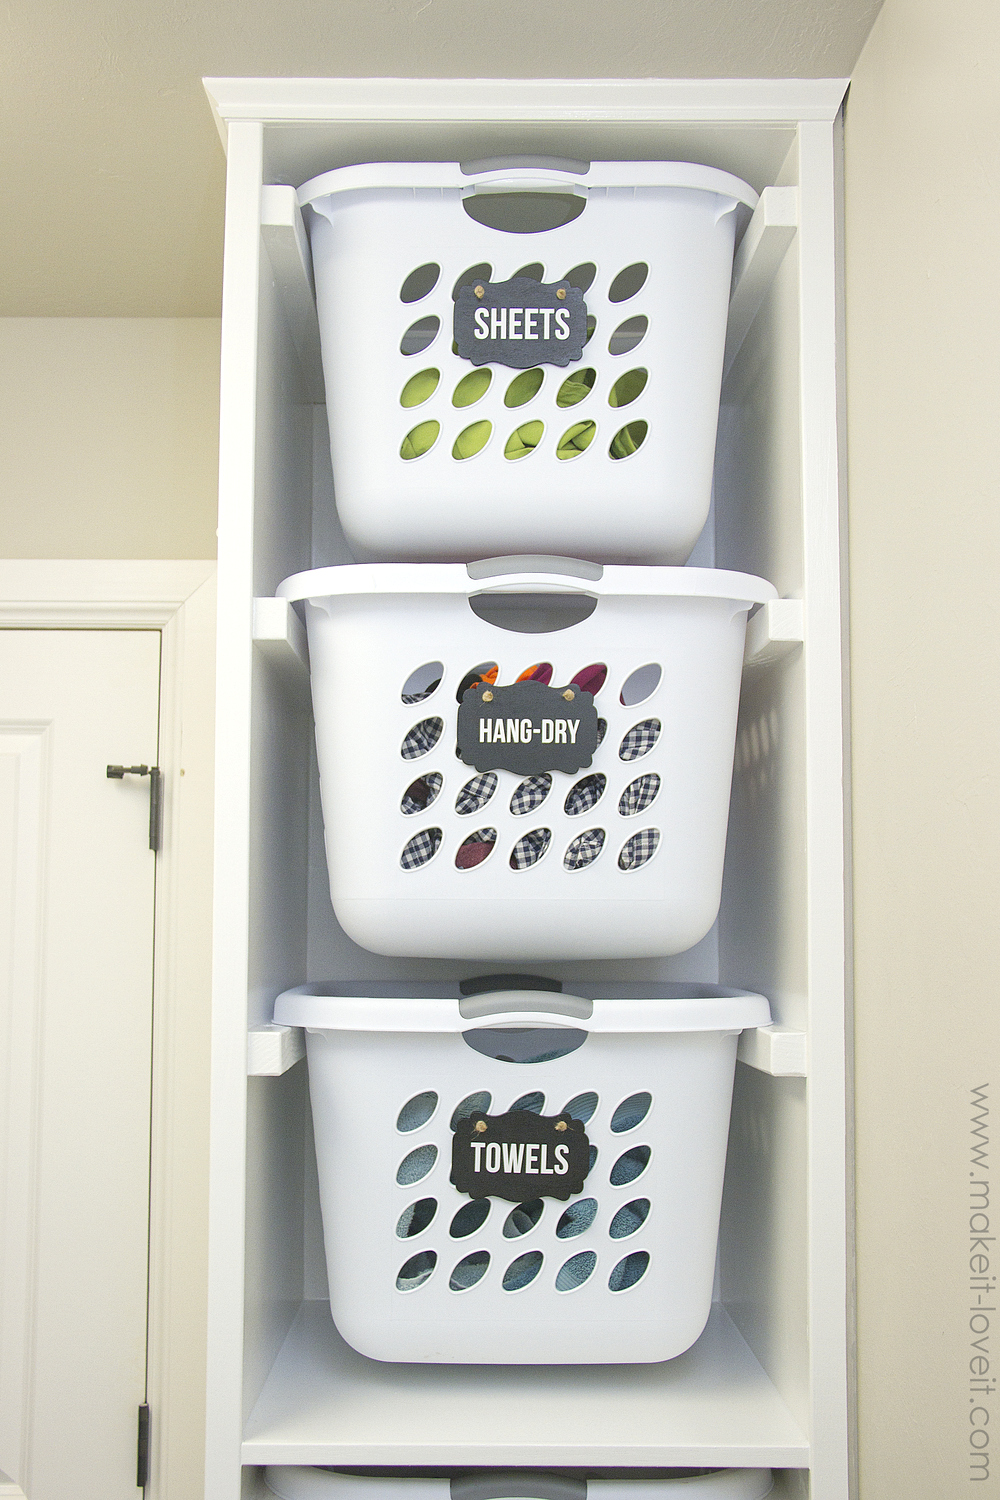
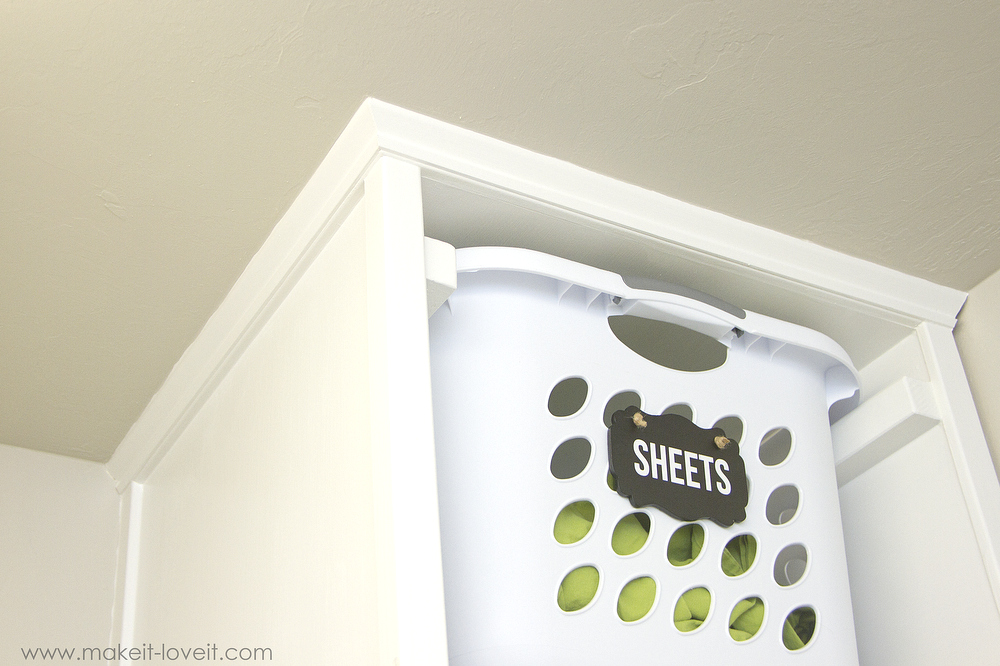
… as well as the rest are up top.
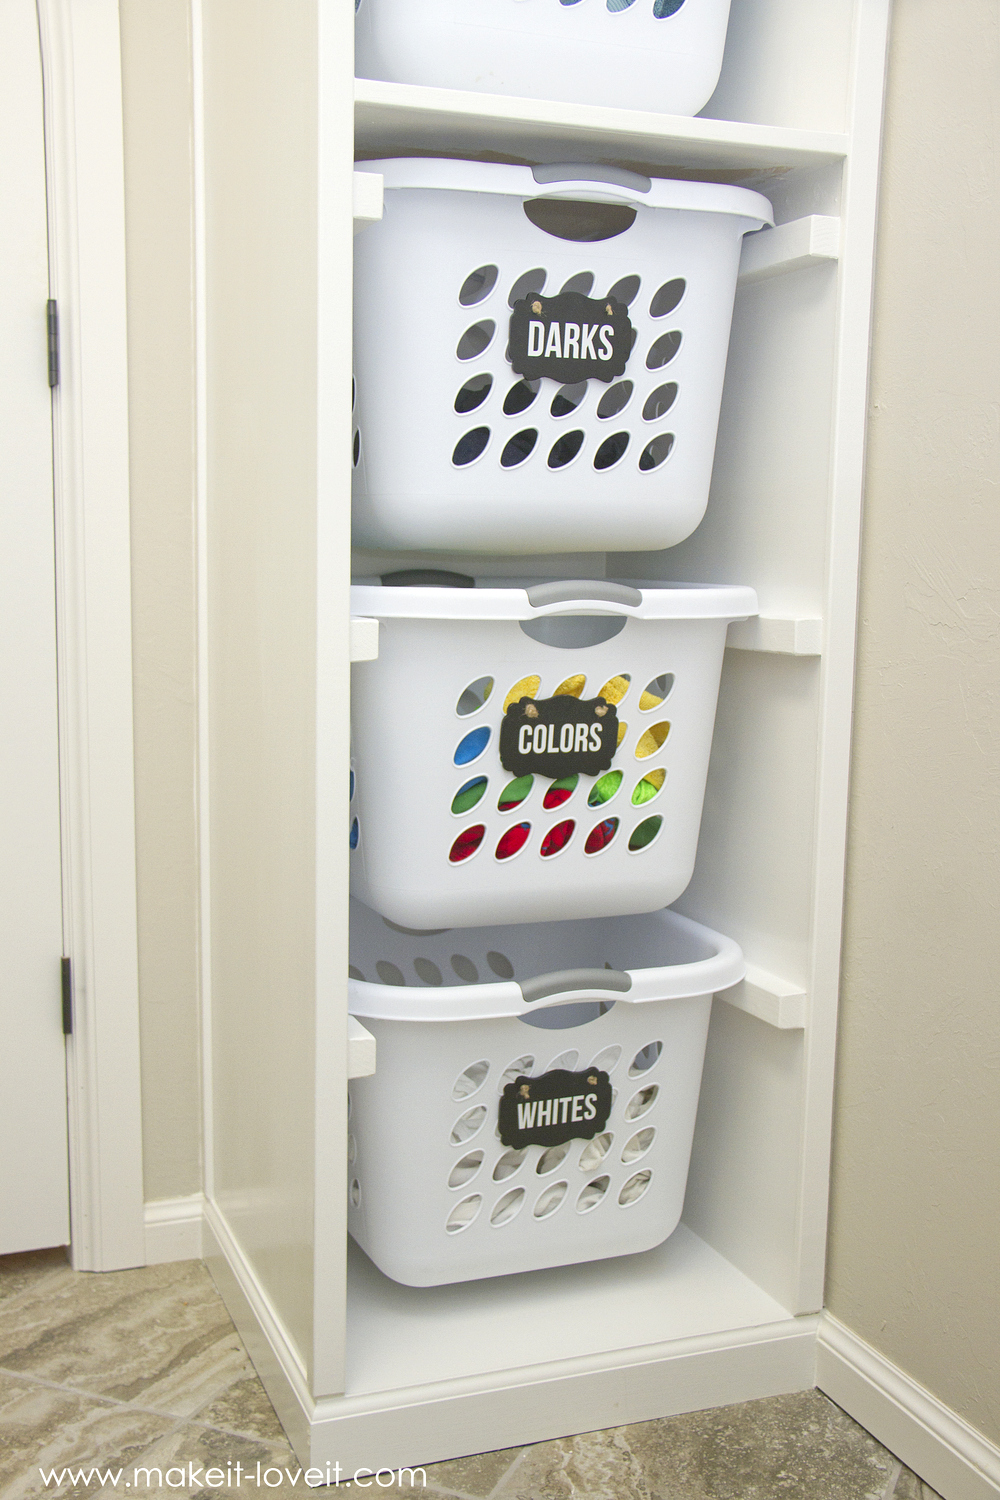
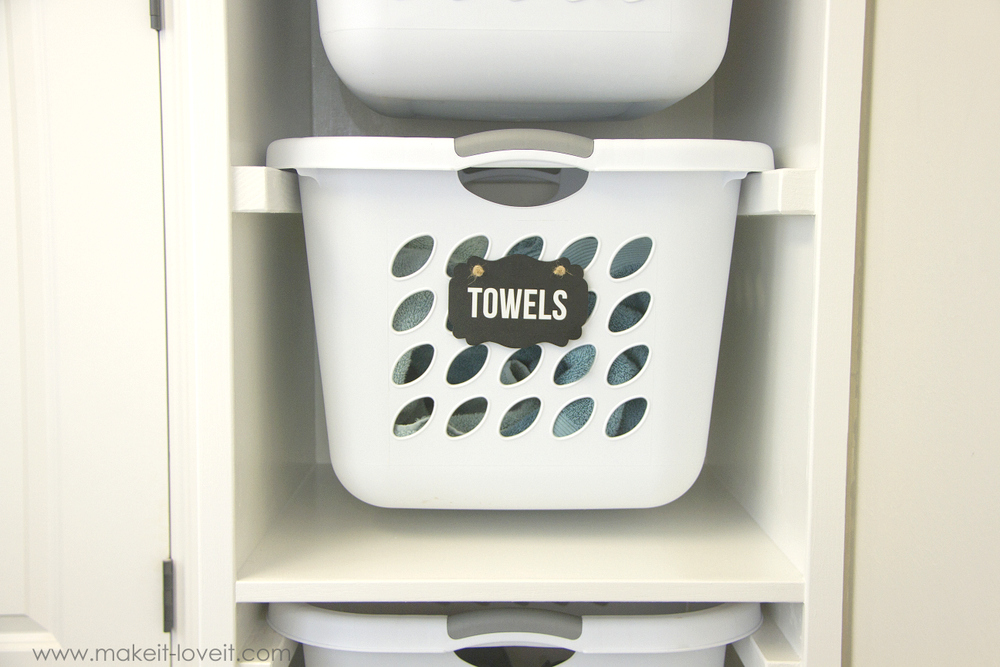
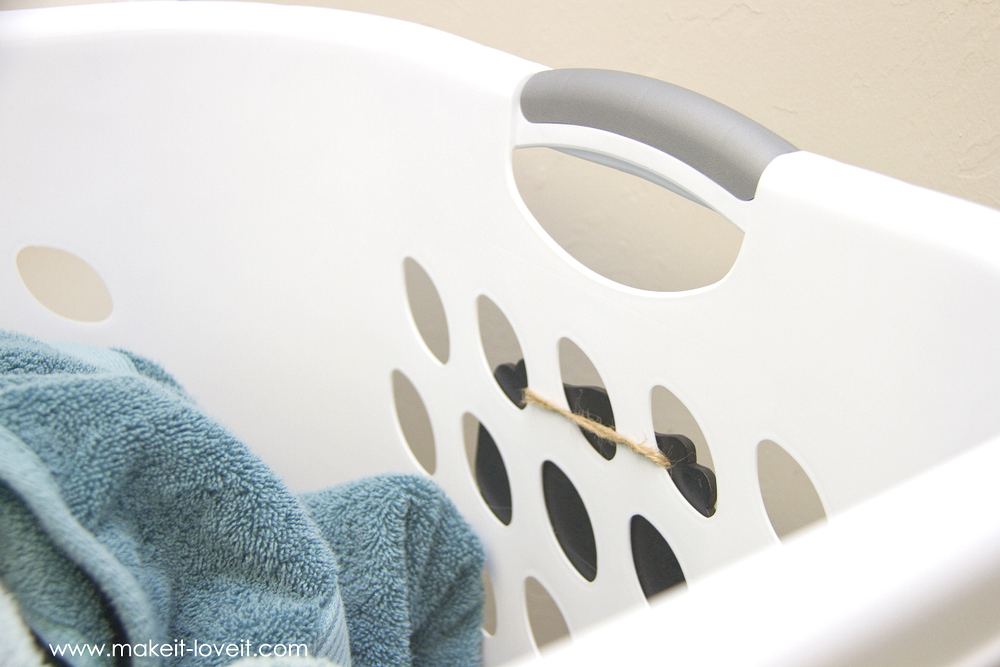
I used white vinyl to classify each of those little black wood tags however you might conveniently make use of a white paint pen and write it on there. Each of the labels are looped via the openings in the baskets and also linked with knots at the front. Easy.
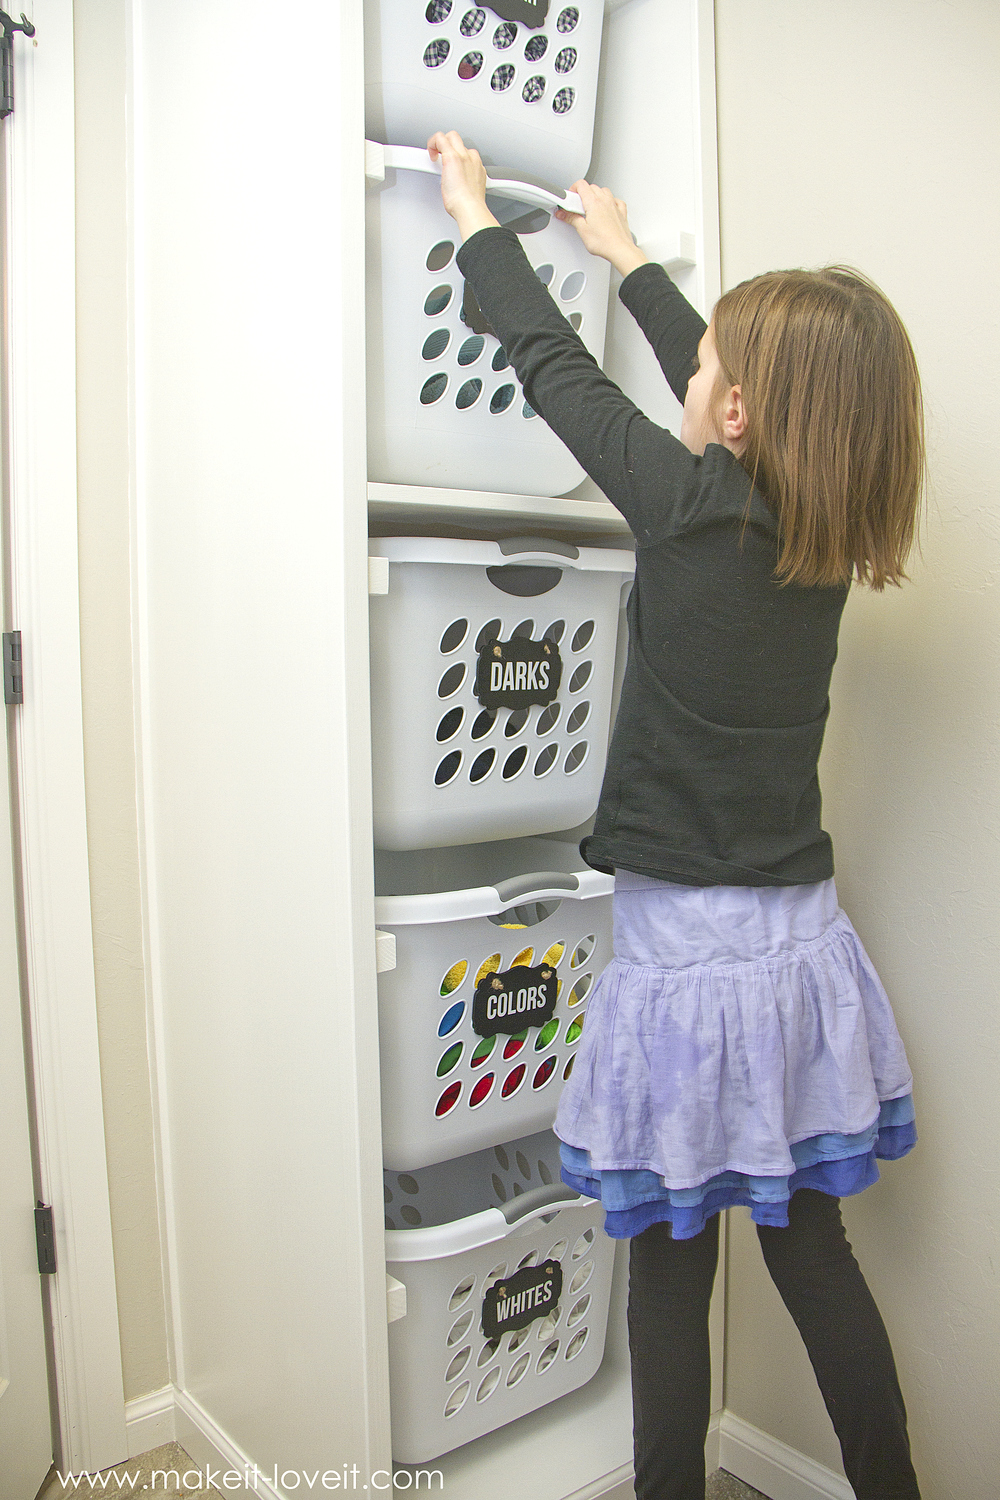
Now, it may look like this tower of baskets is super tall and daunting yet Steve and also I could both reach to the very tippy top. Yet you recognize, also if I couldn’t arrive and also had to get a little feces that I tucked away on the side of the cleaning equipment or something, I would do it if it suggested all of the baskets and washing was up off the flooring. Ahhhhhhhh …
Our highest Elli (as well as Connor) can reach the 4th basket, which is for towels … so they’ll be making use of that a person too.
And because the most commonly soiled baskets are on the bottom, our smallest laundry helper Chloe can even reach all 3 of the bottom baskets. Because yes, all of our children are little Cinderella’s (and Cinderboys?) in the making. 🙂
You could definitely make this arranging system as well as just place it up versus the wall surface like a furniture in a bedroom, down a hallway, or anywhere… We truly liked the concept of making it permanent. So, we safeguarded it to the wall then included some trim along the top\/bottom\/sides, to actually make it gorgeous!
As well as anytime a basket fills with unclean laundry, it’s right below following to the washing machine\/dryer, all set to be thrown in. Ideal!
Now my tiny little utility room appears a lot larger and also open, without anything on the ground anymore. Hallelujah! Okay … excuse me, I have to go switch over the laundry …;-RRB-. SUPPLIES:.
MDF, 3\/4 inch vast (or a few other type of product, such as plywood … we selected MDF due to the fact that it has a smooth surface and paints really well. We required just over one 4 \u00d7 8 foot piece, so had to buy 2 … yet I’ll quickly discover an usage for the scraps.).
thin backboard (we got a 4 \u00d7 8 foot sheet).
- 2 \u00d7 4’s (we acquired 2 8 foot pieces).
- 2 \u00d7 6’s (we just got one 8 foot board).
- Completing Trim pieces (depends upon just what you like … read below for more details).
- screws.
- timber glue.
- nails, nail gun, etc
- . Sterilite Washing Baskets, 1.5 bushel (.
- I got mine on.
- Amazon.com.… since they ran out supply at Walmart. Normally I believe they’re a pretty typically stocked thing at Walmart. Nevertheless, they had to do with the very same price on Amazon … as well as be available in a bundle of 6.).To start with, your organizer could be a various dimension, relying on the area you have, the amount of baskets you need, the dimension of your baskets, etc.. Yet I will certainly reveal you exactly how I made mine, to accommodate an 8 foot ceiling as well as Sterilite baskets … so make any changes as needed..( My finished system is 96 inches tall, 20\u00a03\/4 inches vast, as well as 21 inches deep.).
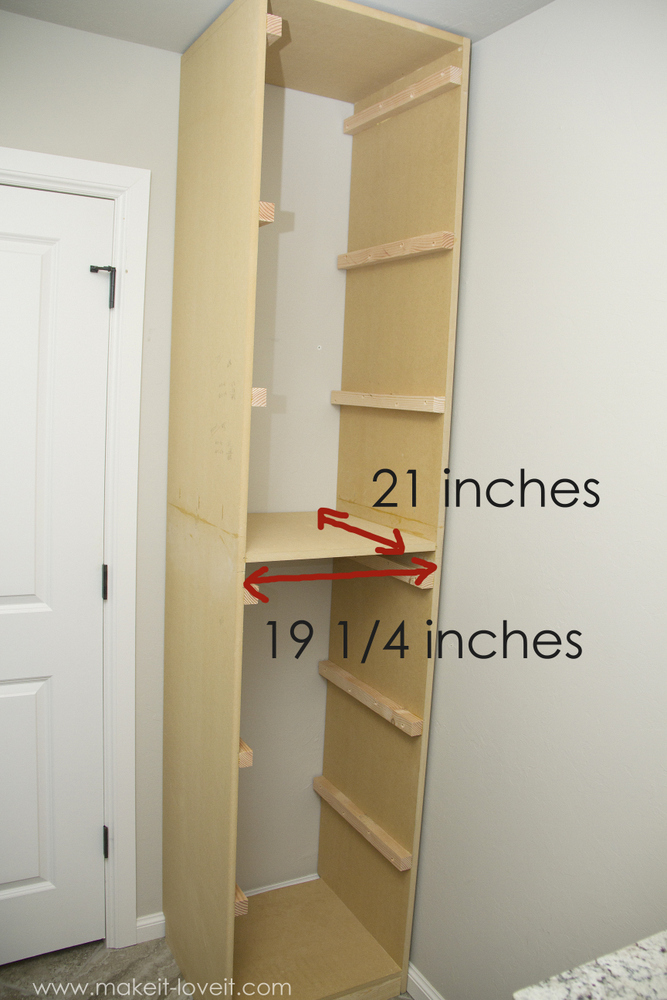
As well as one more thing … we have to have been delighted to obtain cutting as well as assembling since I neglected to take pictures are first. But, here’s an image of the set up pieces, which is very basic as well as straight onward, but I’ll use this to discuss the dimensions you need.You’ll require 2 primary items to produce the left as well as appropriate sides of the structure. Both of those are 96 inches long as well as 21 inches wide. Then 3 items that are 21 x 19\u00a01\/4 inches. (Yet neglect that it’s already all created aware below.).
Simply to make clear, the measurements for the 3 smaller sized items are 21 inches deep and 19\u00a01\/4 inches vast.
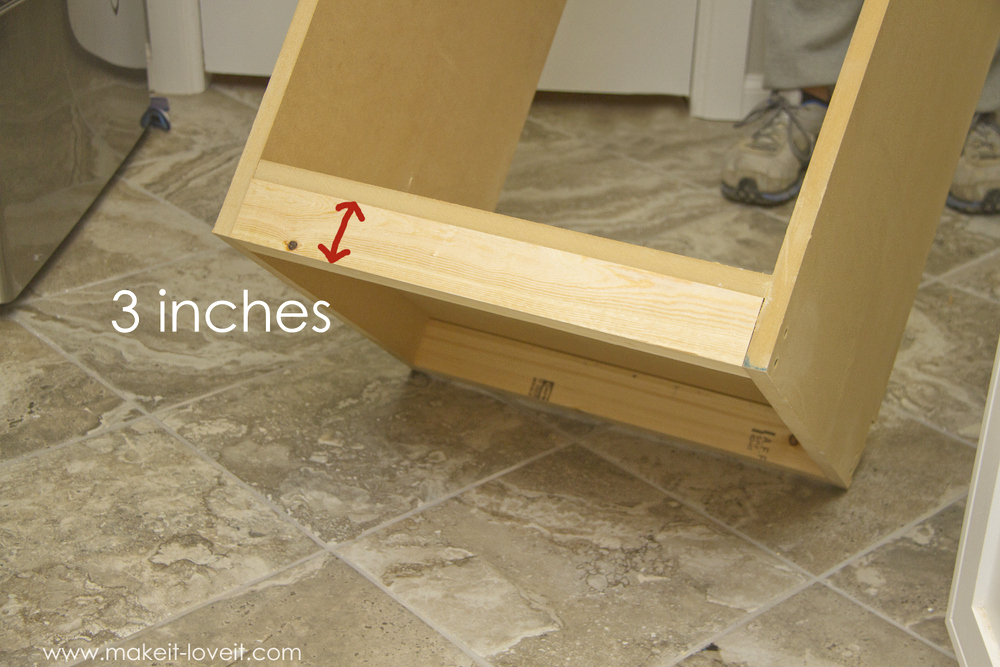
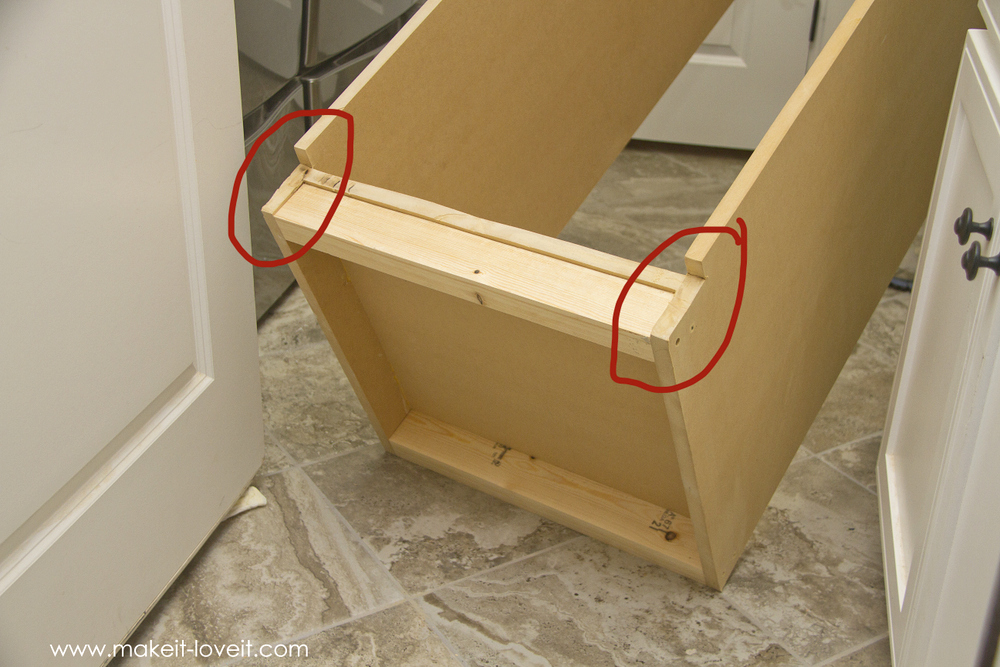
And once more, these pictures have actually been constructed past what I’m in fact speaking about… Overlook the truth that it’s already all placed with each other. Take an appearance at the completed building of the timber pieces, just to be clear just how you’ll line up the wood items as well as connect them together. Because what you’ll be doing is producing a tall rectangle form structure with both huge items on the outer most side of the structure and the smaller straight items fit in between. Yet do not attach them with each other fairly yet … Because I need to show you that we developed a lift at the extremely lower of the framework by including a 2 \u00d7 4 along the front and also the back, connected at the sides. As well as this is because we were aiming to get rid of the walls in the utility room. But because we didn’t need the full width of the 2 \u00d7 4 (as well as we were aiming to conserve inches for the main room for the baskets), we cut a 2 \u00d7 4 down to 3 inches large then two 19\u00a01\/4 inch long pieces. We positioned one of them on its side and also stood the 2 walls up and screwed them with each other.

We cut out areas of the MDF in the back (about 3\/4 inch deep as well as 3 inches high), to make area for the baseboard along the laundry room floor. So as you could see, the 2 \u00d7 4 (that was reduced to 3 inches large), is held up a bit, however is attached the very same way as the one along the front. Once both of those 2 \u00d7 4’s (cut down to 3 inches wide) are affixed, it produced a great platform to attach the bottom straight item … so went on as well as fingernailed the lower platform in place.
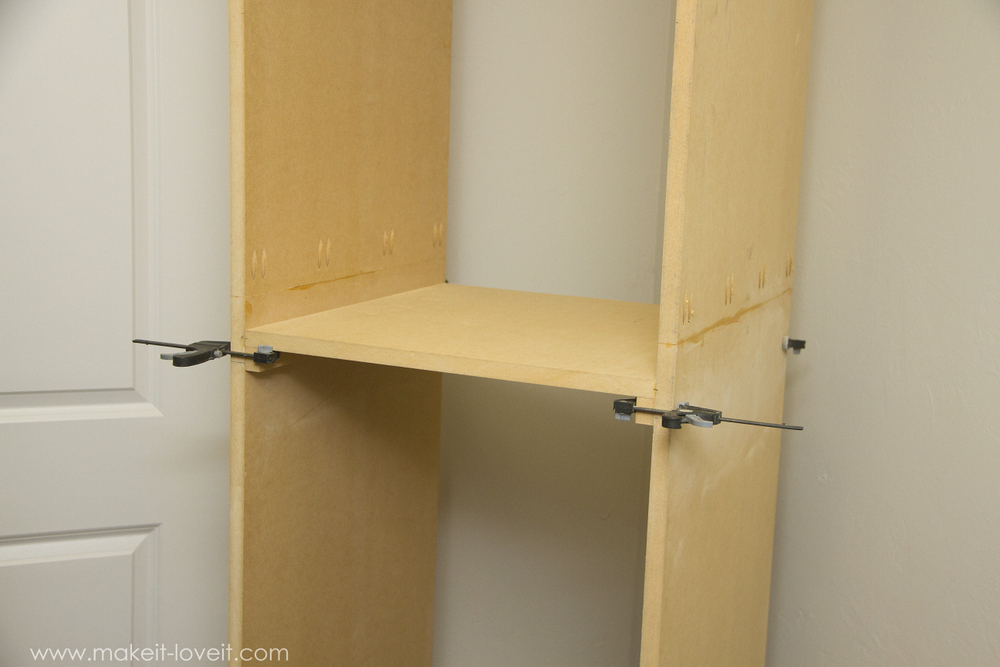
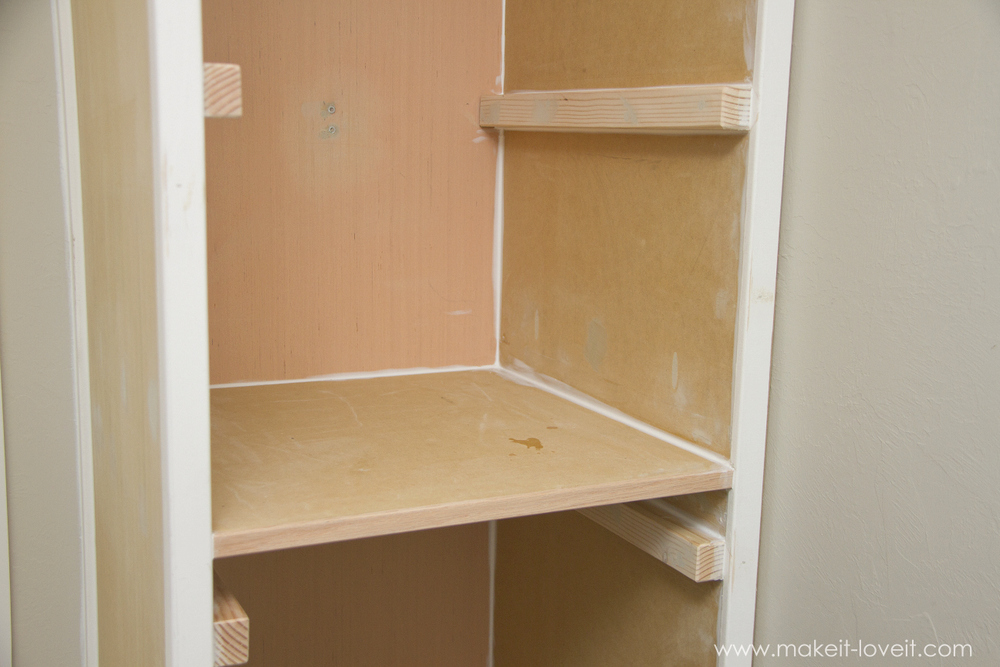
Now, prior to adding the next 2 platforms, we found it really handy to have 2 small strips of timber clamped onto the side walls, right below where the platform should be connected, to offer as a short-term shelf and also to aid maintain things from shifting in any way while you accomplish in..
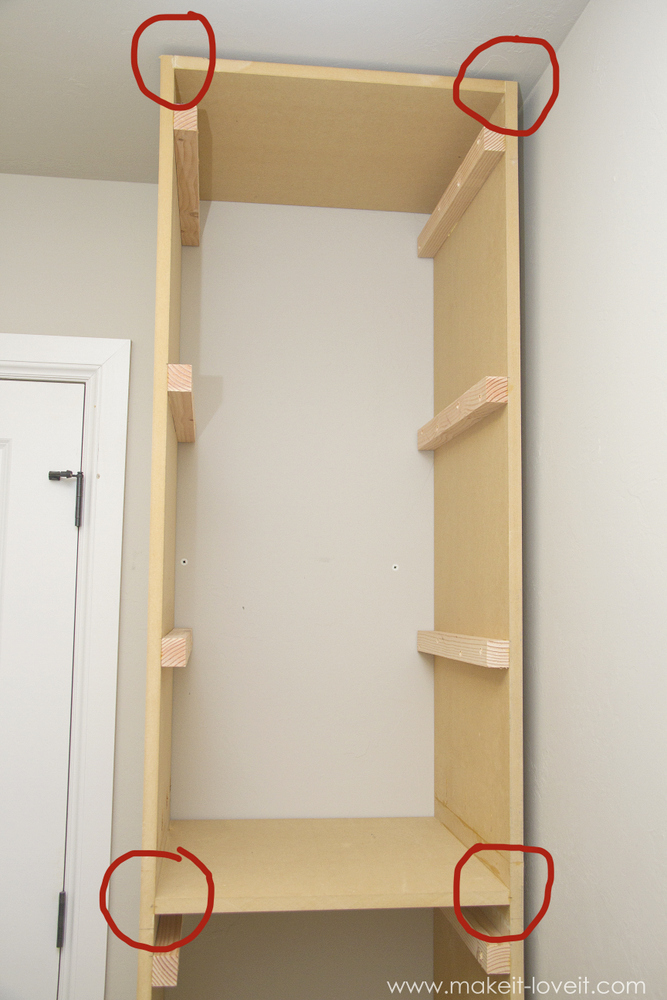
Be sure and also include the leading system first to produce a complete rectangle … and also then measure the elevation of the opening and also area the 3rd system specifically in the middle of the open room. (.
We additionally used wood adhesive along the internal edges, just for extra assistance on the middle and top platform items.
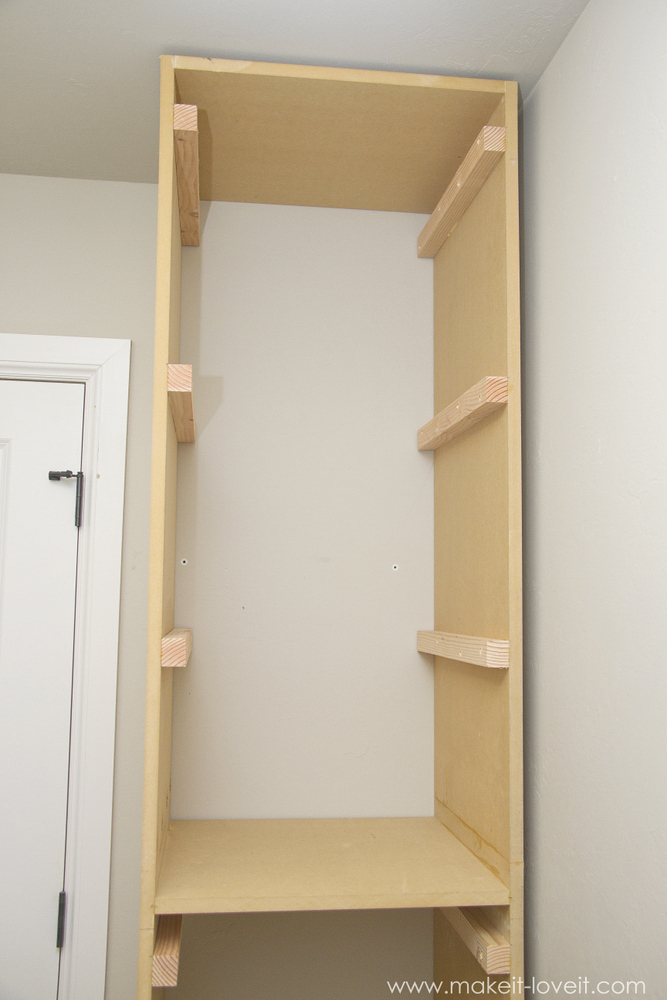
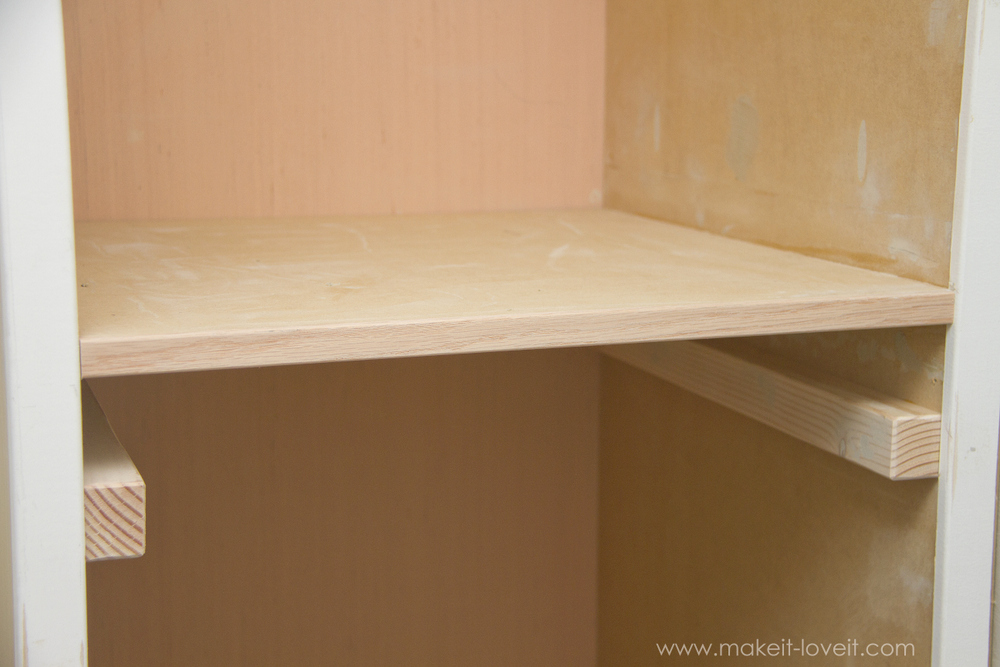
).We put the rack together out in the garage and also then duh, recognized that this structure we were developing got to the ceiling so when we tried to lug it in on its side and also to then try and stand it up…PLEASE LEARN FROM US as well as try as well as put your shelf system with each other inside the area you’ll be installing it !!Okay, now currently’s time to add include little strips of wood, that will certainly as the ledges walks hold each basket. Each of those strips of wood are 1\u00a01\/4 inch wide and also 1\u00a01\/2 inches tall..
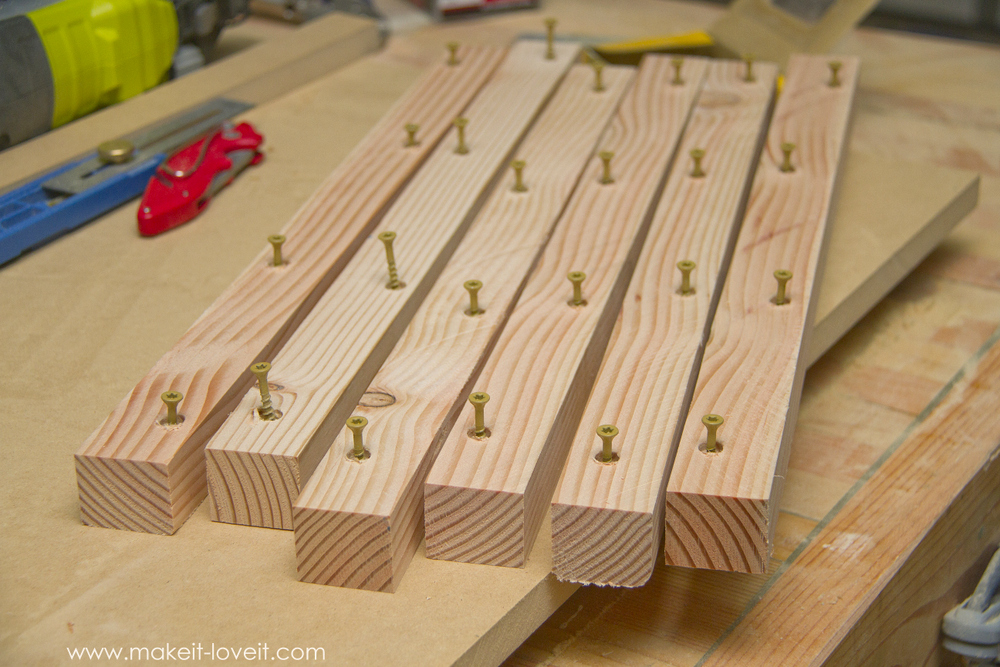
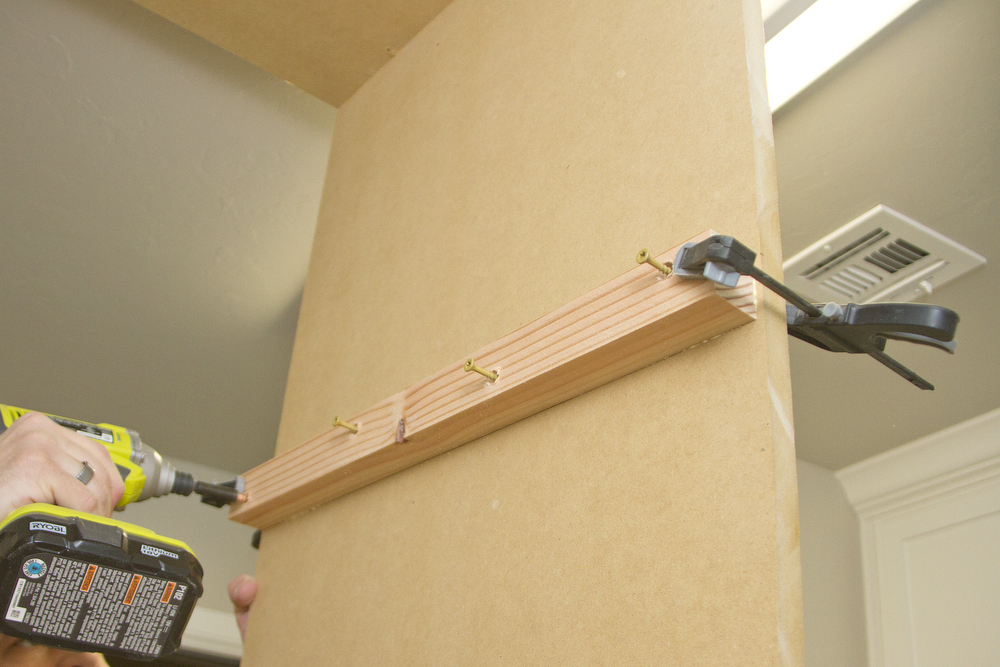
( Reducing them 1\u00a01\/4 inch wide makes them the ideal width to still allow the baskets to suit between yet also give enough of a lip for the side of the baskets to rest on.).The easiest way we located to attach them, was to pre-drill some pilot holes, after that drill in the screws prior to it jabbed out the opposite.

Affix a little bit of wood glue to the inner edge, position the timber along the internal wall of the framework, make use of some clamps to hold the strip of wood in location … and after that screw in the rest of the method..( Simply make sure you have actually pre-determined where you will place each of these strips to fit each of your baskets.).
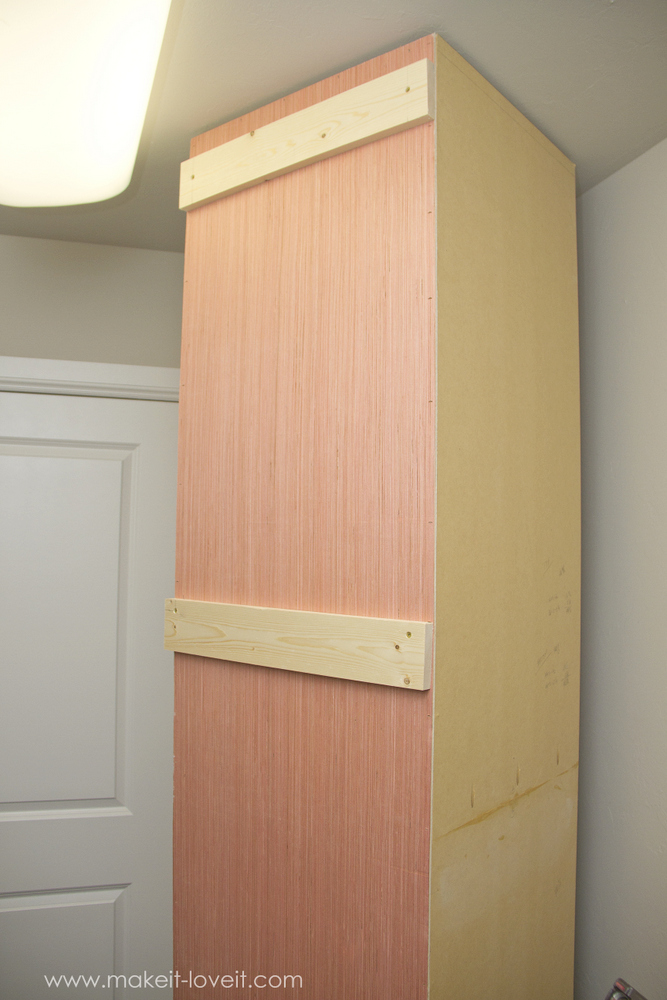
Reduced an item of slim backing that totally covers the back of your shelving structure and affix to the back. Add 2 pieces of a 2 \u00d7 6 near the leading and also then about midway down … screwing them into some of the strips that are along the in of the device. (.
And that’s due to the fact that screwing into those little shelf items of timber is tougher compared to screwing right into the side of a piece of MDF.) The factor for attaching these items is due to the fact that now, when you place your shelf right into location, you can pre-determine where you wall surface studs are and screw these assistance pieces right into the beam of lights in the wall surface.
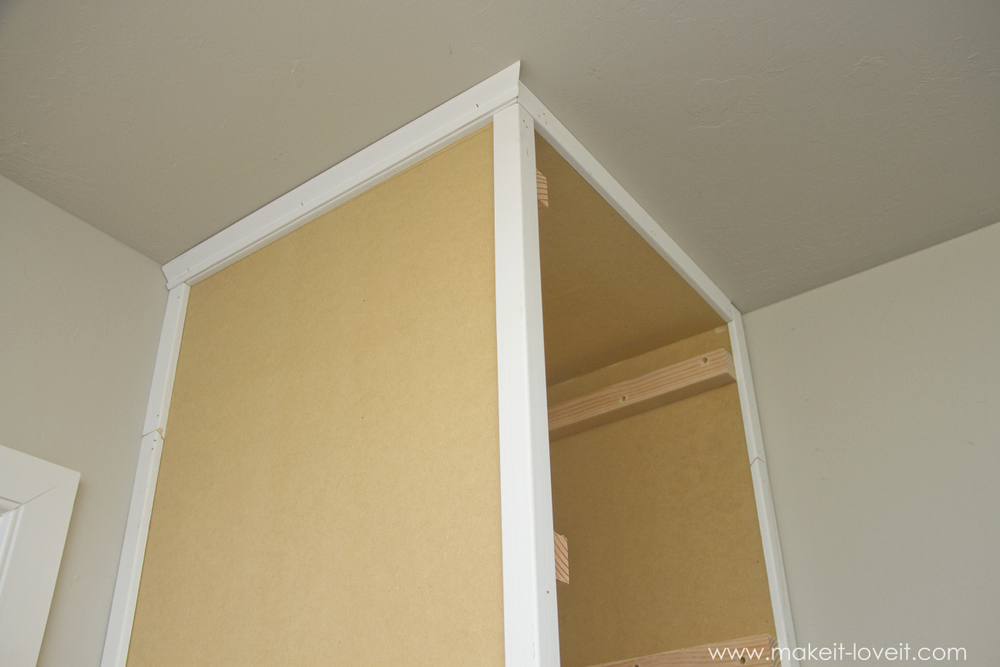
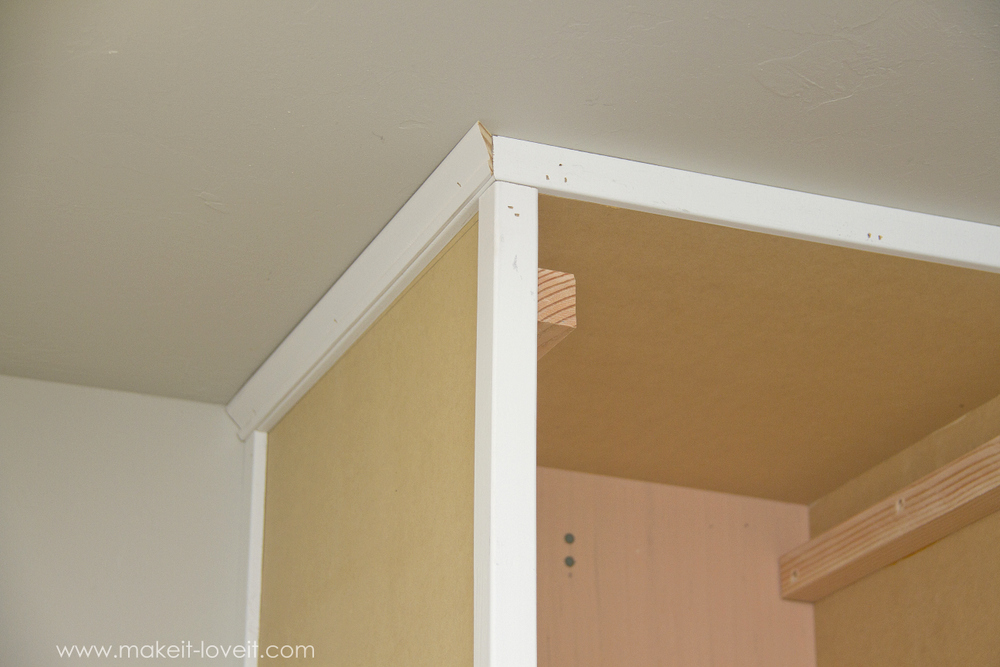
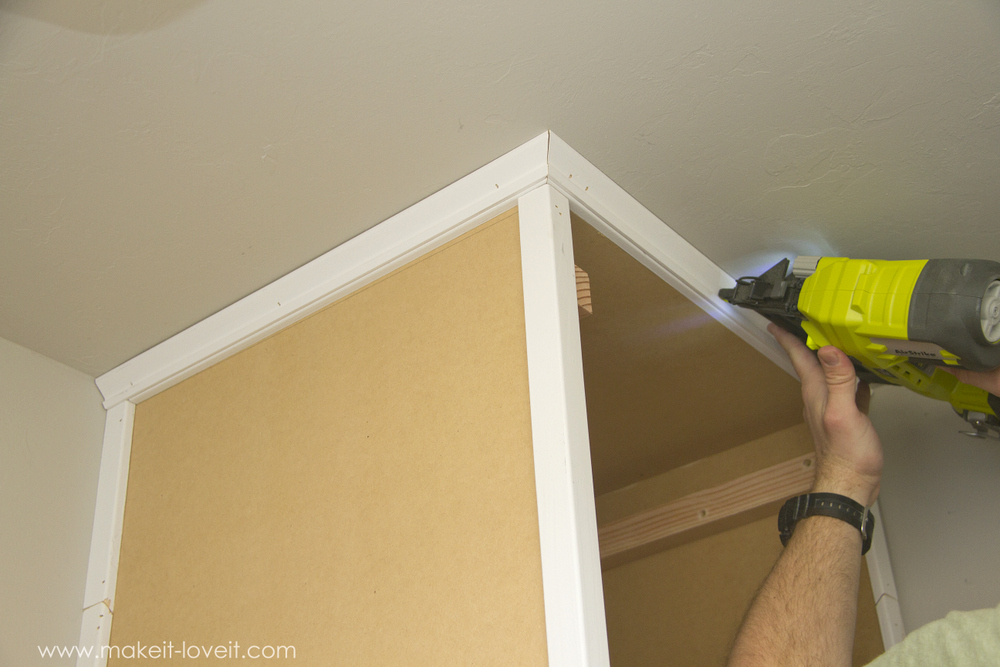
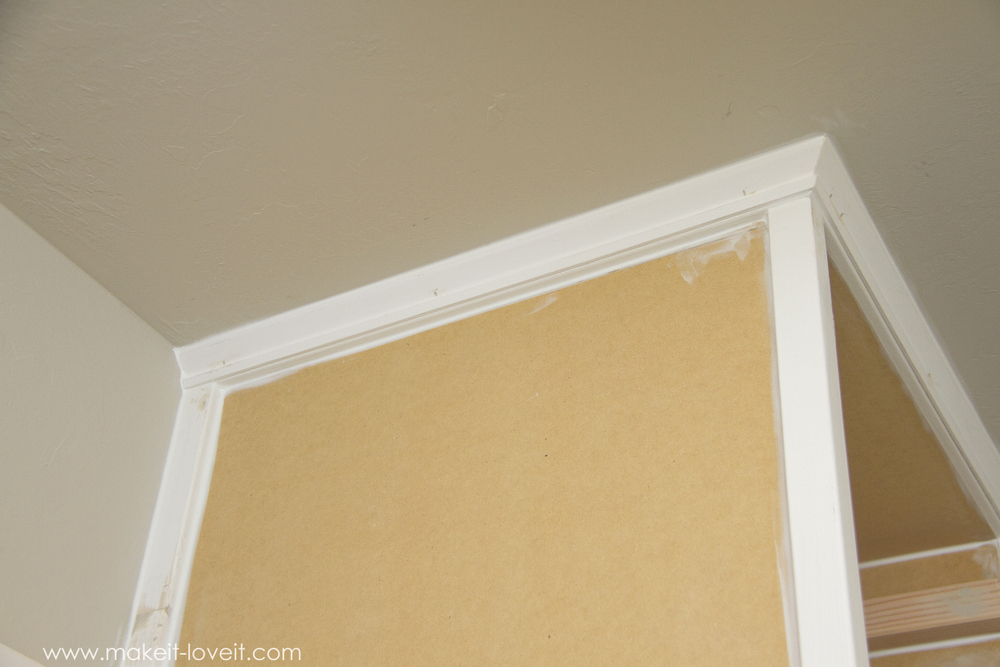
Go on and also put your shelving device right where you want it, screw it right into the wall … and afterwards establish how you intend to complete it off. I wound up positioning a L-shaped trim piece along the front left side (.since the ideal side protested the wall surface as well as it wouldn’t fit.) and afterwards similar width flat pieces along the side touching the wall then along the top to kind cover all inconsistencies and also gaps. (.
Which is entirely regular … due to the fact that more than likely, your wall surface is crooked. And maybe your ceiling as well!;-RRB-.).After that I discovered some 1\u00a01\/2 inch tall faux-crown pieces that we lowered to regarding 1\u00a01\/4 (.Plus the area in between the rack and also ceiling.) because that’s just how much room we had to cover the top item of MDF as well as we connected them along the top, since we really did not have space for taller crown. (.
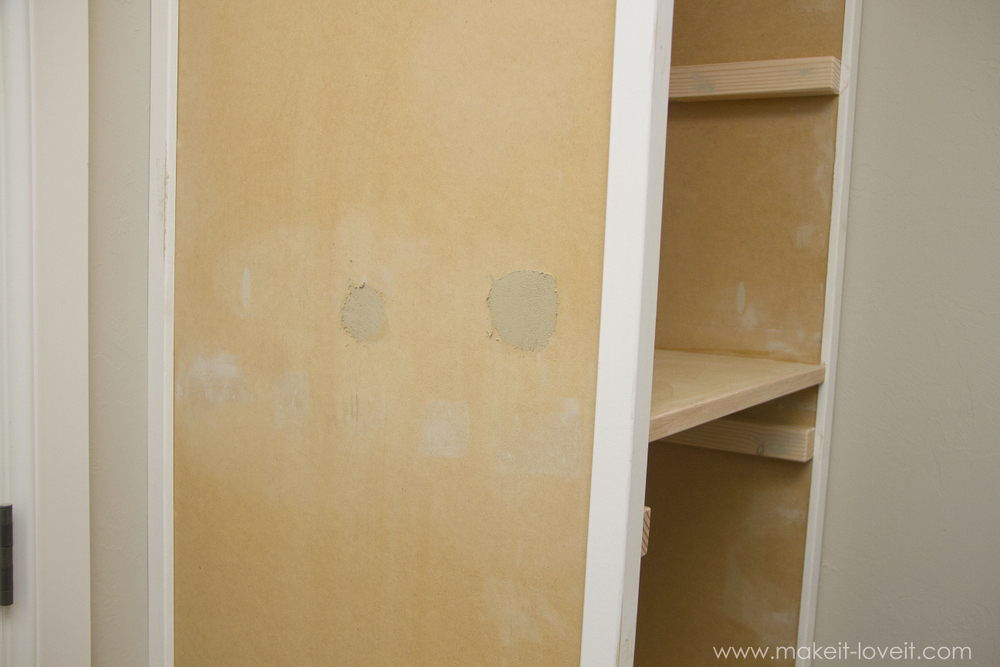
Around all-time low, we just made use of wall that matched the existing walls in the utility room, to make sure that it looked much more integrated in. Describe some of the pictures at the top of the post if needed.).Now, load every one of your nail and also screw holes with wood filler, allow completely dry, and then sand down until smooth.Oh … and also along the center shelf item, we included an oak trim item to cover the raw edge of the MDF, so that it wouldn’t ever before get or swell nicked in the future.Cutting a Window.
post for more info.
).
When the caulk is completely dry, it’s time to paint. Apply 2 coats (or even more if required) then allow totally dry (I would certainly say for at the very least a day or 2) to make sure that the paint is totally dry before gliding in your baskets.Need more help with caulking??? Check out my Enjoy your newly arranged laundry system !!!– Ashley.Share.
1K.
Pin.
569K.
More DIY Home Decor Ideas and Resources
Article source: http://www.makeit-loveit.com/2016/01/diy-laundry-basket-slide-in-organizer.html


