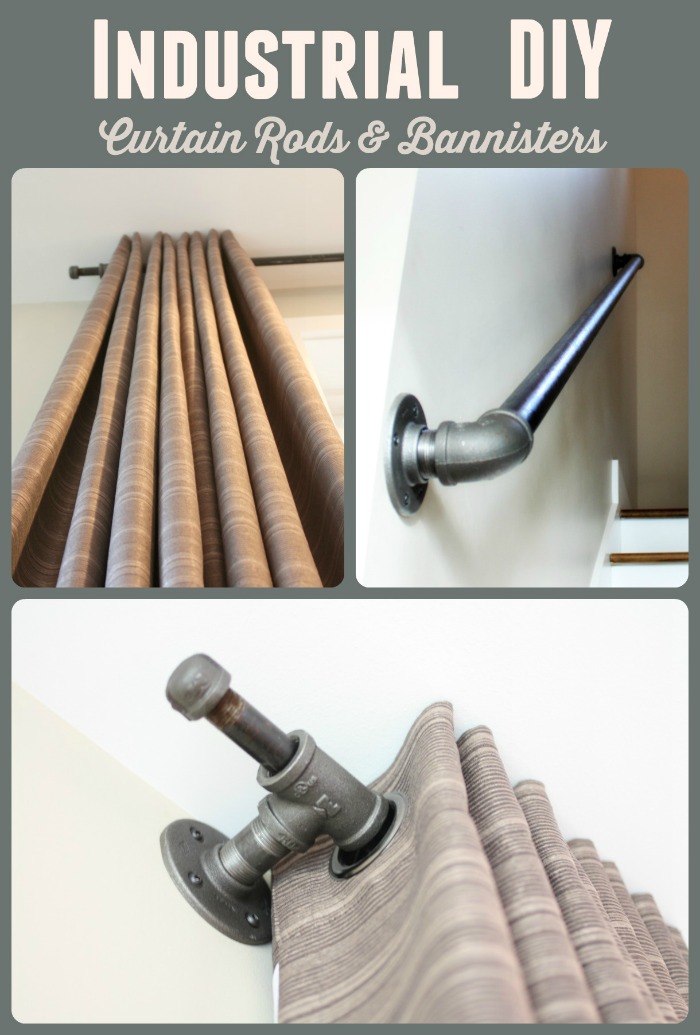
Here we show you how to construct both standard and extra-long curtain rods throughout your living-room using Black Iron Pipe!
Standard Length Drape Rods
Curtain rods are never ever tough to discover in a big box store. They are typically offered in 10-25 various designs for anywhere from $5 to $50. For many, individuals can find what they’re looking for in these places. However not us. No, we can’t be that basic. We desired something to match what was in our minds, and what we saw on the market simply wasn’t doing it for us. And neither were the prices. A minimum of $25 per rod for something substantial isn’t low-cost, and that wasn’t going to suffice for our restricted we just moved into a brand-new house and have nothing spending plan. It was at this point that we decided to pull the style from upstairs down. Bring on the black iron pipeline and fittings!
We had to build 2 standard length curtain rods for the windows on either side of the fireplace. I developed a basic style and mounting system, got Brianna’s approval (the most crucial step of any project), then purchased my products.
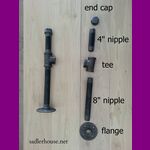
Products
Assembly and Installation
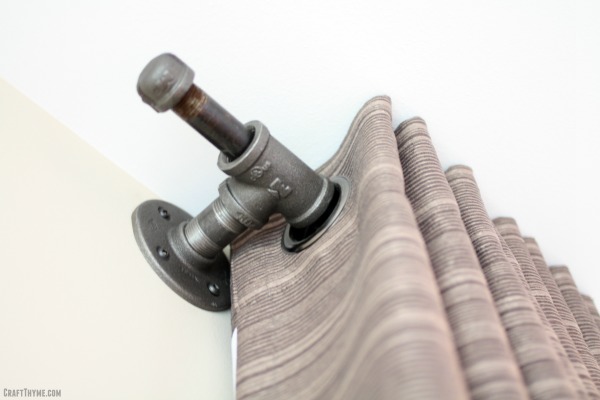
Yes, my supply list is right; I am going to utilize 1/2 ” gauge pipe with 3/4 ” pipeline fittings. How ?! Why ?! Keep reading … Action 1: Construct and Mount your Brackets
This part is easy. (In fact the whole thing is easy. And low-cost.).
Link a nipple to a flange.
- Link a tee to the opposite of the nipple.
- Hand-tighten whatever.
- Mount the bracket you simply hand crafted (go you!) to the wall at a level you please.
- To install, we utilized bronze/black square head screws to finish the industrial appearance. Look for a stud if you can, or utilize suitable drywall anchors to ensure a snug, safe fit. Ensure the tee runs horizontal to the floor; miss this step, and well, you’ll have an excellent towel holder that’s just out of reach for your visitors if you end up here you must be able to tighten up or loosen things just enough to get you back to excellent.
.
Action 2: Figure Out the Length of your Rod.
To that range, add an outright minimum of 3 ” so that your pipe can overhang and be capped. For our installations, we added 6 ” total providing us 3 ” of overhang on each end.
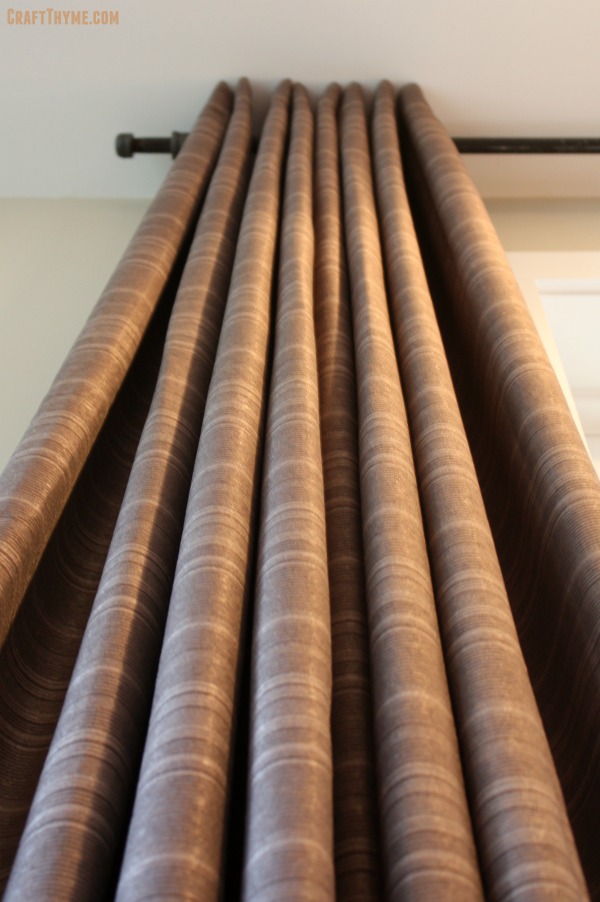
Action 3: Move your Rod into the Holes.
Slide your length of 1/2 ” rod into your 3/4 ” tee. The 1/2 ” rod will fit easily through the tee and allow for simple adjustment back and forth while you to get your curtain( s) in location. Now do you see why we went with 1/2 ” pipeline?
To install your drapes, insert one side of your rod into an open tee, move your curtain onto the rod, and after that pull the pipeline back into place so that it rests in the empty tee. When complete, install the pipe caps on either end, and voila!
Overall expense per standard rod: $11.67.
Extra-Long Curtain Rods.
The front wall of our house has two tall windows whose overall span (windows and wallspace) covers more than 12 “. After some convincing, Brianna offered me on the concept of flooring to ceiling curtains that would cover the whole wall.
At night, we ‘d close the drapes and have a wall of material. To make this take place, we needed to find a 12 “- long drape rod.
Supplies.
Assembly and Setup.
This job follows the basic rod develop guidelines for the many part, however has a twist in the middle. Here goes:.
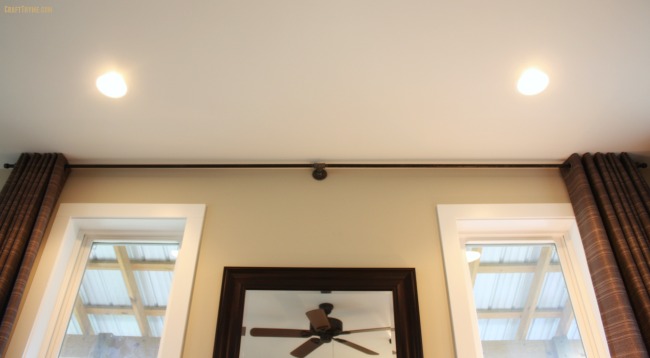
Step 1: Develop and Mount your Outside Brackets.
- Connect a nipple to a flange.
- Connect a 3/4 ” tee to the other side of the nipple.
- Hand-tighten whatever.
- Mount the brackets you just hand crafted to the wall at a level you please.
Utilize the same screws as previously, and again, make sure the tee runs horizontal to the flooring.
Action 2: Construct and Mount your Inside Bracket.
- Link a nipple to a flange.
- Link the special 3/4 ” x 1/2 ” x 1/2 ” tee to the opposite of the nipple.
- Hand-tighten everything.
- Mount this bracket centered in between the two installs you have actually currently set up. Same height. Still horizontal to the flooring.
Action 3: Figure Out the Length of your Rods.
Procedure the distance between the outside edges of your tees to the close edge of the center assistance tee. To that range, add an absolute minimum of 2 ” so that your pipeline can overhang and be topped. For our setups, we added 4 ” overall offering us 3 ” of overhang on each end and 1 ” to screw into the center tee.
Step 4: Slide your Rods into their Holes.
Slide a length of 1/2 ” pipe into your 3/4 ” tee. When your drape on and ready to go, move the rod back towards the center support and screw the 1/2 ” pipe into the 1/2 ” tee opening.
Overall expense for the extra-long drape rod: $25.05.
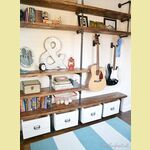
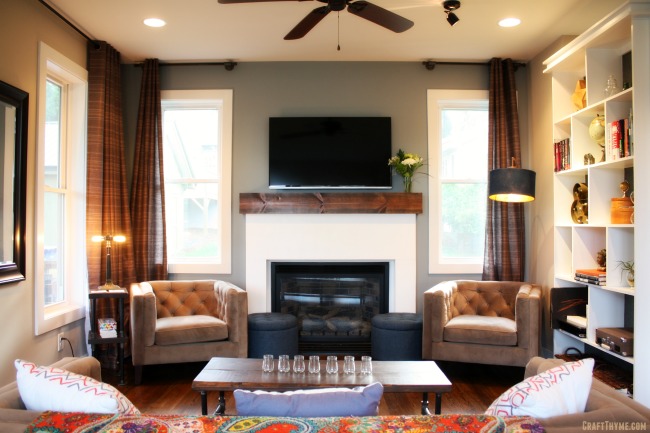
The Finished Whole-Room Look.
Article source: http://craftthyme.com/2015/07/industrial-decor-black-iron-pipe-ii/