21 Easy DIY Home Decor Projects for Every Room
There is something very satisfying about looking around your home and knowing that you built it. You did not order it online or pick it off a shelf at a big-box store. You built it, painted it, sewed it, or arranged it yourself, and it fits your space perfectly because you designed it that way. DIY home decor does not have to mean power tools and a full weekend commitment either. Some of the best projects take an afternoon, a trip to the craft store, and a little patience. This list covers 21 real, practical projects across every room in the house, from the kitchen to the bedroom to the entryway. Each one is beginner-friendly enough to actually finish, but satisfying enough that you will genuinely want to show it off.
1. Painted Accent Wall
An accent wall is one of the highest-impact changes you can make in any room without tearing anything apart. Pick a single wall, the one your bed sits against in the bedroom, or the one your sofa faces in the living room, and paint it a color that is two or three shades deeper than the rest of the room. You do not need a designer to figure out what works. Tape off a large swatch first and live with it for a day before committing.
The trick with accent walls is to use a finish that suits the room. Matte paint works beautifully in bedrooms because it absorbs light and feels restful. Semi-gloss holds up better in living rooms and kitchens where walls get touched more often. Use painter’s tape along the ceiling line and baseboards for clean edges, and roll the paint in a W pattern to avoid streaks. Two coats usually does it. The entire project can be done in a single afternoon for under twenty dollars in most cases.
2. Gallery Wall Arrangement
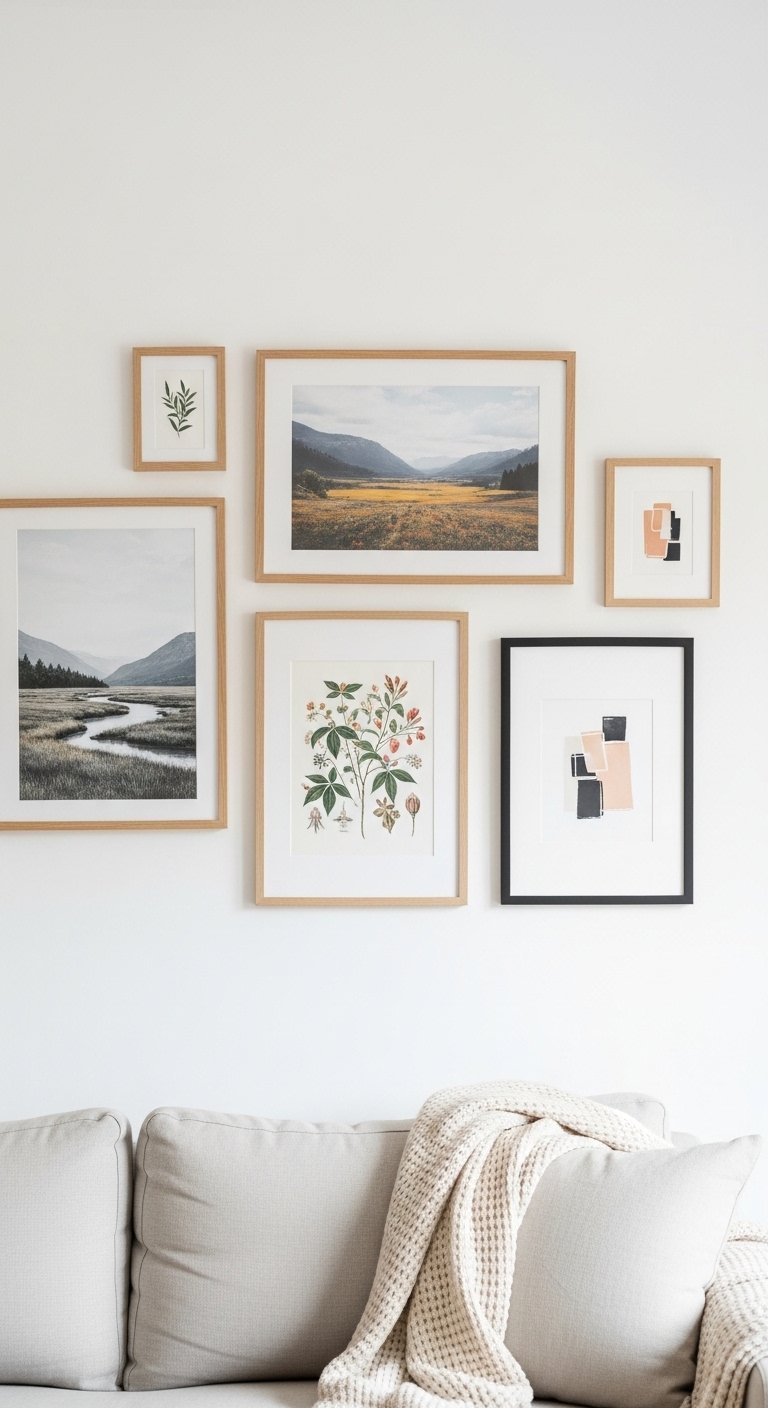
A gallery wall sounds complicated but the actual process is straightforward once you stop overthinking the layout. Gather a mix of frames in coordinating finishes, not necessarily matching, and lay them out on the floor first. Shift things around until the grouping feels balanced. A good rule of thumb is to keep frames within two inches of each other to make the arrangement feel like one cohesive piece rather than random frames stuck to a wall.
Gallery walls work in living rooms, hallways, stairwells, and bedrooms. Fill the frames with a mix of things: a printed photo, a piece of art from a local shop, a pressed botanical, a page torn from an art book with a mat around it. The variety of content is what makes it personal. Use a level on at least the top row of frames to keep things visually anchored. Paper templates cut to the size of each frame help you nail placement before you put a single hole in the wall.
3. DIY Floating Shelves
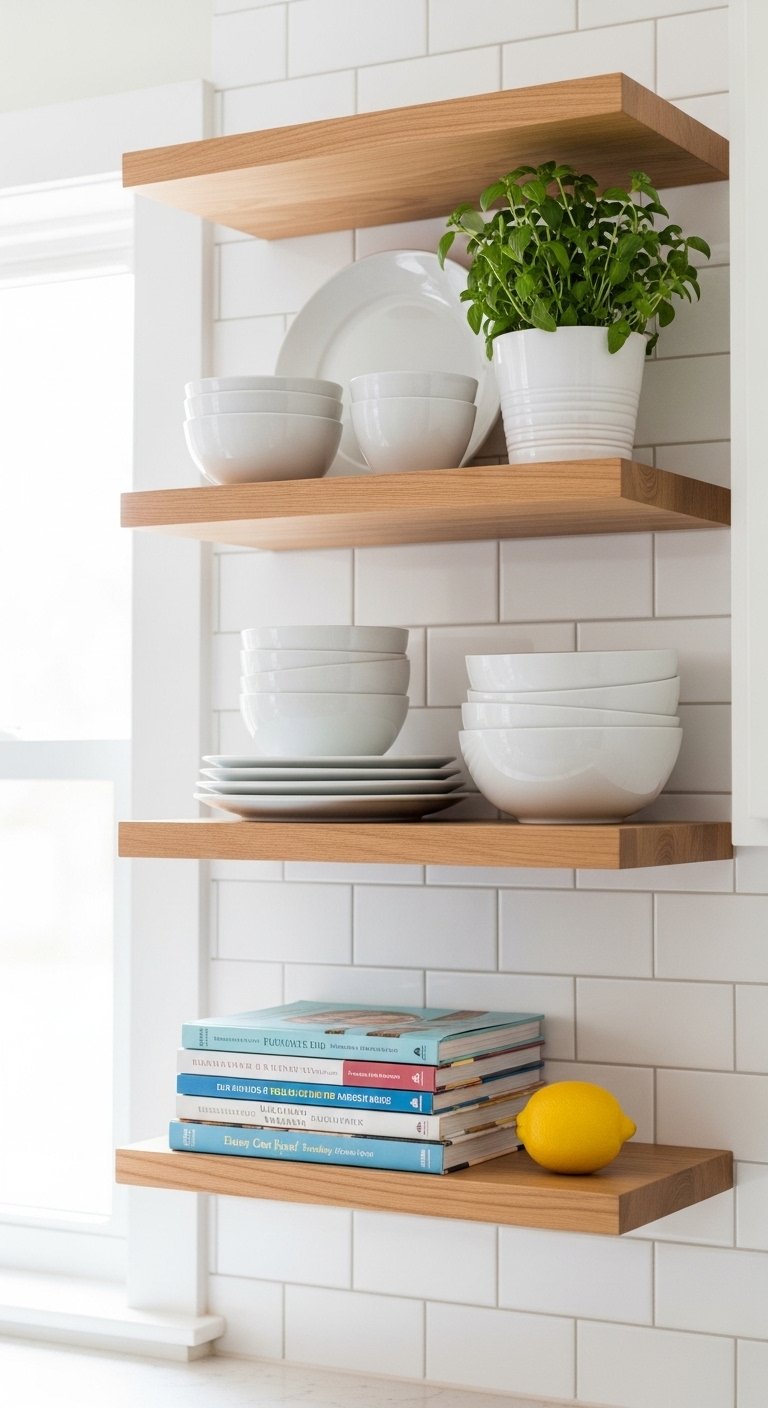
Floating shelves are one of the most useful DIY projects in any home because they add both storage and display space without eating into floor area. You can buy pre-made shelf boards at any hardware store and pair them with hidden shelf brackets. The key is to hit wall studs when you mount them so the shelves can hold actual weight. A stud finder is a five-dollar investment that prevents a lot of frustration.
Paint or stain the shelf board before mounting it, because it is much easier to finish the wood when it is flat on a table than when it is already on the wall. In a kitchen, floating shelves hold dishes and jars in a way that looks intentional and organized. In a living room or bedroom, they display books, plants, and objects at eye level, which immediately makes a room feel more curated. Space them far enough apart that items do not feel cramped, and do not overcrowd the shelves once they are up.
4. Fabric-Wrapped Headboard
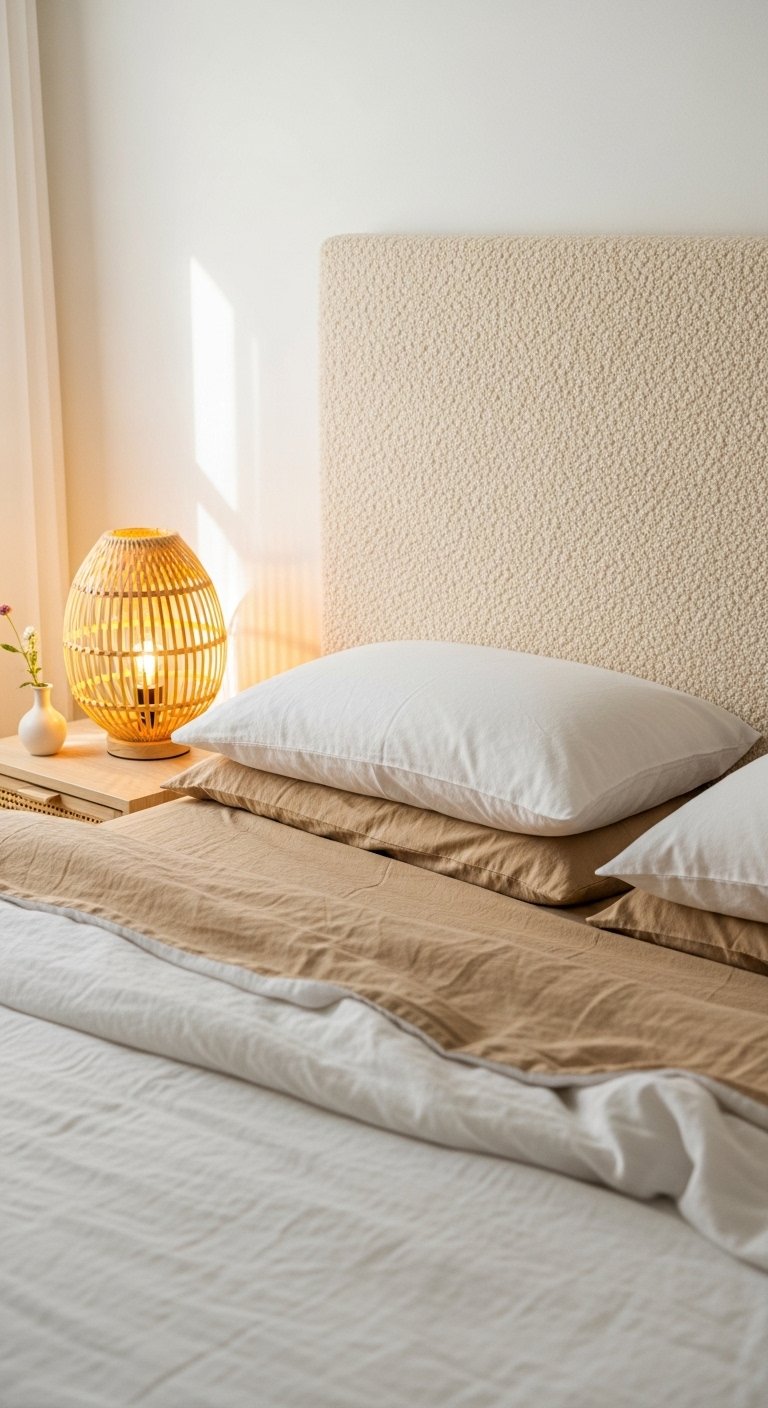
Making a fabric-wrapped headboard is genuinely one of the most satisfying bedroom DIY projects because the before and after difference is dramatic. You need a piece of plywood cut to size, a layer of foam padding, a piece of fabric large enough to wrap around the back, and a staple gun. Lay the foam on the plywood, stretch the fabric over both, and staple it to the back like wrapping a present. The whole thing mounts to the wall with a French cleat or two heavy-duty picture-hanging strips.
Fabric choice makes or breaks this project. A linen in a warm neutral works for nearly any bedroom style and holds up well over time. A patterned velvet feels luxurious and dramatic. Boucle has become extremely popular for a reason: it photographs beautifully and adds texture that reads well even from across the room. The headboard does not need to be the full width of the bed either. A narrower, taller headboard can actually make a small room feel bigger by drawing the eye upward.
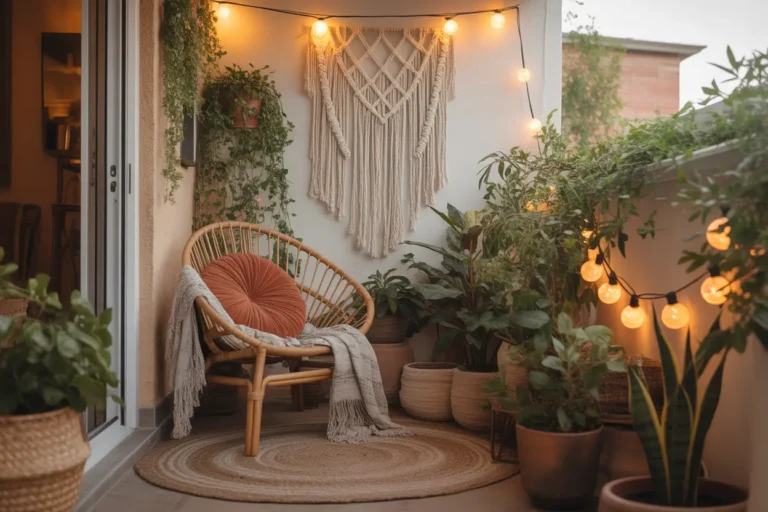
5. Macrame Wall Hanging
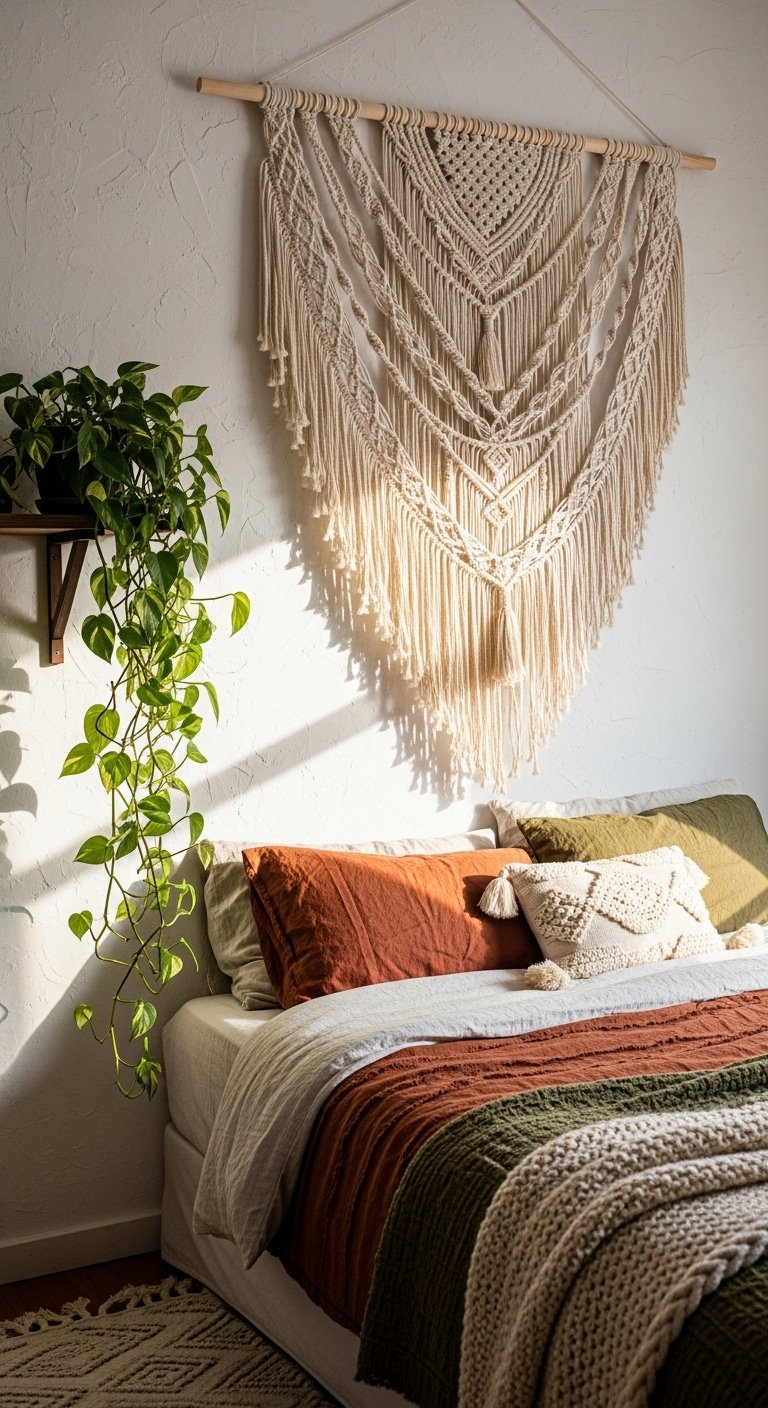
Macrame has been popular for years now and it shows no signs of fading because it works in nearly every decorating style from boho to modern farmhouse to coastal. The basic knots, square knots and spiral half-hitch knots, are easy to learn from a short video and the supplies cost very little. A dowel rod, several yards of natural cotton cord, and a pair of scissors are all you need to get started.
For a beginner piece, a simple fringe wall hanging about eighteen inches wide and two feet long is a manageable first project that still looks impressive when finished. Hang it above a bed, a sofa, or on a blank wall in a reading nook. The natural texture of cotton cord adds warmth to a space in a way that paint and frames cannot, because it has dimension and movement. If you go with a thicker cord, the finished piece looks more substantial and modern. Thinner cord creates a more delicate, intricate look.
6. Terracotta Pot Makeover
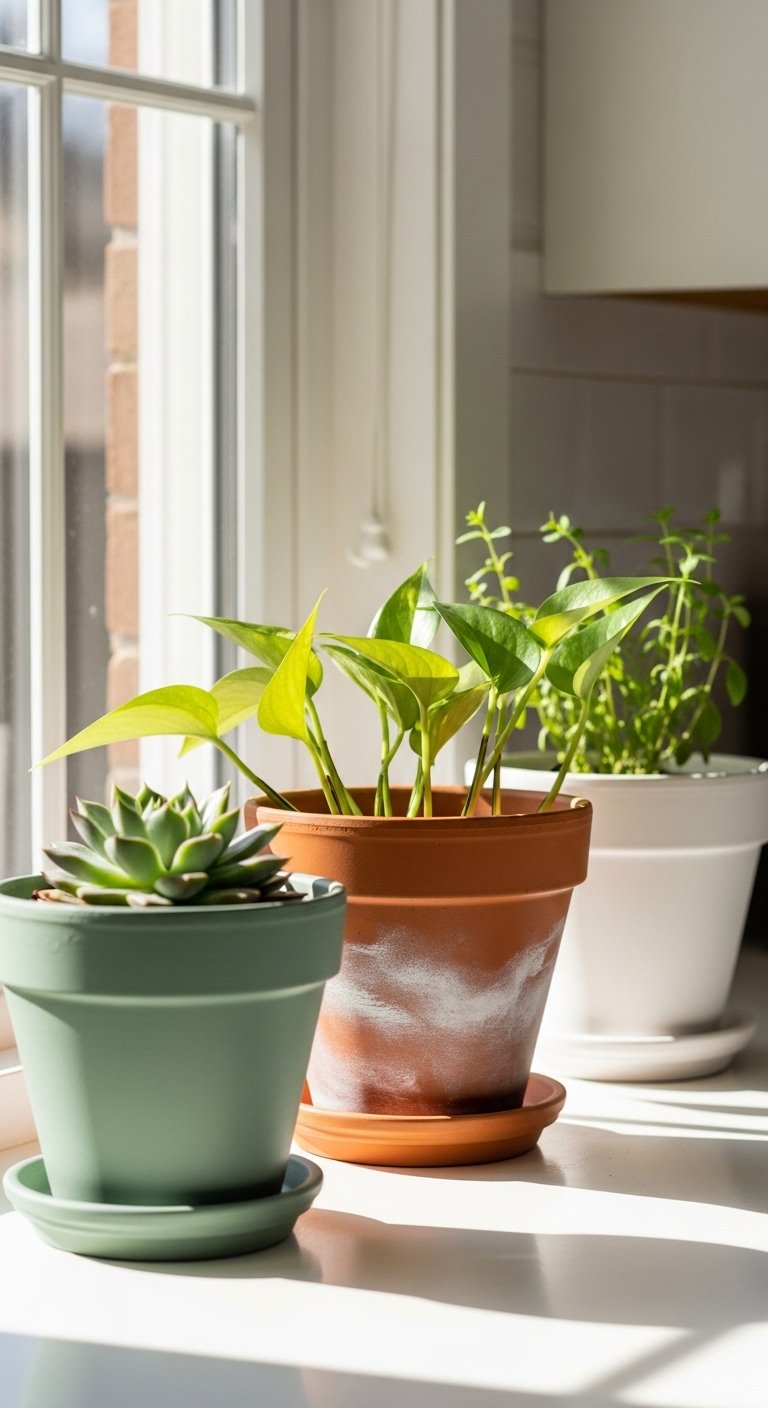
Plain terracotta pots are one of the most versatile DIY canvases available. A small can of chalk paint, a sponge brush, and thirty minutes are enough to turn a basic hardware-store pot into something that looks like it came from a boutique home shop. The most popular treatments right now are solid white or cream paint, a dipped look where only the bottom third is painted, and abstract stripe or dot patterns using painter’s tape.
Seal the finished pot with a clear matte spray to protect the paint from water and soil when you actually plant something in it. These pots work on windowsills, kitchen counters, bathroom ledges, and outdoor patios equally well. Grouping three pots of different heights together with similar paint treatments creates a cohesive little plant display. If you are not into plants, use the painted pots to hold pens, kitchen utensils, or craft supplies and they still look great.
7. Rope Mirror Frame
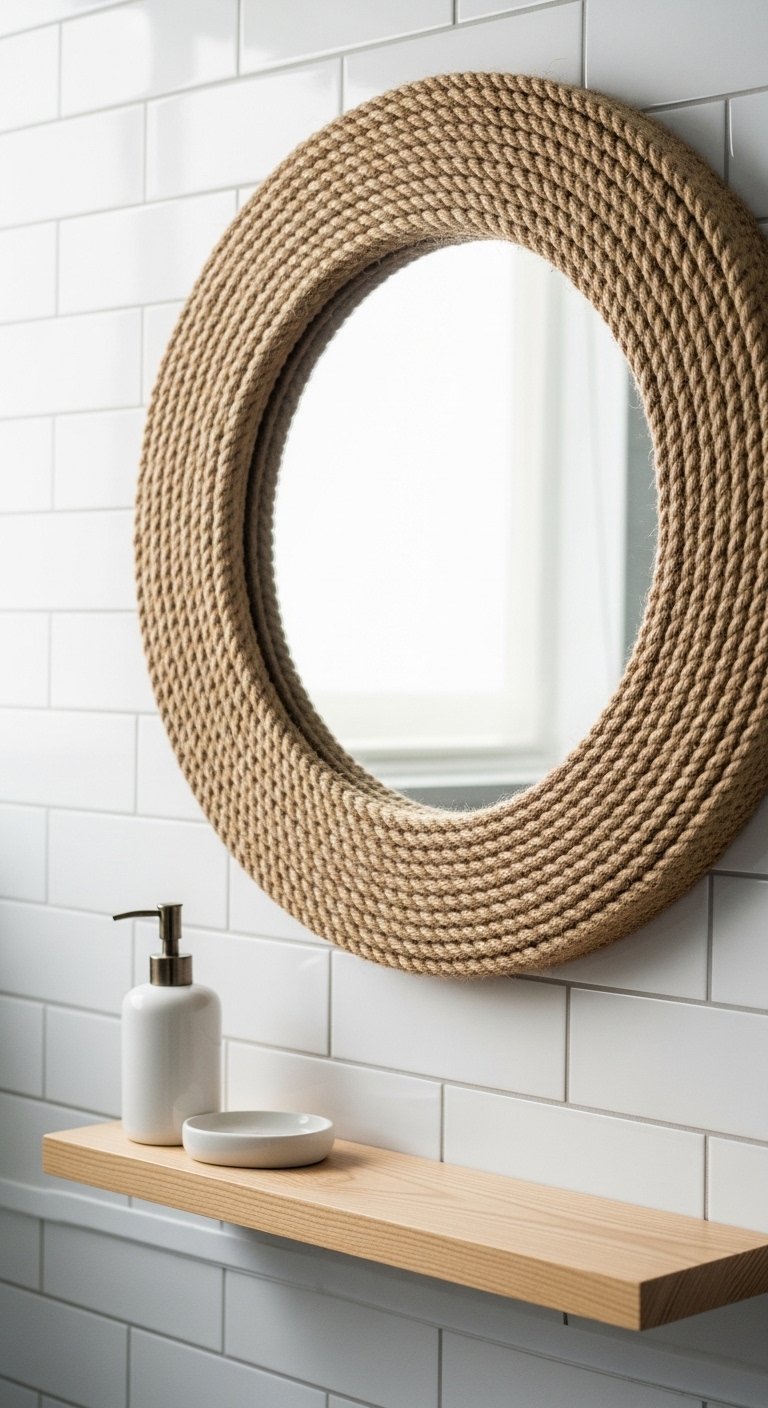
A plain mirror from a discount store becomes something genuinely interesting when you wrap the frame in natural jute or manila rope. The process is simple: run a line of strong glue around the existing frame and press the rope against it, working in tight coils from the inner edge outward. This is a project that requires patience more than skill because the key is keeping the coils snug and even.
The finished look is warm, textural, and organic. It works particularly well in bathrooms, entryways, and bedrooms. For a more modern version, use thicker sisal rope and space the coils slightly apart. For a bohemian look, mix rope thicknesses or add a few wrapped shells or beads into the coiling. A round mirror frame is the easiest shape to work with because the rope lays naturally around the curve. Hang it over a dresser or bathroom vanity where a decorative mirror would normally live.
8. Woven Basket Wall Art
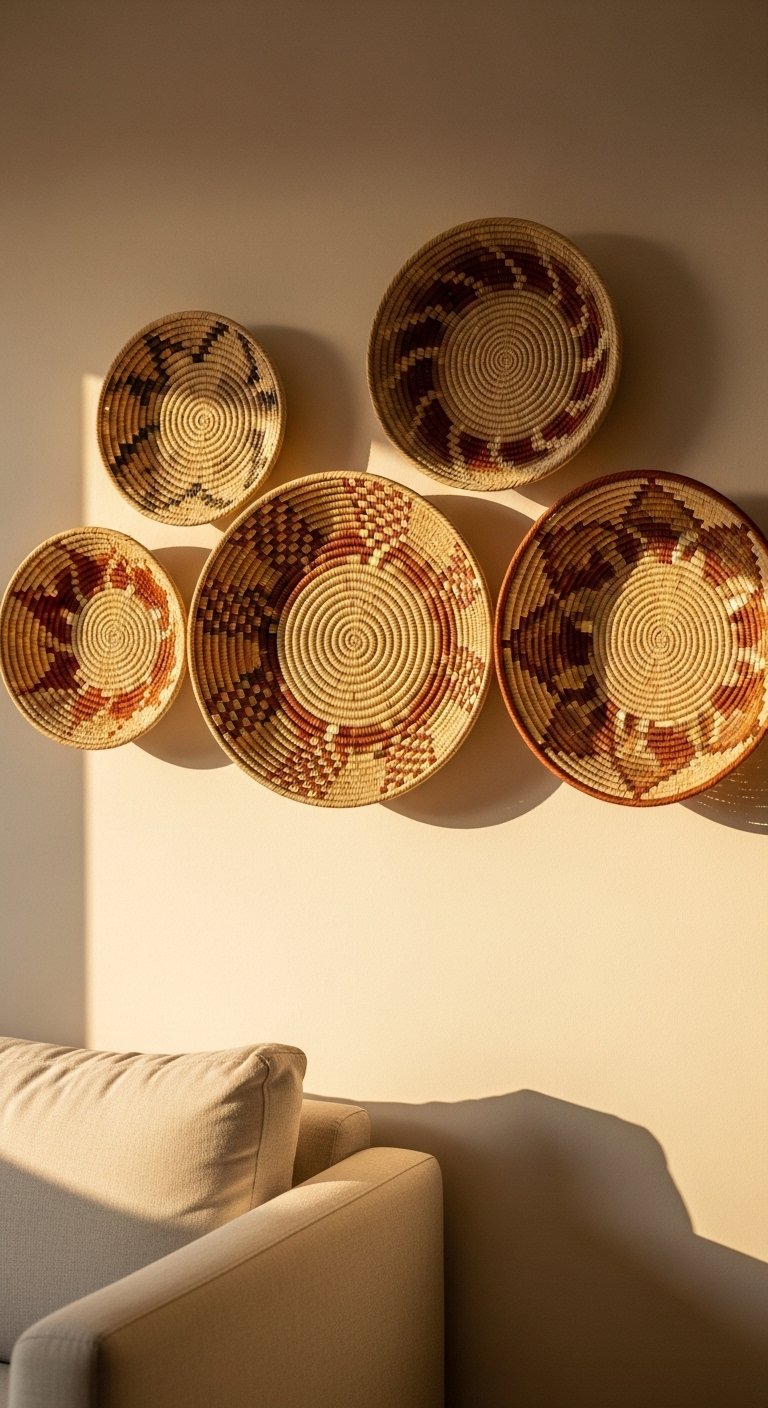
A grouping of woven baskets hung directly on the wall makes a bold, textural statement that costs very little and looks far more expensive than it is. Thrift stores, discount home shops, and online marketplaces usually have a good selection of woven baskets in different sizes and weave patterns. The key is to find three to five baskets that share a color family or material even if they vary in size and pattern.
Arrange them on the floor first to find a grouping that looks balanced. Odd numbers tend to work better than even numbers for wall arrangements. Hang them with small nails or picture hooks through the back weave, making sure each basket sits flush against the wall. This works especially well in living rooms, dining rooms, and bedrooms with an earthy, natural, or boho aesthetic. Above a sofa or a console table are the most common placements and both look great.
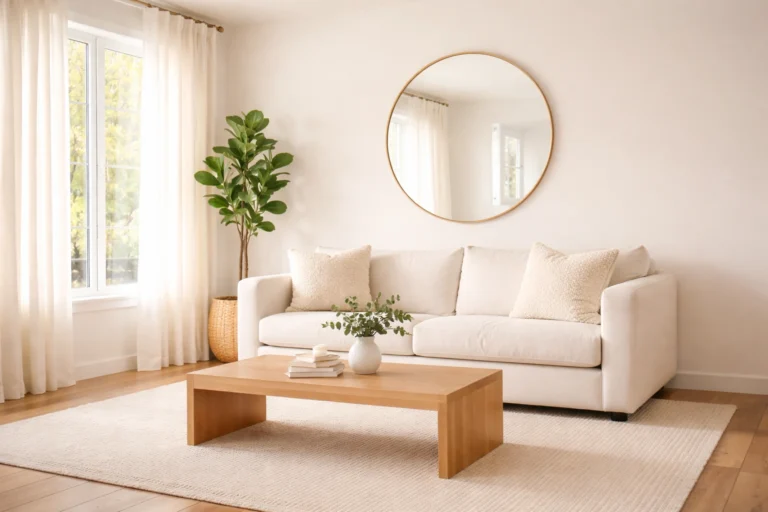
9. DIY Linen Curtains
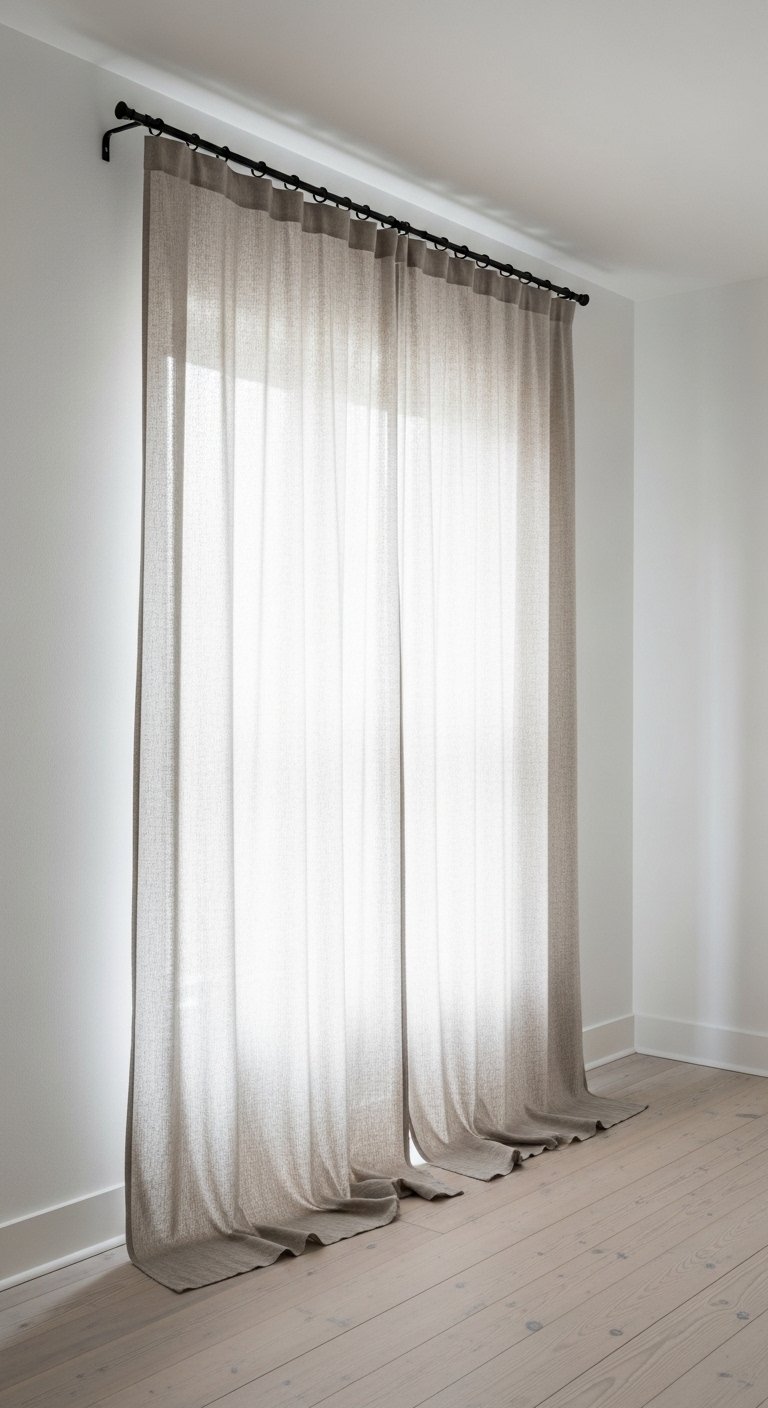
Making your own curtains sounds daunting but a basic panel hem is just two straight lines of sewing, or even iron-on hem tape if you do not own a sewing machine. The fabric choice is what matters most. Natural linen is the gold standard for DIY curtains because it hangs beautifully, diffuses light softly, and looks more expensive than it is when you buy it by the yard.
Measure the window height and add about eight inches for hems at the top and bottom. The finished curtain panels should puddle slightly on the floor or hang just at it, depending on the look you want. Floor-length curtains hung close to the ceiling rather than at the window frame make a room feel dramatically taller. Use curtain clip rings to hang panels from a simple wooden or black matte rod. In a bedroom, bedroom, or living room, the soft drape of linen curtains adds warmth that no other window treatment quite matches.
10. Painted Furniture Makeover
Giving old furniture a fresh coat of paint is one of the best value DIY projects you can do because the material cost is minimal but the visual change is enormous. A wooden dresser, side table, bookshelf, or dining chair can look completely different with the right color and finish. Sand the surface lightly first to give the paint something to grip, wipe away the dust, and apply a primer before your color coat for the most professional result.
Chalk paint is forgiving for beginners because it adheres to most surfaces without extensive prep and dries quickly. Milk paint gives a slightly more uneven, aged look that suits vintage and farmhouse pieces well. For furniture that gets heavy daily use like a dining table or dresser top, a hard-wax oil finish or a polycrylic topcoat is worth adding for durability. Painting furniture legs a contrasting color to the body is a simple detail that makes a piece look custom rather than DIY.
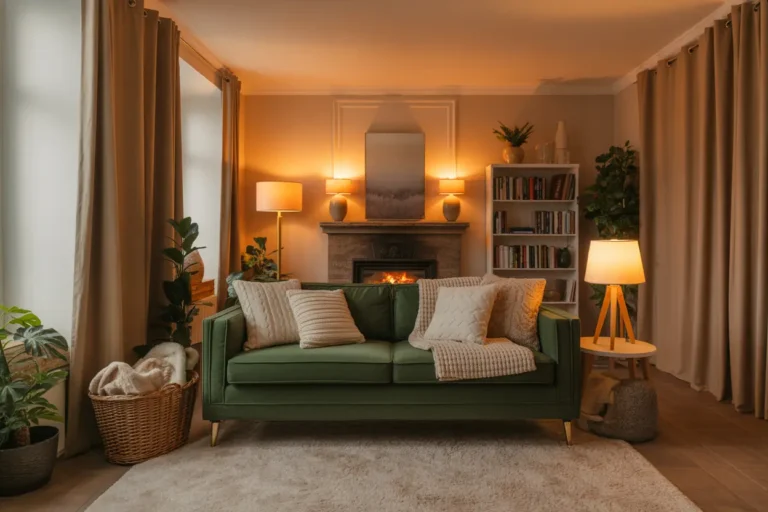
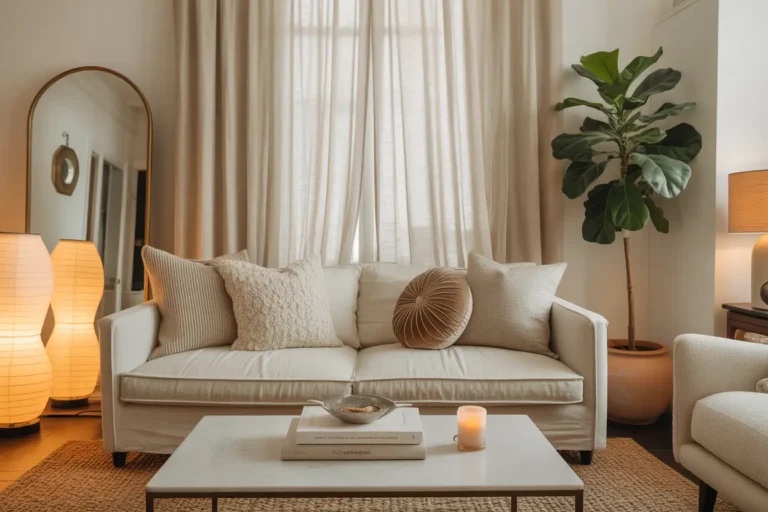
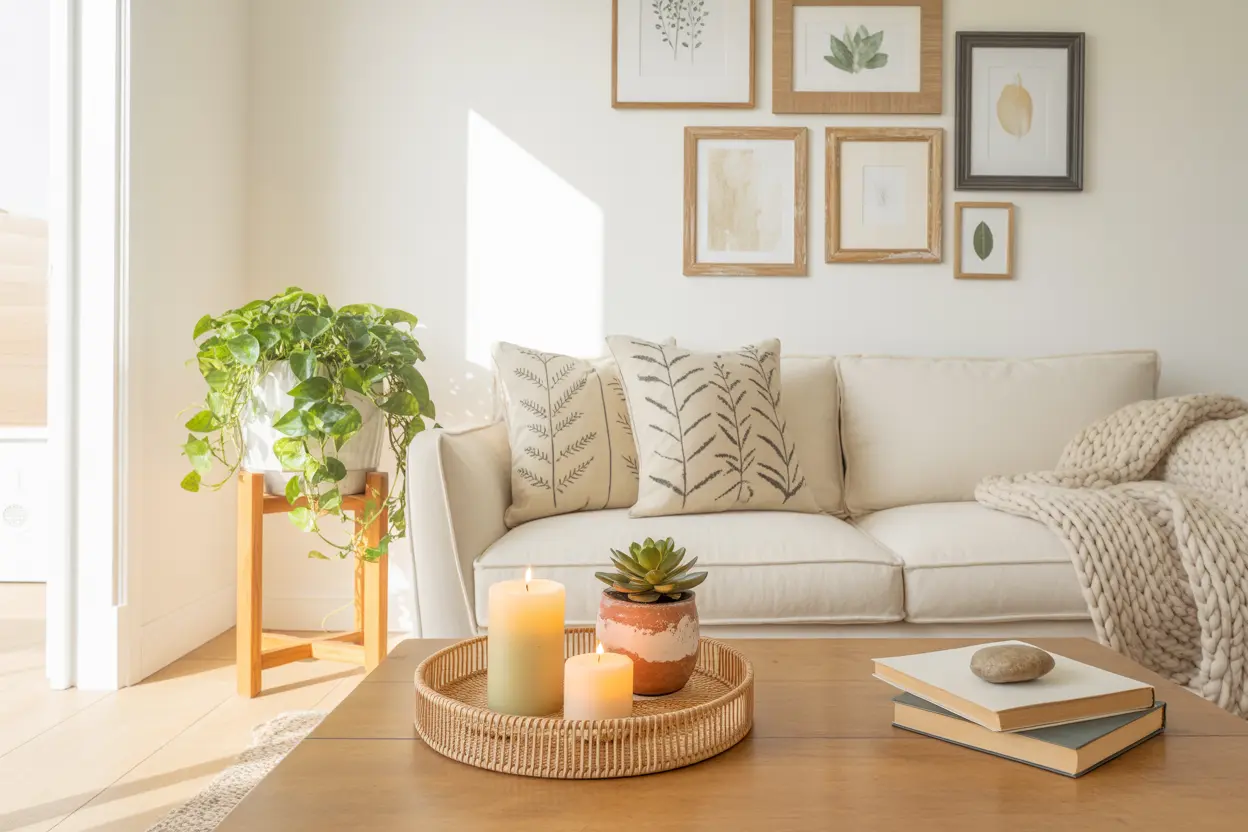
11. Candle Tray Vignette
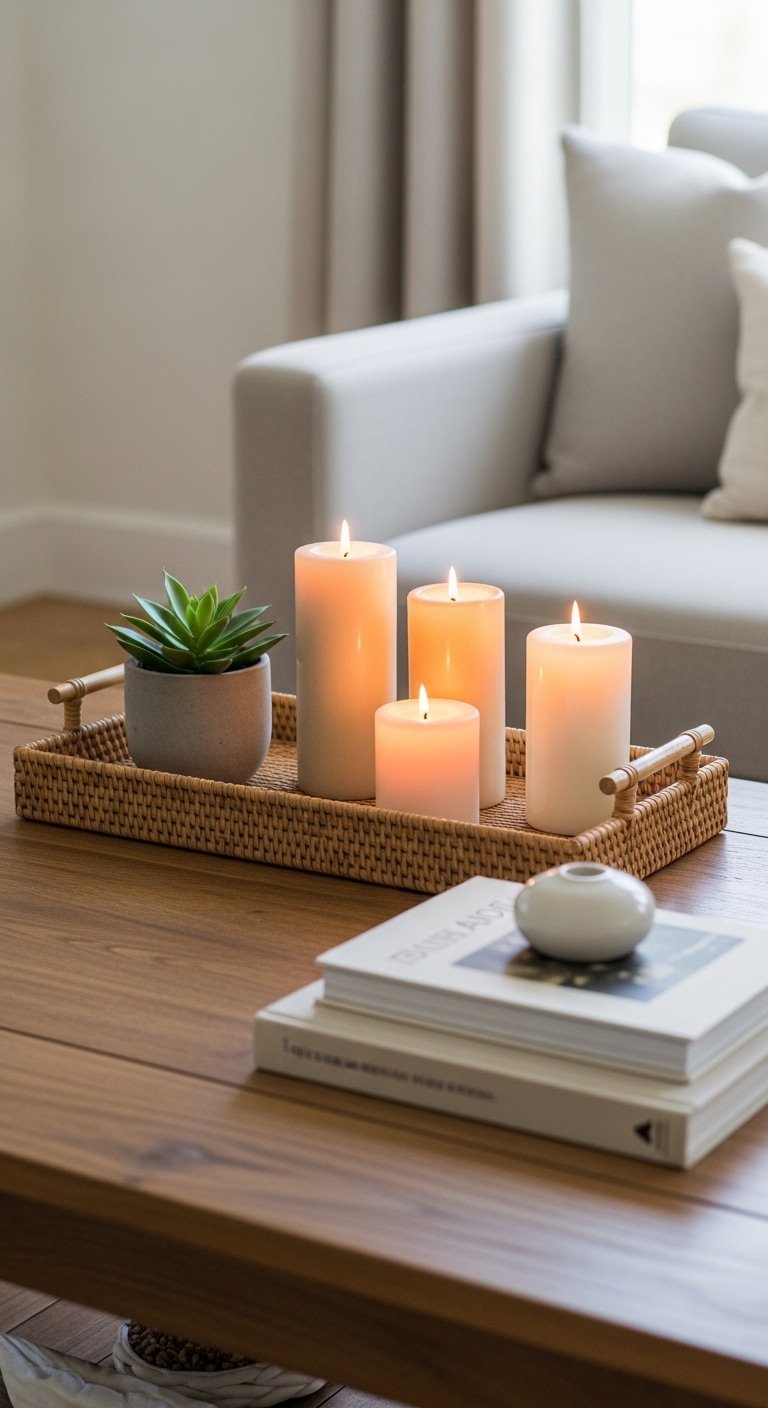
A tray filled with candles, a small plant, a book, and a few objects is one of the easiest and most effective ways to style a coffee table, console table, or ottoman. The tray itself is the container that pulls the vignette together and gives it a finished look. Almost any tray works: wood, rattan, lacquered, marble-look. The tray keeps the grouping from feeling scattered.
Use candles in varying heights, including at least one tall pillar candle, to give the arrangement visual depth. A small succulent or a potted herb adds life. A stack of two or three books with interesting spines adds height variation without looking contrived. Keep the whole grouping within the footprint of the tray and resist the urge to add more once it looks right. In a living room, this type of styled tray is an instant focal point and costs almost nothing if you work with things you already own.
12. Stenciled Pillow Covers
Plain pillow covers from any home goods store become genuinely interesting with a simple fabric stencil and a foam roller. Craft stores carry fabric stencils in hundreds of patterns from simple geometric repeats to botanical motifs. Lay the pillow cover flat, tape the stencil down to keep it from shifting, and roll a thin, even coat of fabric paint across it. Lift the stencil carefully to reveal a clean print.
The trick is to use very little paint on the roller. Too much and the paint bleeds under the stencil edges. A dry-brush technique works best here: load the foam roller lightly and dab off the excess on a piece of scrap paper first. Once dry, heat-set the paint with an iron to make it washable. You can stencil one pillow in a bold repeat or create a matched set of two or three pillows with coordinating patterns. These work in any room that uses throw pillows, which is basically every room.
13. Mason Jar Pendant Lights
Pendant lights made from mason jars are a kitchen and dining room DIY classic that still looks fresh when done well. Pendant light kits with Edison bulbs are widely available online or at hardware stores and include all the wiring already done. You simply fit the socket through the mason jar lid, secure it, and screw in the bulb. From there it is just a matter of installing the pendant where a ceiling light already exists.
The look works best in kitchens over a peninsula or island, in dining rooms over a farmhouse table, or in a reading nook. Grouping three pendants at slightly different heights creates the most visual interest. Use warm-toned Edison bulbs rather than bright white ones for a softer, more atmospheric light. Clear jars let the bulb show and look sleek and modern. Tinted green or blue mason jars cast a subtle warm glow and have a slightly vintage feel.
14. Peel-and-Stick Wallpaper
Peel-and-stick wallpaper has genuinely changed the DIY decor world because it gives you the dramatic visual impact of traditional wallpaper with none of the permanence or mess. It works on accent walls, the backs of bookshelves, the inside of a closet door, bathroom walls, and even kitchen backsplashes. The pattern options at this point are nearly unlimited.
The application is straightforward: start from the top, align the panel with a plumb line, smooth out air bubbles with a squeegee or credit card as you go down, and trim the excess at the baseboard. The most common mistake is rushing. Slow, deliberate placement with frequent checking of the plumb line saves a lot of time that would otherwise be spent peeling it back and repositioning. In a bedroom, a single wallpapered wall behind the bed changes the entire character of the room and takes less than two hours to do.
15. DIY Plant Stand
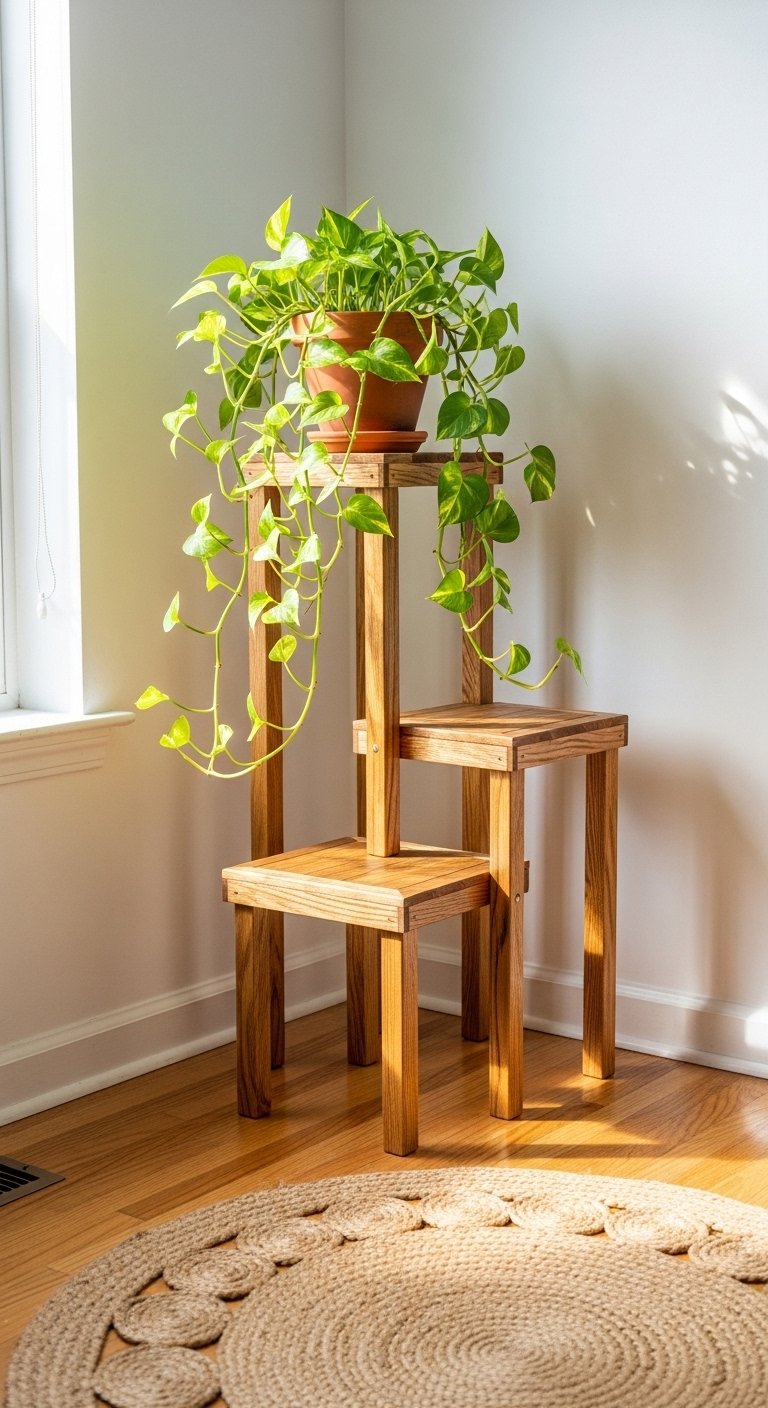
A wooden plant stand is a simple woodworking project that even beginners can complete with basic tools. The most approachable version uses four wooden legs cut to an angle at the bottom and a round or square wooden top platform. Hardware stores sell pre-cut lumber at reasonable prices and most will make additional cuts for you in-store for free or close to it.
Sand the whole thing smooth, stain or paint it to match your space, and seal with a clear finish to protect against water from plant pots. A tall plant stand brings trailing plants like pothos or string of pearls up to a height where they can actually trail, which looks much more beautiful than leaving them low to the ground. In a corner of a living room or bedroom, a plant stand fills negative space in a way that feels organic rather than staged.
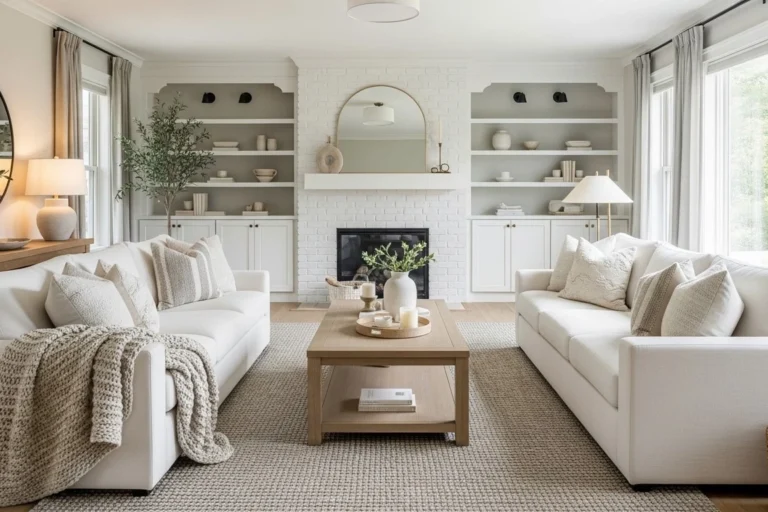
16. Bookshelf Styling
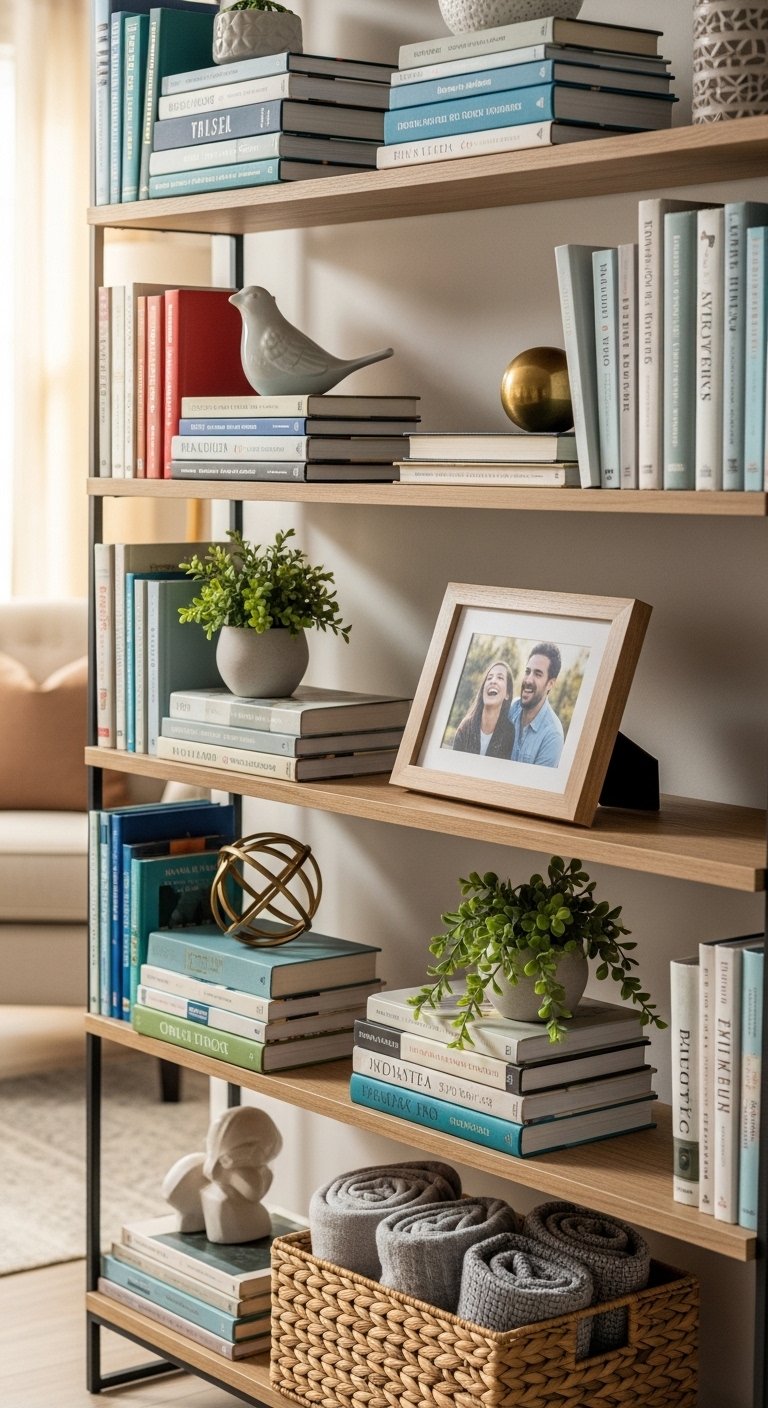
Styling a bookshelf is a skill that makes a huge difference in how a living room or home office looks, and it costs nothing if you already have a shelf and some objects to work with. The core principle is to vary the height, texture, and orientation of items throughout the shelf. Stack some books horizontally to create platforms for objects. Stand others vertically. Leave some sections deliberately open.
Add a few non-book objects: a small plant, a ceramic piece, a framed photo laid face-forward as if it is leaning, a candle. Use the rule of odd numbers when grouping objects: three items or five items arranged together almost always looks better than two or four. Step back and look at the whole shelf from across the room, not just from directly in front of it. The overall visual weight should be roughly balanced left to right, with intentional variation in height throughout.
17. Concrete Candle Holders
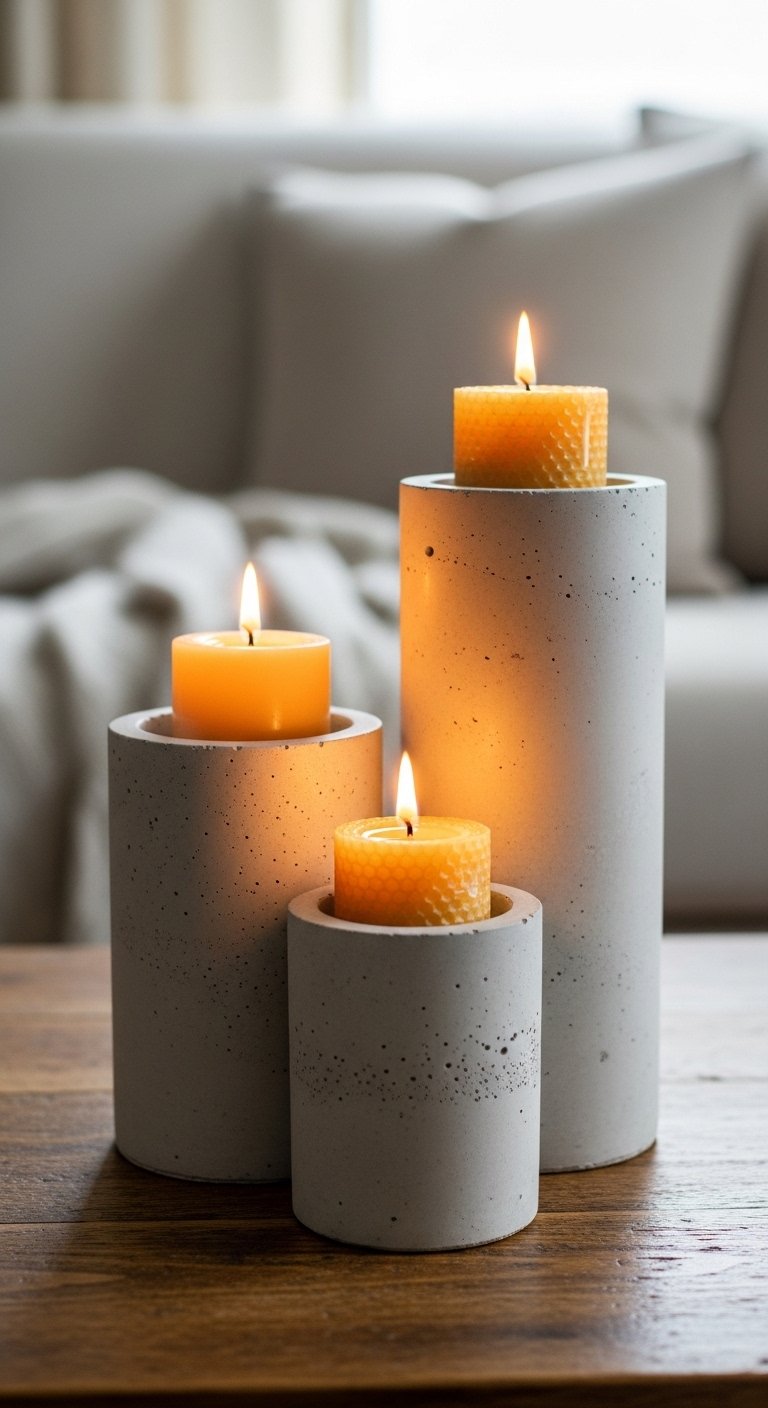
Concrete candle holders are a modern, industrial-chic DIY project that looks significantly more expensive than the materials cost. You need a bag of quick-setting concrete mix, a small plastic mold (a yogurt container or plastic cup works well), a slightly smaller mold to create the interior cavity, and cooking spray to keep the concrete from sticking. Mix the concrete to a peanut butter consistency and pack it around the inner mold until the outer mold is filled.
Let it cure for at least twenty-four hours before demolding. Sand any rough edges once it is fully hardened. The natural gray of concrete looks beautiful on its own, but you can also tint the wet mix with concrete pigment for colored versions. A set of three in different heights grouped on a coffee table, mantel, or dining table looks curated and sophisticated. These make great gifts too, since they look genuinely handcrafted without requiring advanced skills.
18. Layered Rug Technique
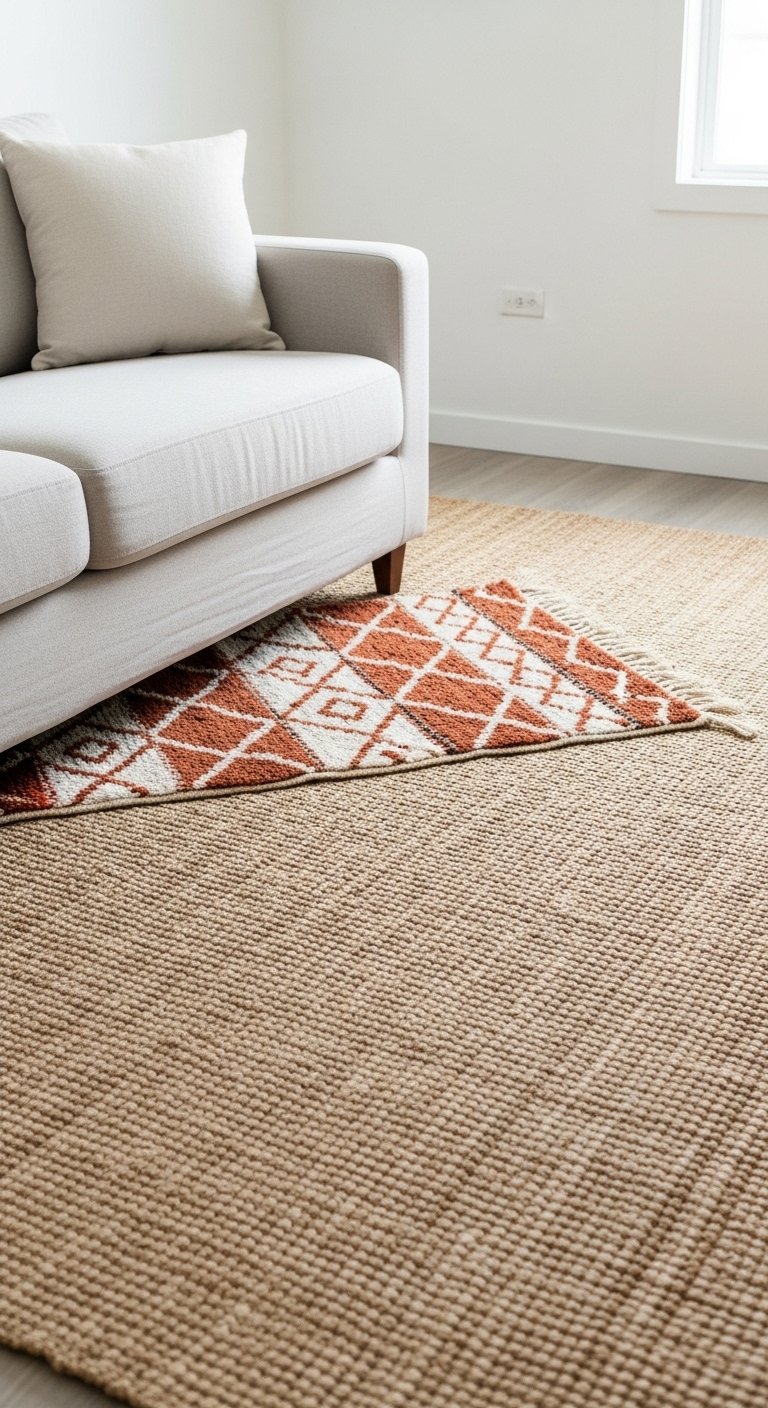
Layering rugs is a styling technique that interior designers use constantly because it adds depth, color, and texture to a space in a way that a single rug simply cannot. The typical approach is to start with a large, neutral rug, a jute or sisal natural fiber rug works especially well as the base layer, and then place a smaller, more colorful or patterned rug on top of it, slightly off-center or angled.
This works in living rooms, bedrooms, and dining rooms. In a living room, the base rug defines the seating area while the top rug adds personality. In a bedroom, a smaller rug layered under the foot of the bed creates a cozy landing zone that makes the whole room feel more intentional. The key is that the two rugs should be different in texture or pattern so they read clearly as separate layers rather than looking like a mistake. Natural fibers under a flatweave or pile is a classic combination.
19. Painted Kitchen Cabinets
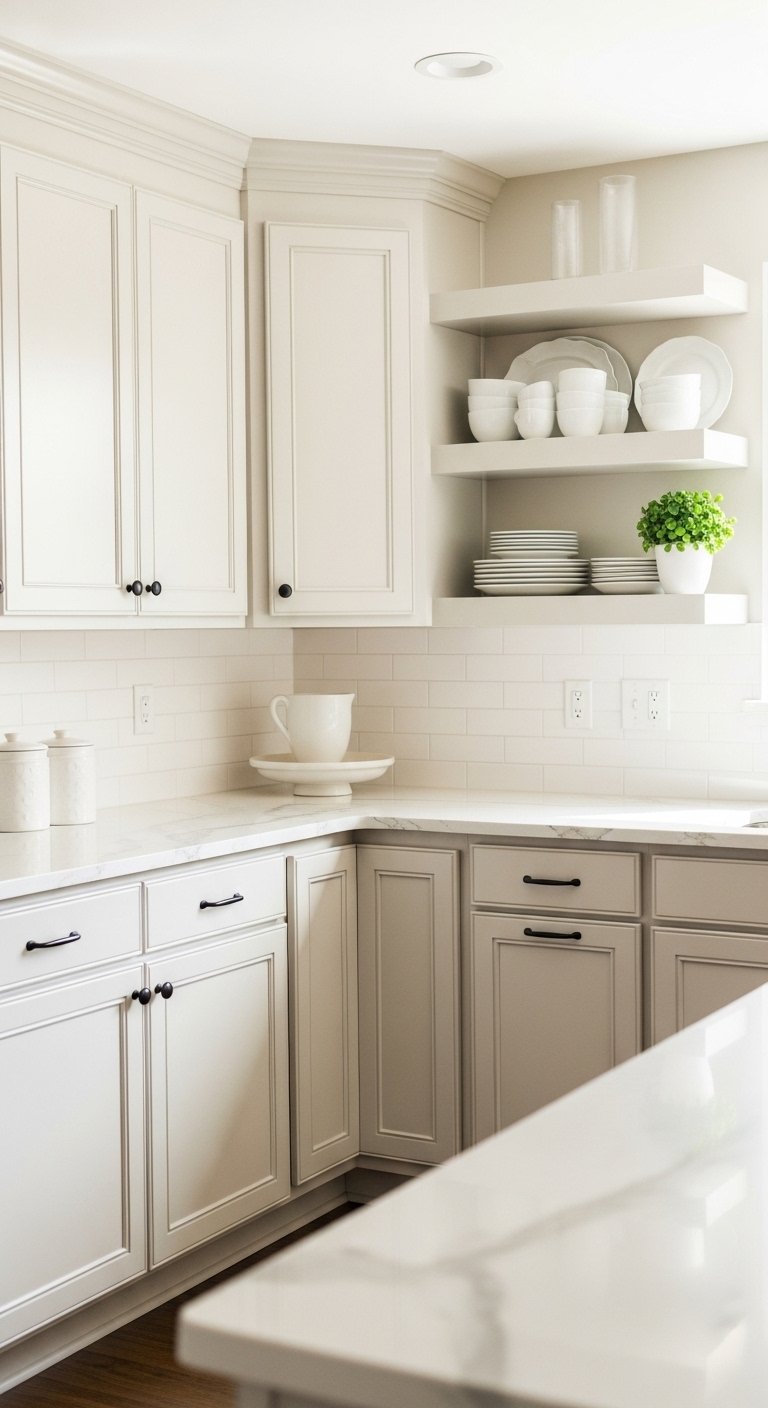
Painting kitchen cabinets is the single highest-return DIY project in the home, and it is also one of the most involved. Done properly, it takes a full weekend and requires proper prep: removing all the doors and hardware, degreasing every surface thoroughly, sanding, priming, and applying multiple thin coats of a cabinet-specific paint. Skipping any step shows clearly in the finished result.
The color choice determines the whole character of the kitchen afterward. Deep navy, sage green, and warm off-white are the most popular choices right now because they all work with a wide range of countertop and hardware finishes. New hardware is the most cost-effective way to make freshly painted cabinets look completely intentional and finished. Matte black pulls on white or off-white cabinets look clean and modern. Aged brass on sage or navy reads warm and eclectic.
20. Framed Botanical Prints
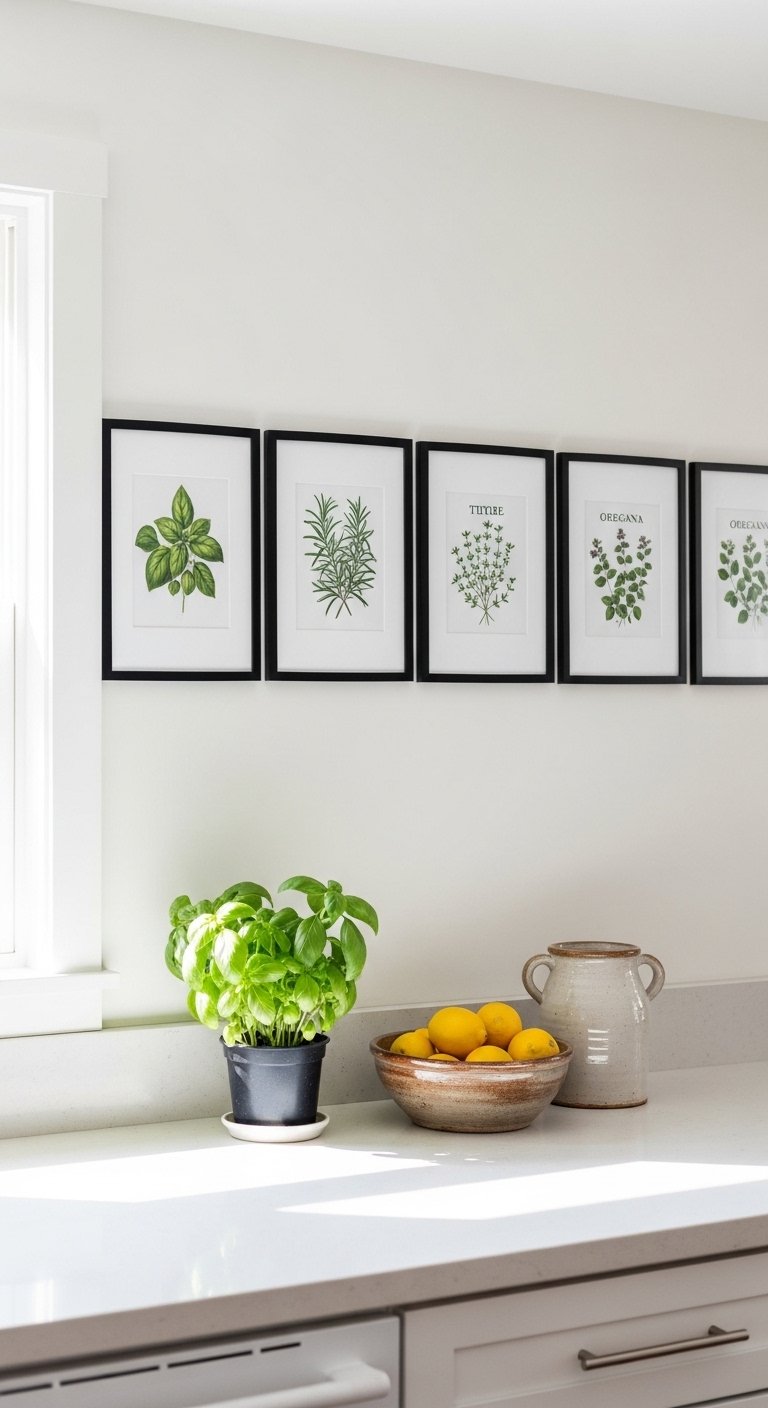
A set of framed botanical prints is one of the most classic and reliable ways to add art to a kitchen, bathroom, dining room, or bedroom. The good news is that you do not need to buy expensive art. Botanical illustrations are widely available for free as high-resolution downloads from old archive collections that are now in the public domain. Print them at a copy shop at the size you need, mat them in simple white mats, and frame them.
A set of three or four botanicals in matching frames hung in a horizontal row above a kitchen counter, above a headboard, or along a hallway feels polished and intentional without spending much money at all. The prints can all be from the same plant family for a cohesive look, or from different plant families for a collector-style display. Either way, black frames give a sharper modern look, and natural wood frames feel warmer and softer.
21. DIY Bedroom Reading Nook
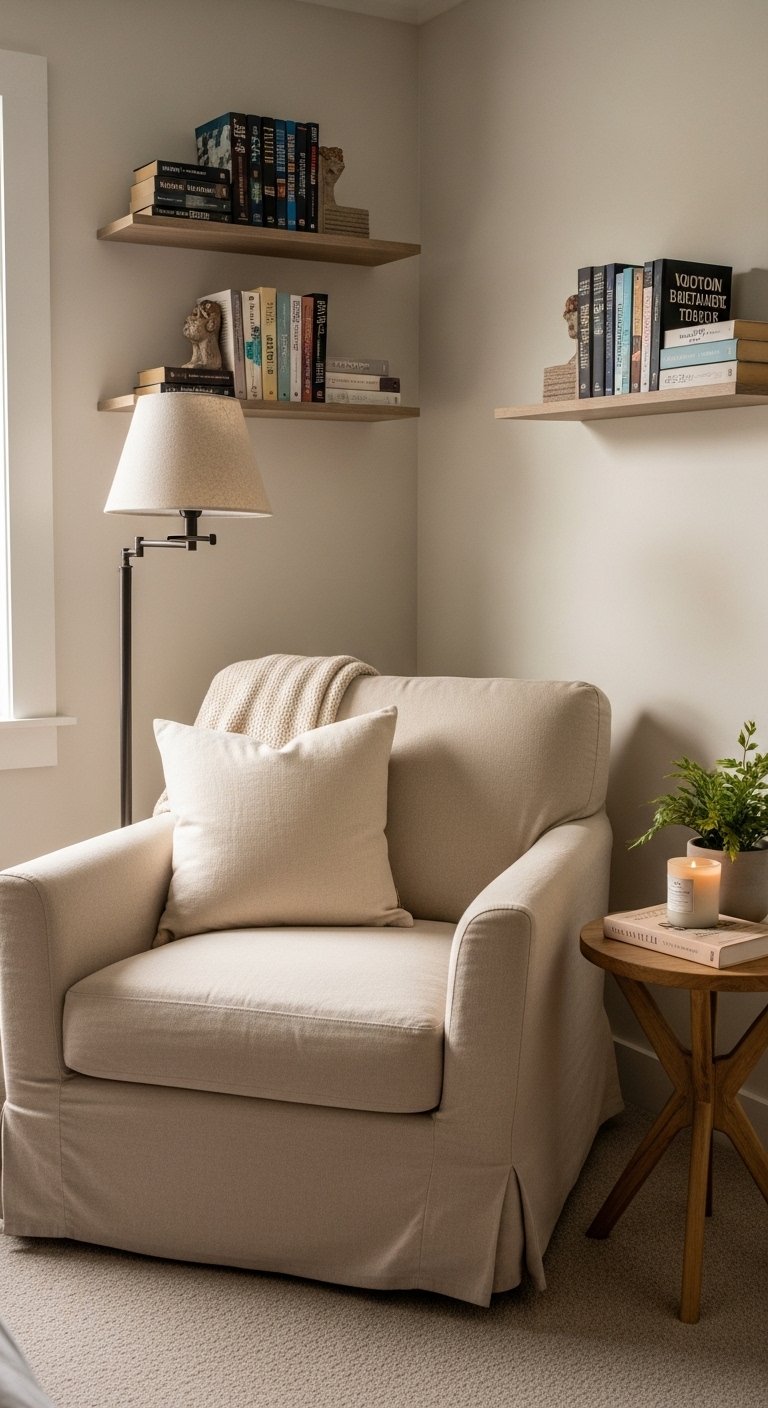
A reading nook carved out of an unused corner of a bedroom is one of those projects that genuinely changes how you use your home. It does not require construction. A comfortable chair or a floor cushion, a small side table or crate for books, a floor lamp or a wall-mounted sconce, and a small rug to define the space are all you need. The corner instantly becomes a destination rather than dead space.
Hang a floating shelf or two on the adjacent wall at seated arm height for holding a current read and a small plant or candle. A throw draped over the chair and a soft cushion for the back complete the cozy picture. If the corner is near a window, position the seating to take advantage of the natural light during the day. A reading nook that actually gets used is worth far more than a perfectly styled corner that nobody sits in, so prioritize comfort above everything else.
Conclusion
The best DIY home decor projects are the ones that get done. None of the ideas on this list require professional skills or a big budget. Start with whichever project you have been putting off the longest, gather your supplies, give yourself a few hours, and see what happens. Your home is always a work in progress, and that is actually the most interesting part of it.