DIY Home Decor Categories

The Ultimate Happy Place: Whimsical DIYs You Probably Never Thought to Try

(Image credit: Marisa Vitale)

You may have caught a look at Amina and Salvatore’s incredible house tour and if not, seriously, how could you miss it? It’s what all your rainbow and unicorn and glitter dreams are made of! What was so surprising, aside from the sheer amount of color packed into 650 square feet of rental space, was the amount of projects they created themselves. As avid DIYers and creative entrepreneurs, the label of “rental” didn’t stop them from creating the ultimate happy-place-heaven for the two of them and their adorable dogs.

Hold on to your faux flower crowns – you’re about to be blown away by all these eye-popping, jaw-dropping DIYs.

READ MORE »

4 Ways to Fight Cabin Fever

Winter is here, and cabin fever is setting in. Feeling a little S.A.D.?  There’s a reason. Seasonal Affective Disorder is a real thing, probably known best by its other name, the “winter blues.” The best way to chase away your funk is by getting started on brightening your space for spring. Read on for five home decorating ideas that will help you fight your cabin fever.

section02_header

1. Color Play

Want to make the gray skies go away? Bring in some color play! A surefire way to elevate your mood is to surround yourself with home accents in a variety of bright and cheerful hues.

section02_products

  1. Orange Tear Drop Finial
  2. Lime London Studded Accent Chair
  3. Aqua Blue Glass Geometric Lantern

section03_header

2. Lighting

Winter days are especially short, and all the extra darkness sure is a bummer. Swapping out your old lamps for new, stylish lighting can help uplift your room’s vibe and give it a new look.

section03_products

  1. Antique Cream Spindle Floor Lamp
  2. Silver Mosaic Uplight
  3. Silver Mercury Glass Table Lamp (shade sold separately)

section03_protip

section04_header

3. Greenery

Being forced to stay indoors keeps us from experiencing nature, which can really kick start the winter blues. Since spring won’t be here for a few more months, bring some greenery indoors with gorgeous faux succulents and spring and summer floral.

section04_products

  1. Succulent in White Pot
  2. Hanging Succulent in Glass Ornament
  3. Mixed Succulents in Concrete

section05_header-2

4. Florals

There’s nothing like a little flower power to kick you out of the winter doldrums. Iconic floral prints invoke the feeling of spring while refreshing any room.

section05_products

  1. Rosie Lagoon Throw Pillow
  2. Forest Bird Comforter King Set- 8-Piece
  3. Red & Teal Floral Area Rug

section05_protip

Did your recent home refresh cure your case of cabin fever? Be sure to show us using #AtHomeStores.

The post 4 Ways to Fight Cabin Fever appeared first on At Home Blog.

Comparing Linoleum and Vinyl Flooring

Buy Vinyl Flooring | Laminate Vs Hardwood Floor

Busy homes need durable flooring, and carpet may not cut it in high-wear areas. At the same time, many homeowners can’t afford or don’t want hardwood or engineered flooring. So they start looking at linoleum and vinyl flooring, but don’t understand the similarities or differences. Let’s look at these two flooring types and compare them.

buy hardwood floors

How they are produced — Linoleum is produced by combining linseed oil with solid fillers such as cork or wood dust. Vinyl is produced by combining synthetic materials including polyvinyl chloride, or PVC.

Ongoing maintenance — Cleaning and maintenance are similar to the two products, but linoleum requires a sealing coat when installing because unsealed linoleum is not waterproof and can be damaged by liquid spills. Vinyl flooring is chemically waterproof, so no sealing step is required.

Appearance and effects of time — Linoleum flooring have an appearance that is unique to the product, and over time will take on different colors and patterns with the natural wear and tear which occurs on all floors. Vinyl is typically manufactured to mimic other products, such as hardwood floors, and wear won’t create any positive changes in the look.

In summary, if you are looking for a natural product that takes on a unique character over the years, linoleum flooring may be your best choice. If ease of maintenance using a man-made product is preferred, then vinyl flooring may be your best bet.

Regardless of your choice, come to Flooring.org first to have access to a wide selection of flooring materials. We have a huge selection of vinyl flooring materials, as well has hardwoods floors, engineered flooring, and renewable materials such as bamboo and cork. We have excellent prices and a knowledgeable staff who can help answer all your questions about choosing the right flooring for your needs.

Different Types Of Bathroom Vanity Tops You Should Consider

It doesn’t matter if it’s a tiny powder room or a luxury master bath, when you step into a bathroom for the first time, what’s one of the first things you notice? The vanity. Bathroom vanities tend to be focal points in bathrooms, housing the sinks and usually some counter and/or storage space. What’s more, as part of the overall look of a bathroom, vanities and vanity tops can provide an attractive design component, showcasing a desired style.

When you’re building or remodeling a home, make the most of the bathrooms by choosing just the right vanities for each space. In order to select the style that’s right for you, here’s a look at some of the different types of vanity tops available today:

  1. Stone: If it’s bathroom beauty you’re after, it’s hard to beat the look of granite or marble countertops. Available in various colors and patterns, stone countertops are trendy yet timeless. Using them is a sure sign of luxury — and a great pick for resale value. Just note these options are also on the more expensive end of bathroom vanities, ranging between $125 and $250 per linear foot.
  2. Tile: Durable and attractive, tile is a long-beloved bathroom choice. It comes in all kinds of designs, can be laid in various patterns, and is made to last. While the grout between tiles traditionally is a magnet for mildew over time, some of the new products on the market work against this issue. Prices for tile can vary from $10 to $40 per linear foot.
  3. Laminate: Low maintenance, durable and inexpensive, laminate countertops offer incredible value. You can find laminate in a wide range of patterns and colors, with textures from mottled to super glossy and smooth. Prices are usually anywhere from $24 to $50 per linear foot.
  4. Solid Surface: To enjoy the beauty of stone with less of the downsides, consider solid surface (i.e., quartzite) countertops. Created from an acrylic resin, this material is resistant to scratches, cuts and burns. It’s an option that’s low maintenance, durable and available in a wide range of colors.
  5. Wood: It’s as true for bathroom vanities as it is for living room floors: Wood is a timeless, natural, traditional choice. In bathrooms, it’s attractive and easy to install; however, wood counters are also vulnerable to water damage, so they have to be well sealed.

Choosing the right vanities for your bathrooms is a matter of knowing your personal preferences and tastes. Explore options online to get a feel for the look you like best, and use the information above to guide your decision. At Modern Bathroom, we’re proud to offer a wide range of bath vanities, from modern to antique, with various sink styles and sizes available. Click here to view vanities and learn more!

5 Ways to Get This Thyme-ly Trend

Spring has sprung, and it’s a great time to get your backyard decorated for all the season’s outdoor parties and get-togethers. Not sure what style suits you? We recommend this trending look that combines vintage, farmhouse-inspired pieces with the year’s hottest color to create the perfect patio space.

Greenery with Envy

Section01_Header

Greenery, the PantoneÒ 2017 Color of the Year, is the shade that defines this style. Incorporate it using textiles, like outdoor pillows and linens, or tabletop accents to bring the colors of the garden into this look.

Section01_Products


  1. Green Square Pillow
  2. Moss Bird Figurine
  3. 4-Pack Madison Sage Green Placemats


Rustic Textures

Section02_Header

This garden style gives a nod to farmhouse décor by using galvanized metal and distressed woods to create a rustic vibe. Try picking planters or unique pieces, like this mirror, to layer these textures in to your patio.

Section02_Products

  1. Wooden House with Three Planters Wall Art
  2. 3-Tier Metal Basket Wood Ladder
  3. 31″X23″ Rustic Wood Framed Mirror


Herb Appeal

Section03_Header

You’ll find plenty of herbs in this garden! Place these plants throughout your patio for a fresh feel and the convenience of having fresh herbs to use in your kitchen. Plus, add in charming wall art featuring your favorite herbs for another way to bring this look to life.

Section03_Products

  1. Rosemary Galvanized Metal Wall Art
  2. Maidenhair & Mini Bamboo Mixed Greenery
  3. Herb on Burlap Wall Art


Vintage Charm

Section04_Header

Top off your Garden Thyme style with charming vintage accents. A clever hanging sign or cute metal piece will be the cherry on top of this stylish cake.

Section04_Products

  1. Flower Linen Scroll
  2. Metal 3-Faucet Garden Planter
  3. I’m in the Garden Wall Sign


Entertainment Ready

Section05_Header

Now that your patio is perfectly styled, show it off when you entertain guests at your next outdoor gathering! Combine sleek white dinnerware and natural elements, like woven placemats, to create the perfect complement to the surrounding rustic pieces. Don’t forget to finish things off with a statement centerpiece!

Section05_Products

  1. 16-Piece White Dinnerware Set
  2. Outdoor Woven Placemat
  3. 36” Olive Tree in Jardin Pot


What trends are making an appearance on your patio this season? Share your style with us using #AtHomeStores, or find even more inspiration when you like us on Facebook or follow us on Instagram!


The post 5 Ways to Get This Thyme-ly Trend appeared first on At Home Blog.

One Stencil, One Home, Four Decor Projects

Four stenciled home decor projects using the Kerry Damask pattern from Cutting Edge Stencils. http://www.cuttingedgestencils.com/wall-damask-kerry.html

Cutting Edge Stencils Shares How One Stencil Can Create Multiple Home Decor Projects

Happy Friday, my little DIY darlings! Cutting Edge Stencils hopes everyone is recovering from their candy coma this morning because we have a stencil story that will absolutely blow your creative little minds!  Start out by envisioning your home completely covered, from bedroom to bathroom, in stencils! No, no this is not some sort of spooky Halloween nightmare that we want you to visualize. Instead today we’re going to show you how reusable our stencils can be!  Are you ready to see how you can use one stencil in multiple rooms of your home without creating a stenciling nightmare? You’re ready? Then let’s begin!

Four stenciled home decor projects using the Kerry Damask pattern from Cutting Edge Stencils. http://www.cuttingedgestencils.com/wall-damask-kerry.html

We’d like to introduce you to Gina, the creative DIYer, interior designer, and frugalista all wrapped up into one great blog called A Sense of Design.  A couple of years ago she bought a cute little cottage on the coast of Sydney and since then she’s been transforming one space at a time on a super tight budget.  Gina has also managed to make FOUR home decor projects using ONE stencil! Yup, you read that right!

Four stenciled home decor projects using the Kerry Damask pattern from Cutting Edge Stencils. http://www.cuttingedgestencils.com/wall-damask-kerry.html

Kerry Damask Stenciled Master Bedroom

Her fab stenciling craze all began when she ordered the Kerry Damask Stencil (size small) to create an accent wall in her bedroom.  Gina was looking to create a subtle backdrop behind her bed so she mixed a beige pearlescent with a turquoise hue to get the perfect stencil color.  She says, “I love the subtle sheen of the pearlescent paint, it adds a little sparkle to the room.”  Doesn’t Gina’s stenciled bedroom look awesome?  We think it does!

Stenciled bedroom featuring the Kerry Damask pattern from Cutting Edge Stencils. http://www.cuttingedgestencils.com/wall-damask-kerry.html

Kerry Damask Stenciled Wall Art

In about a week, Gina was back to stenciling and this time she was creating custom wall art.  See, once the accent wall in the master bedroom was crossed off the list, she noticed the lovely red tiles hanging above her desk no longer worked with her turquoise and warm beige walls.  So she grabbed some blank canvas boards that she had laying around the house and painted them the same turquoise hue she had stenciled on her accent wall.  Then re-using her Kerry Damask Stencil, Gina painted the pattern a beige pearlescent color.  She says, “I am really happy with the end result.”  So far she’s created two awesome projects using one stencil!

Stenciled wall art featuring the Kerry Damask pattern from Cutting Edge Stencils. http://www.cuttingedgestencils.com/wall-damask-kerry.html

Kerry Damask Stenciled Bathroom

Next up was the bathroom.  Gina happened to have some spare time one weekend and because of that, her bathroom got a mini makeover.  First she painted some off-white stripes and then she stenciled her Kerry Damask in a soft beige.  Her goal was to make this bathroom calm and peaceful.  We think she totally succeeded!

Stenciled bathroom featuring the Kerry Damask pattern from Cutting Edge Stencils. http://www.cuttingedgestencils.com/wall-damask-kerry.html

Kerry Damask Stenciled Table Cloth

Can you tell that Gina is on a stenciling roll?  For her fourth stencil project, Gina wanted to create a new table cloth for the Holidays.  Her holiday theme was black and silver.   First she purchased some black Hessian cloth, which is rather inexpensive.  Then she stenciled her Kerry Damask pattern in a metallic silver using acrylic craft paint. Simple and elegant! Her newly designed table cloth is perfect for a holiday gathering.

Stenciled table cloth using the Kerry Damask pattern from Cutting Edge Stencils. http://www.cuttingedgestencils.com/wall-damask-kerry.html

Have you ever purchased a stencil and used it for more than one project? Leave us a comment below, we’d love to read your thoughts!

Haven’t had enough stenciling fun?

Thanks for reading, and happy stenciling!
Michelle and the Cutting Edge Stencils Crew

Decorate Your Table With A Stenciled Tablecloth

Learn how to stencil a tablecloth using the Sari Paisley Medium wall stencil in four easy steps. http://www.cuttingedgestencils.com/wall-stencil-paisley.html

Learn How To Create A Stenciled Tablecloth In Four Easy Steps

Good morning, my DIY home decorators!  It was just this past Friday that Cutting Edge Stencils shared a post by Gina from A Sense of Design that featured our Kerry Damask stencil painted across a black tablecloth.  So pretty, right?

Stenciled table cloth using the Kerry Damask pattern from Cutting Edge Stencils. http://www.cuttingedgestencils.com/wall-damask-kerry.html

Then over the weekend one of our talented fans, Tea, sent us these gorgeous pictures of stenciled tablecloths that she painted for her home using our Zinnia Grande Stencil

A pink stenciled tablecloth using the Zinnia Grande flower pattern from Cutting Edge Stencils. http://www.cuttingedgestencils.com/flower-stencil-zinnia-wall.html

She also created this blue-tiful version using the same stencil. We love it!

A blue stenciled tablecloth using the Zinnia Grande flower pattern from Cutting Edge Stencils. http://www.cuttingedgestencils.com/flower-stencil-zinnia-wall.html

With the holidays just around the corner, stenciled tablecloths are certainly on the rise.  Look at this gorgeous creation by GingerSnap Crafts using our Turkish Tulip pattern.  We’d love to be invited to this luncheon!

Stencil a tablecloth using the Turkish Tulip pattern from Cutting Edge Stencils. http://www.cuttingedgestencils.com/moroccan-stencil-tulip.html

Do all these stenciled tablecloths have you planning your next gathering?  We knew you’d love this stencil project!  Before you send out the invites, we want to make sure you have the step-by-step instructions on how to create your own stenciled tablecloth.

We’d like to say hello to Jessica, the crafty DIYer and blogger behind Lemon Tree Creations.  She was looking to add some flattering table decor to her dining room.  She found this adorable polka dot fabric at her local thrift store but it needed something.  She put her crafty thinking cap on and decided to give it a paisley touch by adding our Sari Paisley Wall Stencil in a vibrant blue.  We think it’s totally awesome.  Now let’s take a look at how she crafted it!

Here is the scoop on how to stencil a tablecloth (this project comes from Lemon Tree Creations):

Learn how to stencil a tablecloth using the Sari Paisley Medium wall stencil. http://www.cuttingedgestencils.com/wall-stencil-paisley.html


First you’re gonna need this stuff listed below:

1. Gather Materials: Start the stencil project by gathering all of the materials listed above.  If it’s needed, iron the drop cloth or fabric to remove any wrinkles.  For this project, Jessica used a piece of polka dot fabric that she found at a local thrift store.  You could easily use a drop cloth to create a whole tablecloth similar to the one shown above by GingerSnap Crafts.

2. Secure The Stencil: Position the stencil design on the piece of fabric. Then you can secure the stencil in place using painter’s tape.

A stenciled tablecloth using the Sari Paisley Medium wall stencil. http://www.cuttingedgestencils.com/wall-stencil-paisley.html

3. Start Stenciling:  Pour your craft paint onto a plate or paint tray.  Mix up the paint with the fabric medium (2 parts paint to 1 part medium).  Then dip your stencil brush into the paint. Blot off the excess paint onto your folded paper towel until the brush looks almost dry.  The key to stenciling is using as little paint as possible.  Too much paint will cause the design to bleed and smudge.  Next you will paint the design onto the canvas square with the stencil brush using a dry brush (stippling) technique.  Stippling is when you tap the brush repeatedly over the stencil opening.

A stenciled tablecloth using the Sari Paisley Medium wall stencil. http://www.cuttingedgestencils.com/wall-stencil-paisley.html

4. Complete the Pattern:  If you are stenciling a tablecloth then you may need to reposition the stencil so you can continue to paint the pattern on the entire surface. Let the paint dry for two hours.

Now let’s position it on our table and presto chango, we have a gorgeous tablecloth!   Oh, and this project is so easy that even a first time stenciler could get the hang of it.  Jessica had this to say about her stencil project, “I was able to bring out a unique and inviting style to my now “not so shabby” little nook! (which I simply can’t take my eyes off of!)”  Great job, Jessica!

A stenciled tablecloth using the Sari Paisley Medium wall stencil. http://www.cuttingedgestencils.com/wall-stencil-paisley.html

Would you consider stenciling a tablecloth for your next gathering? Leave us a comment below!

Haven’t had enough stenciling fun?:

Thanks for reading, and happy stenciling!
Michelle and the Cutting Edge Stencils Crew

Warm & Feminine Apartment Bathroom Makeover

Apartment Budget Bathroom Makeover Asian decor batik pink fuchsia double panel shower curtain linen vanity sink skirt neutral windchimes wall art fresh flowersThe Decor Guru

Sometimes I feel like completing a room makeover is like waiting for a Kardashian to fall into a black hole of anonymity. As much as you want it to happen, it doesn’t look like it will anytime soon.

But hot damn, this bathroom makeover is finally done! Read along to find out what challenges I overcame during this makeover and how I transformed my boring apartment bathroom into a warm, soft space.

Before I decorate/make over a room, I create a moodboard (check it out here). The goal for this bathroom makeover was to create a nature-inspired, zen room. However, I ran into my first challenge not long after I started—myself.

The original vision was a neutral, romantic bathroom with touches of Asian & vintage decor. As much as I like the look of all-neutral rooms, though, I came to realize they’re just not for me.

I LOVE color, always have, and need it in my life! So this is what I instead came up with, a mostly neutral space with a bit of warm color. This was a perfect compromise by using some bright color but not too much that it overpowers this small room. It’s sweet, but not too sweet… much like myself. ?

Apartment Budget Bathroom Makeover Asian decor batik pink fuchsia double panel shower curtain octagon pearl shell mirrror neutral The Decor Guru

Apartment Budget Bathroom Makeover Asian decor batik pink fuchsia double panel shower curtain linen vanity sink skirt neutral The Decor Guru

Apartment Budget Bathroom Makeover Asian decor batik pink fuchsia double panel shower curtain linen vanity sink skirt neutral windchimes wall art fresh flowersThe Decor Guru

Apartment Budget Bathroom Makeover Asian decor batik pink fuchsia double panel shower curtain linen vanity sink skirt neutral windchimes wall art fresh flowersThe Decor Guru

The current shower curtain is actually the second curtain I sewed for the bathroom. (The first one is shown below, in the middle). I adored the cherry-blossom inspired pattern of the first shower curtain, but it just felt so bland in the room. I also wasn’t feeling the length, although it’s standard shower curtain length.

For the new one, I used a batik I’d used in my bedroom makeover months last year. Sewing the new shower curtain into two floor-length panels gives the bathroom a more tailored, chic feel. Symmetry for the win! I also added wood window curtain rings to infuse some natural energy into the room.

Apartment Budget Bathroom Makeover before after homemade personalized shower curtain panels linen vanity sink skirt neutral The Decor Guru
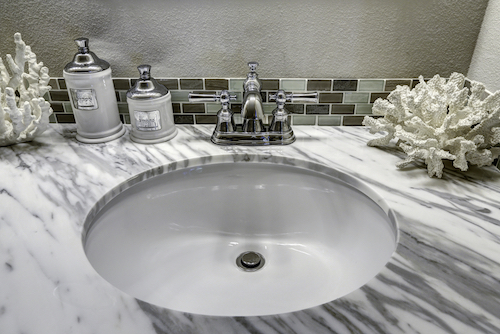
The second challenge? Having a funky apartment bathroom with an even funkier, mismatched vanity. My solution: utilize a palette that complements the beige walls and disguise the vanity with a faux linen (Osnaburg) sink skirt.

Apartment Budget Bathroom Makeover Asian decor batik pink fuchsia double panel shower curtain fresh flowers linen vanity sink skirt neutral The Decor GuruTo attach the skirt, I applied adhesive velcro onto the vanity and sewed the remaining velcro onto the fabric. This way, I can easily remove the skirt to wash it, and then easily reapply it. I removed the vanity doors for easy access.


Apartment Budget Bathroom Makeover linen DIY velcro vanity sink skirt neutral The Decor Guru

The final challenge in this makeover was my budget. It’s always my MO to decorate on a modest budget, but this time around I had to spend less usual. I prioritized my shopping, spending more money on the items that mattered most (textiles). I also repurposed some things into bath decor/accessories and “shopped my home” with items from other rooms.

For instance, this soap dish is actually a piece of dinnerware. I replaced the standard towel rack with a vintage kitchen towel rack I borrowed kept from an old apartment. Using mostly glass and translucent accessories keeps the room feeling light and uncluttered.

Apartment Budget Bathroom Makeover Asian decor sink bath accessories toiletries floating wall shelves neutral The Decor Guru

I repurposed these windchimes (scored on clearance) into wall art above the toilet. The candle tray was created by gluing bamboo reeds into a ceramic serving platter. (They’re also sealed with Mod Podge for protection from the humidity.)

Apartment Budget Bathroom Makeover Asian decor batik pink fuchsia double panel shower curtain fresh flowers bamboo serving candle tealight tray neutral The Decor Guru

Apartment Budget Bathroom Makeover Asian decor bamboo serving candle tealight tray neutral The Decor Guru

The bathroom came with two mismatched bath towel bars, hung in different spots. I decided not to buy new ones and mounted them side by side in a “his and hers” fashion. (You hardly notice they don’t match.)

Above the towels, I brought in a mirror from another room. This was a thrift store score  that I’d previously painted a pearly shade and glued shell beads onto.

Apartment Budget Bathroom Makeover curtain octagon pearl shell mirrror neutral decor The Decor Guru

Apartment Budget Bathroom Makeover curtain octagon pearl shell mirrror neutral decor The Decor Guru

Sources:

Fabric (shower curtains and sink skirt): Joann Fabrics

Wind chimes, Buddha tealight holder, bathmat, and “soap dish:” World Market

Serving tray: Home Goods

Wood curtain rings and toilet paper stand: Home Depot

Floating wall shelves, pink soap dispenser and tumbler: Target

Towels: IKEA

For as long as the makeover took, I’m very pleased with the outcome. I was able to transform this bathroom into a feel-good place, not a boring place I couldn’t stand to look at. It may have taken more time to be creative with the decor, but my bank account can testify it was well worth the wait. And we all know when the bank account is happy, everyone’s happy.

Thanks for visiting! Let’s stay connected!

Featured on:

A Stroll Thru Life: Inspire Me Tuesday

Linked to:

Home Stories A to Z: Tutorials & Tips Link Party

The Stitchin’ Mommy: Tuesday PIN-spiration Link Party

A Stroll Thru Life: Inspire Me Tuesday

Domestically Speaking: Inspire Me Monday

VMG206: Brag About It Tuesday Linky Party

Ginger Snap Crafts: Wow Me Wednesday

DIY by Design: It’s a Party

Craft Dictator: Craft Frenzy Friday

The Pin Junkie: Friday Link Party

Reasons To Skip The Housework: Skip the Housework Saturday

2 Crochet Hooks: Snickerdoodle Sunday

House of Hipsters: Found and Foraged Linky Party

DIY Show Off: That DIY Party

Redhead Can Decorate: Inspiration Monday

Huckleberry Love: Much Ado About Monday

Rae Gun Ramblings: Block Party

Kitchen Table Art: Making Monday

A Bowl Full of Lemons: One Project At A Time

Coastal Charm: Show & Share

 Ladybug Blessings: Handmade Tuesdays

Up to Date Interiors: The Creative Circle

Filed under: Bathroom, DIY, Rental Decorating, Repurposing, Reveals + Makeovers

Mantels, Fireplaces, and Cozy Stenciled Décor

Stenciled fireplaces, mantels, and diy cozy home decor from Cutting Edge Stencils. http://www.cuttingedgestencils.com/scroll-stencil-1.html

Stenciled Sparks Fly from these Fireplace and Mantel Décor Ideas

Good Morning, my home décor enthusiasts!  It’s getting chilly outside so Cutting Edge Stencils would love to settle in near a charming fireplace.  Wait, is your fireplace not looking so charming these days?  No worries, my friend.  We have some ideas on how you can give your fireplace a makeover and enjoy it through the wintery months.  Better Homes and Gardens says that for an attention grabbing look, “The mantel and surrounding wall are integral to your fireplace design.”   We couldn’t agree more! So are you ready to get toasty with stencils?

Stenciled fireplaces, mantels, and diy cozy home decor from Cutting Edge Stencils. http://www.cuttingedgestencils.com/scroll-stencil-1.html

Take the lead from Stephanie and stencil some enchanting wall art to hang above your fireplace.   After watching some of our stenciling videos, she selected acrylic craft paint in blue, pink and cream colors along with our Junior Mural Stencil Kit to paint her masterpiece.  She says she “loves the outcome and can’t wait to complete the next project.”  We love it too!  We also think stenciling wall art is a great project for those who want to spruce up their fireplace without committing to painting a wall.

Stenciled wall art created using the Junior Mural Stencil Kit.  http://www.cuttingedgestencils.com/stencil-mural-kit.html

But if you are ready to take your fireplace makeover to the next level then here’s a project for you!  Stacy the queen of DIY from the blog, Not Just a Housewife, painted this gorgeous nook above her brother’s fireplace.  This space started out dull and dreary until Stacy dazzled it over.  She used our Alessa Scroll Stencil and a warm butter hue to give this fireplace its toasty look!

Stencil the Alessa Scroll pattern over your fireplace to highlight the space. http://www.cuttingedgestencils.com/scroll-stencil-1.html

Similar to Stacy’s project, our Pinterest pal The Staged Style also stenciled the space above the fireplace.  The Staged Style used our Zamira Allover Stencil in a bold blue hue to create this fireplace accent.  They believe a mantel is a great focal point within a living room and that a dramatic wall stencil in this small area can make a BIG difference. We think they might be onto something because this blue-tiful fireplace stencil is a total winner!

A stenciled fireplace using the Zamira Stencil from Cutting Edge Stencils. http://www.cuttingedgestencils.com/moroccan-stencil-designs.html

Andrea, one of our fab fans, designed this stunning fireplace.  Rather than stencil the space above her fireplace, she chose to use our Casablanca Craft Stencil to stencil the surface surrounding her fireplace opening.  You could easily replicate this look using a hue similar to Benjamin Moore’s revere pewter HC-166 and our Moroccan pattern.  Awesome work, Andrea!

A Casablanca stenciled fireplace idea. http://www.cuttingedgestencils.com/allover-stencils.html

Sue, another one of our creative fans, stenciled an accent wall in her living room.  She used our Rabat Allover Stencil and a creamy shade of beige like Benjamin Moore’s splendor AF-385.  By placing the stenciled pattern on the same wall as the fireplace, she totally calls attention to its beauty.  We think it looks absolutely fabulous!

A stenciled accent wall using the Rabat allover Stencil from Cutting Edge Stencils. http://www.cuttingedgestencils.com/moroccan-stencil-pattern-3.html

Which one of these fireplace décor ideas has ignited your stencil itch? Leave us a comment below!

Haven’t had enough stenciling fun?

Thanks for reading, and happy stenciling!
Michelle and the Cutting Edge Stencils Crew

5 Tips for Cleaning Hardwood Floors

Discount Hardwood Flooring | Buy Bamboo Floors

Hardwood floors may not be as easy to maintain as you think. Hardwood flooring requires attention to detail, so be sure you’re meticulously caring for your flooring. To keep your hardwood floors looking polished, clean and like new, check out the following information provided by Reader’s Digest. The guide below contains five tips for cleaning hardwood floors.

buy hardwood floors

  1. Vacuum every week
  2. Believe it or not, dust contains fine grit that acts like sandpaper on hardwood flooring. This dust can wear through your floor’s finish, so be sure to perform a good vacuuming every week to protect your floors and keep them clean.

  3. Keep rain away
  4. Water is damaging to hardwood flooring, so, if rain is in the forecast, keep your windows closed. Accidentally keeping your windows open, or allowing moisture to come in contact with your hardwood flooring, can damage your floors. You should also be sure you have trays under potted houseplants, and wipe up any water that may drip on your flooring right away.

  5. Use no-wax wood floor cleaner
  6. If residue accumulates on your flooring, keep a no-wax cleaner on hand. Liquid-based cleaners are damaging to hardwood, but wiping up spills, dirt and debris with a no-wax cleaner right away can protect your flooring from damage.

  7. Know waxing rules
  8. It is possible to rejuvenate wax finished floors with more wax, but know that you should never use wax on shellac, varnish or polyurethane surfaces. These floors will become far too slippery, and the wax will interfere with the finish of the flooring.

  9. Use an extra doormat, furniture pads and area rugs
  10. Family, friends and guests should remove their shoes when walking on your hardwood floors to prevent water, dirt and salt damage. A great way to prevent this damage from occurring is having an indoor doormat, which guests can remove their shoes on. Furniture pads can also come in handy to keep your hardwood floor’s finish from wearing under the heavy legs of couches and tables. Finally, area rugs can keep your floor save in high traffic areas, such as living rooms or playrooms.

Now that you know how to care for your home’s flooring, consider purchasing hardwood floors from flooring.org. We have a wide range of flooring that can save you hundreds when you buy, so check out our website today!

How to Manage Without a Linen Closet

Hallway stairwell landing storage makeshift linen closet apartment bathroom neutral coastal eclectic natural decor salmon Shrimp Toast repurposing rope baskets The Decor Guru

I envy homes with built-in storage. Hell, I envy a home that has a linen closet. See, my apartment bathroom really lacks storage… unless you count the space under the sink, which is just yucky to me. Only gross things go there, like the garbage can and toilet brush.

Having no bathroom storage is kind of a big deal. To alleviate having no medicine cabinet, I hung a few floating shelves in the bathroom. But for the rest of my toiletries, I needed more space. So I created a makeshift linen closet just outside my bathroom door.

Truthfully, I’ve had this “linen closet” carved out for some time. When I first moved into my apartment, I placed one of my MCM-painted Rast dressers here. Hiding items in drawers worked very well… but on the downside, you’re hiding items in drawers. Labelmakers are so passé, so it was a game of musical drawers anytime I searched for extra cotton balls.

I then moved one of my Lerberg (IKEA) bookshelves in this corner. It’s lightweight and airy, perfect for this tight spot. I thought the open shelving concept would be great because it would force me to keep this area tidy.

The reality is, I just plopped that bookshelf down and threw a ton of crap on it. No organization, no thought involved. Finally, I got tired of this cluttered corner and made it over.

Before after hallway stairwell landing storage makeshift linen closet apartment bathroom neutral coastal eclectic natural decor salmon Shrimp Toast repurposing photo boxes rope baskets The Decor Guru

Taking the time to organize and prettify really made a difference, didn’t it? The wonderful thing about open storage/shelving is that your business is all out there. You gotta be ruthless. Only the necessities survive in open shelving land. (I’m looking at you, blue eyeshadow.)

Photo boxes store some items that are best kept covered like bandages, cotton balls, etc. I also used several baskets to corral items, making sure they were tall enough to (mostly) conceal the contents. This also created a sense of order by not flooding the space with many colors.

Hallway stairwell landing storage makeshift linen closet apartment bathroom neutral coastal eclectic natural decor repurposing photo boxes rope baskets The Decor Guru

Even though I was ruthless, I still had to infuse some style onto the shelves. Everything on these shelves coordinate with my bedroom and bathroom decor. This keeps the spaces feeling cohesive and is perfect for when I “shop my home” and change things up.

At the top, I added my favorite fake plant. Just below, I placed a tray to hold a few cosmetic items. This tray was created by painting a basswood canvas, attaching clear plastic drawer handles, and wrapping hemp rope on the handles.

Hallway stairwell landing storage makeshift linen closet apartment bathroom neutral coastal eclectic natural decor repurposing artificial fake houseplant rope baskets The Decor Guru

Hallway stairwell landing storage makeshift linen closet apartment bathroom neutral coastal eclectic natural decor toiletries tray basswood canvas Shrimp Toast salmon hemp rope clear drawer handles The Decor Guru

You can even use towels as decor. I used to laugh at my mom’s strict regimen of folding and storing all her towels the same way. But now I do it. Funny how it works that way…

Hallway stairwell landing storage makeshift linen closet apartment bathroom decor neat orderly towels The Decor Guru

Taking the time to organize our storage areas really makes a difference—not just visually, but for our peace of mind. If your home also lacks bathroom storage, there are other budget-friendly ways to resolve this issue. Attaching shelves to the wall would also work nicely, as do small dressers. You could even use an over-the-door shoe organizer or a fruit basket for easy and accessible storage.

Have you ever rented a home that had little storage? How do you prefer to store your bathroom items and toiletries? Have you had to improvise for storage?

Thanks for visiting! Let’s stay connected!

Linked to:

Coastal Charm: Show & Share

Skip To My Lou: Made By You Monday

Domestically Speaking: Inspire Me Monday

Sugar Bee Crafts: Take-A-Look Tuesday

The Stitchin’ Mommy: Tuesday PIN-spiration Link Party

Home Stories A to Z: Tutorials & Tips Link Party

Ladybug Blessings: Handmade Tuesdays

Elizabeth & Co.: Be Inspired

Ginger Snap Crafts: Wow Me Wednesday

The Pin Junkie: Friday Link Party

My Romantic Home: Show and Tell Friday

The Answer is Chocolate: BFF Open House Link Party

A Stroll Thru Life: Inspire Me Tuesday

Filed under: Bathroom, Decorating Tips, DIY, Organizing & Storage, Rental Decorating, Repurposing