DIY Home Decor Categories

Five Stencil Projects To Brighten A Crafty Office

Cutting Edge Stencils shares ideas to help brighten an office or craft space! http://www.cuttingedgestencils.com/wall-stencils-stencil-designs.html

Cutting Edge Stencils Shares Stenciled Office Ideas!

Good Morning, my DIY office organizers!  The New Year has just kicked off and already you’re in complete organization mode.  Now we know on the top of that organization list is your home office.  After all it’s a room where you get things done, whether you use that space for traditional business purposes or crafting projects.  Just because you’re putting it into tip-top organization shape, doesn’t mean it needs to lack color and personality.  Cutting Edge Stencils is here to help you brighten that crafty office of yours using our stencils.  Our ideas are easy and inexpensive, so let’s take a look…

Brighten Up A Crafty Office Using Stencils

Cutting Edge Stencils shares ideas to help brighten an office or craft space! http://www.cuttingedgestencils.com/wall-stencils-stencil-designs.html

Stencil An Accent WallThis might be the obvious makeover solution to freshen up your office space because a pretty pattern can drastically change its look.  Creative DIYer and design enthusiast, Erin from the blog Suburban Bitches, stenciled a glittery gold pattern in her combination craft-room/office.    Erin painted the wall in Benjamin Moore’s Decorators Gray and then painted the sparkly Zagora Allover pattern using a color similar to Martha Stewart Living Metallic Paint in Golden Pearl.  It looks so pretty, we’re not sure if we’d get any work done here!

A Zagora Allover Stenciled office.  http://www.cuttingedgestencils.com/trellis-allover-stencil.html

Stencil the Desk:  A plain white desk may gleam with organization but it also screams boring.  Take the lead from the DIY craft queen, Mandy, from Sugar Bee Crafts.  Mandy’s husband built her this custom white desk to fit her needs and her space.  She promptly added our Funky Wheel Wall Stencil in an eye-catching turquoise hue.  Do you love it or do you love it?

A stenciled craft desk using the Funky Wheel pattern from Cutting Edge Stencils. http://www.cuttingedgestencils.com/funky-wall-stencils.html

Stencil The File Organizers: Filing will become your new favorite task with stenciled file holders like these! Our creative fan, Jennifer, decided to reinvent her organization system for the New Year.  She bought some baskets for $4 and then revamped them with craft paint and our Casablanca Craft Stencil and Nagoya Craft Stencil.  We love the patterned pizazz these items add to her traditional desk!

DIY stenciled desk organization using the Casablanca and Nagoy stencil patterns. http://www.cuttingedgestencils.com/craft-furniture-stencil.html

Stencil The Memo Board: Tomorrow’s to-do list will thank you once it’s been pinned to this stenciled stunner.  Meet Heidi, the crafter behind Sew Craft Create.  She put together this adorable magnetic memo and cork board combo using our Turkish Tulip Stencil and in teal blue hue.  For the how-to, check out her post here.

Stencil your memo and corkboard using the Turkish Tulip pattern from Cutting Edge Stencils. http://www.cuttingedgestencils.com/turkish-tulip-craft-stencil.html

Stencil A Laptop:  Do you have  a boring black laptop staring back at you right now?  Let’s give it a colorful whirl!  That’s exactly what our uber clever pal Kimbo, from A Girl and A Glue Gun, did.  She traced our Acacia Allover Stencil on some vinyl and then stuck it onto her laptop to give it a fun, bright, and unique look.  Learn how to give your laptop a makeover from her DIY Club tutorial.

A stenciled laptop using the Acacia Allover pattern from Cutting Edge Stencils. http://www.cuttingedgestencils.com/leaf_stencil.html

We hope you enjoyed our easy and inexpensive stencil ideas to brighten up your office space.

Which one of these office projects are you most likely to complete?  We’d love to read your comments in the section below!

Still looking for more stenciling fun?

  • Enter our $50 stencil giveaways at Decor Adventures!
  • Shop our stencil designs and find the perfect stencil for your project!
  • Follow us on Pinterest to see awesome inspirational photos!
  • Have you completed a stencil project? Come share it on Facebook!

Thanks for reading, and good luck stenciling!
Michelle and the Cutting Edge Stencils Crew

Distressing then Waxing OR Waxing then Distressing?


Waxing and distressing question. I normally paint, distressed then wax. I noticed many people say they distress and sand after waxing. So last night I waxed, buffed this morning and I am now distressing. The paint is already really hard and I find it harder to sand and distress but there is much less dust which I think is why people do this. Thoughts? Do you distress before or after waxing? -Jacqueline from Chicago

This is a great question and one that comes up often enough.

Let’s start by defining furniture distressing because it often gets confused with “antiquing” or “dark-waxing.”

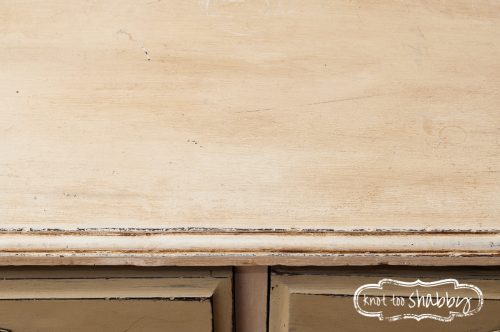
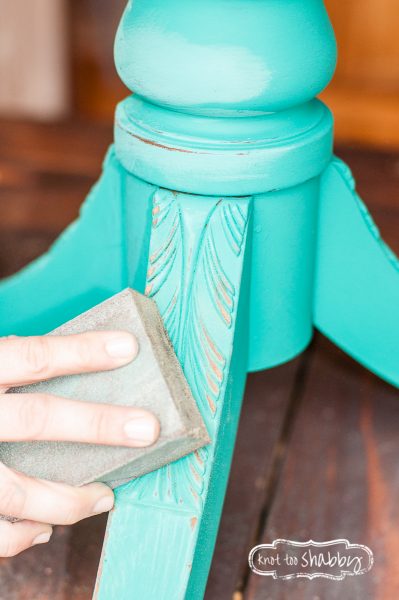
Both distressing and waxing are techniques that can be used to replicate the patina of old furniture. Distressing is the act of wearing down the paint finish so that the substrate of the original finish peeks through. Typically, you would use sandpaper to distress a piece.

Record Cabinet, Blue-6

Louis Blue, Greek Blue and Pure White Chalk Paint® with the edges lightly distressed

When someone wishes to “antique,” a piece they are typically looking to add dark wax to give an aged patina that has a rich depth of color among the finish.

Dresser, Old Ochre, Versailles-24

Lightly distressed edges WITH a dark wax finish to add an antiqued patina

So, do you distress BEFORE OR AFTER you wax?

Let’s review the Annie Sloan method!

Annie paints.
Annie waxes.
THEN Annie distresses.
Finally Annie re-waxes where she distressed.

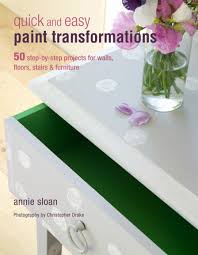
How do I know this, you ask? First of all, I’ve been trained in the Annie Sloan method. Second of all, it’s in her book!!!

Quick and Easy

You can read all about how Annie distresses on pages 12-50 using a variety of methods

So, let’s talk about the advantages of distressing after you wax.

  1. It is a much cleaner process! Wax tends to hold in the dust from the sanding itself keeping an extremely limited amount of free-floating particulates in the air that would otherwise be all over the place if you distressed before you waxed.Table, Florence-2
  2. You have much more control over your distressing by doing it after you wax. Annie Sloan Paint is VERY EASY to work off. I’ve seen and heard of people who have distressed their pieces before they waxed and lamented that “too much paint came off.” When distressing after you wax, you can be much more intentional about taking off just the right amount of paint in the right places without over-doing it.PaintClass-32
  3. You have a consistent finish when distressing after you wax. Meaning, when you distress before you apply the wax, the sand paper is not only removing paint along the edges, but also smoothing out the paint finish around the distressed area. The result is an irregular paint finish that is smooth in some places and more textured in others (as a result of brush strokes). When the wax is applied and then polished off, those distressed edges will have a higher sheen than the rest of the piece. Whereas, if you distress after you wax, the end result will be less varied.Table, Florence-11

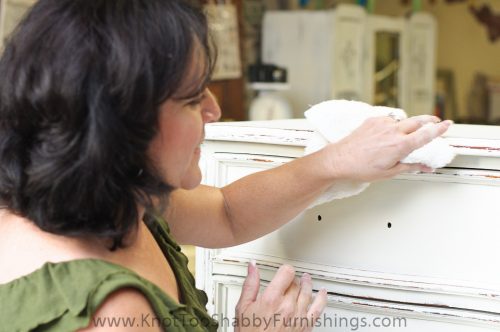
When you distress your furniture after you apply your initial coat of wax, you don’t want to wait a day or two to do so. You will have an easier time of it if you distress immediately after you paint and wax…before the paint has had a chance to thoroughly dry and begin its curing process. Distressing AFTER you wax doesn’t have to be cumbersome or “hard.” If you wait too long to distress your piece, you will have to work much harder to remove the paint.

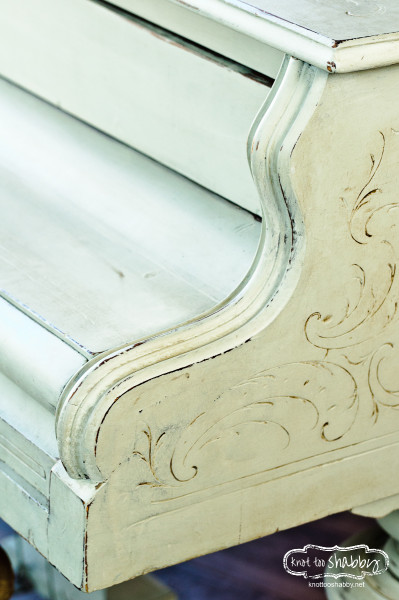
Piano, Mint-51

Now…of course, there are other ways to do it! When I teach a workshop, we talk about wet distressing, how to distress using nothing more than a wax brush and some water, the benefits of distressing with an electric sander, course sandpaper versus fine sandpaper…and so on. You will gain an appreciation for the many varied techniques simply by playing with the paint and wax and exploring the variations of how to create a multitude of looks! And, of course invest in Annie Sloan’s amazing books. I’ll tell you a secret…you can learn EVERYTHING we teach in a workshop just by reading her books. No Joke! I hold nothing back! Hit up your local thrift store, start stocking up on cheap chairs and side tables and become your own expert in the how’s and why’s of Annie Sloan Paint!


How To Make A Bathroom Stylish With Glass

Are you looking for a great way to create a beautiful, stylish bathroom? If so, then think about glass — one of the year’s top bathroom trends. Here is a quick look at the many stylish ways the design world is putting glass to work in the bathroom.

The Shower

If you want to decorate with glass, then the shower will be an essential part of your theme. Here are a few ways you can really take off with glass:

  • One timeless favorite is glass shower doors. Use textured glass or smooth, clear glass — either way, you’ll make a big statement.
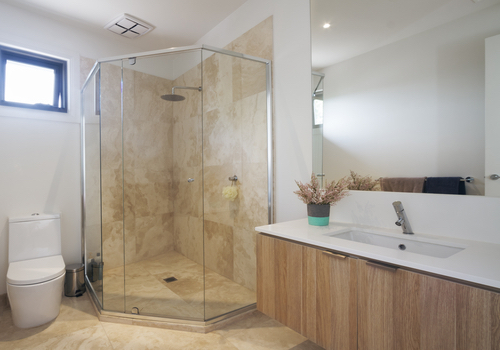
  • The glass shower enclosure is very popular right now, particularly the clean look of a frameless enclosure.
  • Framed enclosures are another great (and lower cost) option, especially when they are designed to look like French doors and windows, or windows with transoms.
  • In more compact bathrooms, sliding enclosures will give you the same look as a glass enclosure, but since the doors slide rather than swing, you won’t need to worry about making sure there is enough room for a swinging shower door to open.
  • Glass block enclosures are incredibly versatile, letting you build a shower in any number of shapes, sizes and designs — including showers with beautifully curved glass walls.

The Bathroom Sink

There are two great ways to incorporate glass in the bathroom sink: One is to make use of glass sinks, particularly vessel sinks, which tend to resemble old-fashioned washstands.

The other way to use glass around the sink is to go with a glass countertop over an open-framed vanity. Continue the theme using a glass vessel sink on the glass counter or choose a vessel sink in a contrasting color. In some high-end bathrooms, the glass counter is even illuminated from below, which adds a pleasantly modern ambience.

Using Glass Elsewhere in the Bathroom

The shower and sink aren’t the only places you can use glass! In fact, there are tons of smaller accents that will help you create a stylish, cohesive look. Consider the following ideas:

  • Add an air of elegance by installing a cut-glass chandelier as the bathroom’s main light source.
  • Install glass shelving, whether you use smaller shelves near the sink for your necessities or larger glass-shelving units for big items like towels.
  • When it comes to mirrors, bigger is better. Not only will they enhance your glass-oriented theme, but they’ll make the room feel more expansive.
  • Put glass tile to use. Glass tile comes in a vast array of colors and styles. It works well as tiling for shower walls or as a backsplash behind the bathroom sink.
  • Don’t forget about the windows! One great way to use windows as an accent is to match them with the shower. In other words, if you have a glass block shower, then consider glass block windows, and if you have a framed enclosure that features transoms, then make sure to continue that theme with the window.

As you can see, there are many ways to get the look you want using glass fixtures and accents. Make your bathroom beautiful with glass, and this is one trend that you’ll enjoy for years to come.

The Big Election: Apartment Therapy’s Big Reveal Makeover Contest

Forget Hillary, Bernie, or Trump. The really big deal is Apartment’s Therapy’s Big Reveal Makeover Contest. See, this lucky lady made over her apartment bathroom a few months back & decided to enter it in the contest. A refresher of the budget-sized but impactful makeover:

Apartment Bathroom Makeover Before and After The Decor Guru DIY vanity sink skirt shower curtain batik windchimes fresh flowers eclectic decorating

Do you know what I could do with $1000? How far that would go at Target and IKEA? That I could buy some fantastic creation from a starving artist or a fabulous piece of furniture?

Voting ends in one week, October 28, so I need as much help as I can get. Unfortunately, AT posts new contestants each day, so those who were announced earlier on have more time to receive votes. That was not me, as I just learned I was accepted a few days ago.

That’s why I need your votes! To help a sister out, go here, log in/register, and then click the heart to “favorite” my room.

Thanks so much for your help! Together, we can do this!

Thanks for visiting! Let’s stay connected!

Filed under: Bathroom, Before & After, DIY, Rental Decorating, Reveals + Makeovers

Clearance Treasure Tuesday (new products just added!)

We’re back this morning with another edition of Clearance Treasure Tuesday! We’ve just moved some new products to the clearance area, and many of them are priced 20-50% off! Here are a few of our favorite items and biggest savings.

Christmas Past napkin and Christmas Past place mat – both 55% off!

863-01-Christmas-Past-Placemat_LRG

Keys wall sign – 47% off!

JRS-331-Keys-Wall-Sign_LRG

‘A little birdie…’ dish towel – 38% off!

PKD-82-917-A-Little-Birdie-Dish-Towel_LRG

Rooster kitchen towel – 47% off!

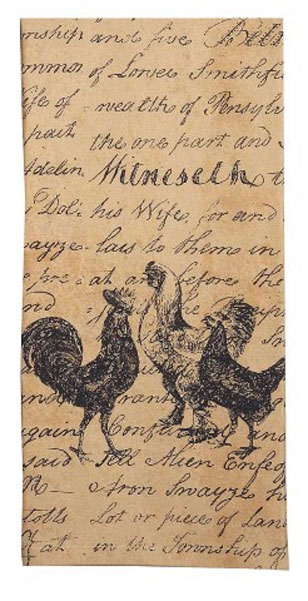
ETSM02-Rooster-Kitchen-Towel_LRG

Small Goodnight Santa – 25% off!

C6506-Small-Goodnight-Santa_LRG

Burlap Bird Ornament Set – 53% off!

7D3619-Burlap-Buddies-Bird-Ornament_LRG

Balsam and Berries Mantle Scarf – 43% off!

878-50-Balsam-And-Berries-Mantle-Scarf_LRG

Sir Flurry – 25% off!

C1628-Sir-Flurry_LRG

Wine Jug Lamp with Shade – 47% off!

25-300-Wine-Jug-Lamp-with-Shade_LRG

Faith Family Friends shower curtain – 46% off!

Faith Family Friends wall border IHF-321-SCB-FFF-Shower-Curtain_LRG

The Wonders of Wax

If you have spent any amount of time with me talking topcoats, you will know within 30 seconds that I am a wax girl.

I have written blog posts and gotten on my soap box during workshops and demos listing the benefits of wax. So, I don’t feel the need to rehash much of what I’ve stated so frequently (If you are interested you can read about my wax tips here, here and here).

Instead, I thought I’d talk a bit more about the differences between the colored waxes and variations in the application process now that I’ve had a chance to work with all the different shades of the new Annie Sloan waxes.

Dresser, White, Blue-3

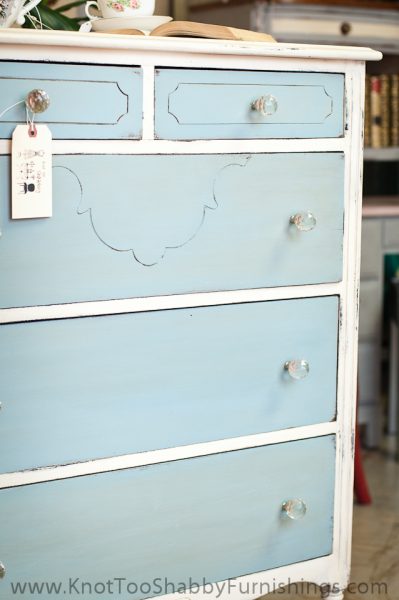
Louis Blue and Old White Chalk Paint® with a clear and dark wax finish

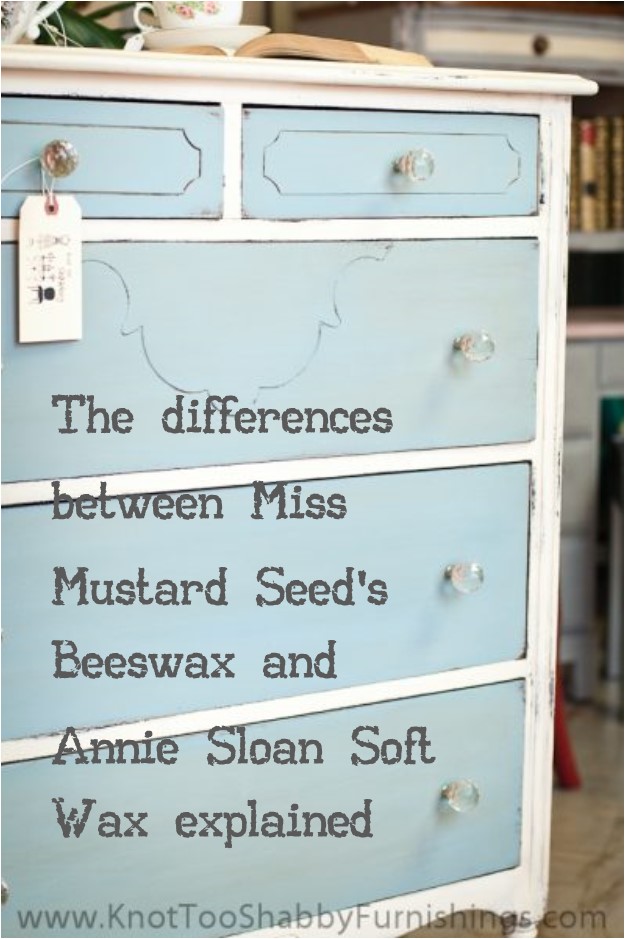
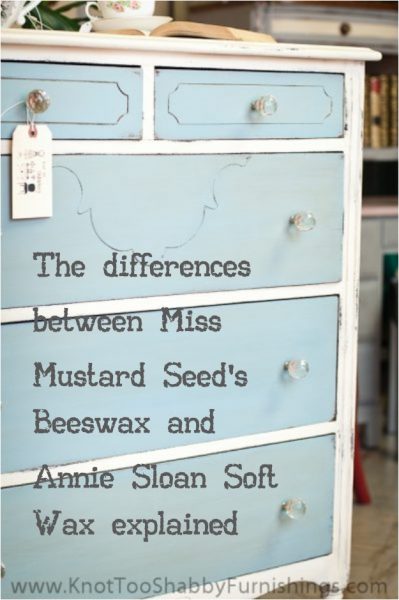
We sell and regularly work with two different wax products. The first is a beeswax that we carry as part of the Miss Mustard Seed’s Milk Paint line. The second is the Annie Sloan Soft Waxes. Although they are both wax topcoats, the application and finished result is quite different. Here’s how I break it down:

Miss Mustard Seed’s Wax

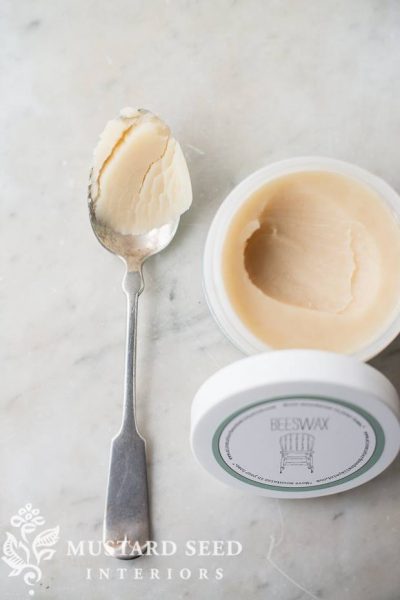
Beeswax

  • MMS Wax has the consistency of very soft butter which makes the application process incredibly easy.
  • It comes in four different formulas; a clear furniture wax, a lavender scented furniture wax (that is also clear), white wax and an antiquing wax. MMS Beeswax is applied in what I typically refer to as a more traditional wax application…meaning, that you brush it on and massage it into the paint finish, allow it to set up for about 20-30 minutes and then buff it off. I make an exception when using white wax and antiquing wax and typically wipe it off right after applying it so that I can exercise more control over the color saturation.
  • There are very, VERY few circumstances that I will use a rag over a brush to apply wax. But, one of those is when I’m using MMS White Wax. I have found that there is something in the formula of the White Wax that causes it to stick in my wax brushes, even when I clean them with my awesome brush soap. I will usually opt for a disposable rag to apply white wax so that I don’t have to mess with cleaning a messy wax brush when I’m finished.
  • White Wax is pretty dramatic. If you are going for a very heavy white-washed look, it’s the way to go. But, if you want a more subtle finish with the white wax, you need to use some of the clear furniture wax to soften the look.
  • The same point holds true when using Antiquing Wax. As a stand alone wax, it will dramatically richen the look of your paint finish, but if you want a more subtle antiqued patina, a little bit of the clear furniture wax allows you to move the dark antiquing wax with more control and ease.
  • I’ve also noticed that over the years, the batches of Miss Mustard Seed’s Antiquing Wax likely use different color pigments from one batch to another so there are subtle color differences. One batch may be a bit more on the dark brown side while a previous batch may have had more grey tones.

When it’s all said and done, Miss Mustard Seed’s Wax offers a wonderfully protective finish that is very easy to apply and it has a matte look and feel.

Buffet, Chalkboard-11

Miss Mustard Seed’s Milk Paint in Shutter Gray and Ironstone with clear furniture wax

Annie Sloan Soft Wax

PaintClass-31

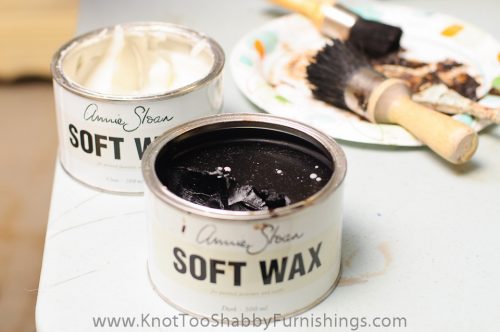
  • Annie Sloan Soft Wax has the consistency (and even the look) of Crisco. It’s nice and smooth to apply, but not as soft and creamy as MMS Beeswax.
  • Annie Sloan Soft Wax has a different application process from any other furniture wax that I’ve ever used. The Soft Wax is applied in sections and then immediately wiped off. You want to allow the wax to harden for several hours (I usually wait overnight) then polish it with a soft cloth.
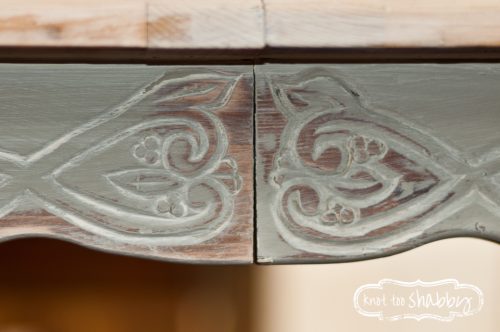
  • The new White Wax offers a very soft and subtle white wash effect. It is not nearly as pronounced as Miss Mustard Seed’s White Wax, therefore a bit easier to manipulate as a stand alone product (meaning, you don’t need clear wax to move the white wax around or help it to blend). I love how the White Wax settles into carved details of wood furniture without being overly dramatic on the flatter surfaces. And, Annie’s White Wax is much easier to clean out of the wax brush than MMS White Wax.
  • Both Annie Sloan Dark Wax and Black Wax must be used with Clear Wax in order to prevent it from staining the paint finish (Of course, Graphite is the paint color that serves as the exception to that rule). I like to mix the Dark and Black Wax with Clear Wax when applying it, although on certain occasions I’ll put a layer of clear wax and then a layer of either dark or black. It just depends what look I’m going for and how much time I have to work on a piece. You can go for a much more subtle dark or black wax effect by using more clear with it, or vice versa.

Your furniture painted with Annie Sloan Paint and paired with her Soft Wax will have beautiful and lustrous sheen to them that can only be achieved when you pair her products together.

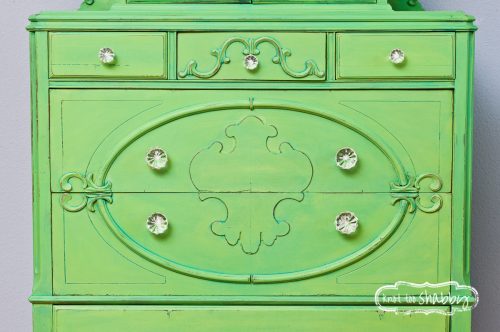
Dresser, Granny Smith Green-10

Clear wax mixed with paint to create a colored wax finish

Which begs the question, can you mix the product lines?

Yes…and, no.

Anytime you start mixing different product lines, you always want to test an area of what you are painting to make sure that the two products will be symbiotic. You just never know what may be in one product that compromises the integrity or finish of another product. So, as a general rule of thumb I recommend that you stick with products in the same line (On a side note, I strongly discourage using Briwax or Minwax Finishing Paste as a top coat on either of these product lines as I’ve seen some pretty dramatic negative results).

That being said, I can sometimes be a bit of rule breaker!

Table, Grey, White Wax-4

French Linen Chalk Paint® with Miss Mustard Seed’s White Wax

I have paired Annie Sloan Soft Wax as a top coat to Miss Mustard Seed’s Milk Paint and vice versa. In doing so, I was hoping to achieve a similar sheen on MMSMP as I get with Annie Sloan Paint. That wasn’t the case and I have since learned that the ONLY WAY to achieve the characteristic “Annie Sloan Look” is to pair her products.

Unlike any other product on the market, wax has the capability of not only serving a functional purpose in protecting your piece of furniture, but  also as a very decorative and artistic element.  So, the next time you are working on a piece of furniture, I challenge you to stretch your artistic abilities and find new ways to use the wax decoratively….whether you incorporate some shading, add color or mix waxes. And, if you are so inclined, we offer a two hour waxing workshop dedicated to the many finishes you can achieve using both wax products!

as and mms wax


How To Create A Vintage Bathroom In A Modern Home

Zeal and gusto fueled your modern bathroom design some years ago. Now when you see your bathroom, maybe you long to transform it into a vintage oasis, yet you don’t know where to begin. By swapping out a few pieces in your modern bathroom, you’ll ignite the zest you once had, and begin transforming your bathroom into a vintage bathroom full of old-world charm and exceptional comfort.

A bathroom remodel doesn’t have to be complicated at all. Infuse your modern bathroom with classic pieces from Modern Bathroom, including tubs, bathroom accessories and fixtures, to transform your bathroom in a weekend.

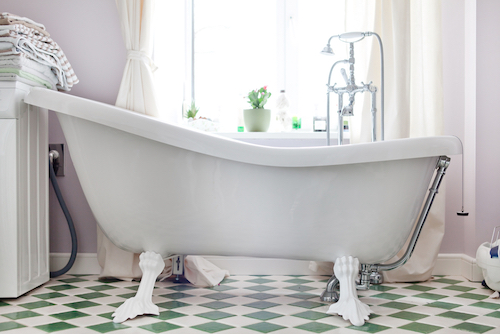
Clawfoot Tubs With Freestanding Tub Fillers Are a Must-Have

From traditional bathrooms to modern bathrooms to vintage bathrooms, clawfoot tubs are a great choice. Accented by vintage copper, satin black or tumbled bronze fixtures, your tub sets the tone. Beyond the design, your clawfoot tub is perfect for hours of soaking following your bathroom remodel. The tub’s therapeutic qualities make it a must-have when your goal is comfort and vintage.

Pro tip:Consider installing a toilet with a detached tank to complement your freestanding tub.

Pedestal Sinks Add Elegance to Vintage Bathrooms

Introduced in the late 1800s, pedestal sinks complement clawfoot tubs well. One of the most popular types of sinks back then, they continue to be elegant, yet functional. What’s even more fascinating about pedestal sinks is the multitude of options you have to choose from these days. Whether you desire an integrated sink or want a pedestal sink with an attached 20th century-inspired porcelain basin, you are only limited by your imagination.

Pro Tip: Bow-front pedestal sinks add dimension to your vintage bathroom.

Vintage Accessories Are the Pièce de Résistance

Bare walls are a no-no when it comes to creating your dream bathroom. You can line your walls with accessories that are functional and those that simply enhance your design. Consider installing a hanging shaving mirror, wall-mounted soap dispensers, and artwork from the period that inspired your new retreat-like bathroom.

Pro Tip: Enhance your lighting and remain true to your design by adding sconces that reflect the popular designs of the period you are imitating.

Checkered Tiles and Wallpaper Tie Everything Together

Checkered tiles are a classic choice when it comes to transforming your bathroom. The time-honored look achieved by installing checkered tiles will never be a bathroom faux pas. It is the marriage of simplicity and vintage design realized. You can’t forget wallpaper. Wallpaper is a simple way to capture the vintage look you crave. With tons of print to choose from, choosing the right design will bring your bathroom to life. To get a truly vintage look, opt for a classy baroque print or a ’50s-inspired striped print.

Pro tip: Add a single chair to your bathroom to drive home your vintage look.

It doesn’t take much to rejuvenate a modern or traditional bathroom. If you want to convert your modern bathroom into a vintage bathroom, then a few inspirational pieces from Modern Bathroom will quickly get you started. Browse our website for the tub, fixture and bathroom accessories you need to take your bathroom back in time.

Five Ideas for Creating the Perfect Log Cabin Bathrooms

No log cabin is complete without comfortable, rustic bathrooms that reflect its cozy style. So whether you’re building a new log cabin or updating the baths in the one you already have, it’s important to think strategically about the fixtures you choose. From bathroom vanities to bathtubs to bathroom faucets, you’ll want to look for fixtures that complement the overall design and style of your log cabin home. To help you create a cohesive home design that incorporates the log cabin feel that you desire, here are some important ideas to keep in mind.

  1. Start With Space

    Are you redesigning a tiny powder room or a large master bath? Before you pick any bathroom components, determine how much square footage you have to work with as you’re shopping for bathtubsshowers and other components. You may love the rustic feel of a certain vanity, for example, but your small space might not accommodate it. Everything from your bathroom sinks to your mirrors must be in proportion to the room.

  2. Decide Whether or Not to DIY

    Remodeling a bathroom on your own can save you a great deal in terms of cost, but do-it-yourself projects aren’t for everybody. Evaluate how much needs to be done. Are you just replacing a vanity? Ripping out wall tile? Putting in wood wall paneling and sealing it properly? Ask yourself how comfortable you are taking on that task. If you’re looking at a small job or one that you already know how to tackle, you can confidently do it yourself. If, on the other hand, you don’t have the time and/or skill to do it yourself, it’s probably best to hire a professional.

  3. Think About Costs

    The prices of bathroom remodels vary greatly, depending on how much you’re changing, what products you’re buying and where you’re buying them, labor costs, etc. Based on your specific project, set a budget and stick to it. Likewise, shave your supply costs by shopping at Modern Bathroom, a supplier that saves you up to 70 percent and offers free shipping on everything we sell.

  4. Get Inspiration

    To help you recognize the common themes in the log cabin look, explore log cabin websites, magazines and photographs for inspiration. Look for common elements: natural colors, greenery, photos or artwork featuring the woods. When you have a good sense of what defines the log cabin style, you’ll be better prepared to shop for new bathroom features.

  5. Plan Your Log Cabin Style

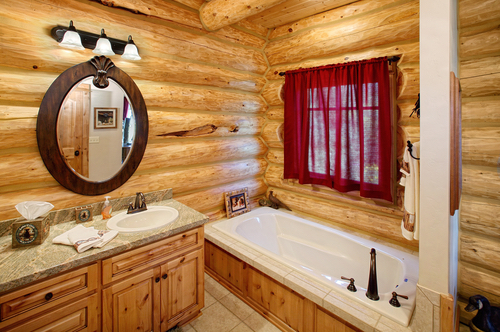
    Decide what you want your bathroom to feature. For a log cabin vibe, you probably want wood tones, natural colors that are found outside (browns, tans, greens, blues, etc.) and textiles and accents that can create a cozy, rustic feel. Incorporating these components in the bathroom means choosing natural elements such as wood floors, wood walls, a natural stone shower and maybe a textured sink or accents of copper or iron. Explore options to see what works for you. You could even continue the unmistakable wood chinking that defines log cabins into the bathroom walls.

When it comes to creating the log cabin bathroom you’ve always wanted, there are many ways to get creative. Use the tips above to guide your decision-making, and simplify the experience to maximize your enjoyment. Then, for the best products on the market, come to Modern Bathroom, browsing its web catalog of factory-direct products.

Modern Bathroom is proud to be your best resource for all kinds of bathroom products, from bathroom vanities to sinks to bathtubs to mirrors. Visit either of our showrooms in California to learn more about what we offer, or explore our extensive online catalog and order online. We not only offer everyday low prices, but also provide a 110 percent price-difference guarantee: Find the product you buy from us at a lower price elsewhere within 30 days, and we’ll refund the difference plus an extra 10 percent.

Search online now to see what we offer, or contact us today to learn more.

4 Ways to Fight Cabin Fever

Winter is here, and cabin fever is setting in. Feeling a little S.A.D.?  There’s a reason. Seasonal Affective Disorder is a real thing, probably known best by its other name, the “winter blues.” The best way to chase away your funk is by getting started on brightening your space for spring. Read on for five home decorating ideas that will help you fight your cabin fever.

section02_header

1. Color Play

Want to make the gray skies go away? Bring in some color play! A surefire way to elevate your mood is to surround yourself with home accents in a variety of bright and cheerful hues.

section02_products

  1. Orange Tear Drop Finial
  2. Lime London Studded Accent Chair
  3. Aqua Blue Glass Geometric Lantern

section03_header

2. Lighting

Winter days are especially short, and all the extra darkness sure is a bummer. Swapping out your old lamps for new, stylish lighting can help uplift your room’s vibe and give it a new look.

section03_products

  1. Antique Cream Spindle Floor Lamp
  2. Silver Mosaic Uplight
  3. Silver Mercury Glass Table Lamp (shade sold separately)

section03_protip

section04_header

3. Greenery

Being forced to stay indoors keeps us from experiencing nature, which can really kick start the winter blues. Since spring won’t be here for a few more months, bring some greenery indoors with gorgeous faux succulents and spring and summer floral.

section04_products

  1. Succulent in White Pot
  2. Hanging Succulent in Glass Ornament
  3. Mixed Succulents in Concrete

section05_header-2

4. Florals

There’s nothing like a little flower power to kick you out of the winter doldrums. Iconic floral prints invoke the feeling of spring while refreshing any room.

section05_products

  1. Rosie Lagoon Throw Pillow
  2. Forest Bird Comforter King Set- 8-Piece
  3. Red & Teal Floral Area Rug

section05_protip

Did your recent home refresh cure your case of cabin fever? Be sure to show us using #AtHomeStores.

The post 4 Ways to Fight Cabin Fever appeared first on At Home Blog.

When Hand Painting Meets Stencils

The world of furniture painting is small. Close knit. In constant communication! It seems weird, but one of my favorite things about carrying both Annie Sloan Paint and Miss Mustard Seed’s Milk Paint is this tight community that is fostered through the product. Not just the community of customers, but that of retailers as well. We’re like a big family of furniture painters. I bring that up because months and months ago, our Milk Paint family participated in a survey and informal discussion about some desired new products. There were so, so many great ideas. One that kept popping up, though was the desire for a new line of stencils. Really, it made perfect sense. Miss Mustard Seed is an avid free-hand painter. Creating stencils that are inspired by her free-hand painting is the perfect pairing to MMS Milk Paint!

I am NOT a free-hand painter. Let’s just say, I know where my talents lay and that is not one of them. I happily volunteered to be among the first to try out the new stencils and photograph our projects!

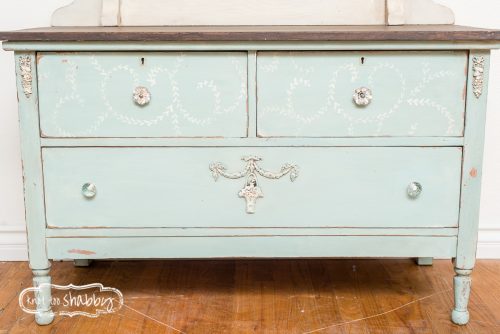
My first piece is an antique dresser that I base coated in white and then added a custom mix of Kitchen Scale and Linen MMS Milk Paint.

dresser-milk-paint-stencil-1

I used Linen for the stencil and mixed a much thicker than usual batch to minimize the paint bleeding beneath the stencil.

dresser-milk-paint-stencil-11

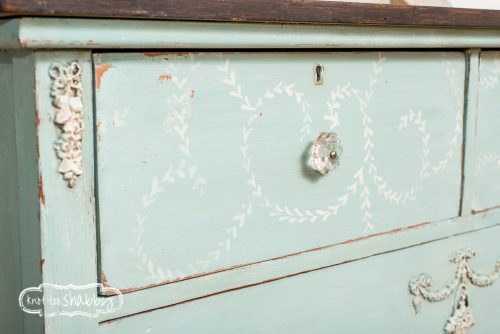
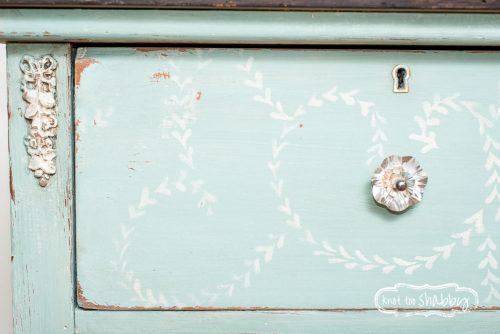
This particular stencil design is very simple, so to add a bit more complexity and give the more free-hand painted look, I had pattern shoot off in a variety of directions all over the drawers. As a result, it looks much more free-hand painted than stenciled (enough so that all of my employees were fooled).

dresser-milk-paint-stencil-6

And, of course I love the minimal chipping on the drawers and front.

What sets the new Miss Mustard Seed stencils apart from other stencil lines is the simplicity of the designs and the ability to layer multiple stencils and create a unique pattern that doesn’t fit into a more rigid design formula.

dresser-milk-paint-stencil-9

As soon as I find out more about the availability of the stencils, we will post it on our instagram feed and facebook page! In the meantime, keep your eyes peeled for those perfect stencil projects!


5 Ways to Make Your Vendor Application Stand Out

While these tips are specifically intended for applicants hoping to become vendors at the knot too shabby BAZAAR, you’re likely to find that this is a secret recipe to getting accepted at any craft fair or vintage market.

5 ways to make your vendor application stand out for the next craft fair #knottooshabbyBAZAAR

Here is a preview of the vendor application for the knot too shabby BAZAAR that you can print out and use to refine your responses before submitting the official vendor application on the knot too shabby website. Once you’ve filled it out, made revisions, and have a final draft that you’re proud of, make backup copies and save them somewhere so you’ll be able to use it again as a reference for future festival applications.

Selection for the #knottooshabbyBAZAAR is a juried process. To impress the selection committee, you need to show that you have quality merchandise that fits in with the festival’s guidelines and that you are prepared to act as an ambassador both online and in-person at the event. We’re looking for artisans with products we can get excited about and who will make customers excited to shop at the fair.

I’ve read a lot of applications in my five years coordinating the knot too shabby BAZAAR so I’m sharing with you 5 of the biggest mistakes applicants make and how to not only fix them, but how to make your application stand out no matter what the competition!

  1. Quality photos
  • BAD:

    What NOT to do when applying for a craft fair or vintage market

    Cluttered background, dim fluorescent lighting, crooked perspective, dusty product with the price tag still on, & unimaginative presentation.


  • GOOD:

    How to apply for a craft fair or vintage market--and get ACCEPTED!

    Uncluttered background, bright natural window light, level perspective, clean product, & visually interesting presentation.

Don’t take your photos on your kitchen counter, on your couch, in your dirty garage, at night, or in direct noontime sunlight that you try to hide with a filter (it will look like it’s waiting for an old west duel with the sheriff). Please don’t. I’m begging you.
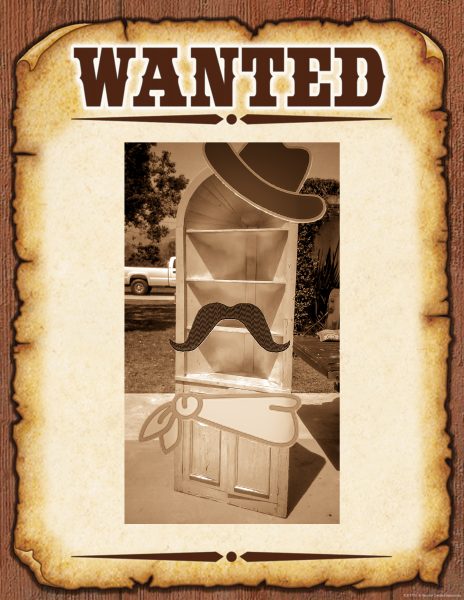
How to improve the product photography of your small business and tell filters to skedaddle!

Sorry pardner, this filter won’t hide your high noon photo shoot

I get the feeling–it’s late, you’ve just finished that project you’ve been working on, the kids are finally asleep, and you’re in a hurry to snap a photo on your phone and instantly share it with the world. But with a few simple steps, you can make a photo that actually draws viewers in and entices them to buy your product–even if you don’t have a fancy camera.

How to set up a low-budget product photography shoot that will get you noticed

Behind the scenes: No expensive lighting equipment, just a large window letting plenty of natural light shine through.

Lighting: Near a large window or in open shade is often best. Avoid your living room’s tungsten lamps or your kitchen’s florescent lights–these could make your product seem discolored and they never provide enough light.  Natural daylight is ideal, but pay attention to shadows–direct sunlight can create harsh unflattering shadows in addition to stark glare, but tree shade can also cast distracting mottled shadows.
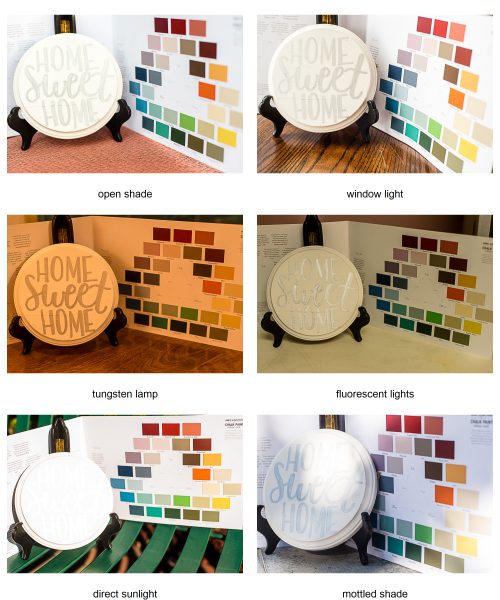
How to improve the product photography of your small business without spending a dime #lighting

“Home Sweet Home” sign by Maeberry Lane Design
Chalk Paint® color chart by Annie Sloan

Setting: Arrange your merchandise in a way that makes it easier for the viewer to picture it in their home (or even better, their dream home). Stage a vignette that looks inviting by mixing textures. A soft throw blanket and a live plant can add a homey touch to hard wood furniture. 
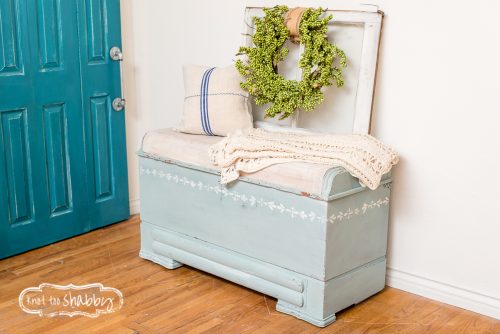
Details can make or break a room's ambiance. My favorite ways to tie a room together are with textiles and plants. Color isn't the only way to coordinate--textures will have a huge impact. Adding a vintage afghan, repurposed grainsack pillow, or lush greenery like the ones shown here at #knottooshabbyGLENDORA can be the key to making a room sing "comfort."

Hope chest painted using Miss Mustard Seed’s Milk Paint & her Linda stencil

If you make apparel, jewelry, or accessories, spend a late afternoon or early morning photographing it on a live person in a setting that matches your style. Rustic? Take a trip to the great outdoors! Coastal? Head to the beach and find a lighthouse! No matter which location you choose, your setting should complement your product; not distract from it.

Fashion & jewelry designers: how to improve your product photography

Model: Claire Max
Mona B apparel: knot too shabby
Jewelry: Fitzydoodles
Flowers: la petite fleur
Photo: Killer Cupcake Event Photography

Alternatively, you can use a minimalist setting to make your product pop. An all-white backdrop means that your merchandise stands out without any other distracting elements in your image.

How to make a pop-up shop application that POPS!

Whether you use fabric, a painted wall, or a sheet of 8.5×11 printer paper like I did above, make sure your backdrop is completely clean of any scuff marks or lint, and that you have a large, bright light source to keep shadows to a minimum.

Angle: Do you know what your best side is? No, don’t look in the mirror–look at your merchandise. Often one of the best angles to photograph it from is the angle that customers will most frequently see it from. That means taking a moment and thinking about how your product is meant to be used. Sure, you may be on the floor already from painting those table legs, but customers won’t know what the tabletop looks like from that angle.
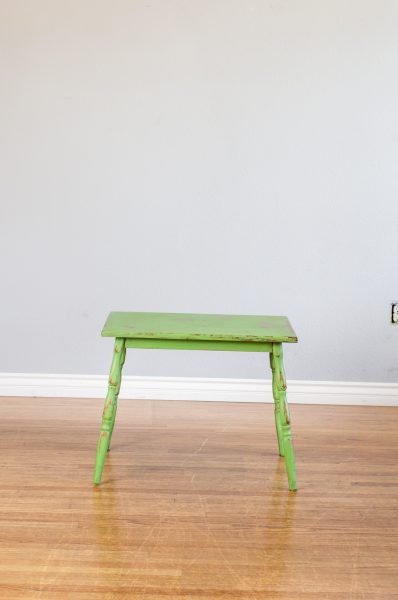
What to do when your product photography needs improvement

To improve the perspective of this photograph:
1. Turn the table or move your camera to get a 45° angle that shows more of the tabletop and all 4 of the legs.
2. Get closer–most of this image is wasted space.
3. Watch out for a crooked horizon line, it looks sloppy.
4. Remove distractions like that ugly electrical outlet and the funky shadows. To do this you can move in closer or re-position your camera like mentioned above, but sometimes you may need move your product.
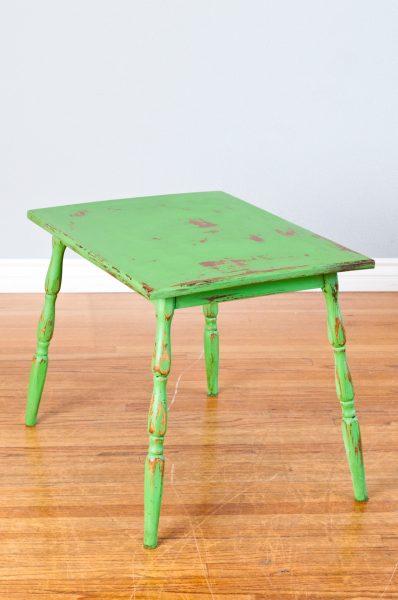
How to make a pop-up shop application that POPS!

Much better!

  1. Dynamic descriptions
  • BAD:

    How to write dynamic descriptions for your next maker fair application

    This description is vague with no attention paid to spelling or punctuation.


  • GOOD:
     

    How to write dynamic descriptions for your next maker fair application

    This description is much more readable without distracting errors and it conveys vivid imagery.

The first description gets the ballpark idea across, but won’t set you apart from the many, many other furniture painters out there.

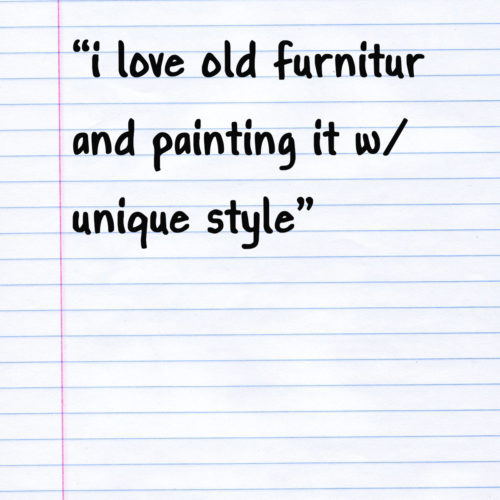
Specificity is key. What is it that makes your style unique? What feelings do you want your products to evoke? What is it about your process that no one else could replicate? Those aren’t rhetorical questions–sit down and make some notes about what defines your work and no one else’s. Then take those topics and incorporate it into your new tagline.

Did you notice the second description makes no mention of furniture at all? If you’re pairing it with a quality photograph or a well-designed logo you won’t have to. Some of the most memorable slogans bypass the literal for the emotional: Apple’s “Think Different”,  Capital One’s “What’s In Your Wallet?”, and Las Vegas’ “What Happens Here Stays Here” to name a few.

The second description may be slightly cheesy, but from the wording any reader could easily infer that vendor offers casual furniture pieces painted with eclectic patterns. Being vague is like a pair of old sweatpants: it may be comfortable, but if you want to go anywhere exciting, you’re going to have to make decisions and change.

  1. Active online presence

    • BAD: 
      What NOT to do when applying to a maker fair

      Social media business DON’T: pushy advertisements or little-to-no activity


    • GOOD: 

      How to leverage social media to get accepted at craft fairs

      Social media business DO: nuanced advertisements sprinkled in among lots of photo & video posts about how & where your products are made, who makes them, and what inspires you.

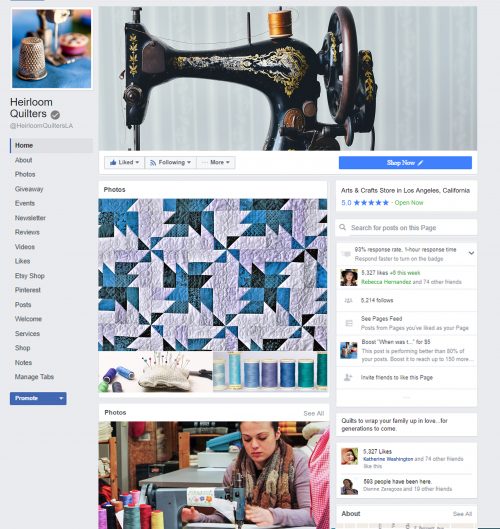
The knot too shabby selection committee looks for vendors who can help attract the most customers to our annual shabby chic festival. We want vendors who have vital online followings. Having a large number of followers can be helpful, but having followers who regularly comment on and re-share your posts is even better. Engaged online followers are most likely to become customers who are enthusiastic to visit the knot too shabby BAZAAR and spend money shopping there.

Incomplete or inactive websites and social media accounts discourage would-be customers. In addition to making it harder for them to contact you, it can also hurt your reputation. Especially if you don’t have a brick-&-mortar shop, your online presence is the face of your business. A profile that lacks descriptions, quality photos, and current updates gives the impression that you’re not serious about your customer service or your products.

Building an active online presence is about showing your products in the best light possible while building a relationship with your customer base. When posting photos, include a mix of product photos, work-in-progress pics, and yes, a few photos of yourself. Consumers who appreciate vintage and handmade products want to support small business owners who are authentic and relatable. Be careful not to fall into the trap of spamming your followers with constant self-promotion. No one likes to be bombarded with non-stop advertisements. Interact with your followers and fellow handmade & vintage enthusiasts on a genuine, personal level. Regularly like and comment on their posts. Consistently show quality work and kindness and you’ll go far. It’s as easy and as difficult as that.

  1. Know your ideal customer
  • BAD: 
    DON'T: try to appeal to every customer that could possibly exist--that would be overwhelming

    DON’T: try to appeal to every customer that could possibly exist–that would be overwhelming


  • GOOD:

    DO: focus on appealing to your ideal customer and you'll go far

    DO: focus on appealing to your ideal customer
    and you’ll go far

Especially when you’re responding to open-ended questions such as:

      • “How would you describe your merchandise?”
      • “What materials are used in creating your merchandise?”
      • ​”Tell us about your booth space”

Write your answers as though you were responding to your ideal customer. Not only will you create more vivid descriptions, you’ll have sales pitches that will be ready for use in conversations with customers at the knot too shabby BAZAAR and beyond.

Who is your ideal customer? If you answered “anyone with cash” then you have some critical thinking to do. You’re never going to please everyone all the time and you’ll spread yourself too thin if you try.

Think about the lifestyle, spending habits, and interests of the ideal customer for your business. Is your customer someone who prefers quality or quantity? Do they appreciate originality or nostalgia more? Would they care about practicality or luxury more? What need does your product fulfill for your ideal customer? What changes in their life would prompt them to want your product? What concerns might they have before buying your product? The more clearly you can define your ideal customer, the better you can market your products to the customer base you’ll have the most success with. Know where they’re coming from, how they like to spend their free time, and which social media platforms they interact on. The more you understand about your ideal customer, the easier you can make it for them to discover your business.

Lots of customers may come and go, but if you can find your ideal customer they’ll shop with you again and again.

  1. Individual style
  • BAD:
    Trying to fit in with the crowd is exhausting--and you risk going unnoticed

    Trying to fit in with the crowd is exhausting–and you risk going unnoticed


  • GOOD:

    How to stand apart from the competition: Be yourself without worrying what everyone else is doing.

    Be yourself without worrying what everyone else is doing.

What’s your style? If it’s vintage or shabby chic, perfect! But that’s only a start. Every applicant’s style is vintage or shabby chic–don’t be afraid to stand out!

Use every relevant comment box on the application to your advantage. The multiple choice questions will tell the knot too shabby BAZAAR jury all the necessary basics, so there’s no need to duplicate that information. If you answered the multiple-choice question “What types of merchandise do you offer?” by choosing the option “Live plants” then your response to the short-answer question “How would you describe your merchandise?” should elaborate much more than also typing out “Live plants.” I’m not saying you need to write an essay for each comment box; after all, brevity is the soul of wit. Choose your words carefully to concisely create a vivid image of your business. Give us your best elevator pitch! If you only had 30 seconds to get a complete stranger excited about your business, what would you say?

Be as specific as you possibly can. Odds are, there are plenty of other applicants who share the same category as you. If you sell vintage clothing, what sets you apart from other vintage clothing sellers? Knowing your ideal customer will help you distinguish your individual style (and vice versa). Someone who sells rare items meant for collectors will have a different perspective than someone who’s selling items for everyday use. If you’re making items by hand, do you have a technique or tradition that sets your business apart from other makers? Perhaps you use antique tools to make your jewelry or the stationary paper is made from the flowers of distant lands you’ve traveled to–these are the kinds of details that will get the knot too shabby BAZAAR jury excited about your application!

5 ways to make your vendor application stand out for the next vintage market #knottooshabbyBAZAAR

In a nutshell, be original and go the extra mile to give your words and photos that “Wow!” factor. Whether your application gets approved or not, you will have crafted a portfolio for your pop up shop that will be beneficial for as long as you keep it updated to reflect your growing business.

When you’re ready, submit your application for the knot too shabby BAZAAR. Don’t take too long–the deadline is March 28th!

Save

Save

Save