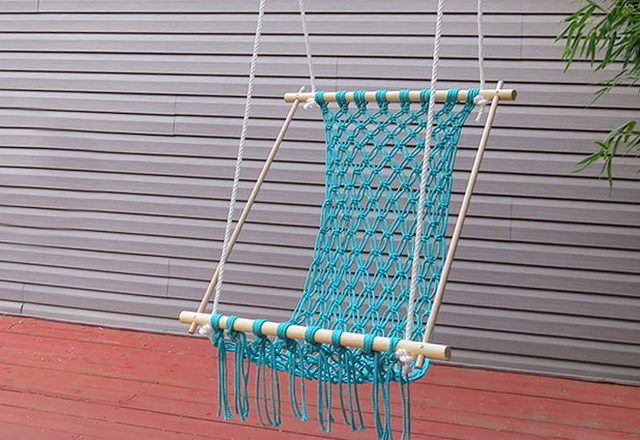
This hammock is made utilizing the macrame method, which calls for binding together cords. Macrame is a centuries-old method utilized to make furnishings, plant holders as well as various other house design items.
credit:
Angie Diersman
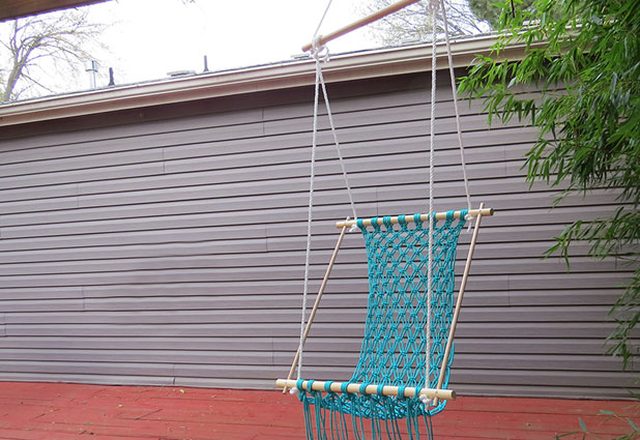
Loosen up on your porch in a comfortable macrame hammock.
Things You’ll Require

credit:
Angie Diersman
Products to make a macrame hanging chair.
- 31 1/4- inch hardwood dowels, 30-inches long
- 25/8-inch hardwood dowels, 36-inches long
- 200 backyards, 1/4-inch macrame cable or rope
- 8 lawns, 1/2-inch rope
- 41-inch timber screws
- Drill and also 5/8-inch bit
- Gauging tape
- Scissors
Action the Dowels
credit:
Angie Diersman
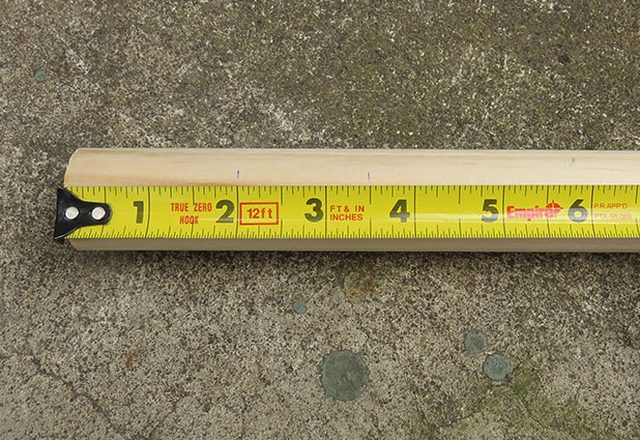
Measure and mark the dowels for drilling.
While measuring as well as drilling the dowels, guarantee all the openings are degree and lined up with each other to ensure that the frame is completely square. On 2 of the 1 1/4- inch dowels, measure and mark at 2 inches and also 3 1/2 inches from each end. The third 1 1/4- inch dowel will just require to be marked at 3 1/2 inches from each end.
Drill Holes in the Dowels
credit:
Angie Diersman
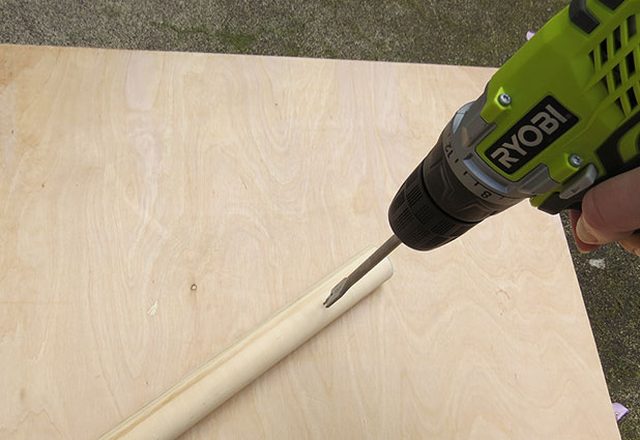
Pierce openings in dowels utilizing a spade little bit or dowel jig.
Pierce a hole at each mark on each 1 1/4- inch dowel. Start with a little drill bit and work your method as much as 5/8 inch. A spade bit or dowel jig makes this much simpler.
Sand the Holes
credit:
Angie Diersman
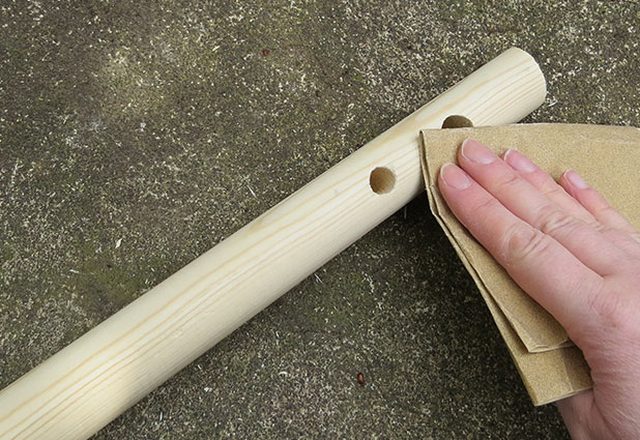
Sand openings to eliminate any kind of splinters.
Sand the holes to eliminate any splinters from drilling.
Glide the Dowels Together
credit:
Angie Diersman
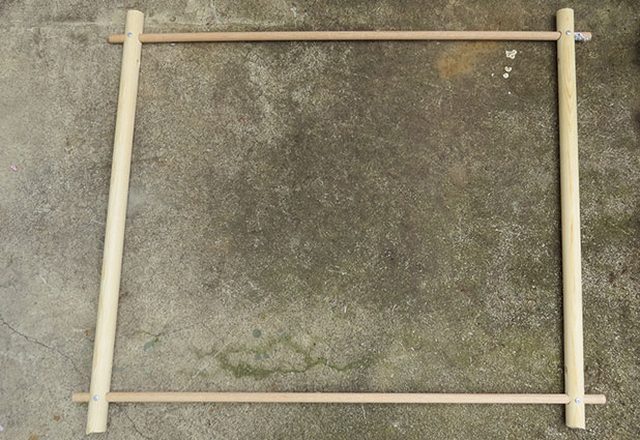
Slide dowels with each other to create a square structure.
Make a square structure for the seat by moving each of the small dowels into the 5/8-inch holes on the large dowels. Leave regarding 1-inch overlap on each end.
Secure the Framework With Screws
credit:
Angie Diersman
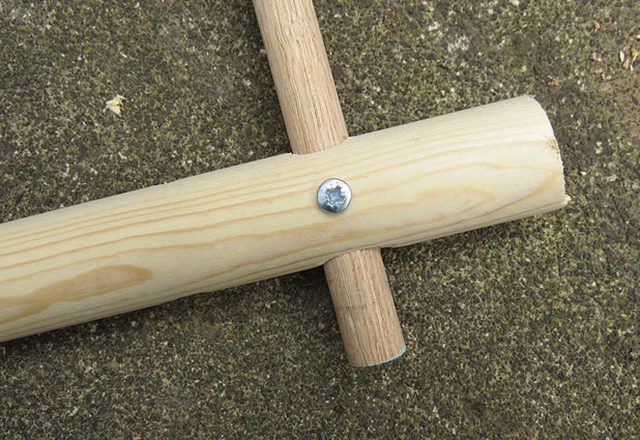
Screw with each other the two dowels to secure the framework.
Drill a tiny pilot opening where the dowels satisfy. Using a 1-inch screw, protect both assemble.
Hang the Frame
credit:
Angie Diersman
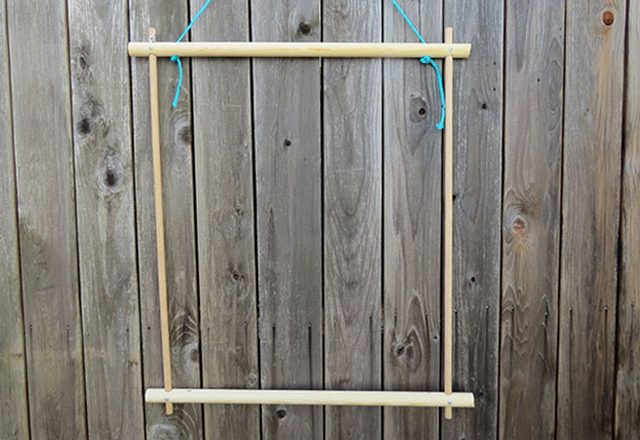
Temporarily hang frame for easy use.
Before beginning the macrame, briefly hang the framework in a place where you could quickly stand or rest to knot the ropes.
Cover the Cords Around the Dowel
credit:
Angie Diersman
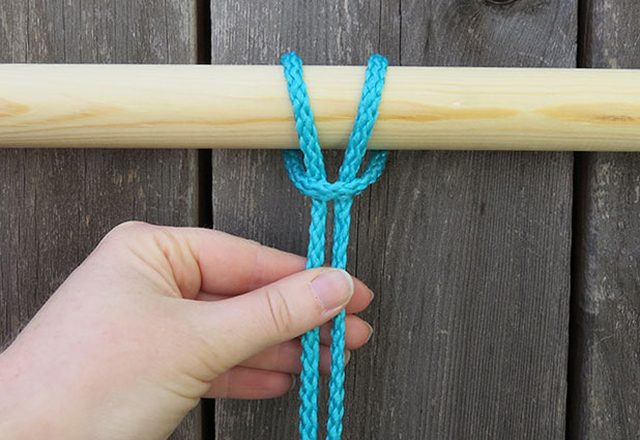
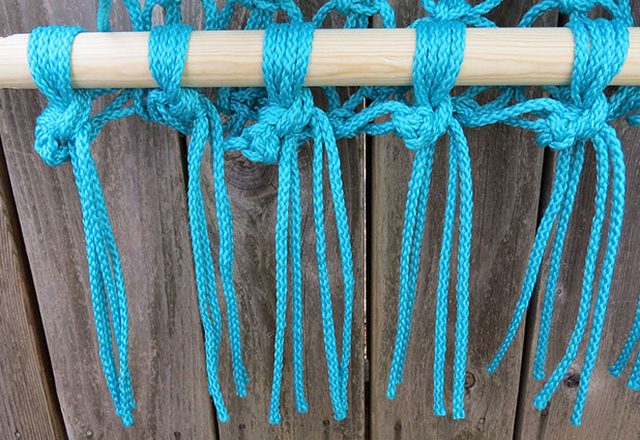
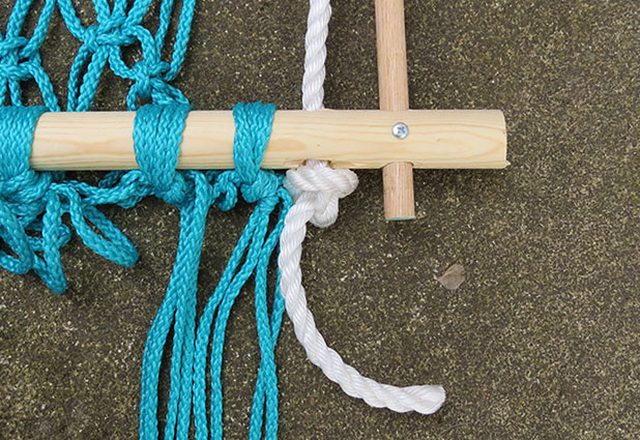
Wrap the loophole around the dowel and also draw the tails with.
Making use of the 1/4-inch cord, reduced 16 26-foot pieces. It seems like a lot however as you knot, the cable shortens swiftly. Get one cable and also fold it in half. Cover the loop around the dowel from the front to back. Pull the tails with the loophole. Continue with all 16 hairs of cable. Once they’re all hanging, you’ll have 32 hairs.
Cross the Wires From Left to
credit:
Angie Diersman
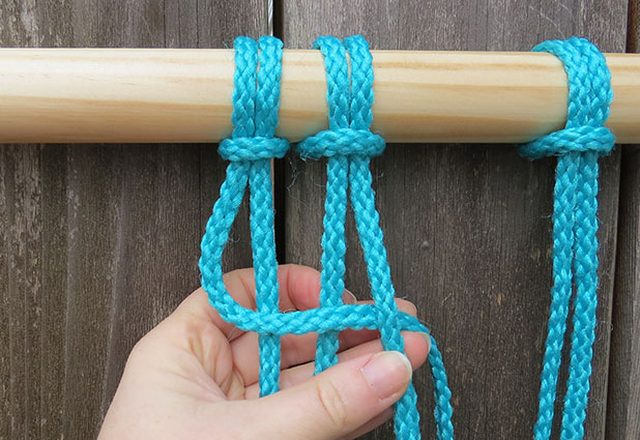
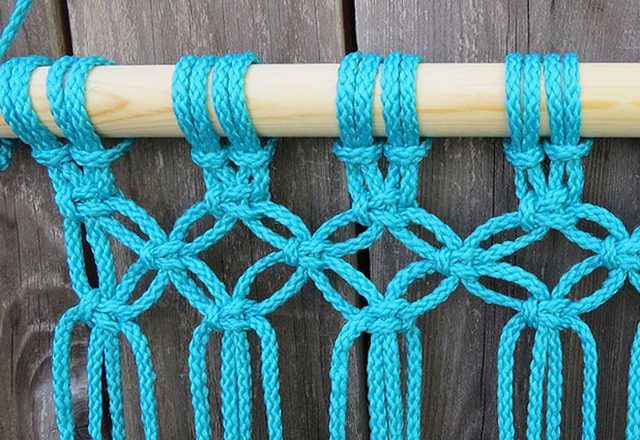
Four cords are used to produce a square knot.
To produce the seat, you’ll be making use of a simple square knot. Beginning with the first 4 cables, take the left cord and cross it over the center two, after that under the ideal cord.
Cross the Cords From Right to Left
credit:
Angie Diersman
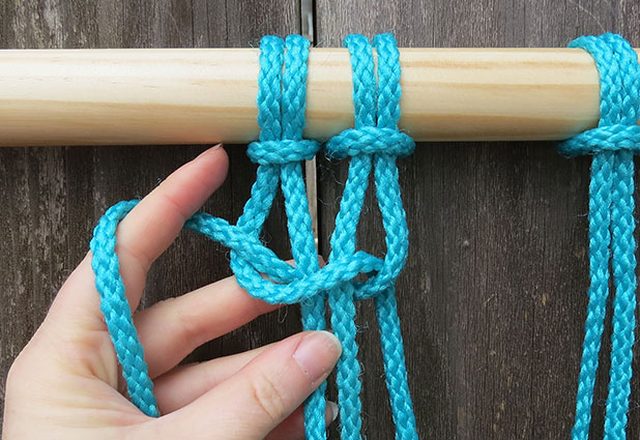
Modification the direction by crossing the cords from right to left.
Take the right cord as well as cross it under the center 2 cables and up with the opening, passing over the left cable.
Full the Square Knot
credit:
Angie Diersman
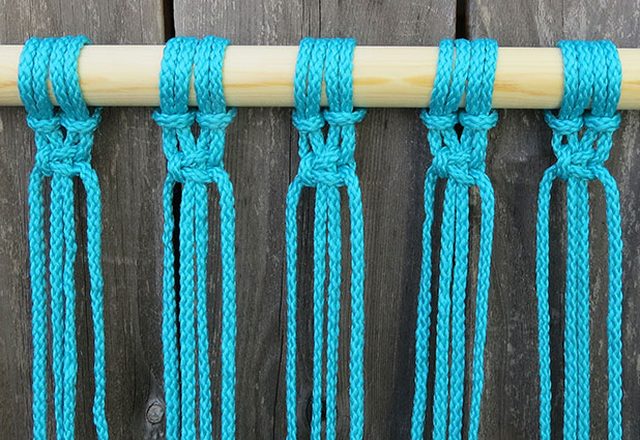
Draw the knot tight and also proceed with all the cables.
To finish the second fifty percent of the knot, you’ll do the very same point backwards. Take the best cord and cross it over the facility two, after that under the left cord. Take the left cord and cross it under the facility 2 cables as well as up through the opening, passing over the best cable. Pull the knot tight. Continue this with all the cords.
Start With the Third Cable
credit:
Angie Diersman
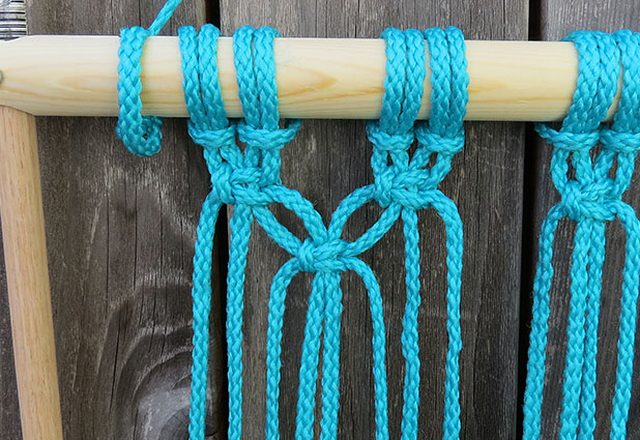
Use 2 strands of cable from each area.
The following row additionally uses the same square knot yet begins with the third cord. You’ll be utilizing 2 hairs from each section. When binding them with each other, see to it to keep whatever also. Proceed this until to reach completion of your cords.
Repeat the Pattern
credit:
Angie Diersman
Continue utilizing square knots to produce the seat pattern.
Currently the pattern repeats. Simply like in the start, link a square knot with the initial 4 cables as well as work your way across. Use the 3rd cord to start the next row.
Knot Until the Seat Actions 45-inches Long
credit:
Angie Diersman
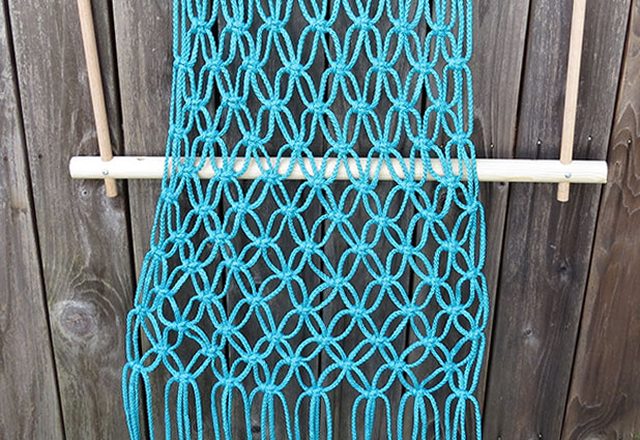
The seat needs to be longer than the structure so it hangs loosely.
Proceed binding till the seat has to do with 45-inches long. The completed macrame has to be longer than the frame.
Affix the Seat to the Frame
credit:
Angie Diersman
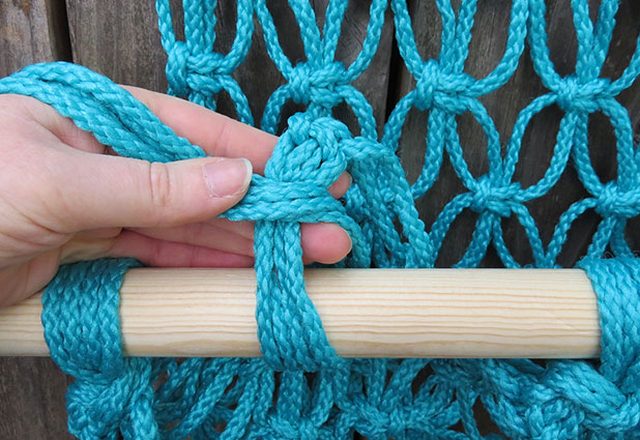
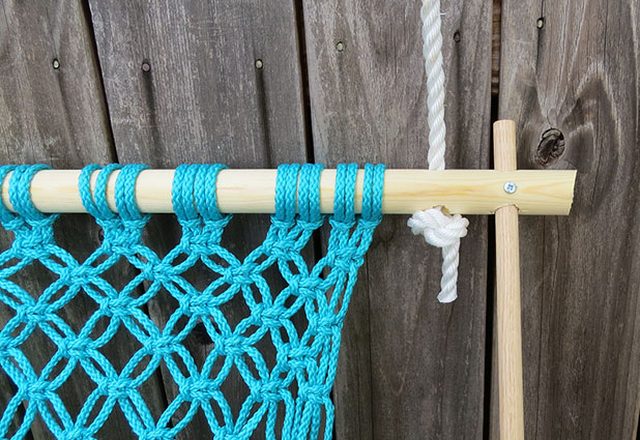
Cover the cords around the dowel and link a knot.
To attach completions to the bottom of the structure, cover all four cables from each section around the dowel as well as link a knot.
Link a 2nd Knot
credit:
Angie Diersman
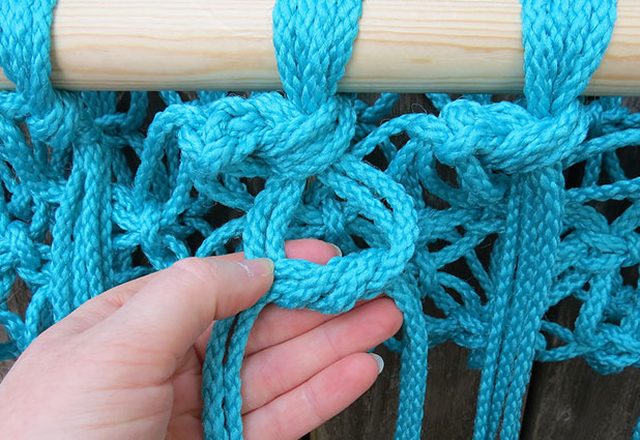
Link a 2nd knot to safeguard the cables to the framework.
Link a 2nd knot by splitting the strand into 2. Draw it as tight as you can.
Cut the Ends of the Cables
credit:
Angie Diersman
Cut completions of the cables to the length wanted.
Cut completions of the cords to the length wanted. You can fray the ends or leave them as is.
Cut a 1/2-inch Rope
credit:
Angie Diersman
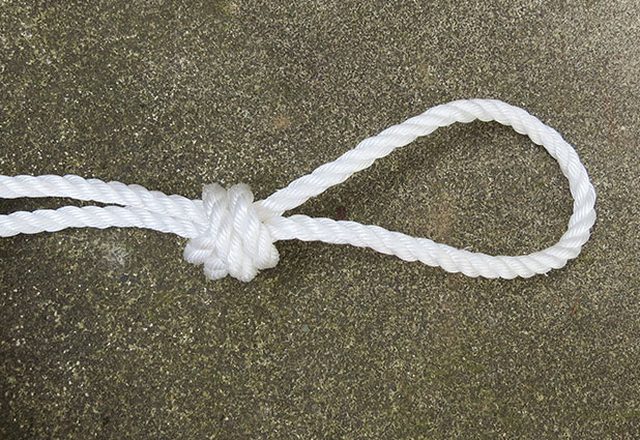
Cut the rope and also produce a loophole.
Cut one 120-inch item of 1/2-inch rope. Fold it in half and connect a knot a couple of inches from the top, creating a loop.
String the Rope With the Dowel
credit:
Angie Diersman
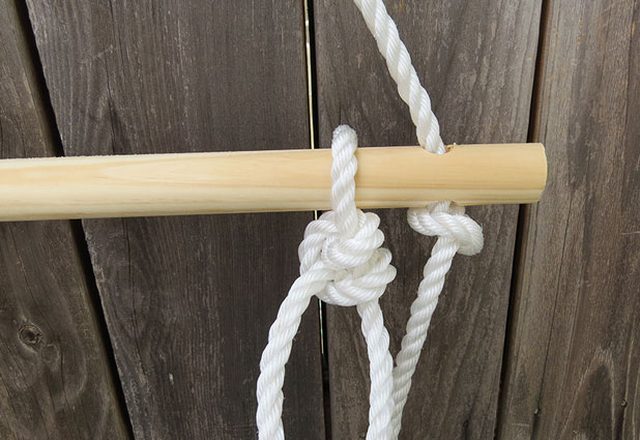
Momentarily hang the rope to string the dowels.
Now, if you can hang the rope in a momentary place by the loop, it will be a lot less complicated making certain all the ropes are also progressing. Utilizing the remaining 3rd dowel, string the rope via each hole and tie a knot, leaving regarding 20 inches between the loop as well as dowel.
String the Rope Through the Top of the Framework
credit:
Angie Diersman
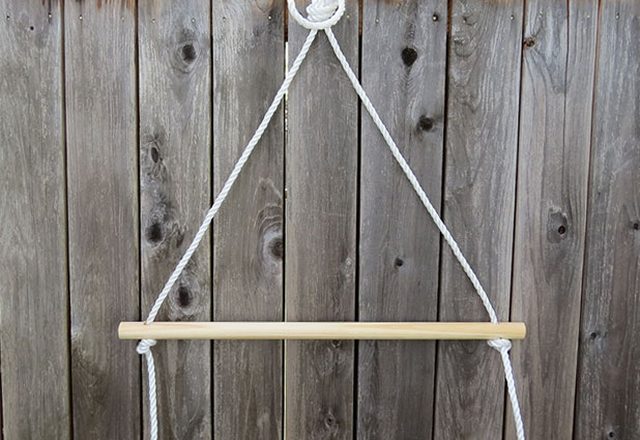
String the rope through the top of the framework and tie a loose knot.
Proceed with the exact same piece of rope. String it down through the top of the framework on each side as well as connect a loose knot, leaving 30 inches in between the two dowels. You want a loosened knot due to the fact that once you hang the finished chair, you’ll require to make some minor changes.
String the Rope With all-time low of the Frame
credit:
Angie Diersman
String the rope with bottom of frame and also tie a loosened knot.
Cut two 65-inches pieces of 1/2-inch-thick rope. Starting at the base of the structure, string one rope on each side through the opening and also tie a loosened knot. This time, the knot must be listed below the dowel with the rope adding.
Link the Rope Around the Third Dowel
credit:
Angie Diersman
Cover the rope around the third dowel and also connect a loose knot.
Run the rope right approximately the top third dowel. Cover the rope around the dowel and also link a loose knot, leaving 60 inches between the third dowel as well as all-time low of the framework.
Hang the Seat as well as Adjust the Ropes
credit:
Angie Diersman
Hang the hammock from a durable hook and change the ropes.
Make sure all the ropes are also. Tighten up all of your knots.When resting in the hammock for the initial time, Use care. The ropes will certainly increase a little and also kind to your weight. As soon as whatever feels right, reduced off any type of excess rope hanging listed below the knots or battle royal them to hang cost-free.


