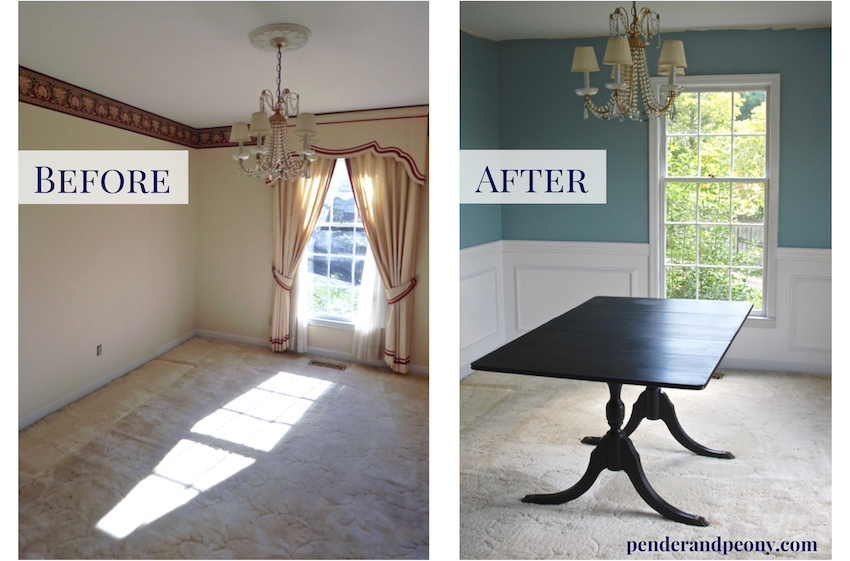
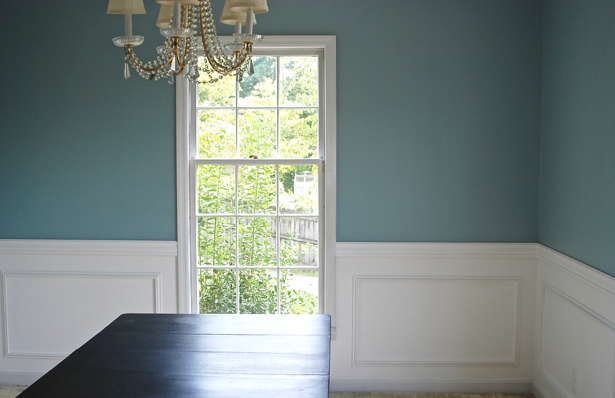
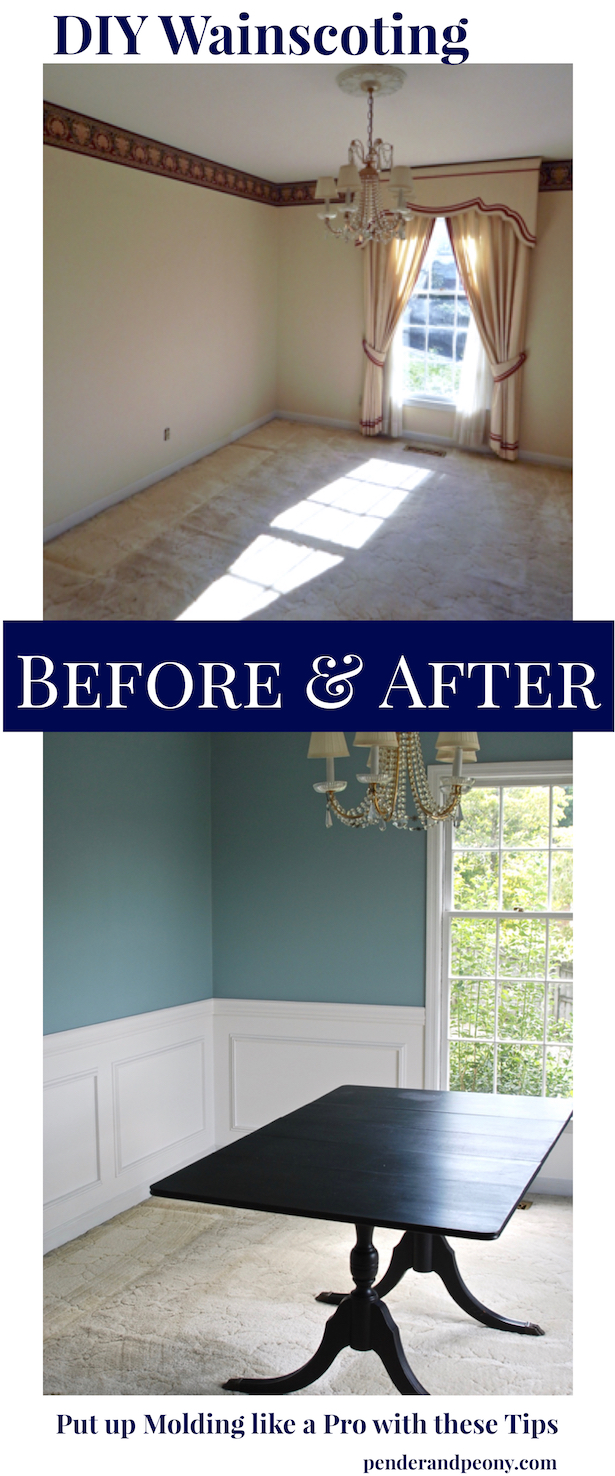
Development is finally being made on our remodellings! Over the weekend S. and I completed our dining room DIY wainscoting and chair rail project. S. did many of the work; he is a jack of all trades: a mechanic, a carpenter, and one hell of a good-looking ginger all rolled into one fine Southern gentleman.
What you do not learn about S. is that he is a professional at putting up molding. He did all of this in a weekend on top of a time sucking journey to Lowes with me documenting him the entire method. Plus I was sidetracking him with concerns about what he was doing and why, so I could share his knowledge with you all. Superhero badge earned!
You might be wondering what my contributions were to all of this tough work. Well … faux image frame wainscoting and a chair rail were my concept in the first location. Oh … and I did the painting!
No. 1 Paint Molding Before Putting It Up
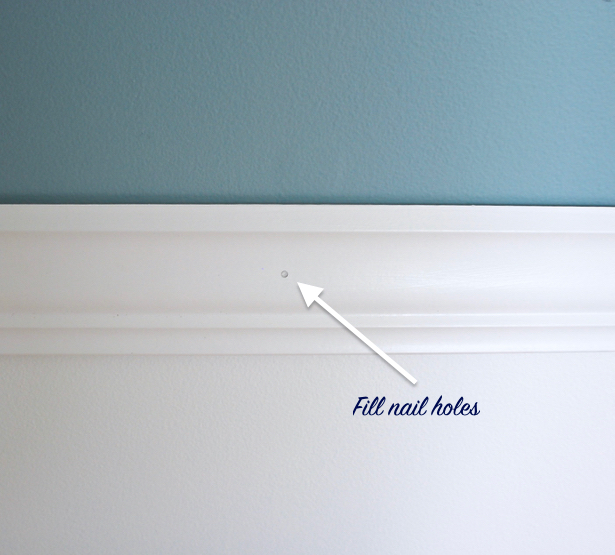
Why? Its just easier. Make sure it is great and dry prior to installing. You will need to go back and retouch nail holes and smudges
.
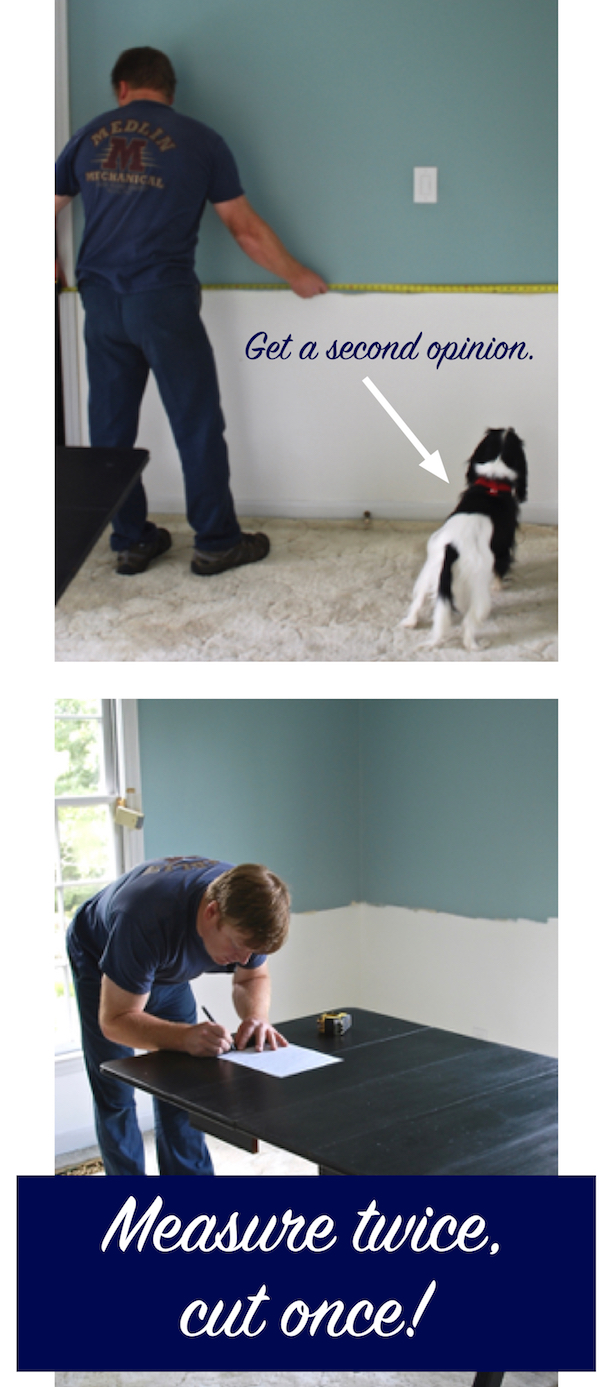
No. 2 Measure Twice, Cut As Soon As.
You understand that saying. Well, our guidance is actually to determine twice, have a second set of eyes inspect you, then cut when (Henry was amazed with the tape measure). Measure each length of wall where you will be installing the chair rail. Our chair rail height is at 33 inches. This is based on where the top of our dining-room chairs struck the wall. Measure your height on one wall where you start the chair rail. Utilize the laser level to make it level throughout the wall. Then work around the space, ensuring that each brand-new area of chair rail is even with the one before it. If you have un-even floorings, this is crucial. So we began with a height of 33 inches, but in the opposite corner the height is actually 33 1/2 inches off the floor, however it looks level.
No. 3 Put Your Nails into the Studs.
You can acquire one of those expensive stud finders, however S. prefers to use the outlet approach. Essentially, you use an outlet on the wall to discover the stud. The outlet will be connected to one side of the stud. Tap up and down on either side of the outlet, listening for the higher more solid tone that indicates a two-by-four. Then determine every 16 inches (studs are often at 24 inches) to find the other studs and mark your molding or wall for the nail holes.


No. 4 Blunt completions of Finishing Nails.
Utilize your hammer to lightly tap down the pointed end of the nail. This will assist keep the molding from splitting.

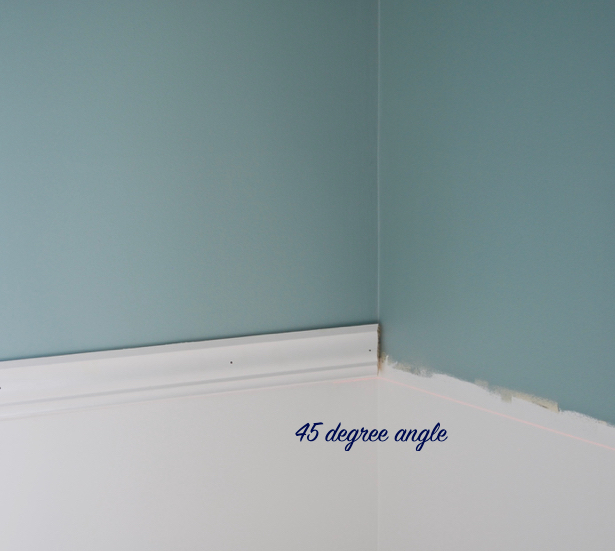
No. 5 Corners are Easier than They Look.
Cut first molding piece on its side at a 45 degree angle then cut its corner mate in the opposite instructions on its side at a 45 degree angle. Ensure angles satisfy up before installing.
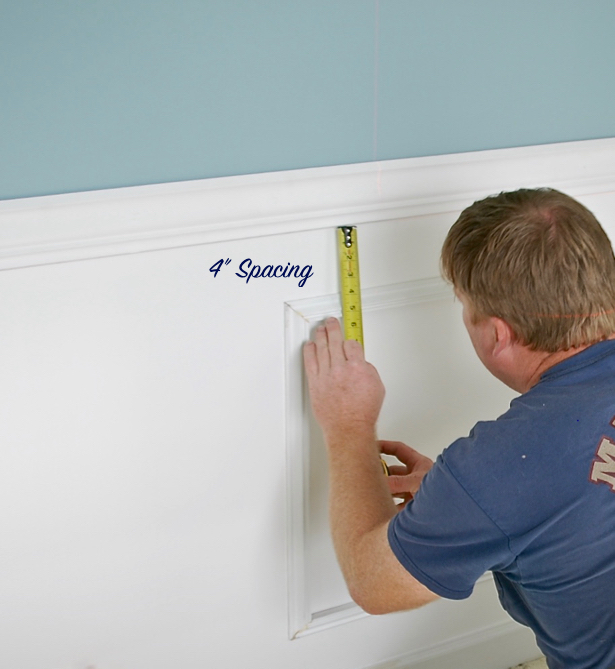
No. 6 Make the Height of and Spacing around Wainscoting the Very same.
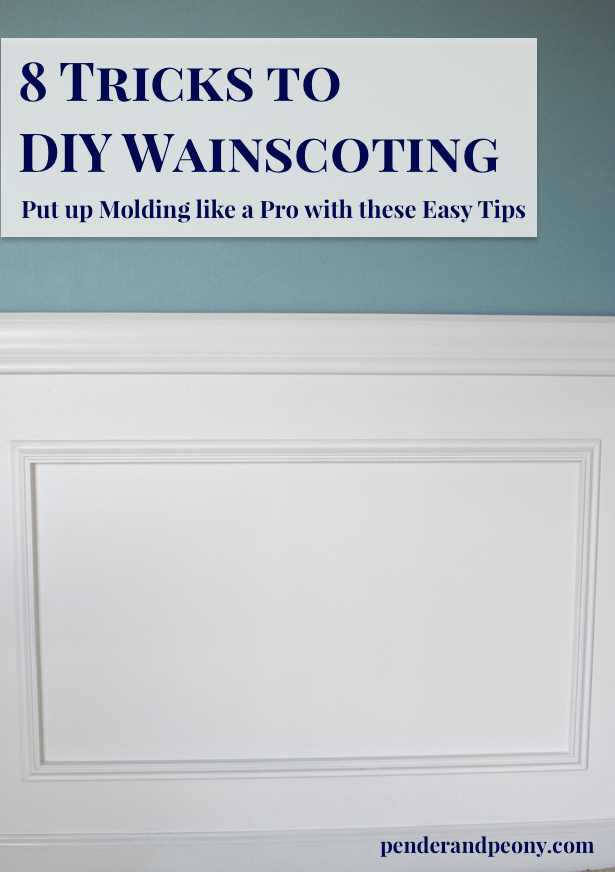
No matter how long or the number of boxes you provide for the photo frame wainscoting, it will look better and consistent if they are all the exact same height and equally spaced from the chair rail, baseboard, and each other. Our wainscoting is spaced 4 inches from these other elements.
No. 7 Make Image Frames.
Because we in fact set up synthetic picture frame wainscoting, not the raised panel version, S. generally simply made frames at the height and length we desired for each box. He stapled the corners together on the back. Then he hung them on the wall with just a couple of, strategically put nails in the studs.


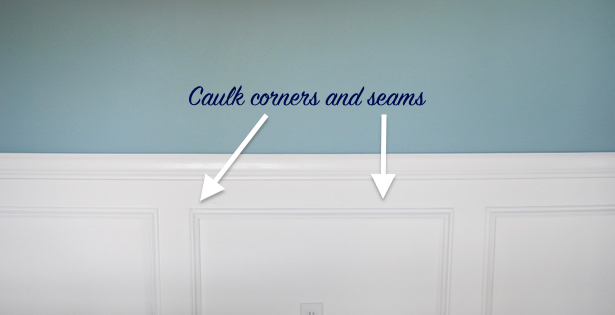
No. 8 Caulk is Your Friend.
Opportunities are your frames and chair rail will not be completely lined up at the corners without any spaces. This will offer that ending up touch to the chair rail and wainscoting.
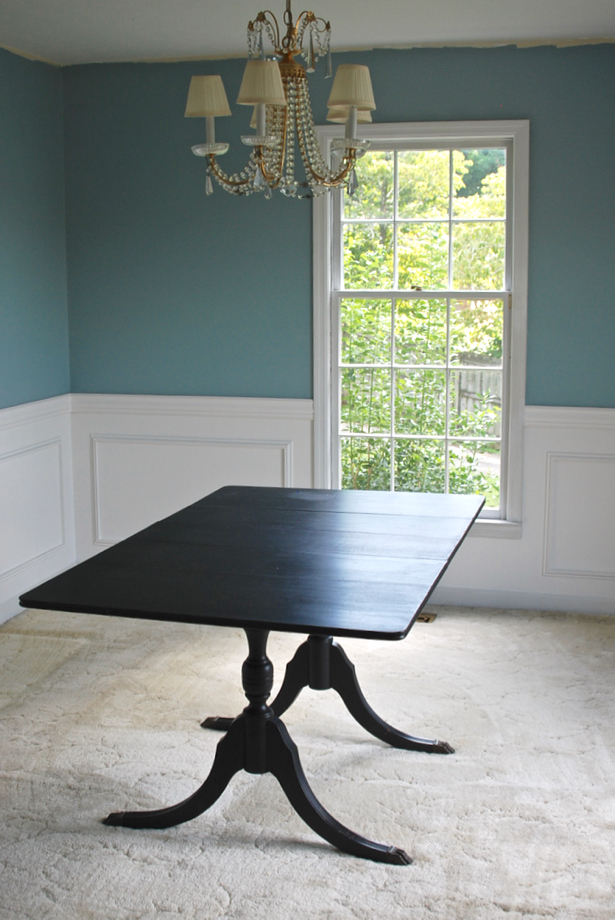
Aren’t you ready to tackle that wainscoting or chair rail project now? As you can see we are still not done with the dining room. crown molding here. !
See the full dining-room remodelling reveal here!
Article source: http://penderandpeony.com/2016/08/8-tricks-to-diy-wainscoting/


