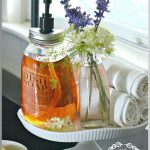
Simple DIY projects to make your kitchen an inviting, rustic dream.
Cute, light-filled farmhouses aren’t just the stuff of your Pinterest fantasies—you can DIY rustic furniture pieces to give your kitchen that warm, classic feeling. In her new book A Touch of Farmhouse Charm, Liz Fourez of the blog Love Grows Wild lays out projects that will totally transform your whole house into the cozy cottage you’ve always wanted. We decided to start with the kitchen—the heart of the home—to help you begin your journey to farmhouse bliss. Read on for some of Liz’s coolest ideas for your kitchen.
Chalkboard Canister Label
Glass canisters on a kitchen counter are perfect for storing things like flour, coffee, nuts, grains, and pasta and make a beautiful display of the ingredients. To add an extra decorative touch, create some of these chalkboard labels using craft wood and twine to label each jar, which you can easily change and adjust with different ingredients.
What You’ll Need
- Drill and drill bit
- Thin craft wood rectangle
- Chalkboard spray paint
- Chalk
- Dry cloth
- Twine
- Scissors
- Kitchen canister
Directions
Step 1: Drill a hole centered in the top of your wood rectangle using a drill bit just big enough to make a hole you will be able to slide the twine through. Apply several light coats of chalkboard spray paint to the wood and allow the paint to dry completely, about 4 hours.
Step 2: To prepare the chalkboard for use, condition the surface by rubbing the side of a piece of chalk over the entire chalkboard. When the surface is thoroughly covered in chalk, erase the board with a dry cloth.
Step 3: Cut a piece of twine with scissors and slide both ends through the hole from the front of the chalkboard. Tie a knot in both ends of the twine, creating a loop to hang the chalkboard label from. Hang the label on the lid of a canister, and write the contents on the chalkboard using chalk.
Tip
Look for thin plywood rectangles in the unfinished wood section of a craft store.
Aged Terra Cotta Pot
If you love vintage style, you’ll agree that brand-new terra cotta pots don’t look nearly as pretty as ones with some age on them. To give new pots an old look, use a textured spray paint to build up some texture on the pot, then antique the paint with dark wax. When you’re finished, you’ll have pots that look like they’ve been sitting in the garden for decades.
What You’ll Need
- Stone-textured spray paint
- Terra cotta pot, any size
- Paintbrush
- Dark paste wax
Directions
Step 1: Shake the can of spray paint for one minute, then lightly spray the pot in short bursts. Don’t worry about completely covering the pot; you want to be able to still see some of the terra cotta underneath. Do one coat for a lightly aged look or multiple coats to build up the texture. Let the pot dry completely overnight.
Step 2: Lightly brush dark paste wax over the pot to blend in the spray paint and give it an aged appearance.
Tips
You can find the stone-textured spray paint at most hardware or home improvement stores next to the regular spray paint.
To give the pots a moss-covered look, lightly brush a little bit of green paint over the textured parts before adding the dark wax.
Cracked Paint Finish
Get the look of a beautifully aged piece of furniture with this technique. To get this cracked paint finish, apply a thin layer of glue before adding your paint, and then sit back and watch the magic happen as it dries.
What You’ll Need
- White school glue
- Wooden stool
- Paintbrushes
- Paint
- Hair dryer
- Sanding block (optional)
Directions
Step 1: Working in small sections, no more than one square foot at a time, apply a thin layer of glue on the stool using a paintbrush. Immediately apply a thick layer of paint over the glue before it starts to dry. Use the highest heat setting on a hair dryer to quickly dry the paint. As the glue begins to dry, you will see the paint crack and separate. Make sure to use a thick enough paint layer to completely cover the wood underneath. Adding a second layer of paint will cover the cracked finish you’ve created.
Step 2: If desired, use a sanding block to lightly remove some of the finish along the corners and edges for an authentic aged look. Make sure the paint finish is completely dry before sanding.
Tip
Don’t worry about applying the glue and paint perfectly. Having some areas with cracks and some without will make the piece look more natural.
Simple, Natural Centerpiece Ideas
The heart of farmhouse style comes from the simple and organic beauty found in nature. When you need a quick centerpiece, look around your home and use what you have available to you. Eggs set in a wooden bowl, wildflowers in a ceramic pitcher, lemons in a basket or fresh garden clippings in a mason jar—these ideas don’t cost a lot of money or require a lot of work. Let your creativity flow and remember that simple is always beautiful! Here are a few ideas to get you started.
Container Ideas
- Wood bowl
- Wire basket
- Mason jar
- Pitcher
- Wine bottle
- Lantern
- Pottery
- Teacup
Filler Ideas
- Eggs
- Fruit or vegetables
- Flowers or greenery
- Pinecones
- Tree-branch clippings
- Pebbles
- Moss
- Seashells
- Candles
Farm-Fresh Eggs in a Bowl
Fill a bowl with farm-fresh eggs, using a mix of white and brown eggs to add interest. A simple white bowl will give the centerpiece a more modern look, while a wood or pottery bowl will give it a more rustic feel. Rotate new farm-fresh eggs in the bowl every few days so they don’t spoil before you are able to cook them.
Fresh-Fruit Basket
Use a wire basket to hold lemons, apples, oranges or bananas. They make a beautiful, colorful display as well as a great snack!
Simple Floral Jars
Gather a collection of old mason jars and fill them halfway with water. Purchase a bouquet of fresh flowers from the store or clip some from your garden. Trim the stems on an angle to fit inside the mason jars, and add two or three flowers to each jar. Using just a few stems in each jar gives the display a casual look and also stretches the bouquet further.
Baby’s Breath Bouquet
Set a bunch of baby’s breath (also called gypsophila) in a white pitcher. Baby’s breath is very inexpensive and looks even more beautiful as it dries out over time.
Make Your Own Centerpiece
Select a container large enough to fit your filler. Fill the container with all one item for a simple, soothing look or layer the container with a variety of items to create a unique, multidimensional display. Remember to change the water frequently for fresh flowers or greenery.
To buy this book, click here.
Projects and images excerpted from A Touch of Farmhouse Charm: Easy DIY Projects to Add a Warm and Rustic Feel to Any Room by Liz Fourez (Page Street Publishing Co., 2016).
Article source: http://diyhomedecorideas.net/wp-content/uploads/images/articles/kitchen_decor/farmhouse-charm-kitchen


