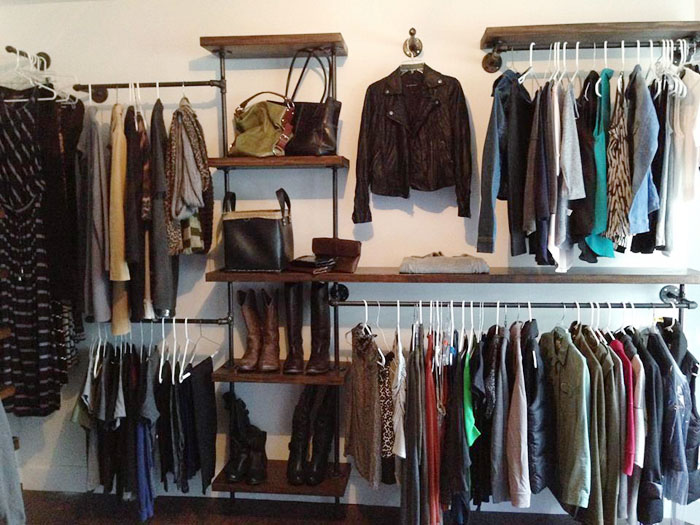
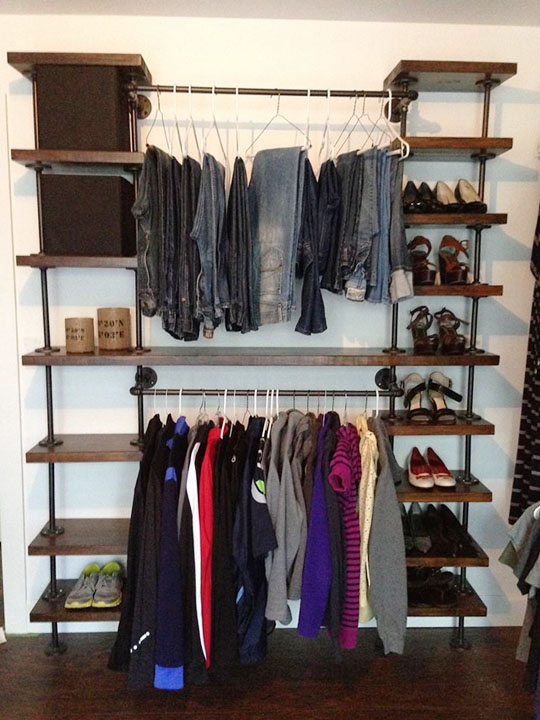
Okay first off? Christina gets an A+ for design. Hers puts my weenie little closet organizer to shame. Second? I’m having major wardrobe envy right now. I’ve been wanting to update my look, and I kind of think Christina should shop for me. Or at least consider sending me that jacket.
We had this smaller office space right next to our master bedroom that we converted. While I drew up a few designs, everything changed as I went. At first I wanted to drill holes through the shelves like many do, but I was concerned about stability and lining up holes. The uneven floors and walls really ended up dictating the design as well. While I wanted to use all pre-cut pipe, I quickly learned that was not at all going to be possible. To give you an idea, in the picture with my husband’s suits and shirts, the two pipes that are vertical from the floor to the hanging bar are different in height by nearly half an inch.
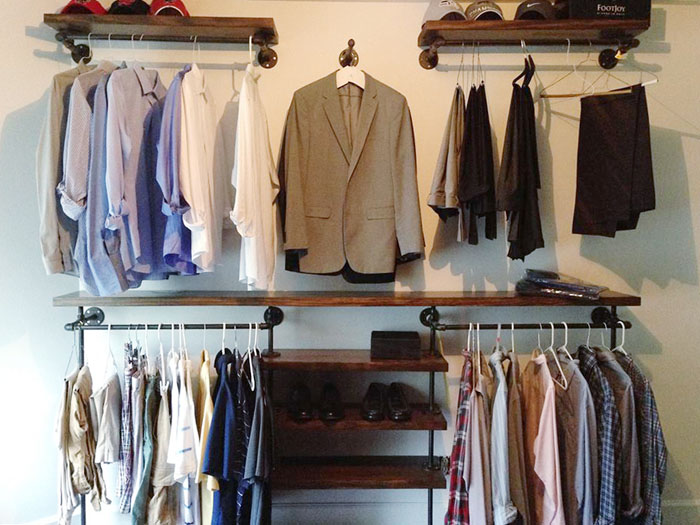
(Katie’s note: Those top shelves aren’t actually crooked — sometimes wide camera angles can distort straight lines.)
The wood is from Lowes and a local lumber yard. They are pine 2 x 12s. I sanded and stained them, then applied a coat of poly.
The pipe is black pipe. I degreased and cleaned them[check out my instructions on how to do this ] before spray painting with an oil rubbed bronze spray paint. Almost all of my fittings and any pre-cut pipe I ordered online because it saved so much money.
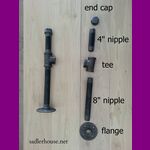
The shelves are screwed into a flange- connected to a nipple- connected to a tee.[Yep, nipple is the correct term. This is why plumbing rocks. Check out my description of all of the major fittings for further explanation.] Initially I just wanted to lay the wood directly on top, but then I realized that left no room for hangers to fit over the bar. Extending the bar out an inch or two didn’t match with the design of the shelf and hanging bar below. I’m sure there was an easier way, I just ran with the idea though.
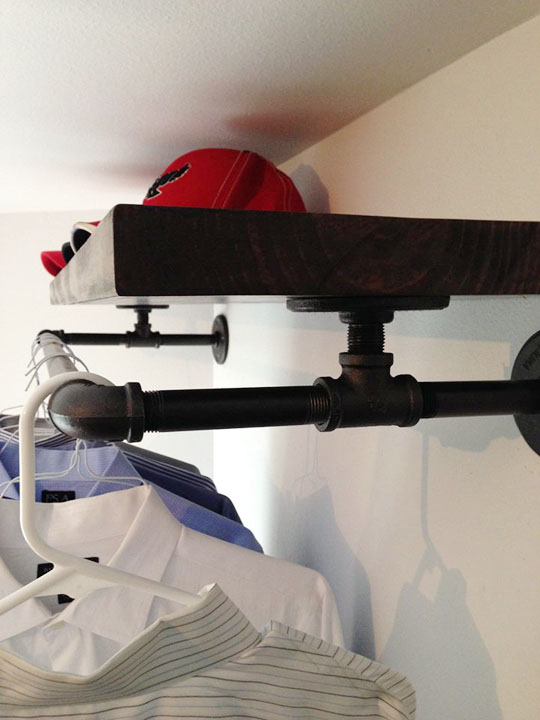
There is an easier (and cheaper) way — the way I did it — but I love how Christina’s looks even better!
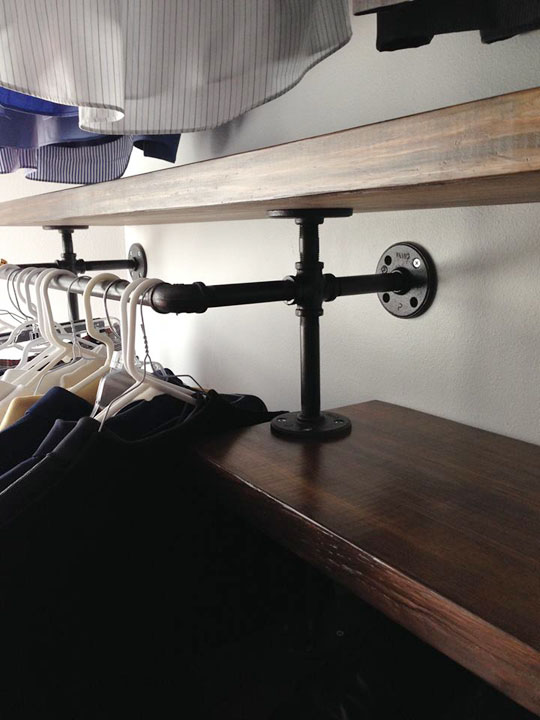
The beautiful thick wood she chose and the color she spray painted her pipes has something to do with it, but the extensive use of flanges (those round things with the screw holes) really gives it a super high-end look.
Because… well… it is super high-end. Flanges ain’t cheap. (Though the ones I bought were significantly less expensive than those from the box stores.)
One thing I would go back and change would be using four flanges instead of two on the shelves. Floor flanges were the most expensive fitting. I wanted to save money by using fewer flanges. It was a challenge to get the two flanges lined up perfectly across from each other AND so that when they were connected to the shelf above, none of the pipes were tilted. I actually remade some because I messed it up so bad in the beginning.
Part of the problem was that the boards varied in width 1/16-1/8. In hindsight, I would have just paid more and installed four flanges — one in each corner. Also, I learned that you definitely get what you pay for when it comes to floor flanges. The expensive, domestic flanges are far superior to the imported flanges. 80% of the imported flanges (from China) were unusable. Most were uneven when laying on a flat surface, which I could work with some. The primary problem was that the interior thread caused the pieces of pipe to tilt slightly. I was fortunate that the company I ordered from would allow me to exchange the flange. It was just that with each new batch, there was a guaranteed amount that wouldn’t work. Since the domestic flanges were so different in appearance and I had already used so many of the imported flanges, I had to stick with the imported ones to keep a consistent look.
Article source: http://www.domestiphobia.net/2014/08/08/now-plumbing-pipe-closet-organizer/
