22 Bathroom Wall Ideas That Fix an Ugly Space Without Retiling
Bathroom tile is expensive to replace and almost impossible to remove without making a bigger mess than you started with. But tile is not the only option for a bathroom wall, and the tile that is already there is often less of the problem than the overall impression the wall creates. There are quite a few ways to change how a bathroom wall looks, what it holds, and what kind of atmosphere it contributes to the room without touching the existing tile at all. Some of these ideas add color, some add texture, some add storage, and some just add the visual personality that a blank or dated bathroom wall is missing. All of them are achievable without a tile saw or a demolition crew.
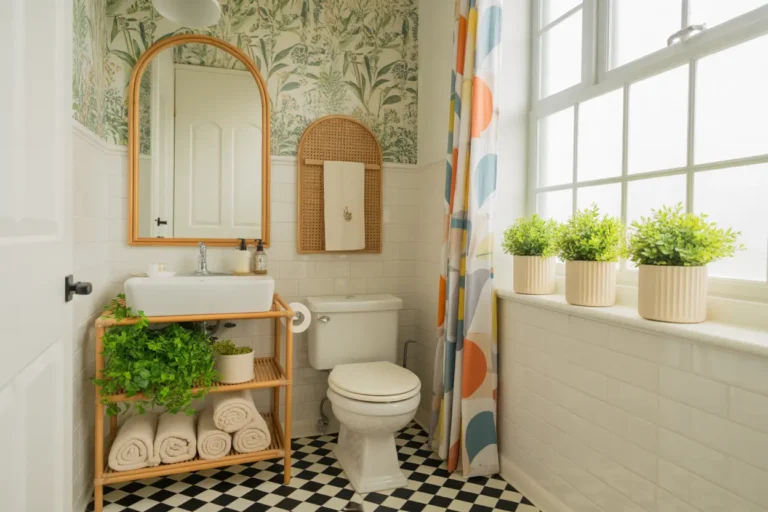
1. Removable Wallpaper Feature
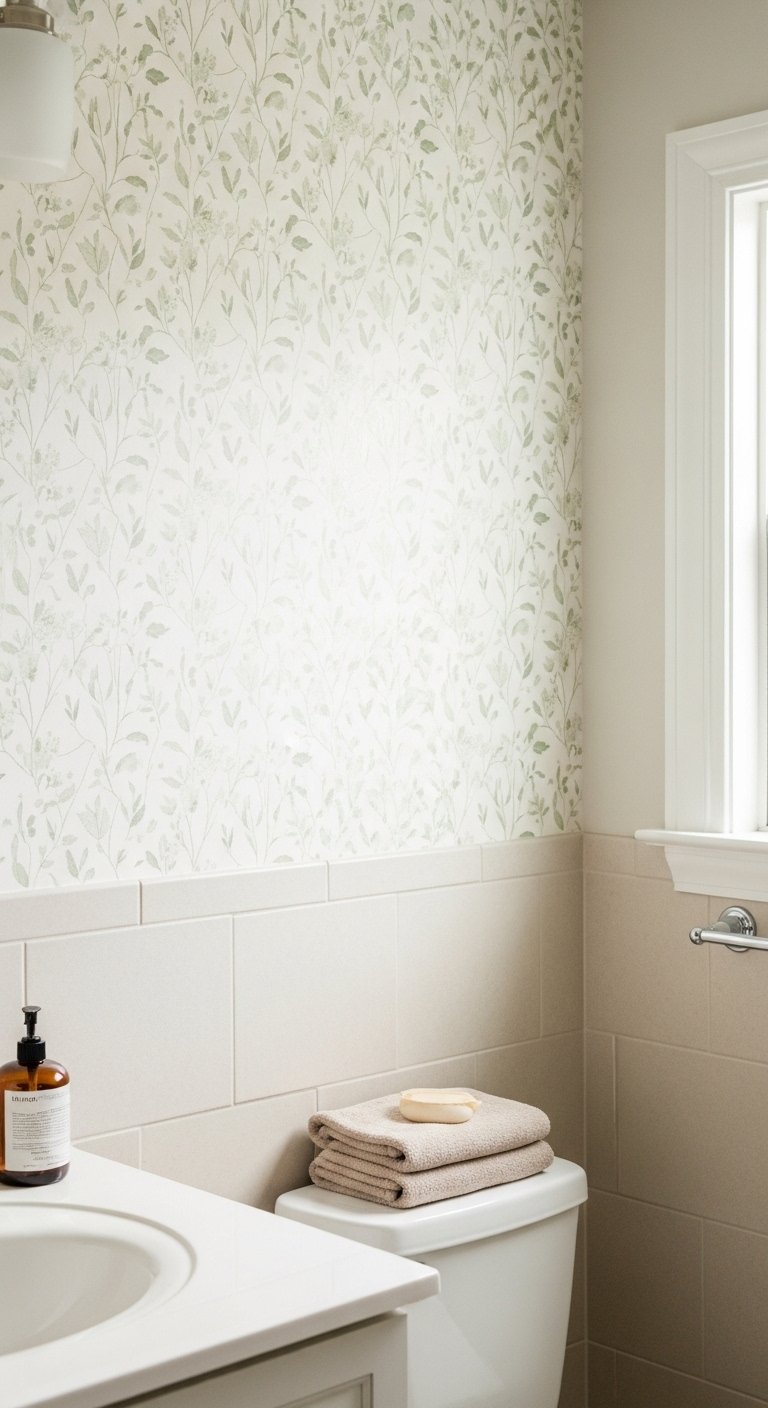
Peel-and-stick wallpaper applied to a bathroom wall above the tile line or on a non-shower wall creates a bold design statement that completely changes the personality of the room. Modern removable wallpaper holds reliably on properly prepared surfaces and peels off cleanly without damaging the surface beneath it, making it suitable for rental bathrooms as well as permanent ones. Choose a pattern that brings what the bathroom is currently lacking: a subtle botanical print for an organic, natural quality, a simple geometric for a more graphic modern look, or a maximalist floral for a confident, personality-driven statement. A single accent wall in a removable pattern costs between thirty and seventy dollars in materials and takes an afternoon to apply. The result reads as a professional wallpaper installation to anyone who does not look too closely at the seams.
2. Beadboard Panel Installation
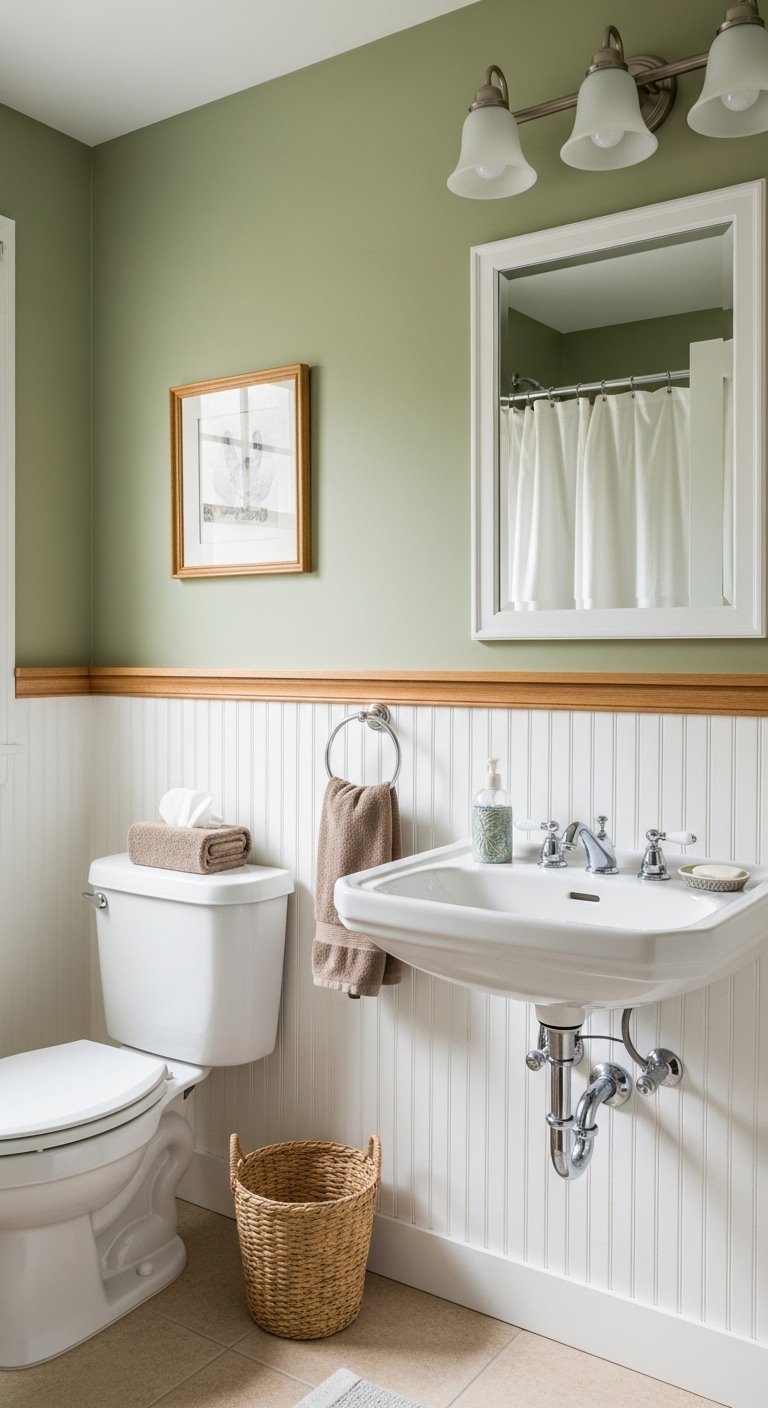
Beadboard wall paneling, the narrow vertical tongue-and-groove boards associated with traditional farmhouse and cottage bathrooms, installs directly over existing drywall or tile using construction adhesive and a few finishing nails. It does not require the removal of existing surfaces in most cases. Paint the beadboard in a soft white, warm cream, or a cottage tone after installation and the bathroom wall gains an entirely new character and texture at a fraction of the cost of retiling. Beadboard is most commonly used on the lower half of the bathroom wall up to dado height, capped with a simple wooden chair rail. Above the beadboard, a contrasting paint color or a complementary wallpaper creates a two-part wall treatment that looks deliberate and finished. Beadboard panels from a home improvement store are inexpensive and cut easily to size with basic tools.
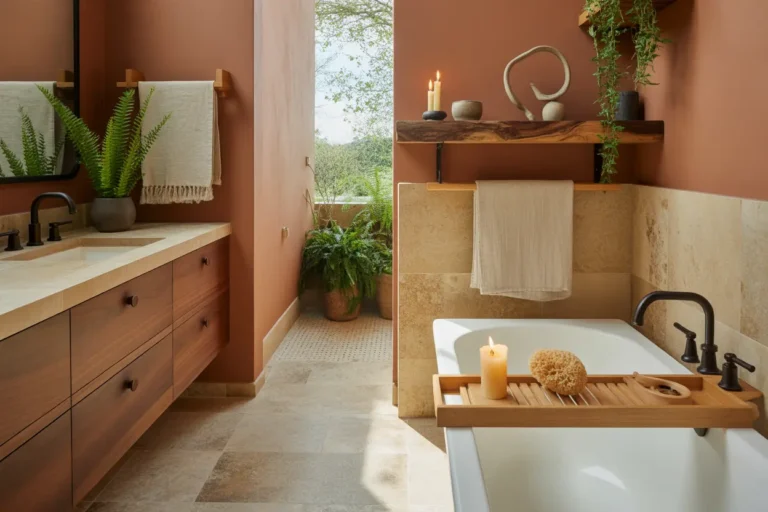
3. Limewash Paint Effect
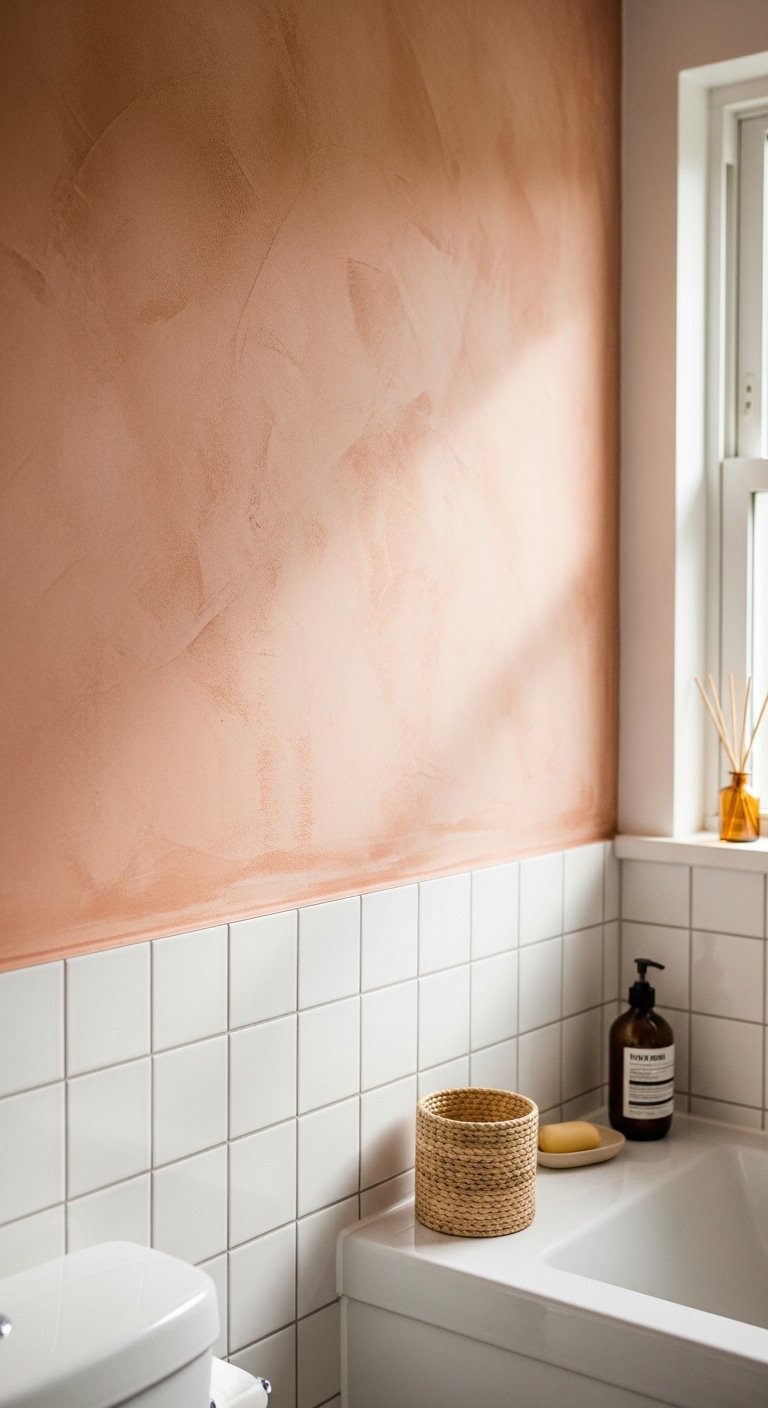
Limewash paint applied to bathroom walls above the tile line creates a textured, aged-looking finish that is unlike anything standard paint can produce. The technique involves applying a diluted mineral paint with a brush in overlapping strokes and then partially wiping it away before it fully dries, creating an organic, uneven surface with natural depth and variation. The result looks like an old Italian plaster wall and suits bathroom styles from rustic farmhouse to modern organic to maximalist Mediterranean. Limewash paint is moisture resistant when sealed and is an appropriate choice for bathroom walls above the tile line. Available in a range of earthy tones from warm white to terracotta to dusty sage, it is applied over clean, primed walls and creates a finish that no amount of standard painting can replicate.
4. Gallery Wall in Bathroom
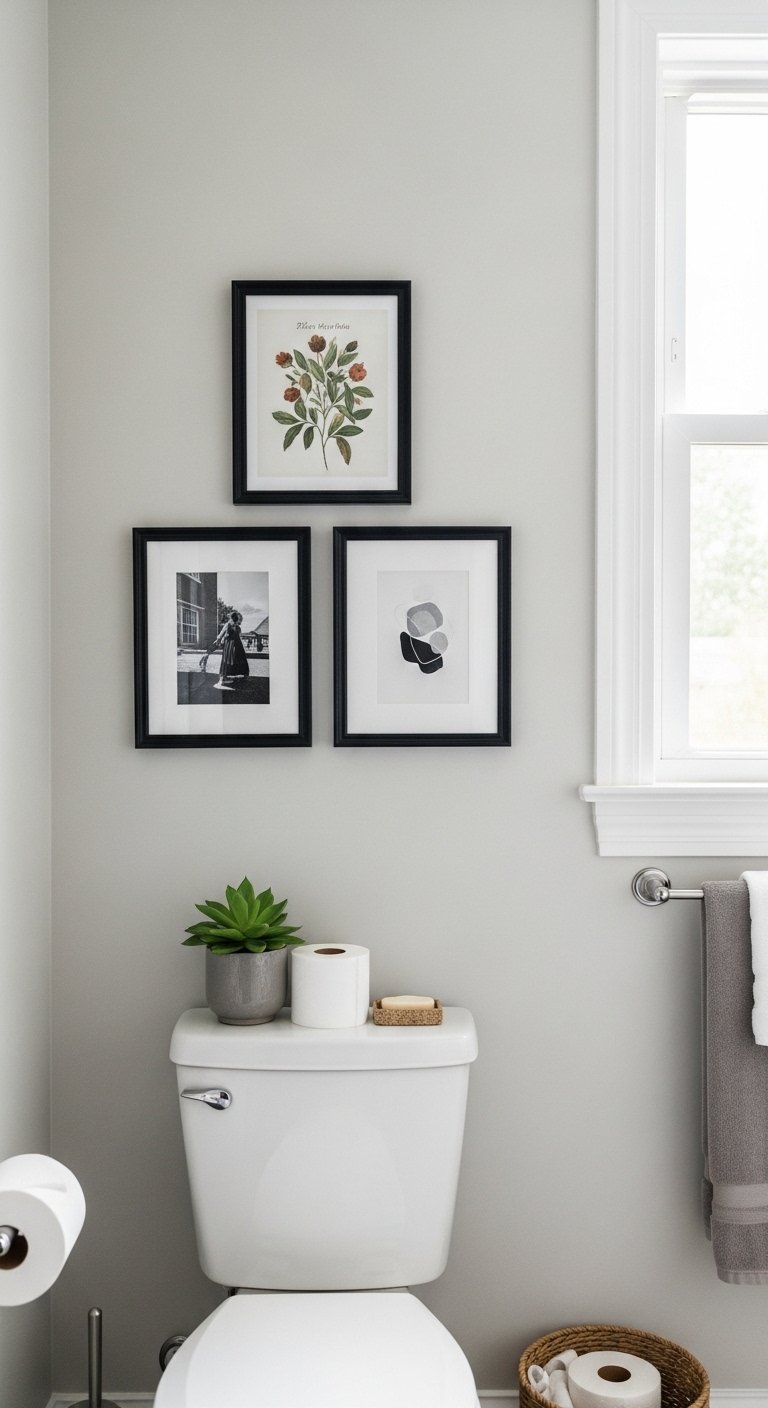
Hanging a collection of framed prints, photographs, or art pieces on a bathroom wall treats the room with the same design intention as any other room in the house and immediately makes it feel more personal and curated. Most people leave bathroom walls completely bare aside from the mirror, which makes the room feel like a utility space rather than a designed one. A small gallery wall beside the toilet, above the toilet, or on the wall opposite the shower adds visual interest to an area that people spend time facing and gives the bathroom a character that goes beyond its function. Choose frames in a rust-resistant finish or solid wood since bathroom humidity affects certain materials over time. Use adhesive picture-hanging strips rated for the weight of your frames for installation that leaves no permanent wall damage.
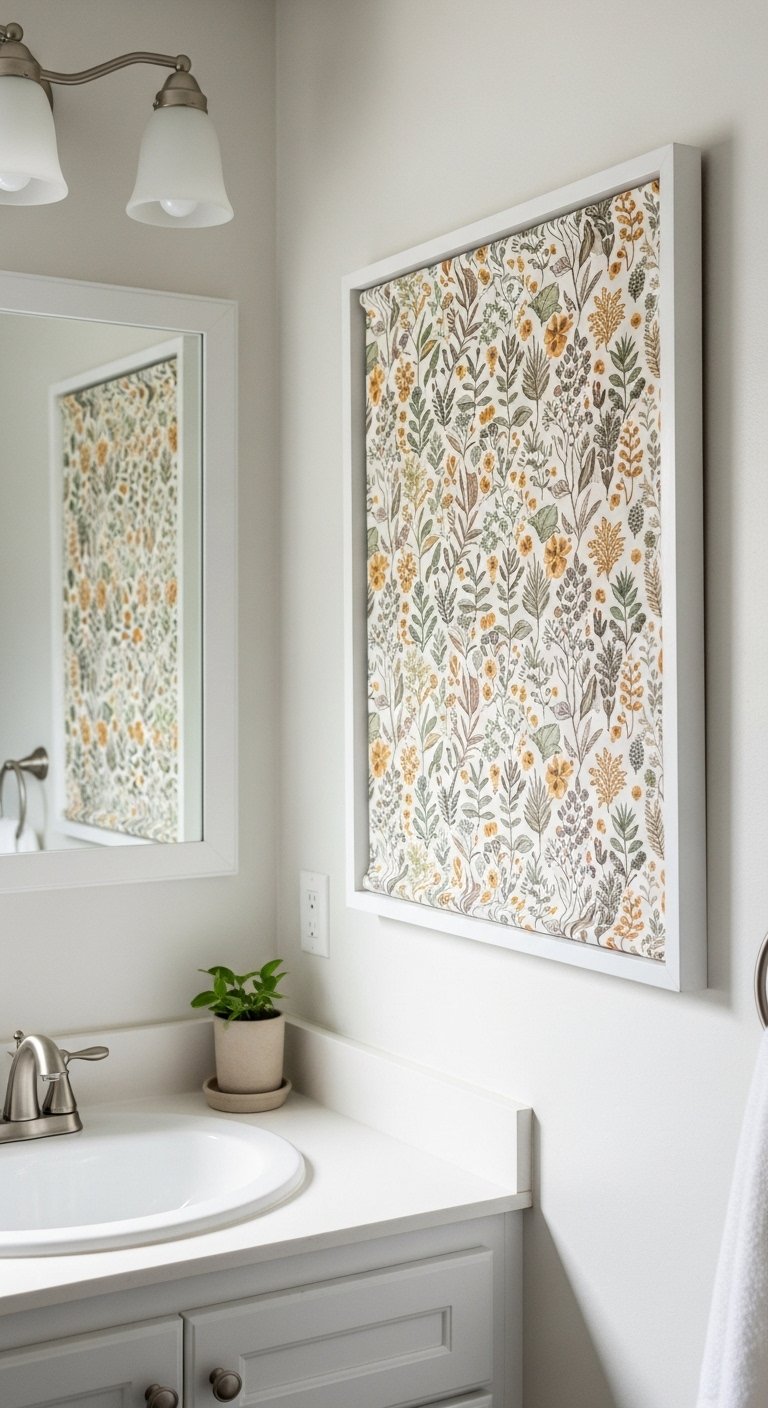
5. Large Artwork Statement
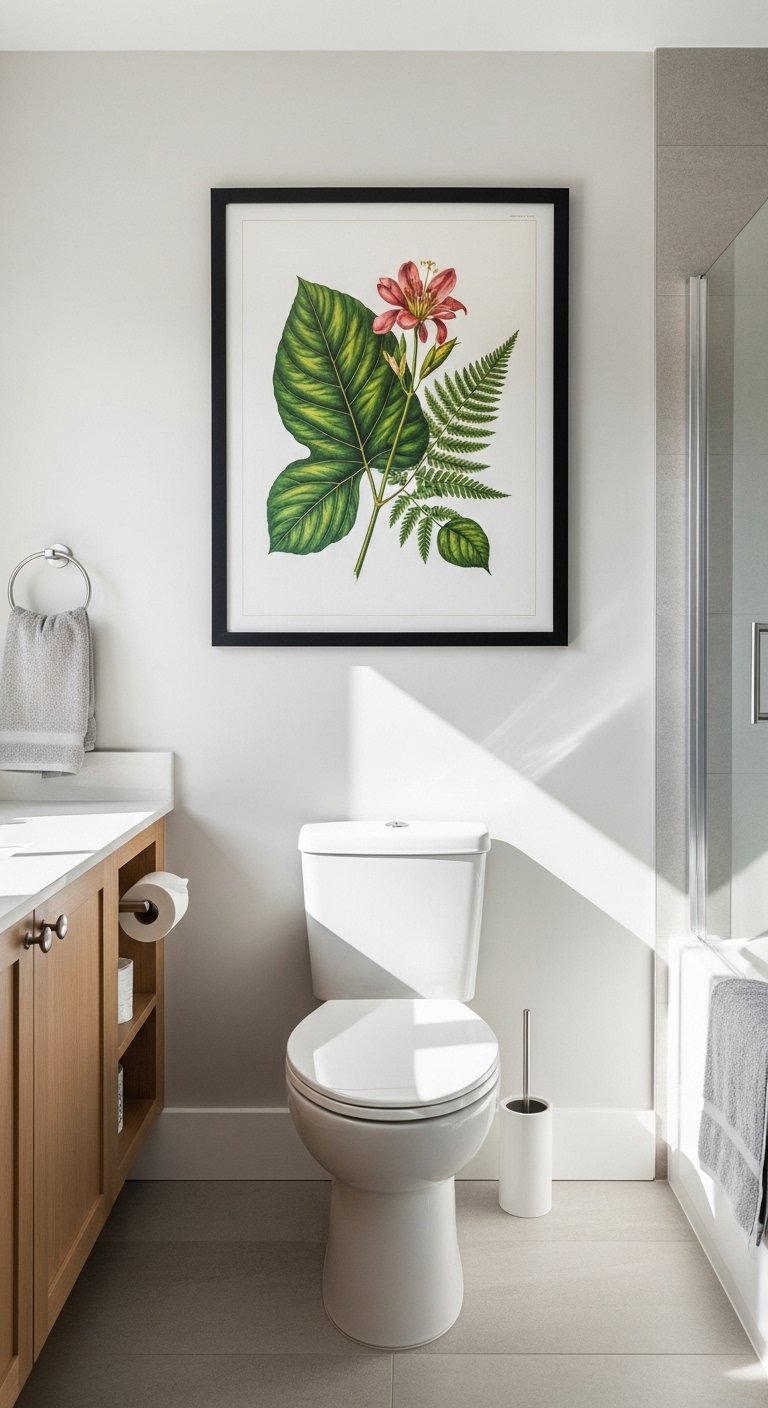
A single piece of large artwork on a bathroom wall makes a stronger and more confident statement than a collection of smaller pieces and requires far less planning to execute well. One large print in a simple frame, at least sixteen by twenty inches or larger for a standard bathroom wall, creates a focal point that anchors the room and signals that the bathroom was designed with intention. Botanical illustrations, abstract prints, black and white photography, or any art in a style you would display elsewhere in the house all work in a bathroom context. The key is scale. A print that is the right size for the wall reads as a deliberate choice. A print that is too small looks like it was placed there by accident. Frame it in a finish that coordinates with the room’s hardware and hang it at eye level on the most prominent wall available.
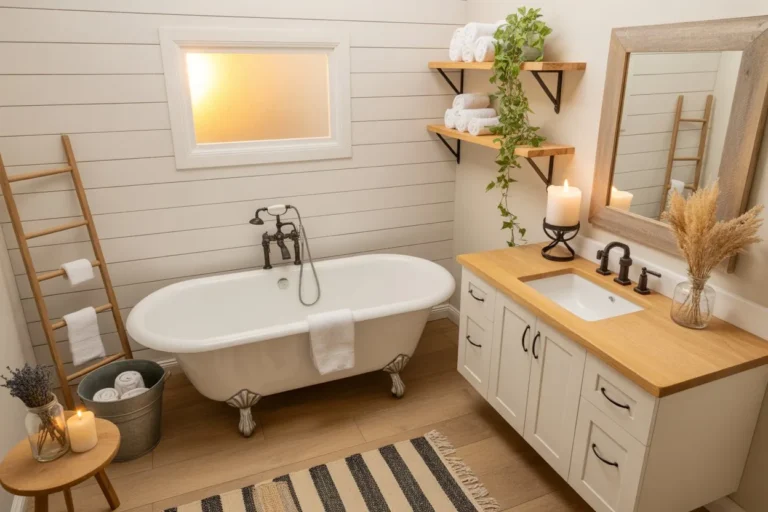
6. Shiplap Accent Wall
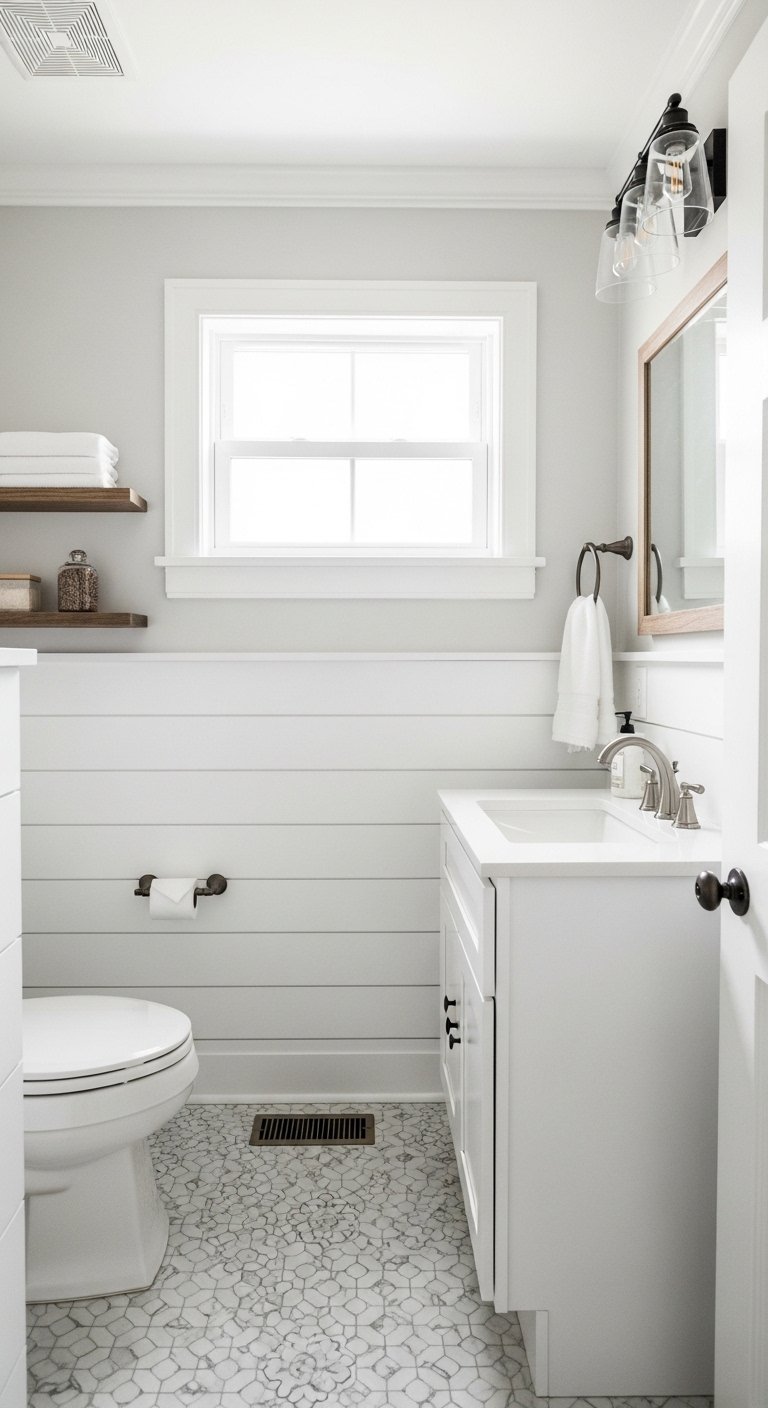
A shiplap accent wall in the bathroom, whether on the wall behind the toilet, the wall beside the vanity, or the wall opposite the door, adds horizontal lines, texture, and a farmhouse-to-coastal quality that transforms a plain painted wall into an architectural feature. Shiplap planks are available in standard lengths at most home improvement stores and install over existing drywall using nails and a level. Paint them in the same color as the existing walls for a subtle textural effect or in a contrasting tone for a more dramatic accent. Water-resistant paint applied after installation protects the wood from the humidity of the bathroom. Even a single shiplap wall in a bathroom shifts the room from plain and functional to warm and designed without any tile work or structural changes to the room.
7. Tile Paint Application
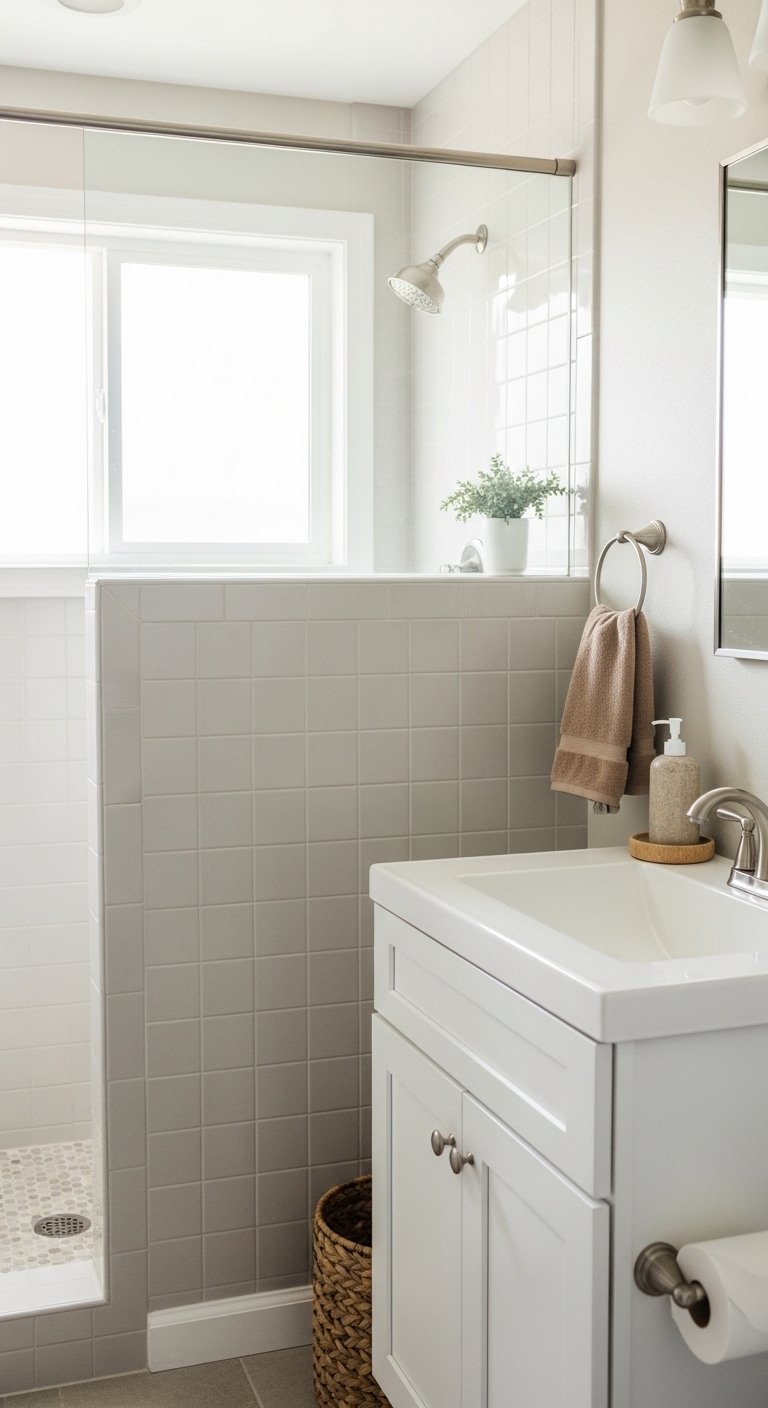
Tile paint specifically formulated for ceramic and porcelain surfaces allows you to change the color of existing tile without removing it. A bathroom with beige, pink, or brown tile from a previous decade can be painted in a fresh white, a warm gray, or a soft sage and look genuinely current rather than dated. The process requires thorough cleaning of the existing tile, light sanding for adhesion, a bonding primer, and two coats of the tile-specific paint, followed by a sealing topcoat. The result holds up well in non-submerged areas, meaning the walls and the floor outside the shower are good candidates while the inside of the shower is less suitable due to direct water contact. Painting the wall tile outside the shower enclosure changes most of what is visible in the bathroom for a fraction of the cost of new tile.
8. Mirror Gallery Arrangement
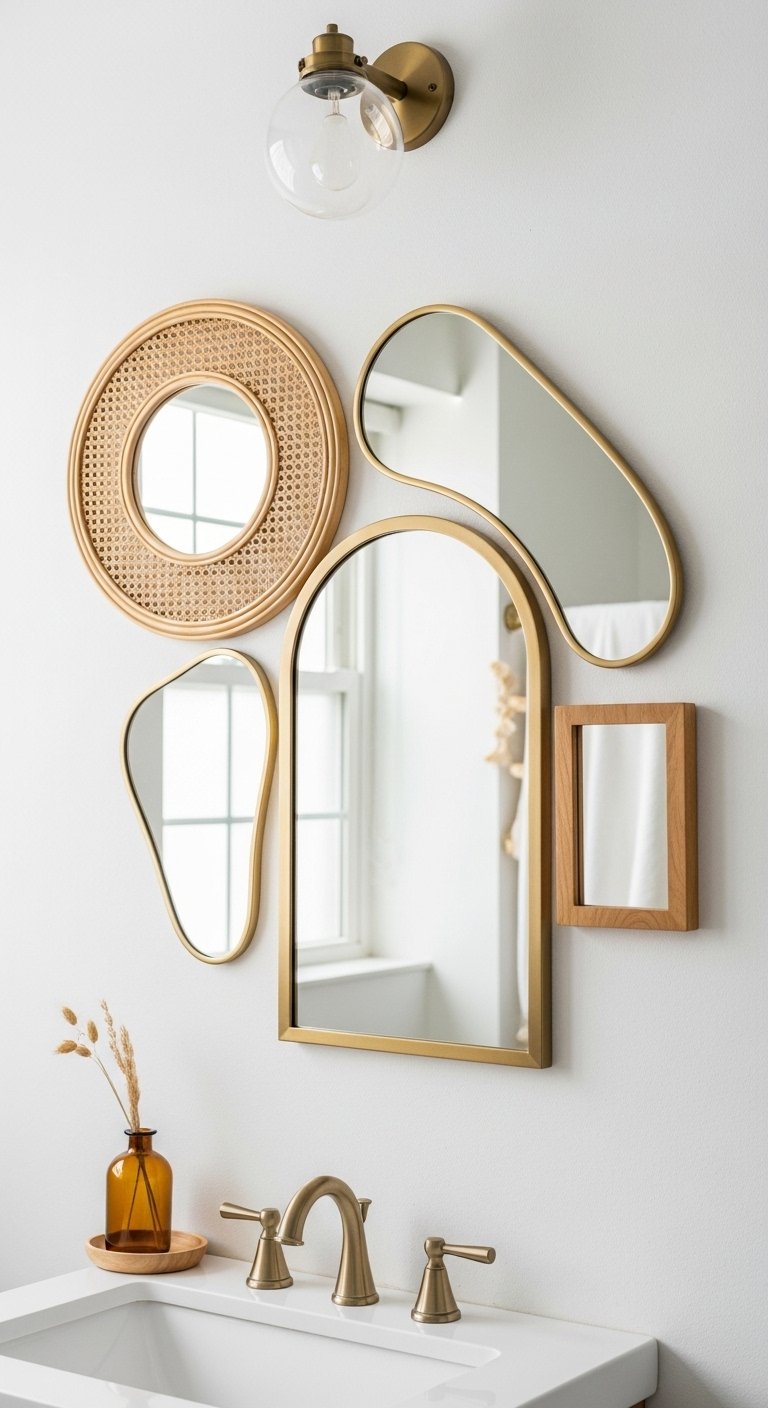
A collection of mirrors in different shapes and sizes hung on a bathroom wall creates a reflective, light-multiplying feature wall that makes the room feel significantly brighter and more spacious while also looking highly designed. Mix a round mirror, an arch-shaped mirror, and a small rectangular mirror in coordinating frame finishes, natural rattan, warm wood, and brushed gold all work well together, and arrange them in an organic grouping that fills the wall without a rigid grid. The overlapping reflections from multiple mirrors at different heights create a layered, dimensional effect that a single large mirror cannot achieve. This works well on the wall beside the vanity, on the wall opposite the window where the mirrors can reflect natural light across the room, or on any blank wall that currently contributes nothing to the bathroom’s visual character.
9. Wainscoting Addition
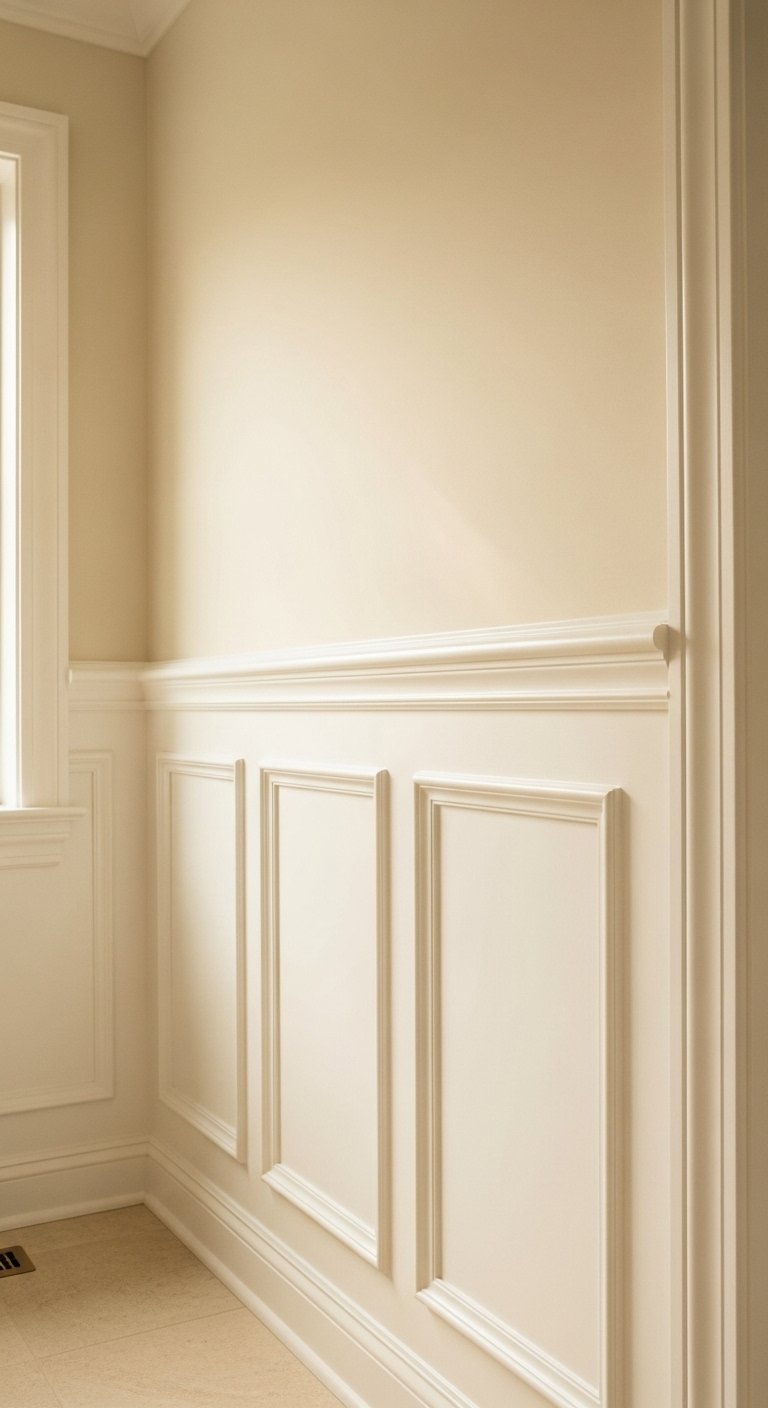
Wainscoting, the application of paneling to the lower portion of the bathroom wall, adds architectural detail and a sense of traditional craftsmanship to a plain bathroom without requiring any tile work. Classic raised-panel wainscoting gives a bathroom a more formal, finished quality. Simple flat-panel or board-and-batten wainscoting creates a cleaner, more modern version of the same idea. Both can be installed over existing painted drywall using adhesive and finishing nails and painted with a water-resistant paint in whatever tone suits the room. The transition between the wainscoting and the upper wall is typically marked by a chair rail, which adds another horizontal line of architectural interest. This type of wall treatment is common in both traditional and contemporary bathroom design and makes a significant difference to how considered and complete the room feels.
10. Colored Grout Refresh
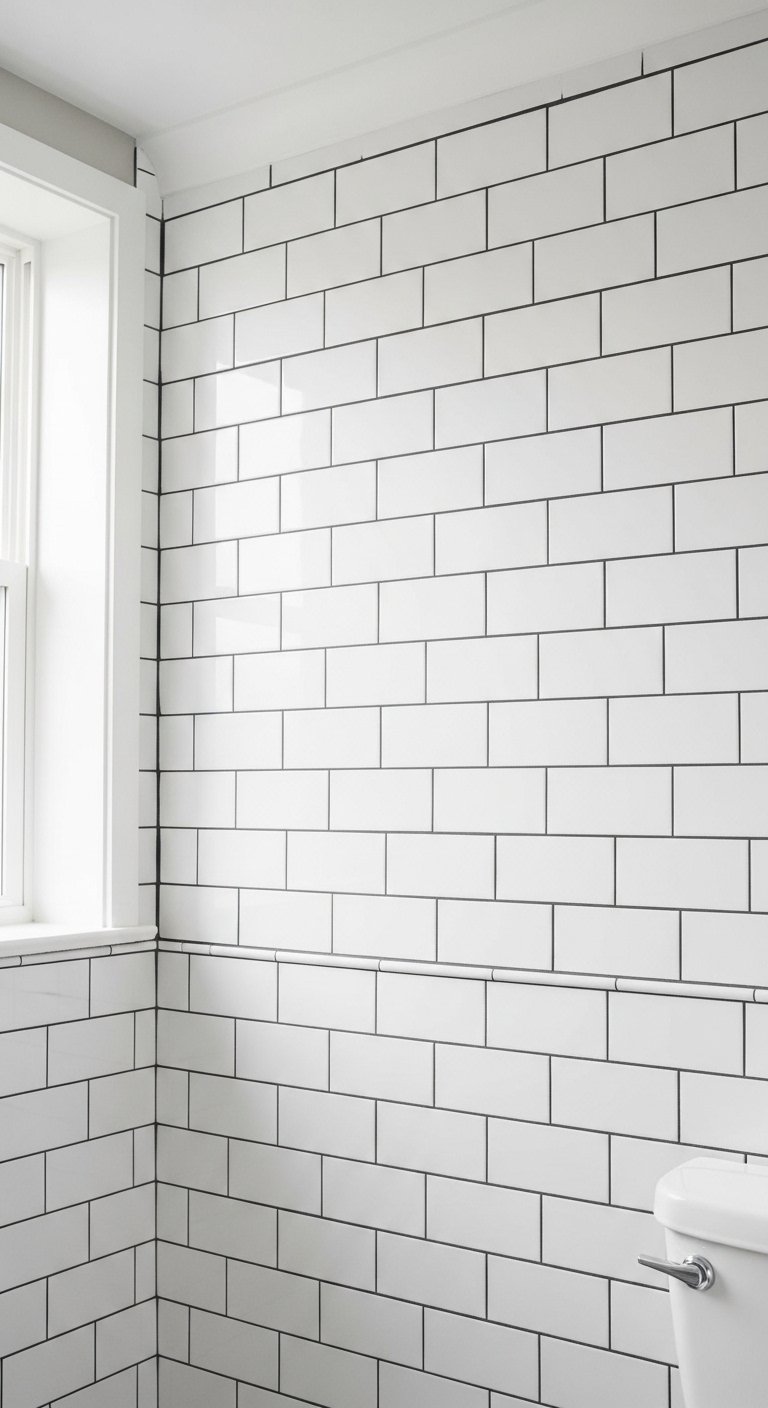
If the existing tile in the bathroom is in reasonable condition but the grout has darkened, stained, or simply looks tired, recoloring the grout rather than replacing the tile is an option that most people overlook. Grout colorant and grout paint are available at home improvement stores and can be applied over existing grout with a small brush to restore it to a bright white, change it to a different color entirely, or apply a dark grout tone for a dramatic contrasting look that makes the tile pattern much more prominent. Changing grout from a dated beige to a crisp white, or from a worn gray to a deliberate charcoal, changes the entire character of the tile wall for under thirty dollars in materials. Clean the grout thoroughly before application and seal it after for the most durable result.
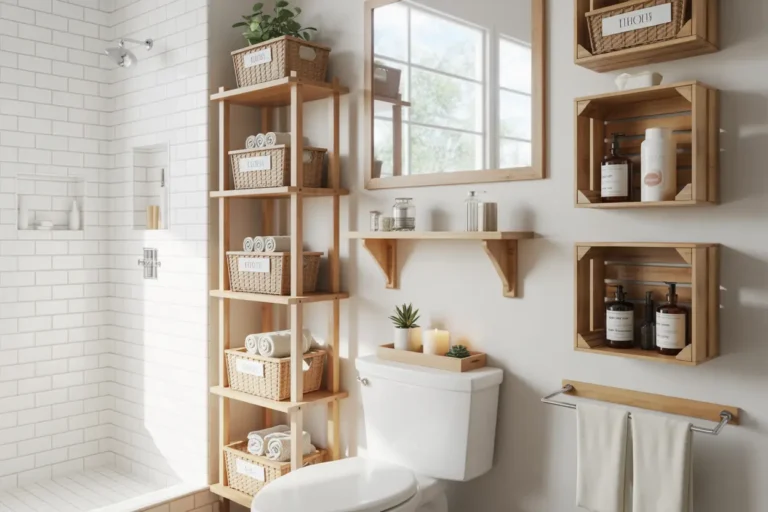
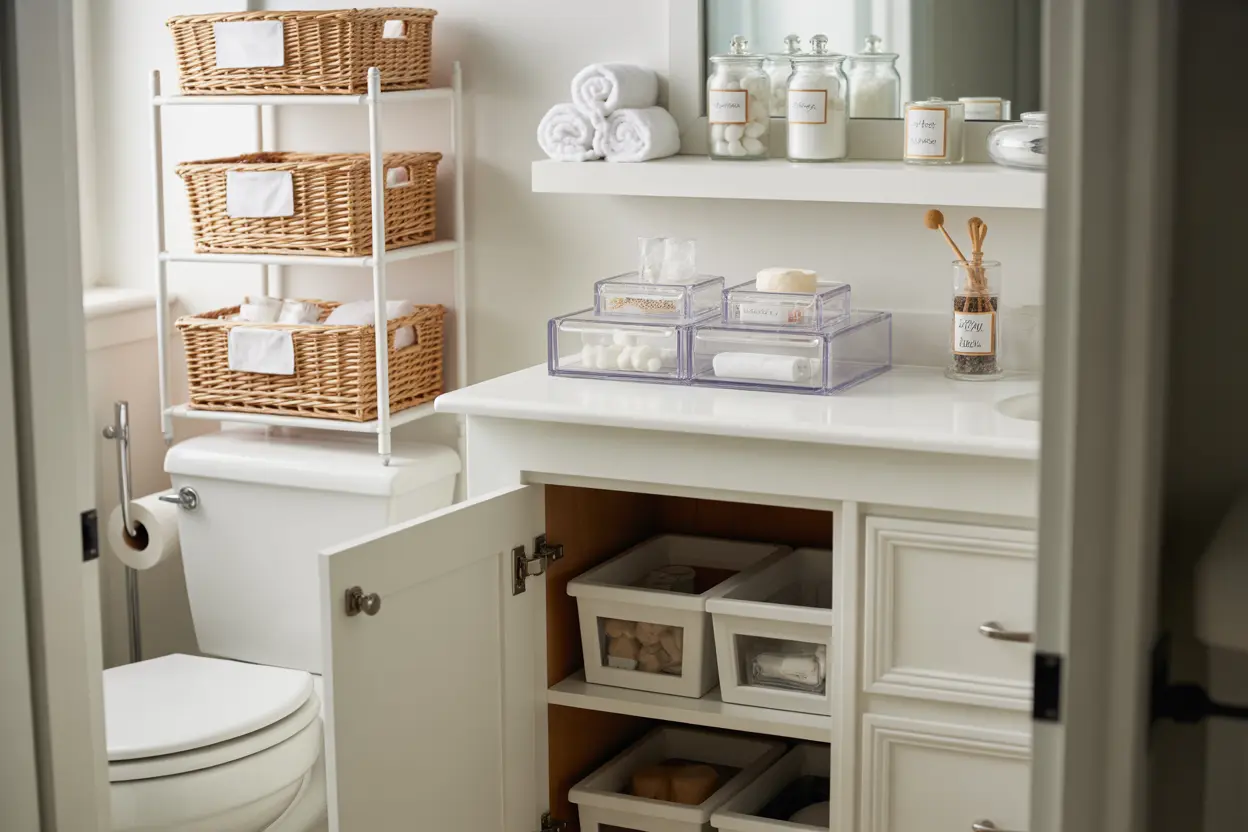
11. Floating Shelf Display
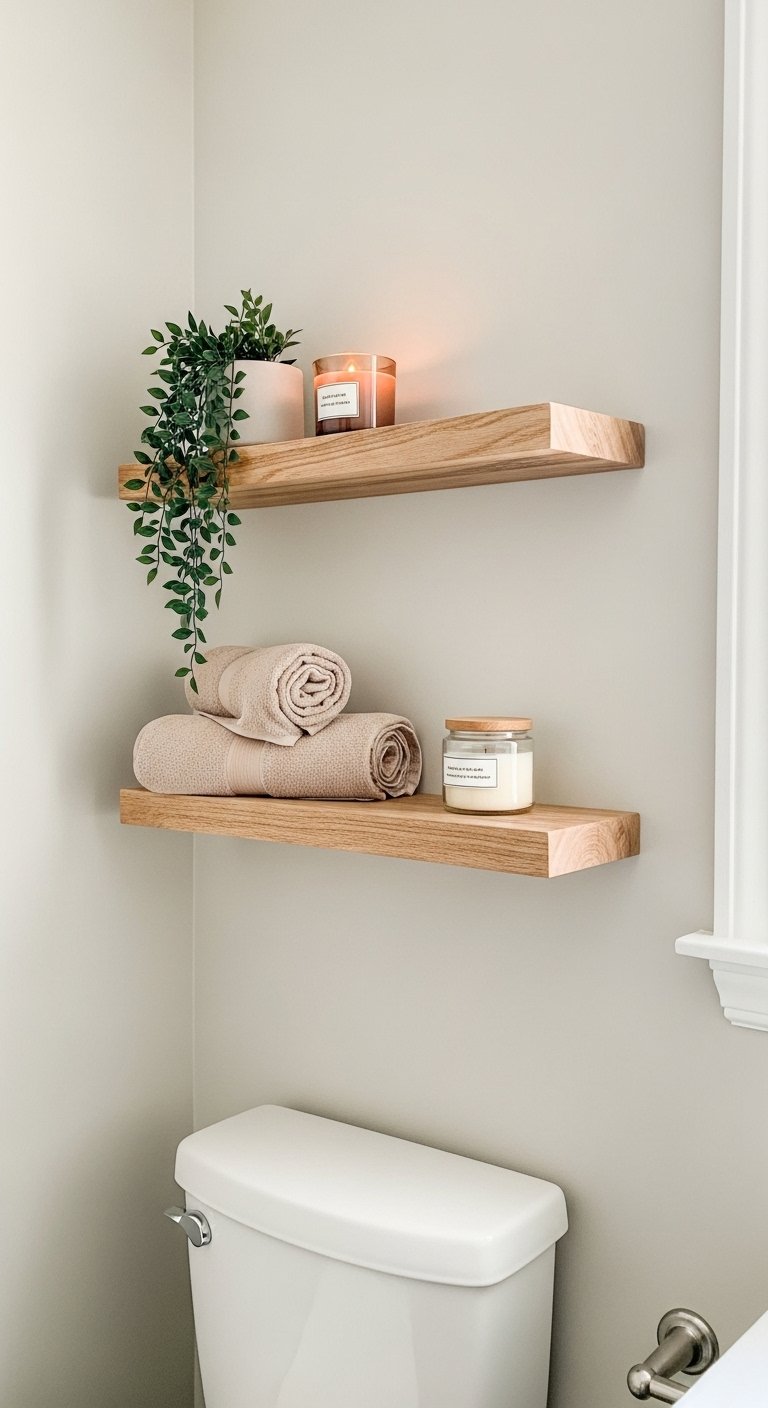
A single or a pair of floating shelves installed on a bathroom wall, styled with a mix of functional and decorative items, turns a blank wall into a display surface that gives the room personality and character. A shelf beside the toilet becomes a practical home for toilet paper, a small plant, and a candle. A shelf above the vanity becomes a display for matching dispensers, a plant, and a framed quote or small print. A shelf in the shower area holds shower products, a eucalyptus bundle, and a small succulent in a waterproof pot. Each of these applications takes a plain wall and gives it a purpose beyond simply filling space between the floor and the ceiling. The combination of practical items and a few chosen decorative objects is what distinguishes a styled shelf from simply a shelf with things on it.
12. Stone Veneer Panels
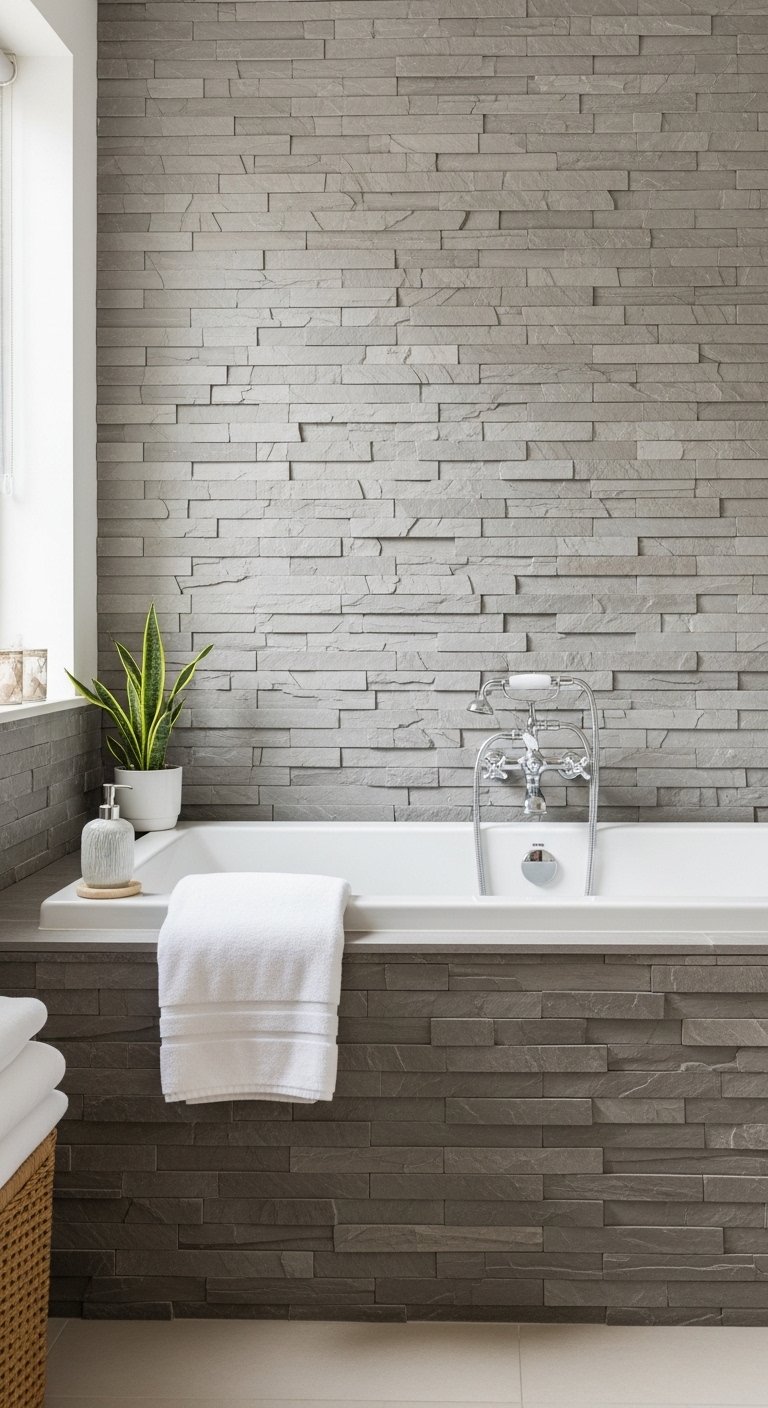
Thin stone veneer panels, available in formats that mimic natural slate, stacked stone, and fieldstone at a fraction of the weight and cost of actual stone, can be applied directly over existing bathroom walls outside the shower using construction adhesive. The result is a textured, natural-looking stone accent wall that reads as a significant renovation even though the installation is achievable in a day without professional help. Stone veneer panels suit bathrooms with a natural, organic, or spa-inspired aesthetic particularly well, especially when paired with warm wooden accessories, linen textiles, and warm lighting. Use them on the wall behind the freestanding tub, on the wall behind the toilet, or on the wall facing the entrance to the bathroom for the maximum impact on the first impression of the room.
13. Painted Stripes Technique
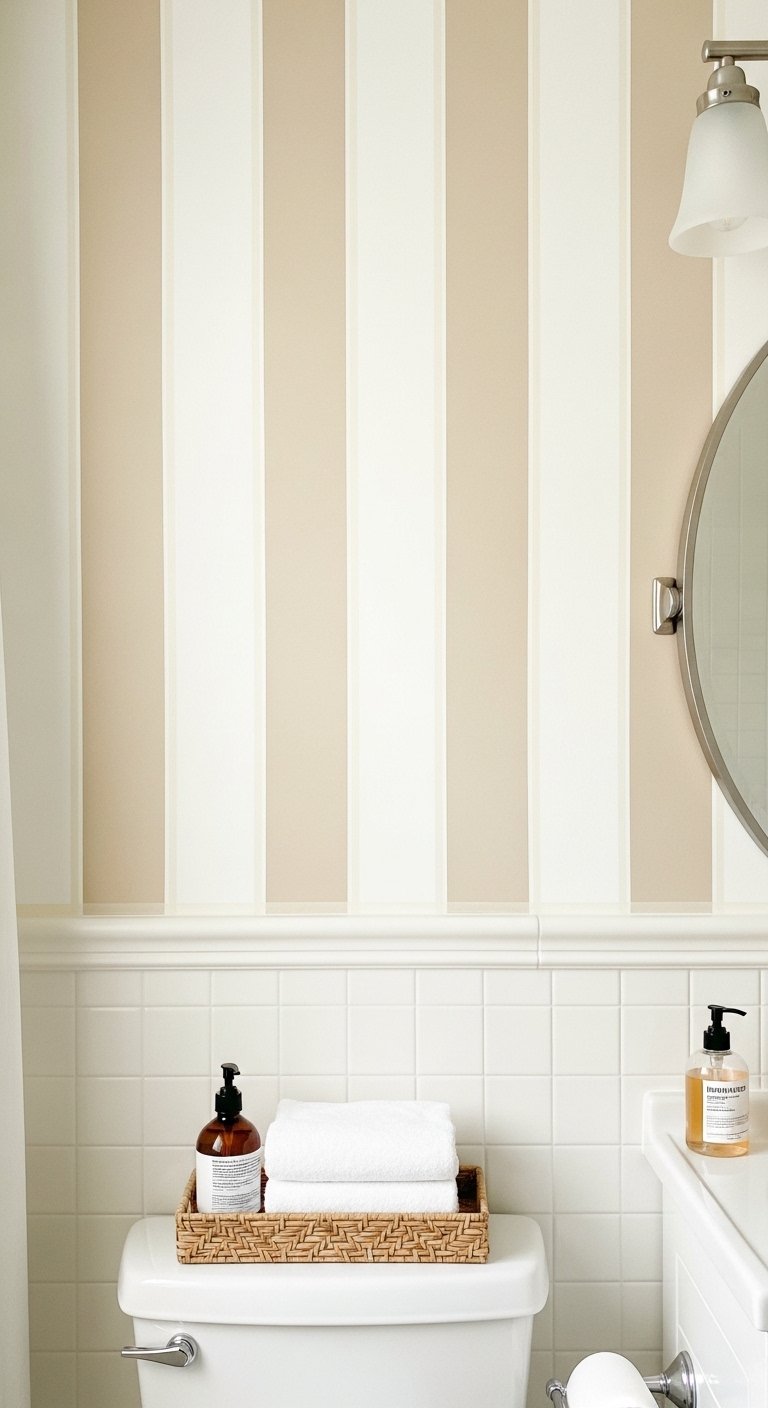
Painted stripes on a bathroom wall above the tile line or on an entirely painted wall create a decorative element that is affordable, bold, and achievable in a single afternoon with painter’s tape and a small roller. Vertical stripes make the room feel taller. Horizontal stripes make it feel wider. A single thick stripe at dado height creates a two-tone wall treatment with a graphic quality. A series of narrow stripes in two tonal values creates a subtle textured effect that reads more like wallpaper than paint when viewed from a normal distance. The key to convincing painted stripes is patience with the painter’s tape application and enough dry time between the base coat and the stripe color to avoid bleeding. Use the same sheen on both colors for a tonal effect or different sheens in the same color for an even subtler stripe.
14. Textured Paint Technique
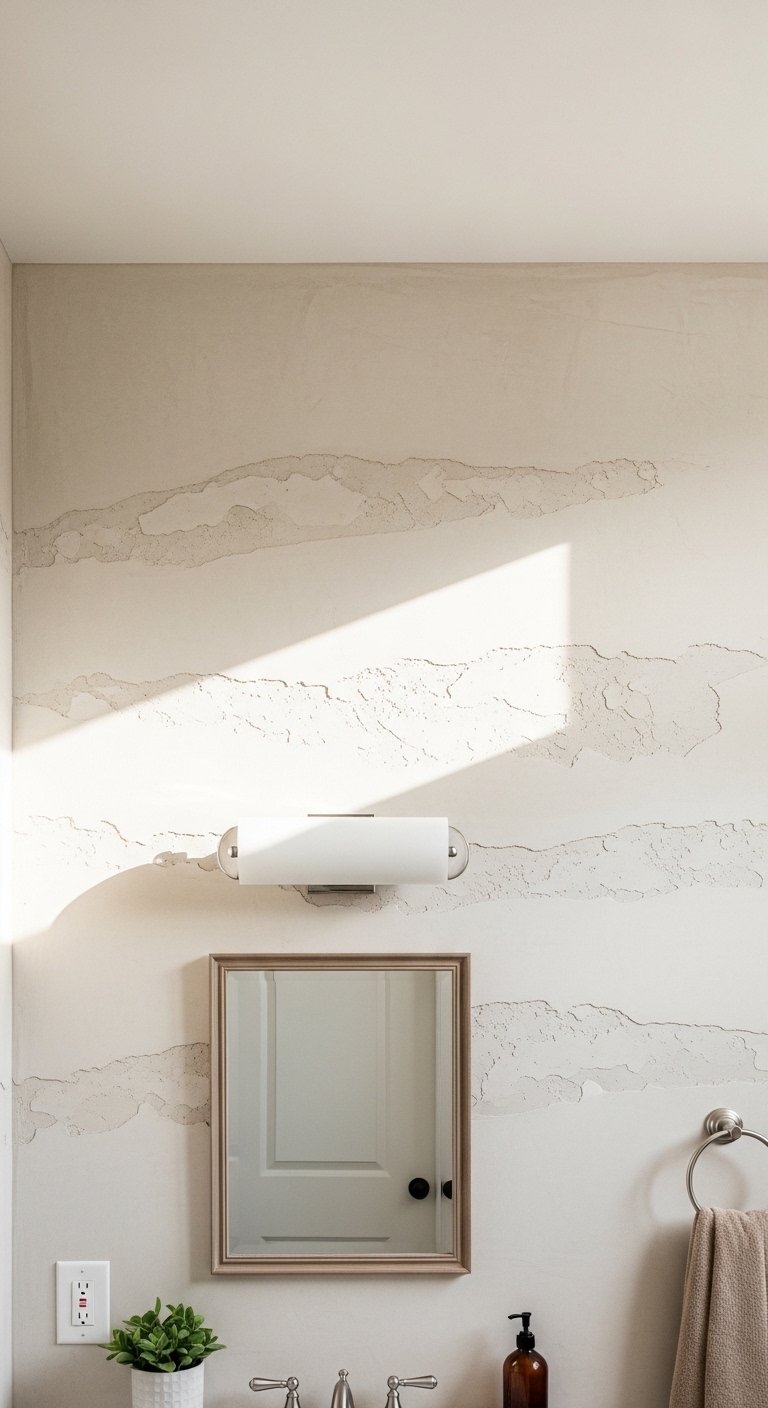
Textured paint finishes applied to bathroom walls above the tile line add a visual depth and tactile quality that standard flat or eggshell paint cannot provide. Venetian plaster effect, created by applying several thin coats of a specially formulated finish with a trowel in overlapping strokes, creates an aged, marble-like surface with natural depth and movement. Sandstone or suede effect paints give a matte, granular surface that catches light differently across the day. Both techniques are available in kit form that includes the materials and instructions for a DIY application. The finished surface looks like a specialty treatment that required professional skill even when it was applied by a first-time user following the kit instructions carefully. These effects work especially well in small bathrooms where the textured wall becomes the primary visual interest in the room.
15. Mirror Tile Strips
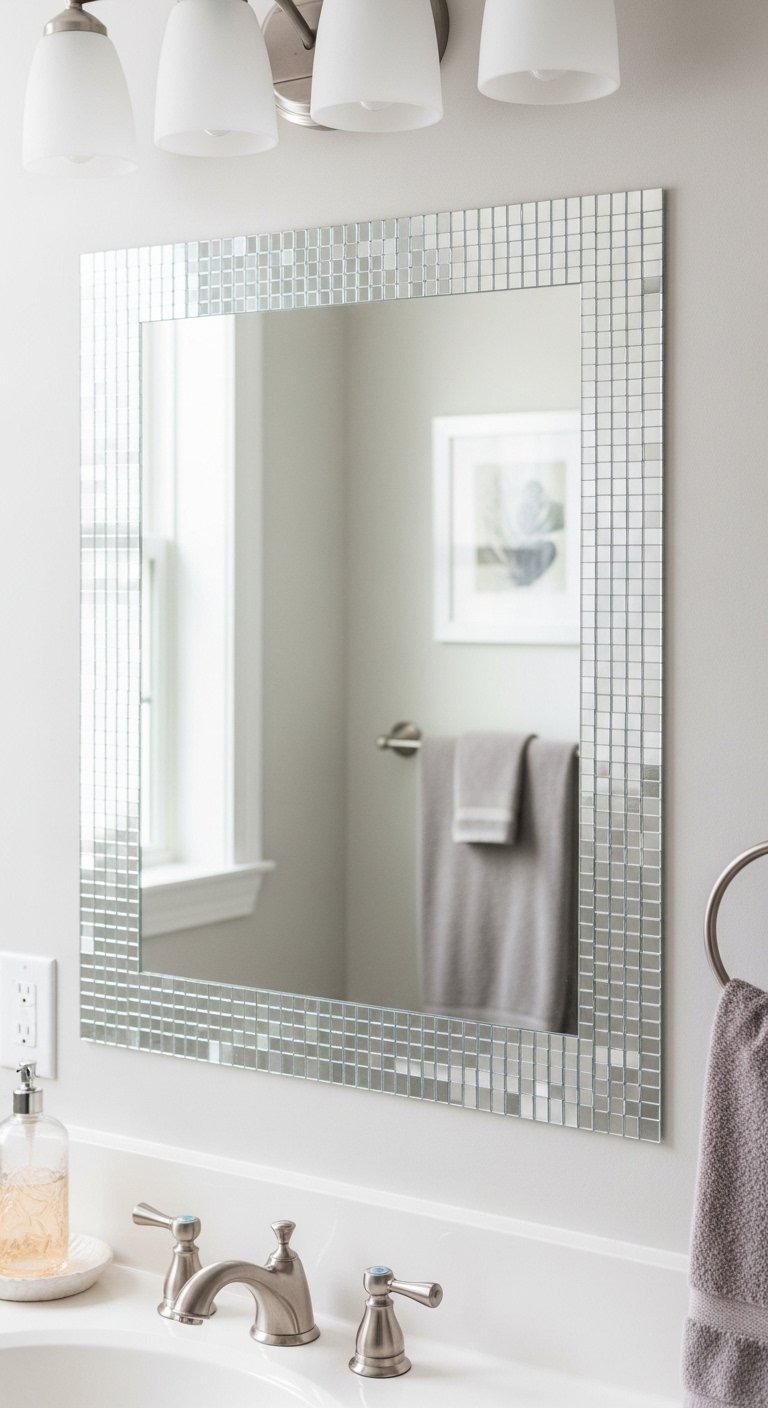
Adhesive mirror tile strips or mosaic mirror tiles applied in a vertical column beside the vanity mirror, as a border around a plain mirror, or in a horizontal band across a section of wall create reflective light and a sense of expansion in a bathroom without the commitment or cost of a full mirror wall. The strips add sparkle and the light-doubling quality of mirror to a targeted area of the wall. This works especially well on the wall beside the main mirror where the additional reflective surface extends the mirror’s light-multiplying effect across a wider area of the room. Self-adhesive mirror tile strips are available from home improvement and specialty tile retailers, apply easily to clean flat surfaces, and can be removed with heat when no longer wanted.
16. Macrame Wall Hanging
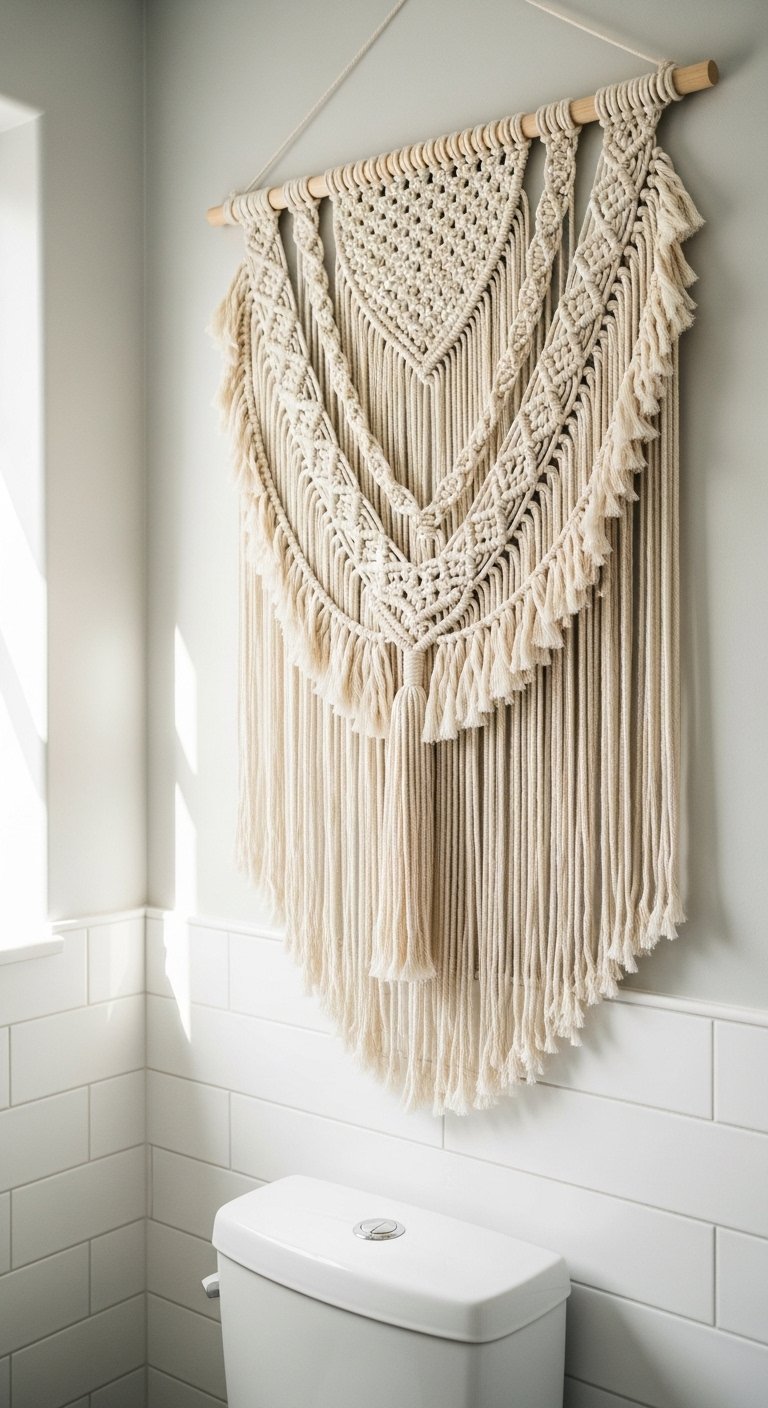
A large macrame wall hanging in natural cotton cord hung on a bathroom wall, particularly the wall above the toilet or the wall beside the vanity, adds a warm, handcrafted textile element that contrasts beautifully with the hard reflective surfaces of a typical bathroom. The three-dimensional quality of the macrame, with its knotted patterns and trailing fringe, adds texture and visual interest to a wall that would otherwise be blank. Natural undyed cotton cord in off-white or cream works in almost any bathroom palette. A macrame piece in a larger format, twenty-four inches wide or more, makes a genuine impact on the wall and reads as a deliberate design choice rather than a small accessory. Use a wooden dowel or a simple tension rod to hang the piece without any wall damage.
17. Plant Wall Installation
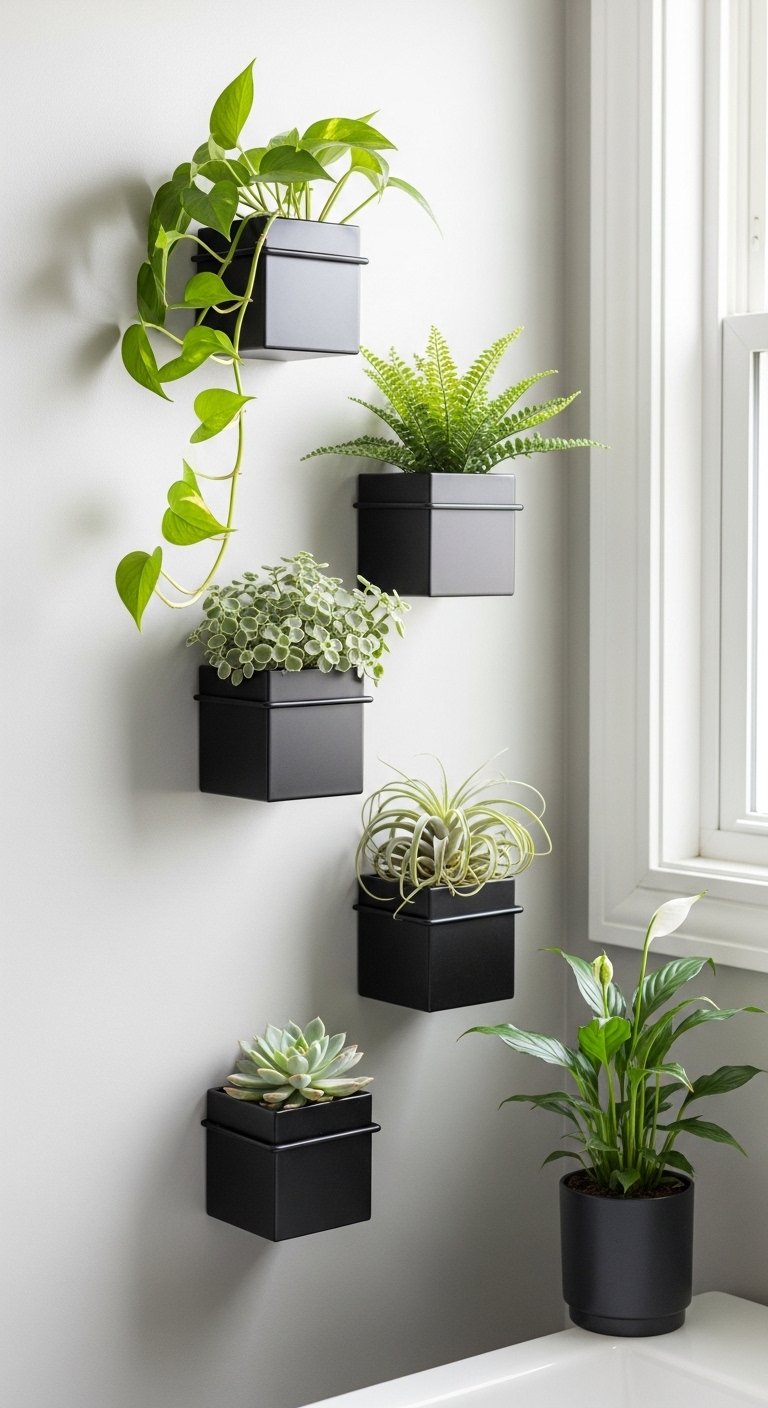
A bathroom wall fitted with a series of small wall-mounted planters, wall pockets, or a living plant frame creates a vertical garden element that is one of the most visually striking and genuinely cozy things you can do with a blank bathroom wall. The combination of multiple plant species in coordinating small pots at different heights creates a lush, layered effect that makes the bathroom feel like a greenhouse corner rather than a utility room. Use wall-mounted plant holders in a consistent finish, matte black, brushed brass, or natural wood, and choose plant species that suit bathroom conditions: trailing plants, ferns, air plants, and small succulents all work well in varying light and humidity conditions. Mount the holders with secure wall anchors and keep the plants well-watered and trimmed to maintain the full, lush quality that makes the installation effective.
18. Fabric Wall Panels
Stretched fabric wall panels, created by wrapping a piece of decorative fabric tightly around a wooden frame and securing it at the back, hang on a bathroom wall like framed art and add color, pattern, and textile softness to a hard-surfaced room without any paint or wallpaper application. Choose a fabric with a pattern, color, or texture that brings what the bathroom currently lacks. A linen panel in a warm neutral adds softness. A printed cotton in a botanical pattern adds color and personality. A woven tapestry fabric adds depth and a handmade quality. Make the panels yourself from a standard canvas stretcher frame and your chosen fabric, or order custom stretched fabric panels from an online art printer. Hang them with standard picture hooks or adhesive strips depending on the weight of the panel.
19. Chalk Paint Cabinet Doors
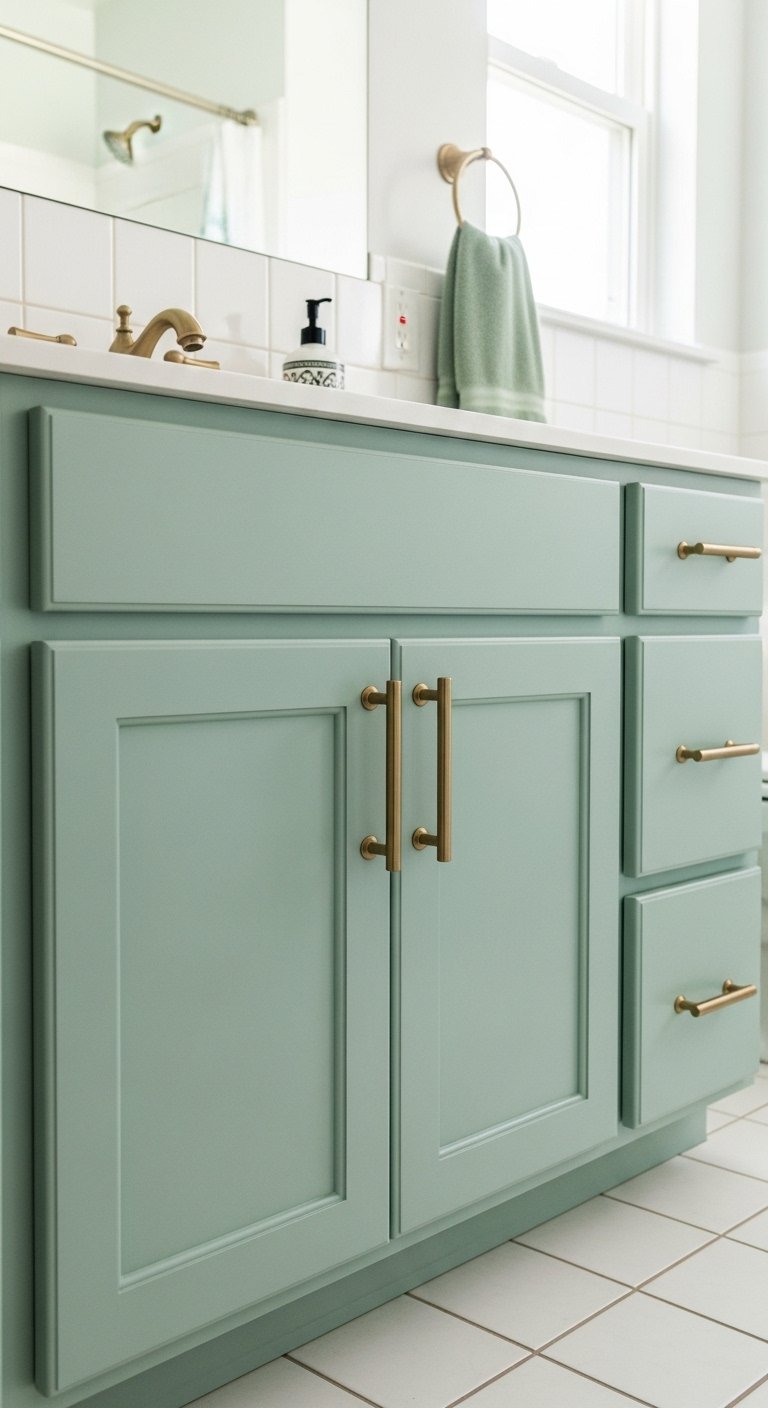
If the bathroom has a vanity with cabinet doors or drawer fronts that are plain, dated, or simply the wrong color for a refreshed room, painting them with chalk paint in a current color transforms the largest single piece of furniture in the bathroom for under twenty dollars in materials. Chalk paint adheres to most surfaces with minimal preparation and dries to a soft matte finish that looks genuinely handcrafted rather than factory-produced. Sage green, dusty navy, warm cream, and soft terracotta are all popular current choices that give a bathroom vanity a custom, designed appearance. Follow with a clear wax topcoat or a water-based matte sealer for durability. Change the hardware at the same time for a complete vanity transformation that looks like a significantly more involved renovation than the painting and hardware swap that actually produced it.
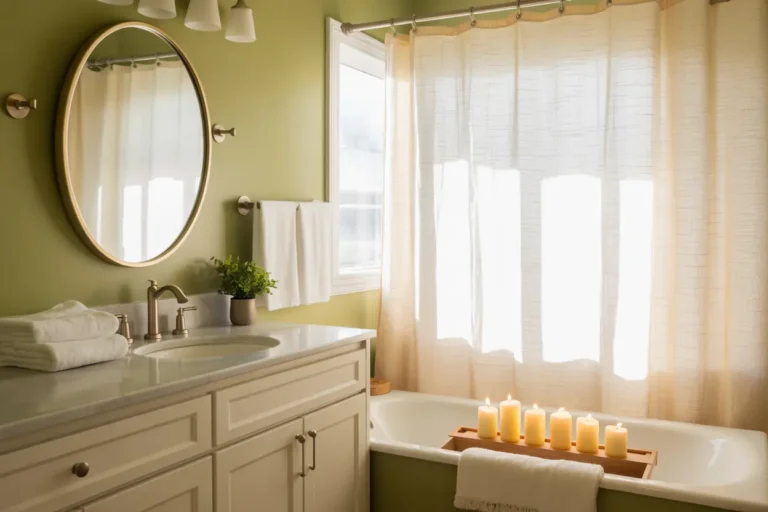
20. Statement Mirror Replacement
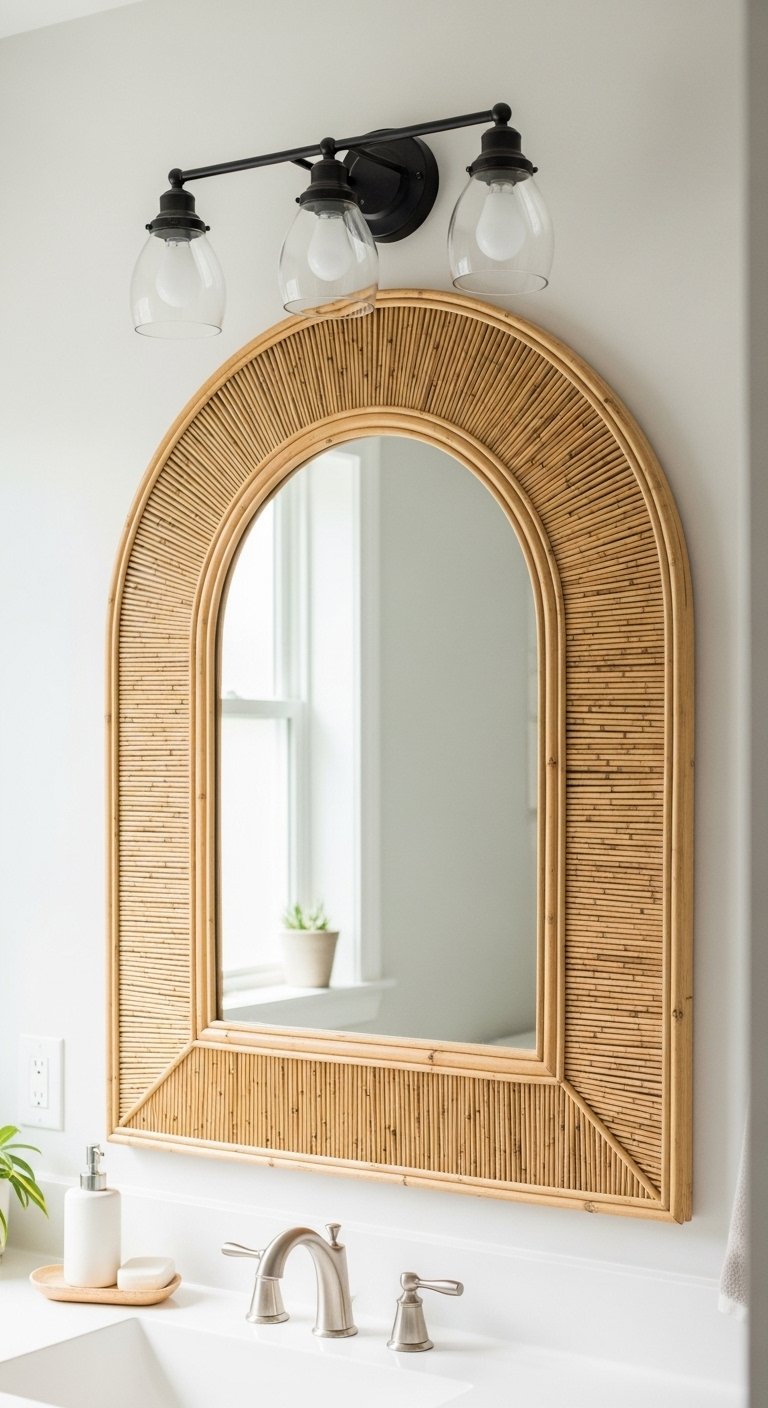
Replacing a standard rectangular builder mirror above the bathroom vanity with a shaped, framed, or oversized alternative is one of the most impactful single changes available to a bathroom wall without touching the tile or the plumbing. An arch-shaped mirror in natural rattan adds organic warmth. A large round mirror in a brushed gold frame adds a soft, glamorous quality. An oversized rectangular mirror with a slim black frame extends the entire width of the vanity and reflects so much more light than a standard size that the room feels genuinely larger. The mirror replacement requires no plumbing, no tile work, and no structural changes. In most bathrooms it takes about thirty minutes to remove the old mirror and hang the new one, and the effect on the vanity wall, and the whole room, is immediate and significant.
21. Wicker Paneling Accent
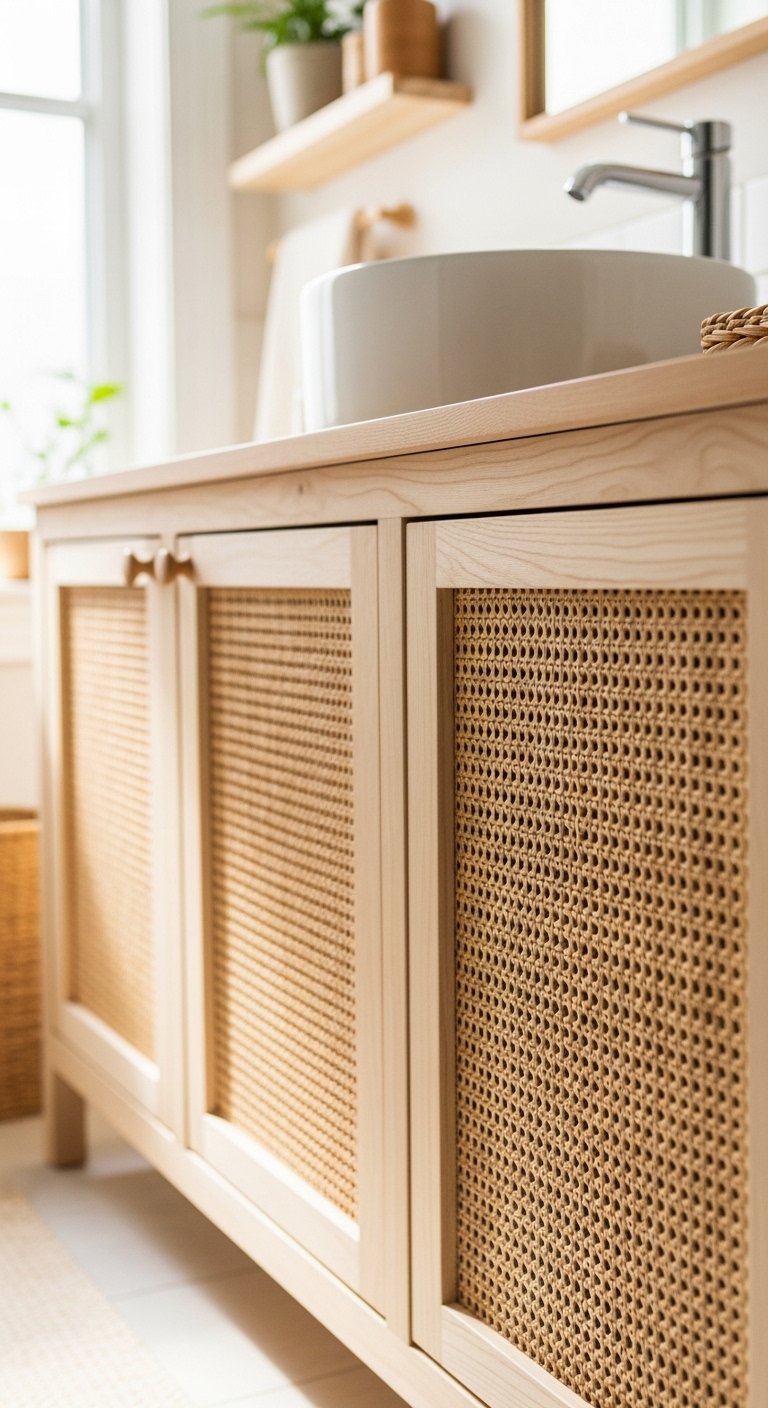
Wicker or rattan panel inserts applied to the front of a vanity cabinet, mounted as a decorative panel on a section of wall, or used as a screen in front of an open shelving unit add a natural, woven texture to the bathroom that suits both coastal and organic interior styles. Wicker panels are available as pre-cut sheets from specialty retailers and can be adhered to flat cabinet doors or mounted in a simple wooden frame for wall installation. The texture of the wicker is open enough that light passes through it partially, creating a slightly diffused quality when the panel is used in front of a lit cabinet interior. On a bathroom wall above tile, a large framed wicker panel in a natural undyed tone reads as a deliberate design feature that adds visual interest without any painting or permanent installation.
22. Vertical Wood Plank Wall
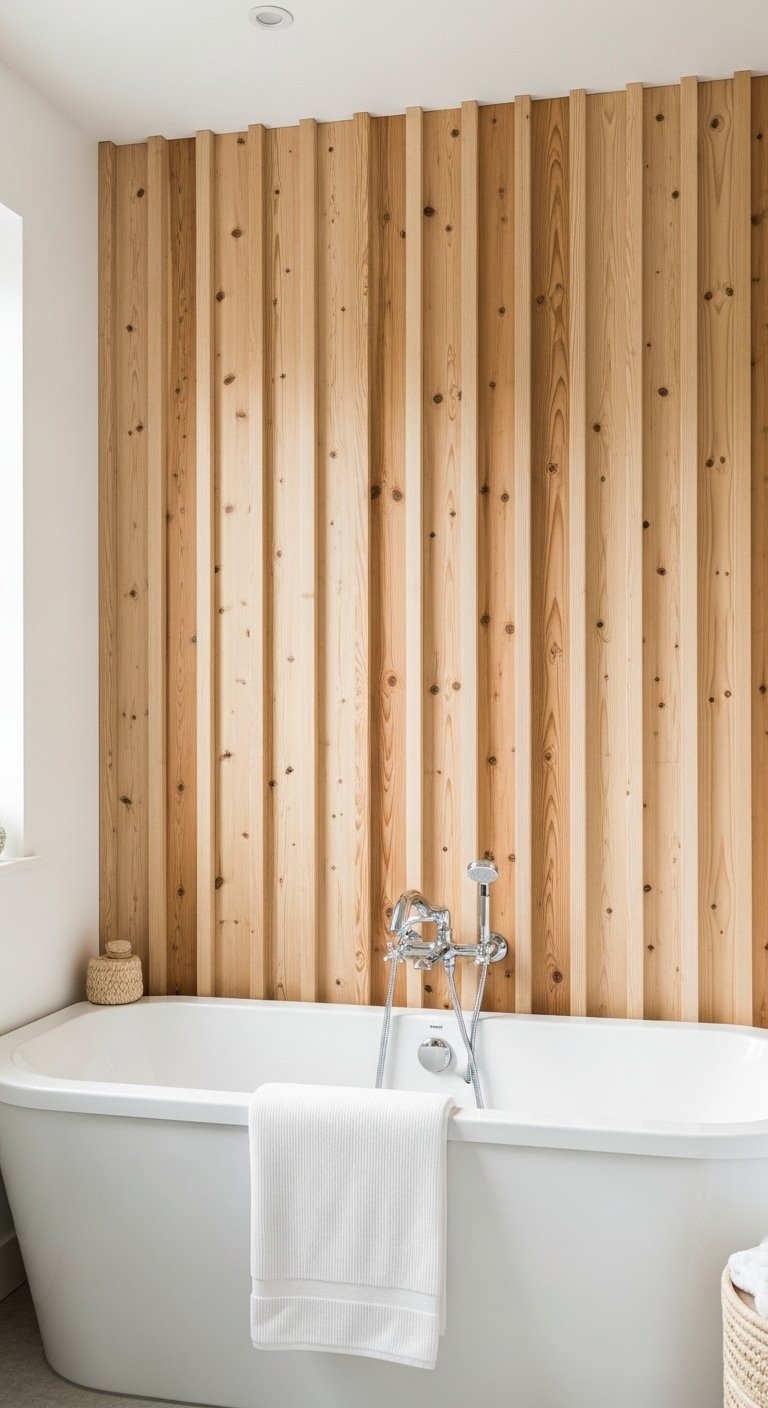
Vertical wood planks applied to a bathroom wall create a strong graphic element that makes the room feel taller and more designed. The planks can be applied in a natural wood stain for warmth, in white paint for a Scandinavian clean look, or in a dark tone for drama. Use tongue-and-groove boards from a home improvement store cut to the ceiling height of the bathroom and install using construction adhesive and a brad nailer. Seal with a water-resistant polyurethane or an exterior-grade sealant for the finished surface to handle bathroom humidity without swelling or warping over time. A full wall of vertical wood planks behind the tub or on the wall facing the door creates a feature that reads as a significant architectural addition and makes the bathroom feel considerably more interesting and personal than four plain painted walls.
An ugly bathroom wall does not have to stay ugly. Most of these ideas cost very little and none of them require touching the existing tile. Pick the one that addresses what bothers you most about the current wall and see how much it changes the room.