You guys!
I can’t tell you how excited I am about today’s post.
I tackled it. Got it back in order… Dealt with the paper clutter that had built up over the busy past few months and got our system fully functional again.
I feel like a 10,000 pound weight has been lifted off my shoulders.
It’s such a relief to know that no important documents or tasks are lurking, unseen, in the corners of our command closet. I have my pile of “action” items to deal with; but I know what they are and what I have to do to deal with them.
Tomorrow I will be back to share HOW I dealt with all our paperwork clutter; but today I’m getting deep into the details of how to get and stay organized with a system; including the essential elements of a command center.
If you’ve been following along for a while, then you know that I am in my first week of a TEN WEEK challenge for organizing my entire house…
To read the full plan; pop over here.
This week, Week One, the challenge is to deal with Paperwork and Command Centers
The goals for this first week of the challenge are to:
- Go through, purge and then organize your paperwork
- Develop a system for your incoming and outgoing paperwork and create a space for it – such as a command center
If you are starting out with piles of paper that you need to sort through, you’re gonna want to get those dealt with before you set up your Command Center. I started this series by sharing my best tips and tricks for tackling paper clutter once and for all…
Once you’ve got all the old paper clutter sorted through and purged or shredded and filed {more details on my filing system are coming soon}, then you need to create a system to manage incoming paperwork.
That’s what we are talking about today!
Start by designating a spot in your house where paperwork will go every time it enters your house.
And I do mean EVERY. TIME!
Do not let it spread out all over the place; that is the key to keeping on top of it and developing a system to keep yourself organized.
Since our front coat closet was right off the kitchen, we designated it as a “Command Closet”.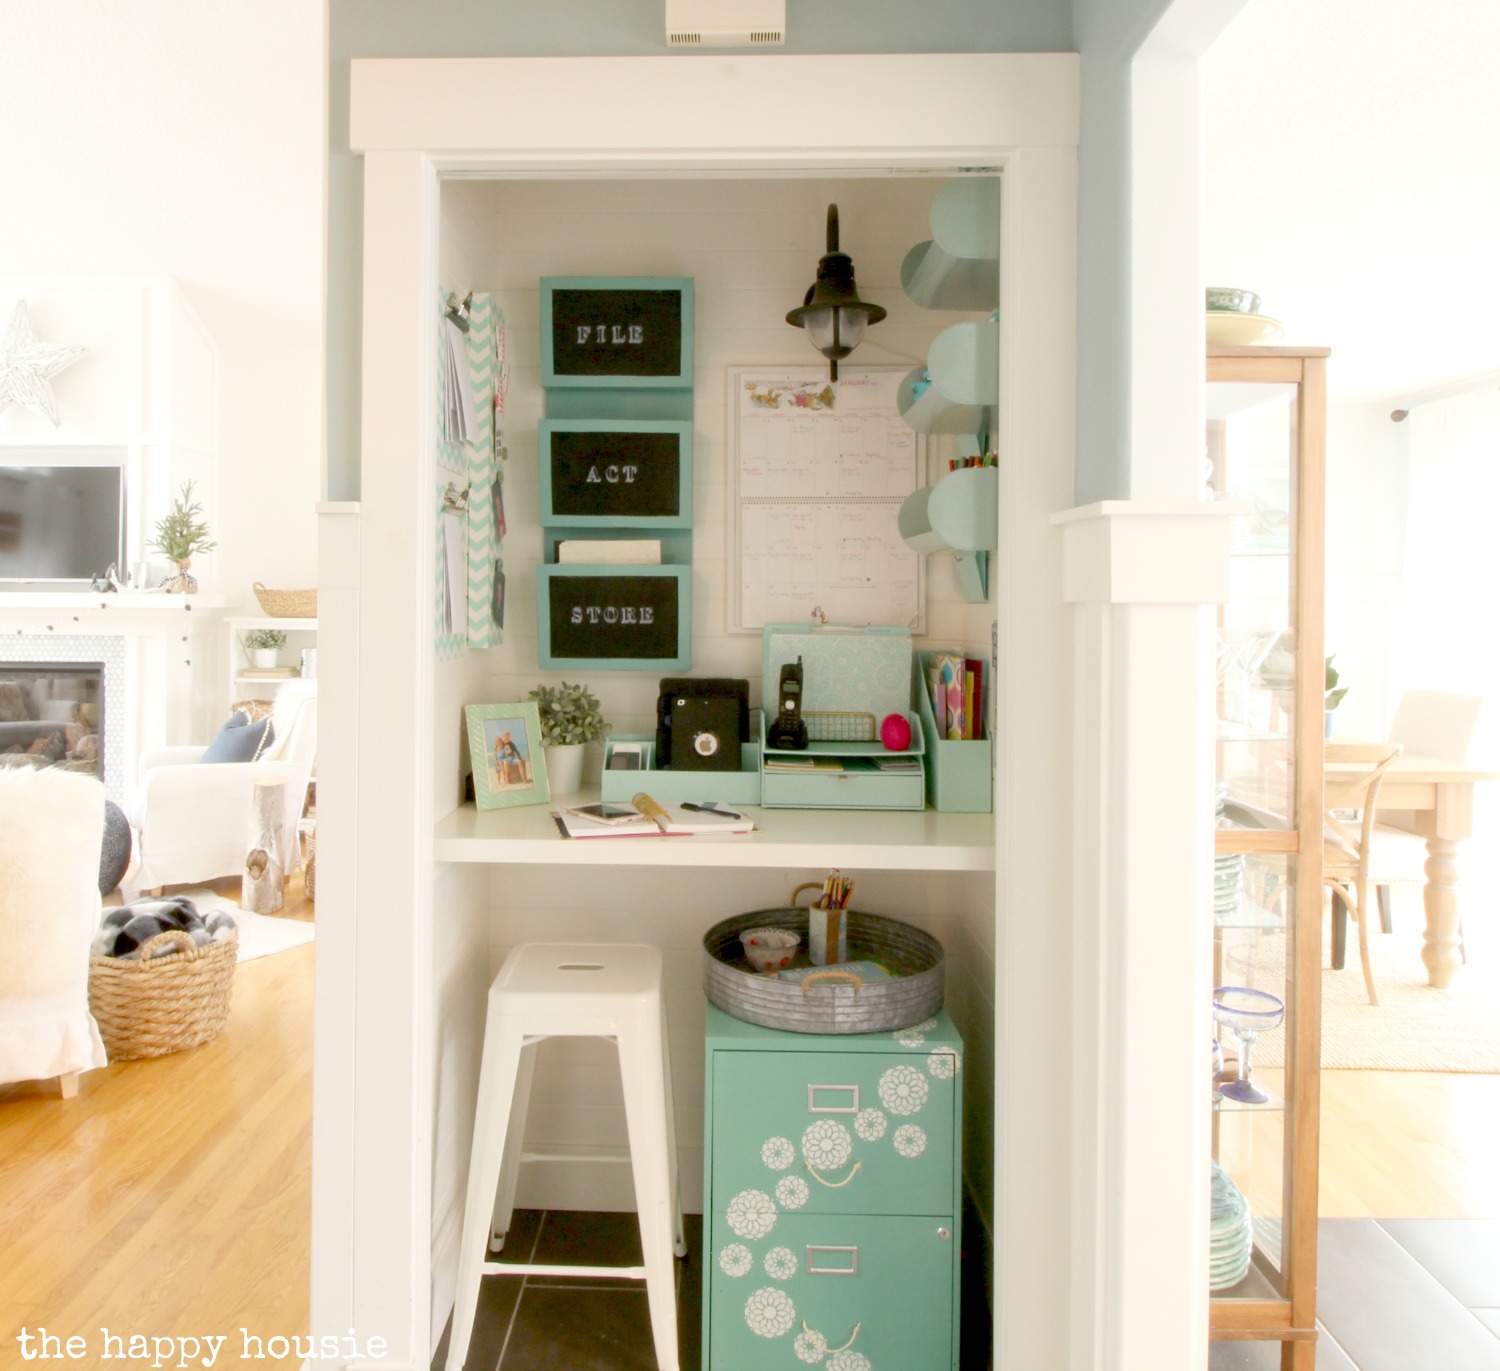
But you don’t have to have an entire closet!
There are plenty of command centers that take up less space…
Like this one by Lindi from Love Create Celebrate. She used the side of a cabinet and a little bit of countertop for her compact Command Center:
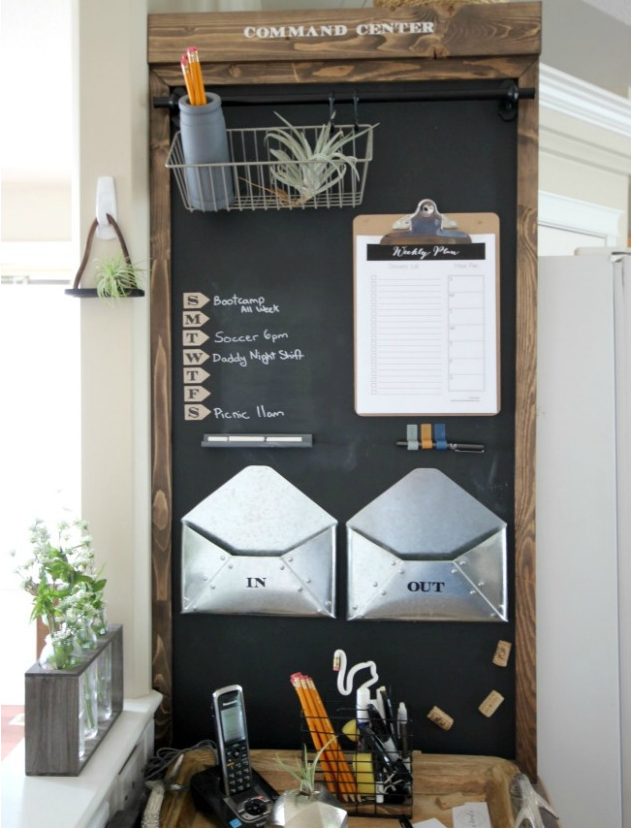
Or this compact command center on a small area of wall space at One Creative Housewife.
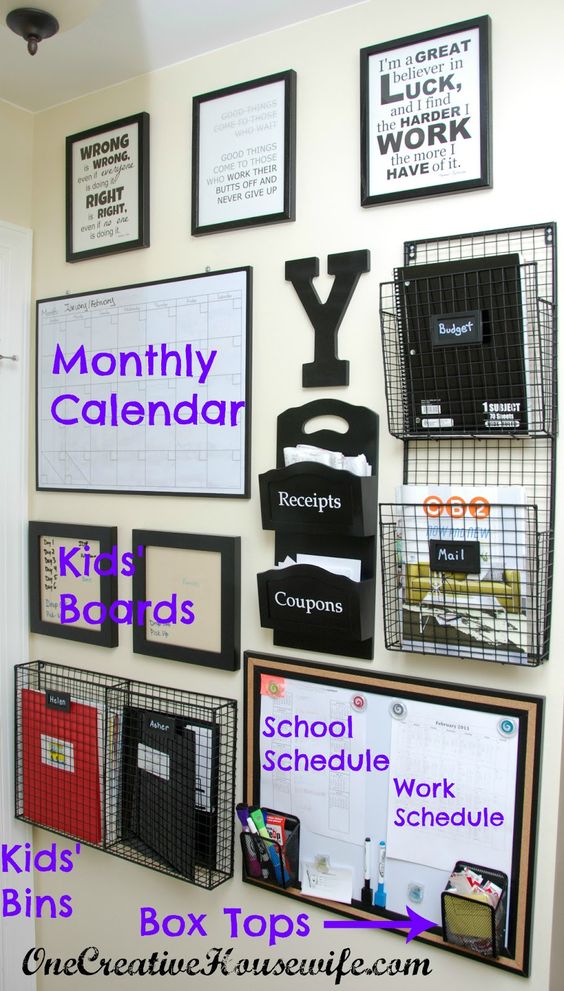
I also found this great example on Pinterest and couldn’t track down the source, but I love how it incorporates a little shelf and so much storage in this small area of wall space…
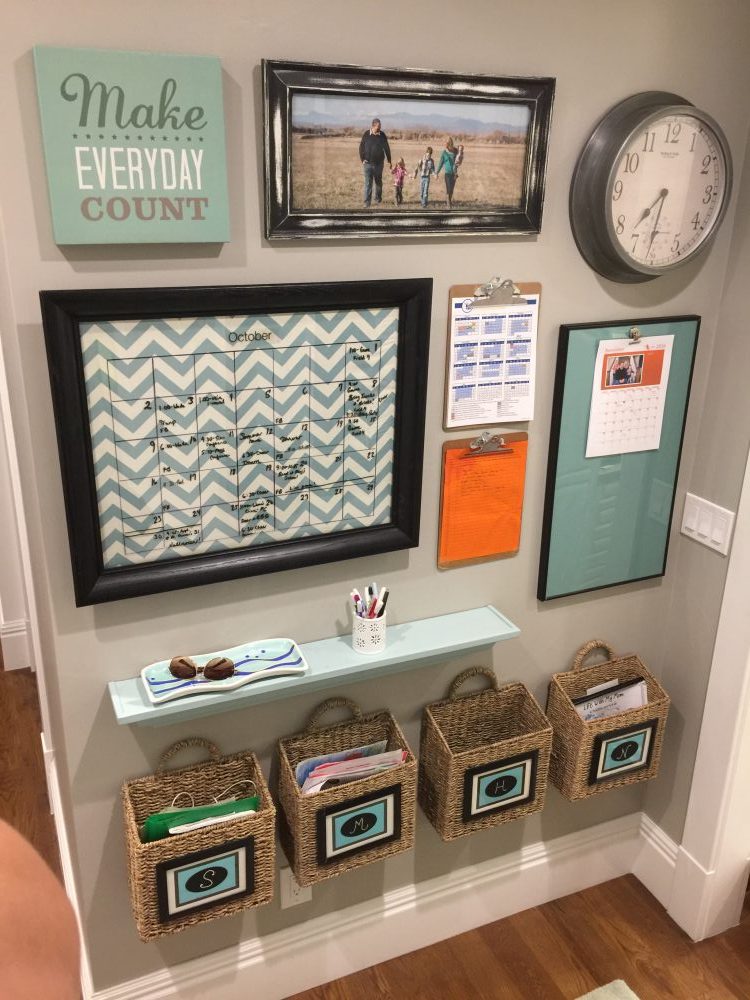
Once you designate a space, you want to consider WHAT KEY ELEMENTS of a command center you want to include in yours.
In ours, we have:
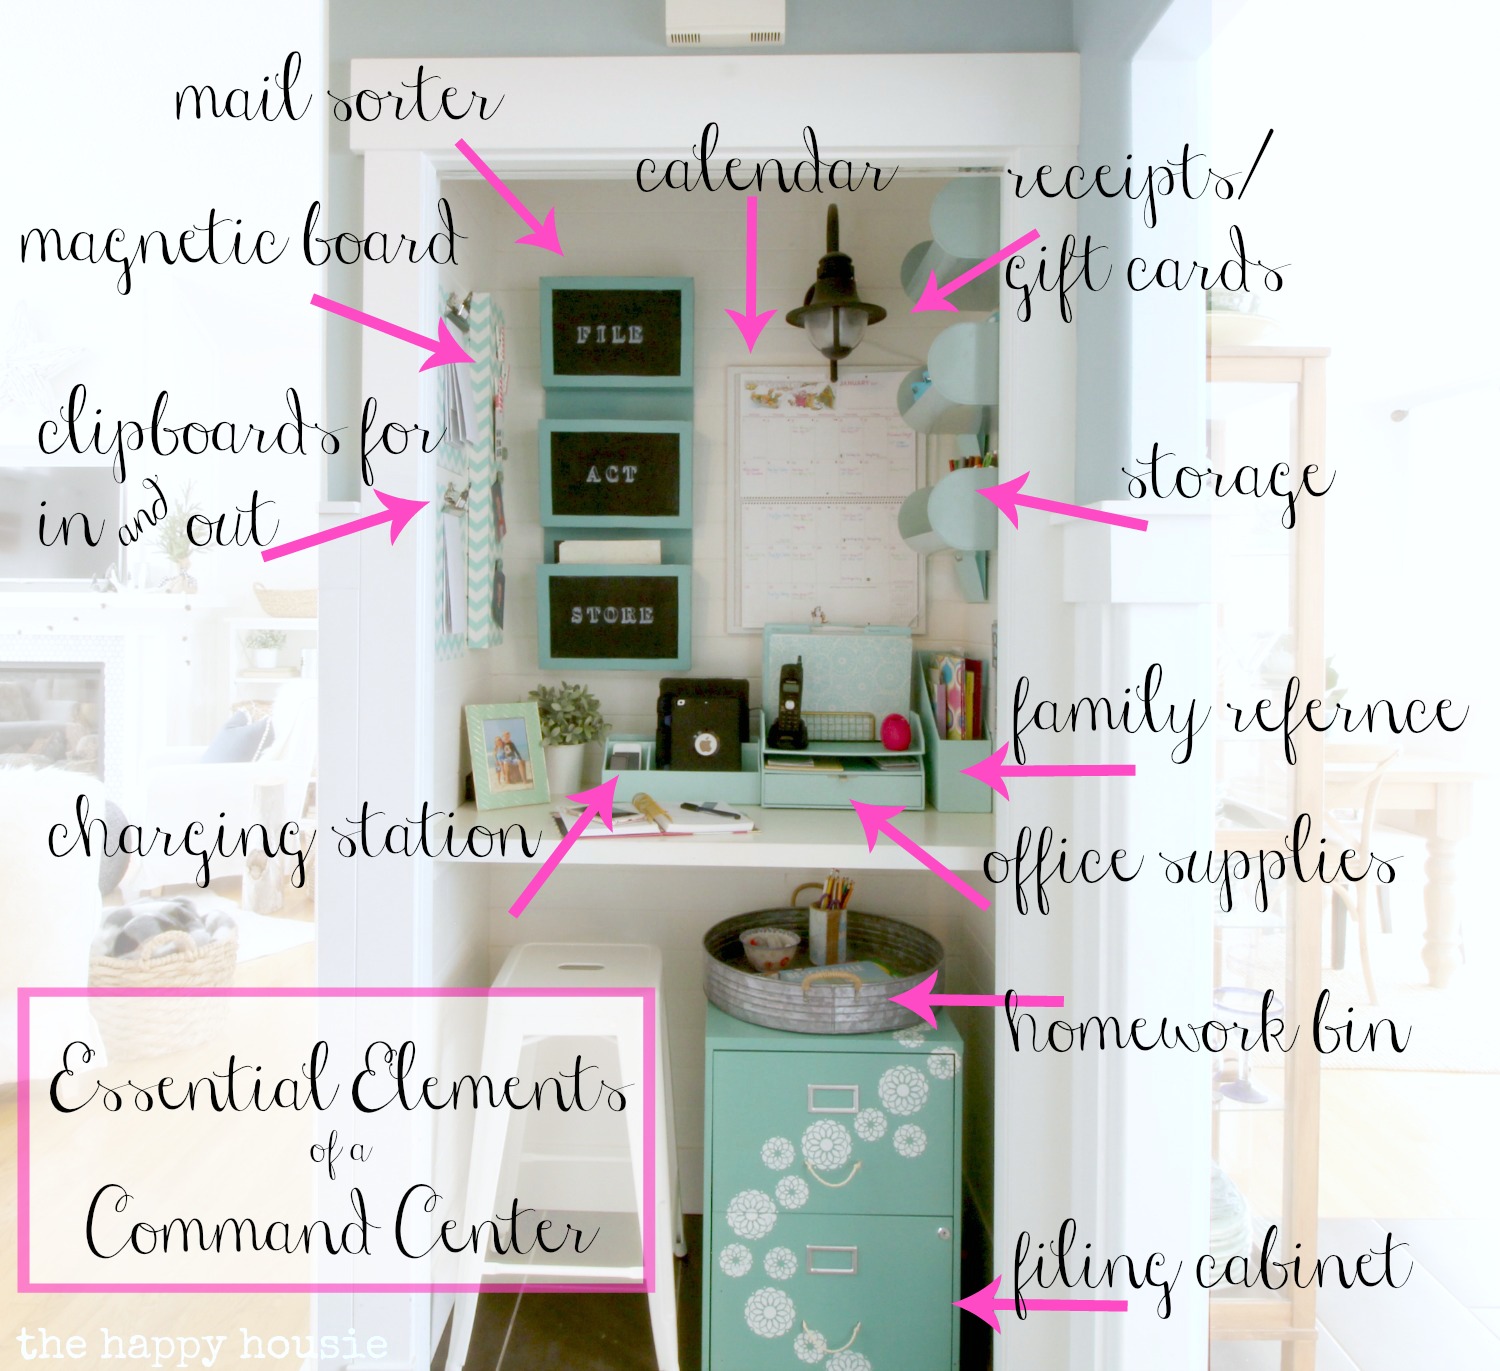
- A “Mail” Sorter – We use this to divide our papers into three areas – STORE (for papers we need to hang onto for a little while but don’t want cluttering up our counters), ACT (for things we need to deal with) and FILE (for things we need to… guess? file! ding ding ding! obvious, I know).
- A Calendar – To track our lives on. I LOVE my More Time Moms Calendar and seek them out every year in July or August. I usually pick mine up at Costco but they are also available online. Sometimes I forget to look at my calendar, so I am in process of using an electronic family calendar as well so that we can all be on the same page as far as events and activities go.
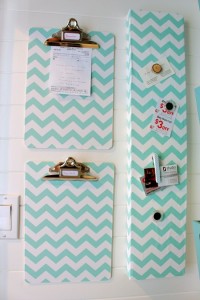
- Clipboards for IN and OUT. The key to staying on top of a system is to open MAIL as it comes in and deal with it right away. If something is coming “IN” and you can’t deal with it that moment, clip it to the IN board so that you don’t forget to deal with it. Then OUT is for bills or banking etc. that you need to remember to take with you, or papers to send back to school (though I try to put those into backpacks right away).
- Magnetic Board – We use this to post little reminders, photos, coupons to remember etc.
- Shelving Station – We use our to hold pens/pencils/felts/scissors; sunglasses (I know, right??), and then extra keys for various houses and locations that we need to keep safe (shhh don’t tell anyone they are there).
- Folders – for receipts and gift cards are located behind the storage shelf.
- Magazine File – contains family reference materials like the phone book, address book, our take-out menus, etc.
- Office Supplies – we keep various little office supplies in our Command Center as this is like our home office as well
- Charging Station – this is where we keep the devices when they aren’t in use, and also charge them here so they don’t clutter up our kitchen counters (there is a plug directly behind the charging station unit).
- Homework Bin – we keep weekly homework, books, and school related materials as well as pencils, pencil crayons, erasers, and sharpeners in here.
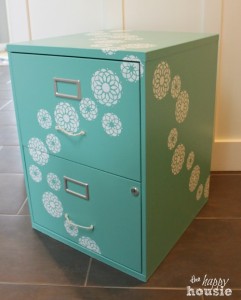
- Filing cabinet – where all those important papers go to live for the long term {more details on that coming soon}.
THE SYSTEM
As paper work comes in to your house, immediately open it and make a decision about it.
- Mail: Open all mail right away or put it on the IN clipboard if you can’t. Once you open it; if it’s junk: trash it. If it has important dates: write them on the calendar. If you need to act on it; do so right away or put it in your ACT bin to deal with as soon as you have some time (maybe set aside a weekly time you deal with your ACT items). Anything you need to hold onto long term goes into the FILE bin and you should set aside a time once a month to do all your filing (unless you find it builds up more quickly then that).
- Bills: are part of mail. Try to open and pay them right away, but if you don’t have time then put them into the ACT bin and make sure to go through this pile weekly. Once paid, if you need to keep a bill for tax purposes, then put them in the FILE bin.
- Homework: Goes in the homework bin while it’s being worked on (we have weekly homework here), and back in the kid’s school bags when it is ready to go back. School newsletters – read through them quickly if you can (if you can’t at that time, clip them to “IN” and read them as soon as you can). Write down important dates on the calendar. If you feel you need to temporarily hang onto the newsletter for other items then put it into the STORE bin.
- Receipts: Receipts that are needed for tax purposes or that are for major items can be FILED. If you want to keep receipts for things that you might return or that you feel you need a receipt for then designate a spot to store those so that you don’t have them spread out all over the place (we have one folder for receipts and one for gift cards/coupons).
DAILY:
You need to go through incoming paperwork and make a decision about the best spot for it in your command center. Act on it and get rid of the paper if you can do so.
WEEKLY:
Go through the ACT bin and tackle all jobs you can. Get rid of or file the paper as appropriate.
MONTHLY:
Go through the filing bin and file it in your larger file cabinet or file unit. I’ll be sharing my system soon.
Related DIYs!
- Chalk Painted and Stencilled Filing Cabinet Transformation
-
DIY Decorative Clipboards {using wrapping paper!}

Mail sorters
Calendars
Cork Boards or Magnet Boards
Office Supply Organizers
Charging Stations
Wall Shelving / Storage Systems
Filing cabinets
Want to remember this?

Join the challenge!
Sign up to have The 10 Week Organizing Challenge sent to you weekly!
Want to learn more about the ten week organizing challenge? Head over here!
Save
SaveSave
Article source: http://thehappyhousie.porch.com/how-to-create-a-command-center-essential-elements-of-a-command-center/
