Hey Guys, it’s me Ginny again bringing you a big reveal today. If you tuned in a week ago you’ll have seen our sneak peek intro to the Modern Deco kitchen we recently finished. Gahh, I’m insanely excited about this one because I think (hope) you are all going to go nuts for it just as we have. We all want to move in ASAP. I don’t think I need to say too much about this one because I feel like the space really does speak for itself. But, I’ll give you a run down of what we did with it and how we styled it out for the everyday use of a busy family of 4.
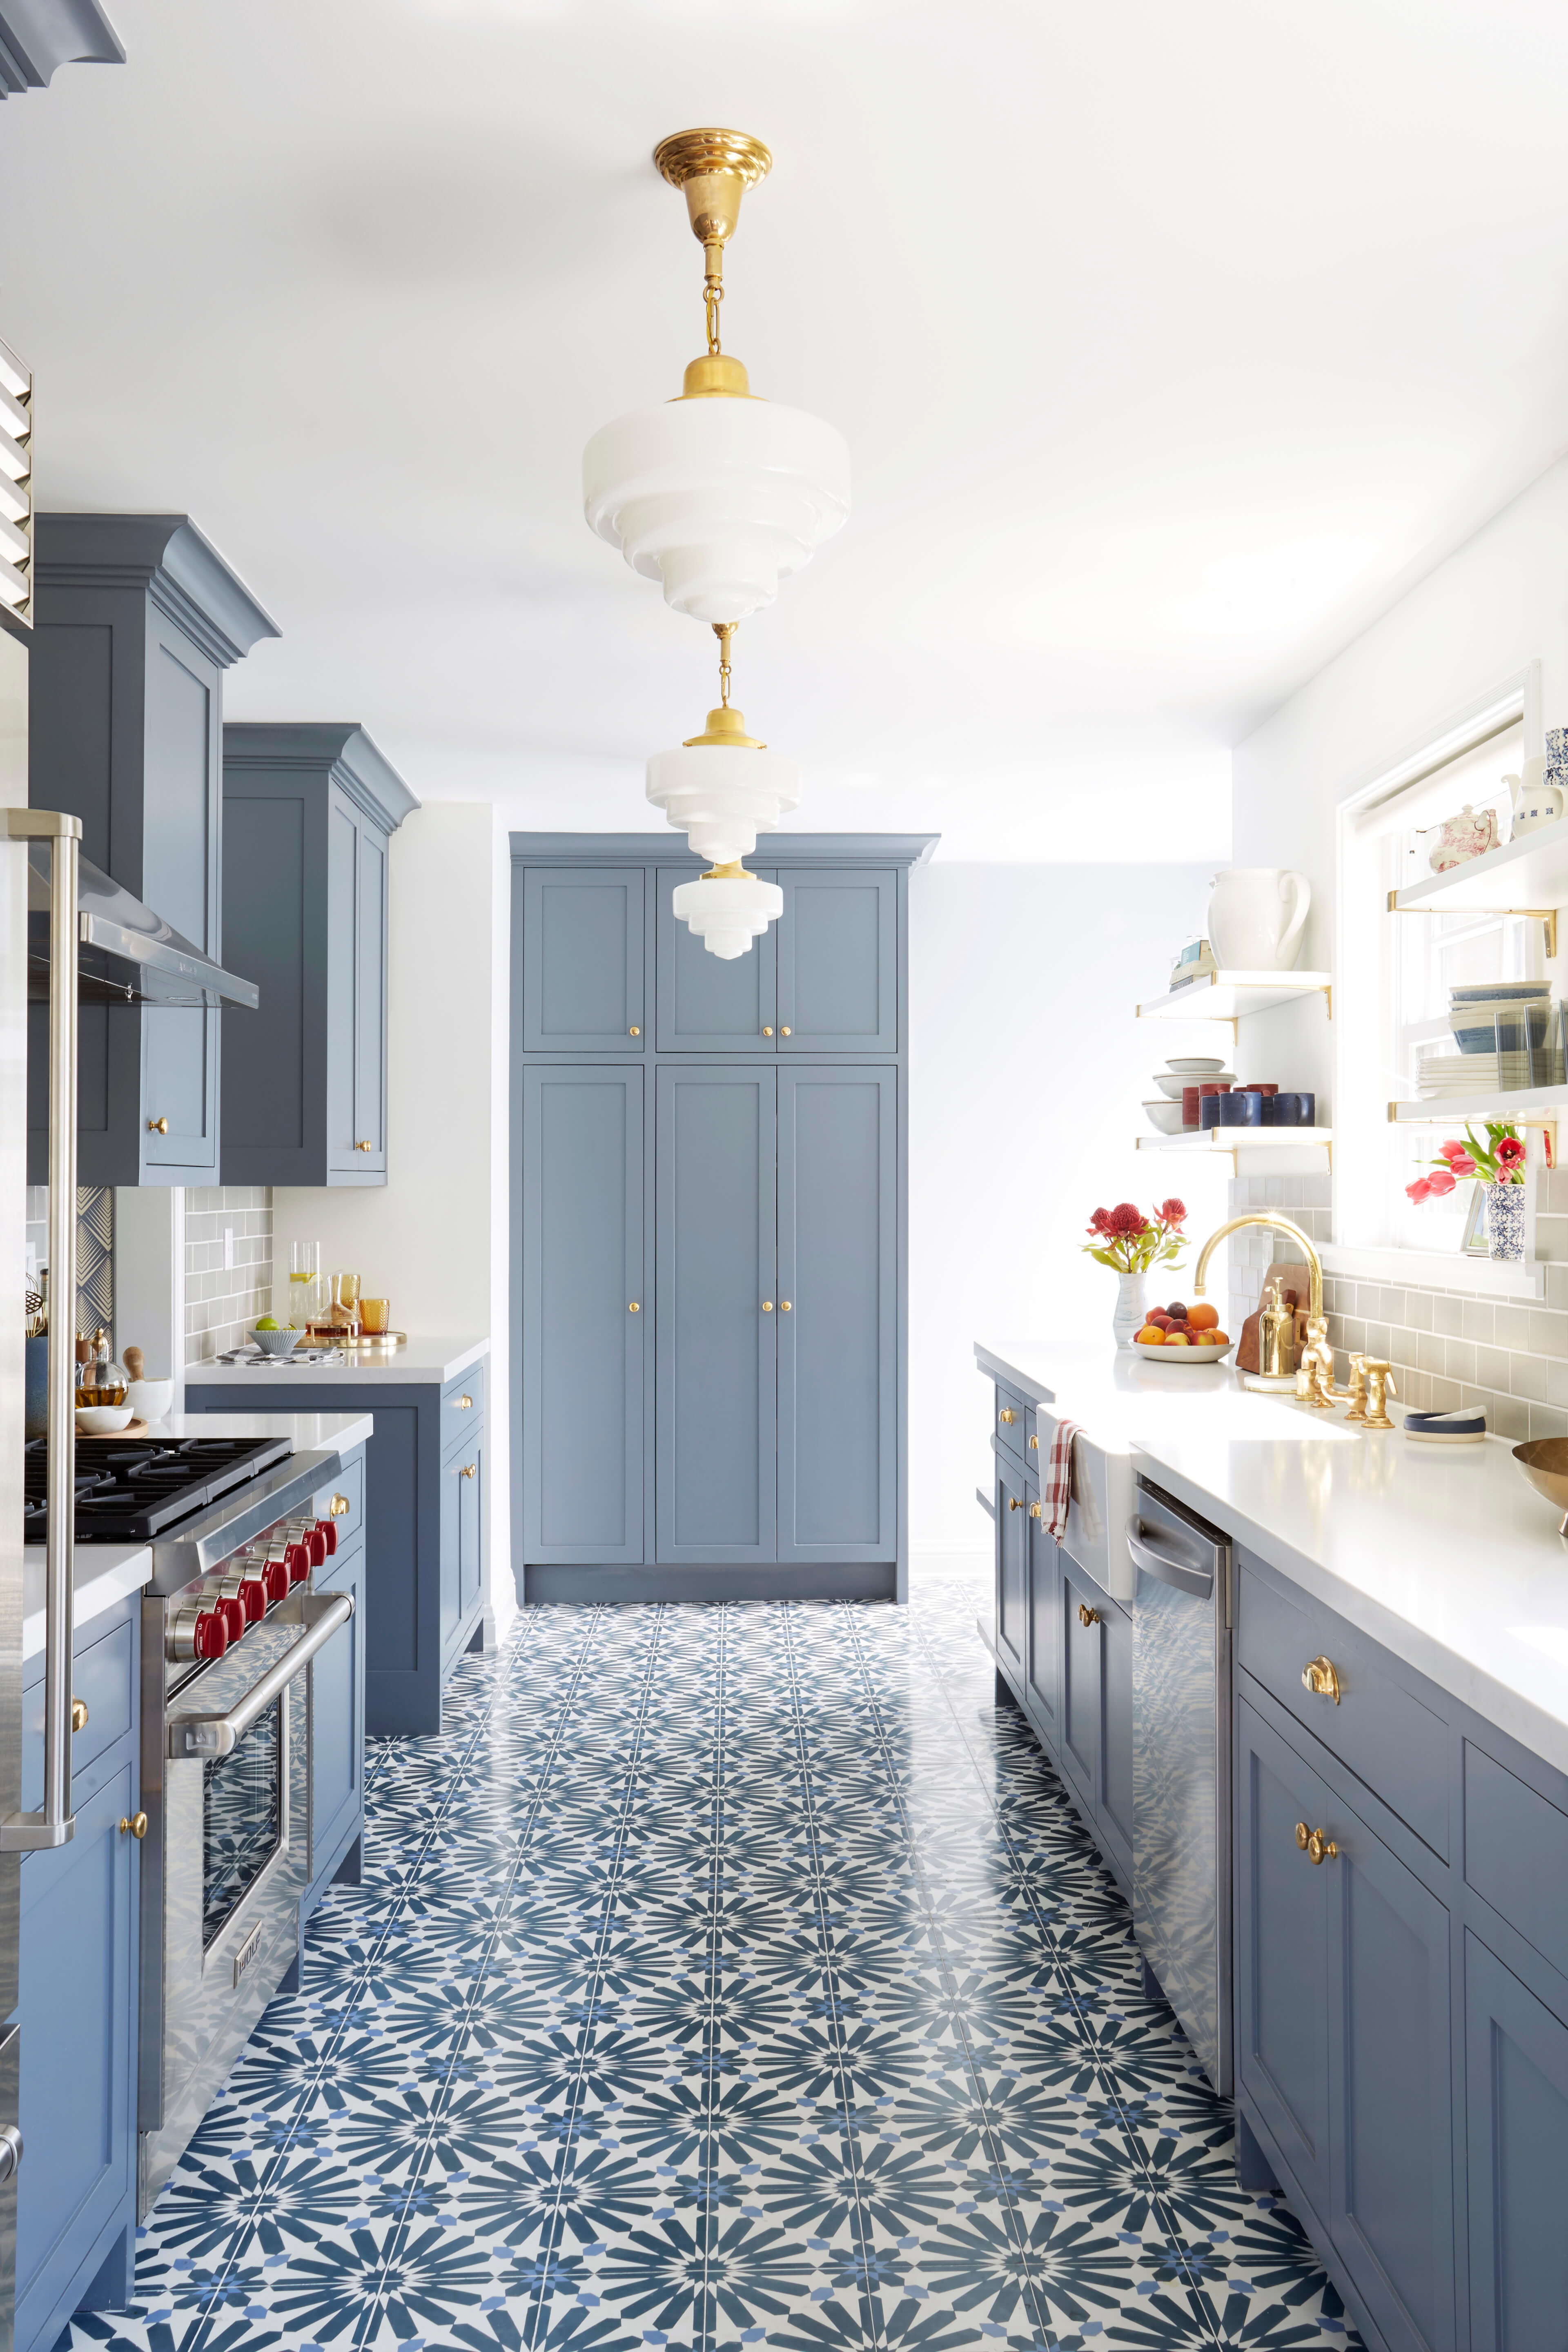
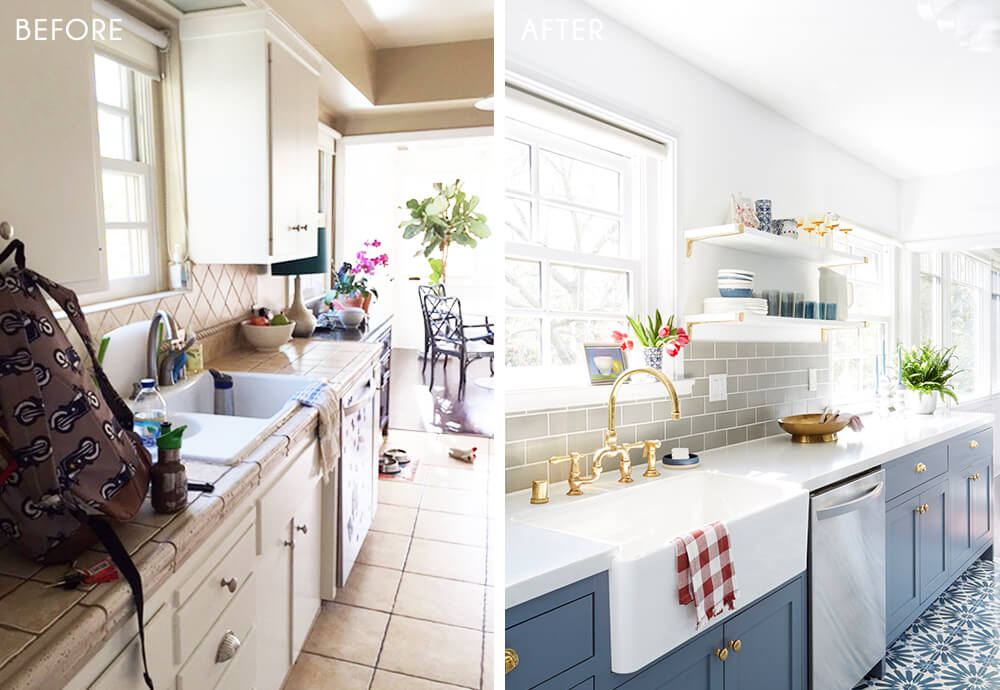
First off, let’s talk about the floor tile, because that really set the tone for the rest of design for the space. This Silver Lake Hills family is not afraid to bring color and pattern into their home and we wanted something that felt graphic (so it would tie-in with their dining room wallpaper), yet timeless. The color variation is subtle enough that they won’t get bored of it in a few years and they will age and beautify over time. It literally is the wow-factor in the room.

We brought in a blue-grey paint for the cabinets that ties-in with the floor. We thought about doing just a straight grey but this just felt warmer, more inviting and and happier for a young family. Since we opened up the kitchen pantry space we were presented with this slightly awkward corner (above). There was an option to make it closed storage but that meant having a blank panel to one side which I didn’t love the idea of. Then there was a thought of chamfering it off so that the corner would be an angled cabinet but that felt a little 90’s dated. So we ended up utilizing this spot as large open shelving for books and big crock pots and vessels. We did make sure that the family was happy with the fact that it would be a right angle, as some people might be concerned about banging themselves on the edge, but they didn’t mind because of the amount of circulation space to the exterior door.
We did inset cabinet doors and drawers with a frame which gives it a more custom, traditional look. We also recessed the toe-kick a few inches more than normal so that you see more of the floor tile since the tiler installed it under the cabinets.
 MY LATEST VIDEOS
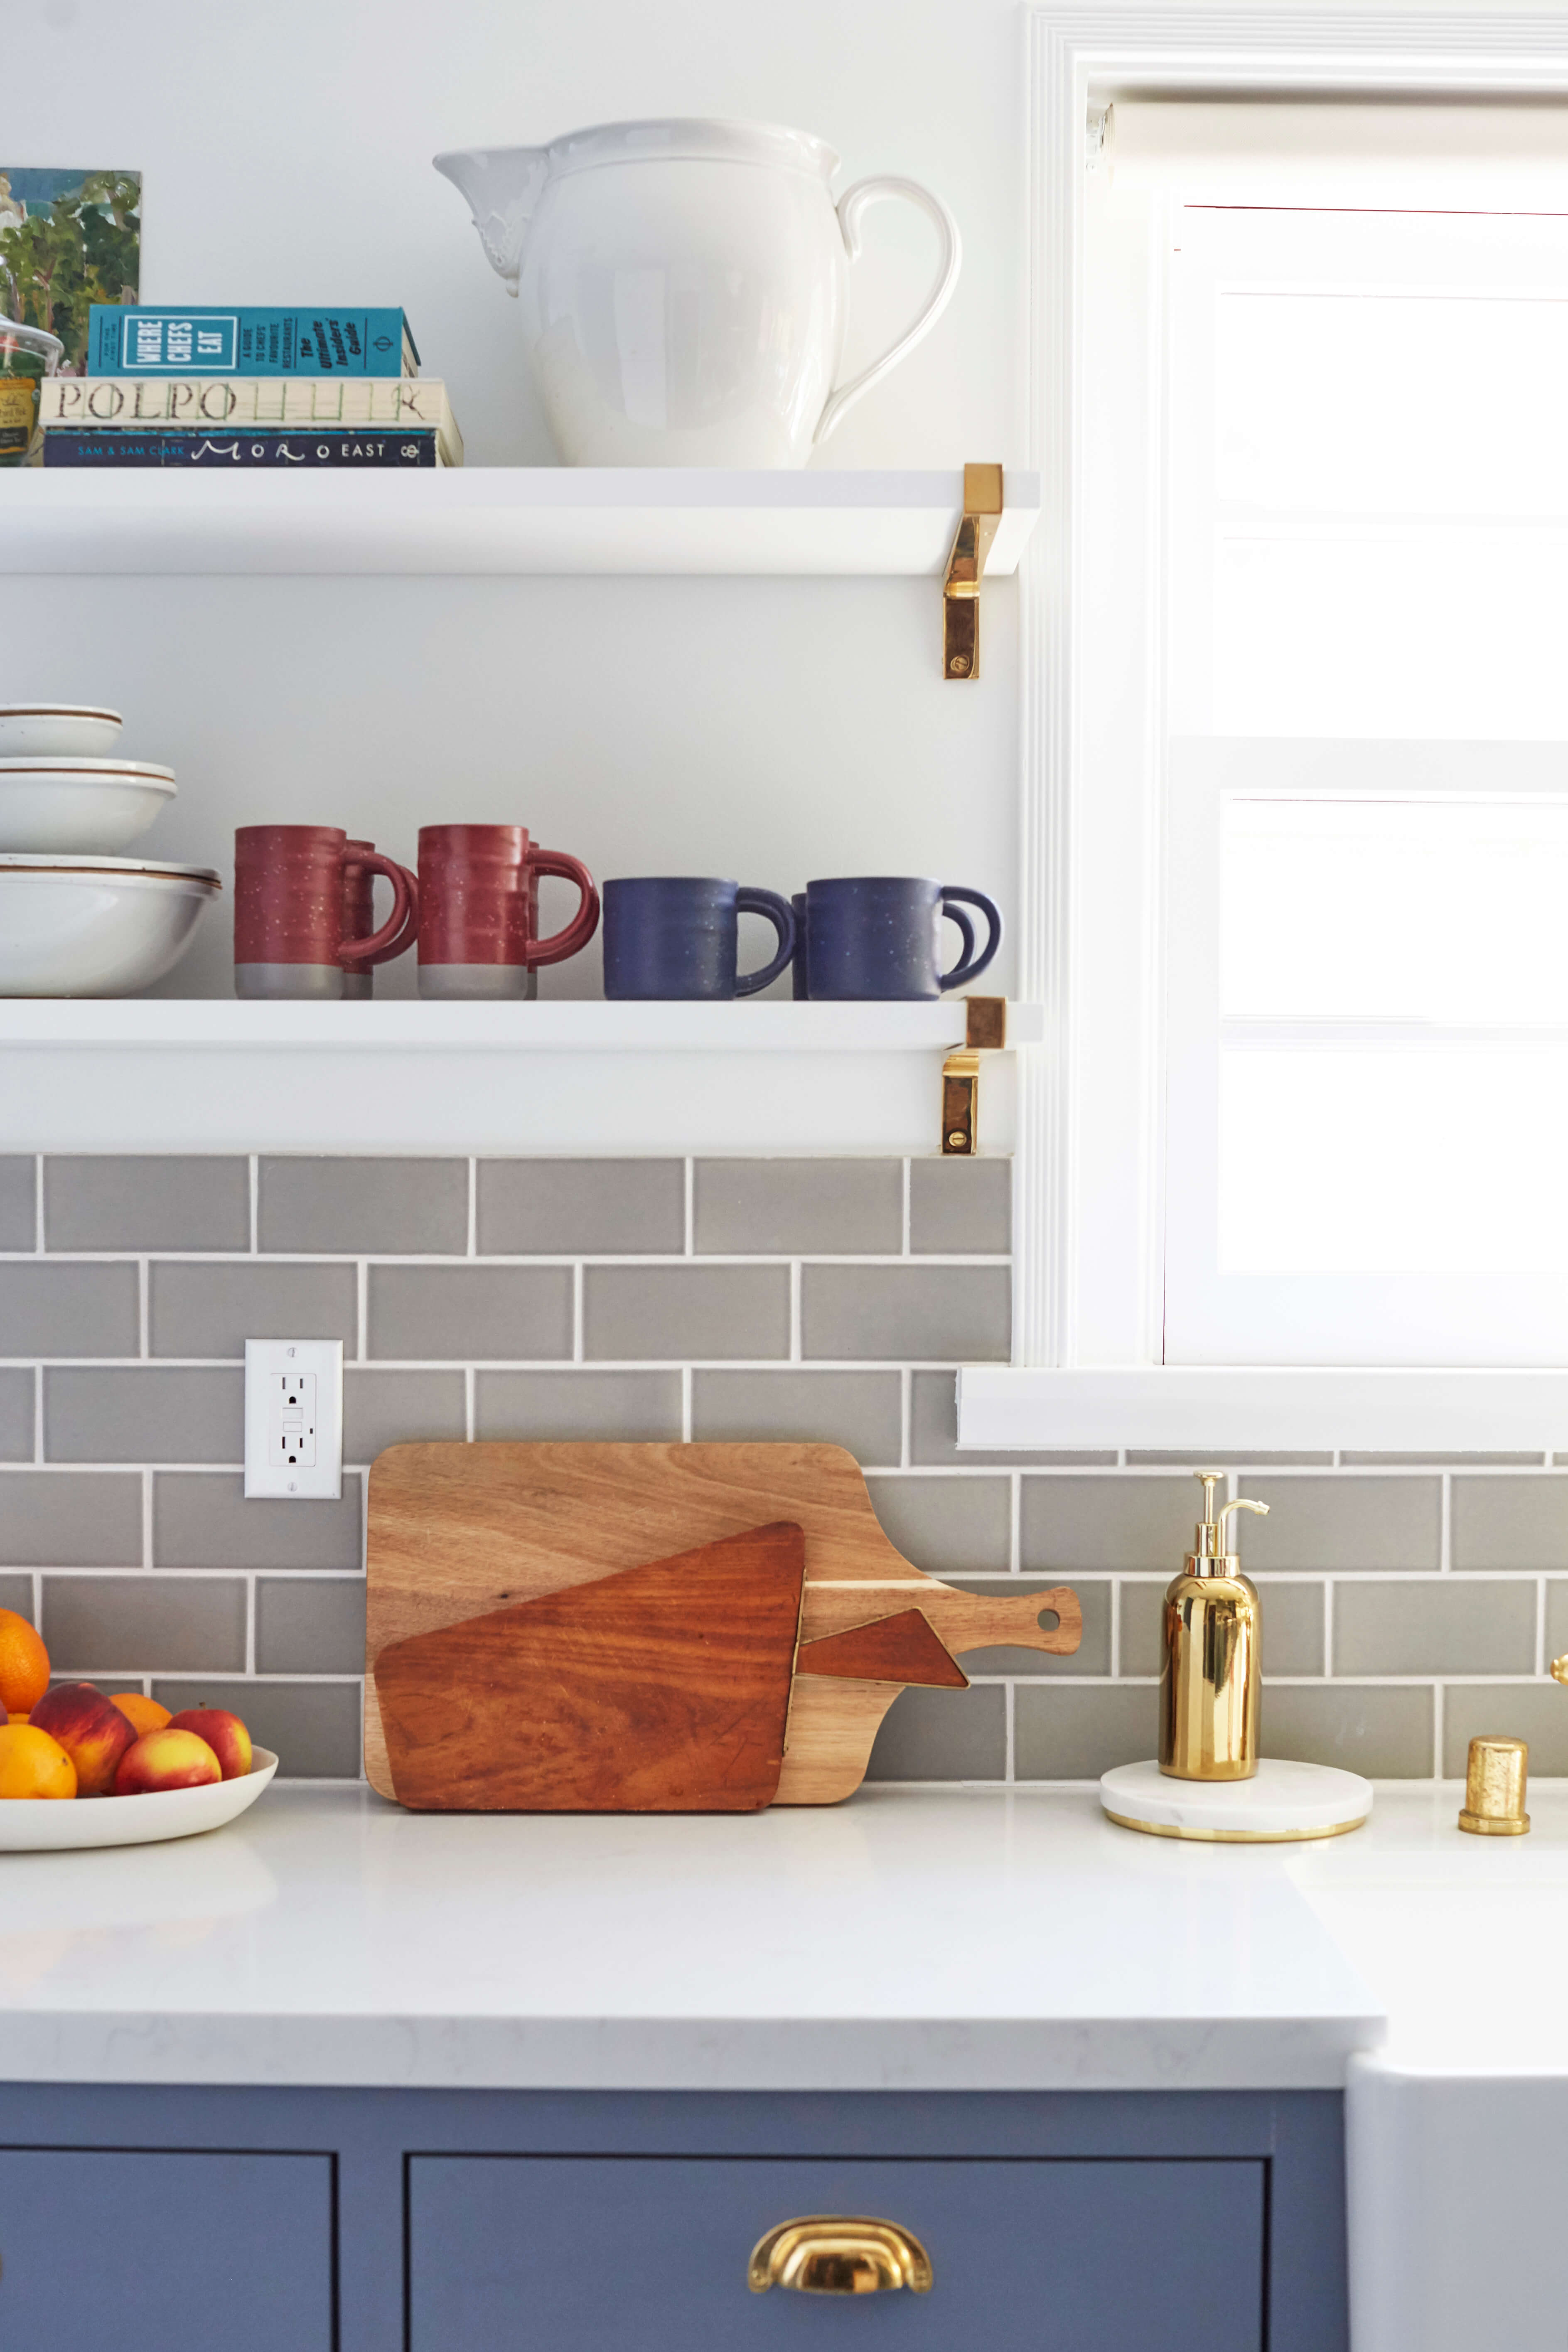
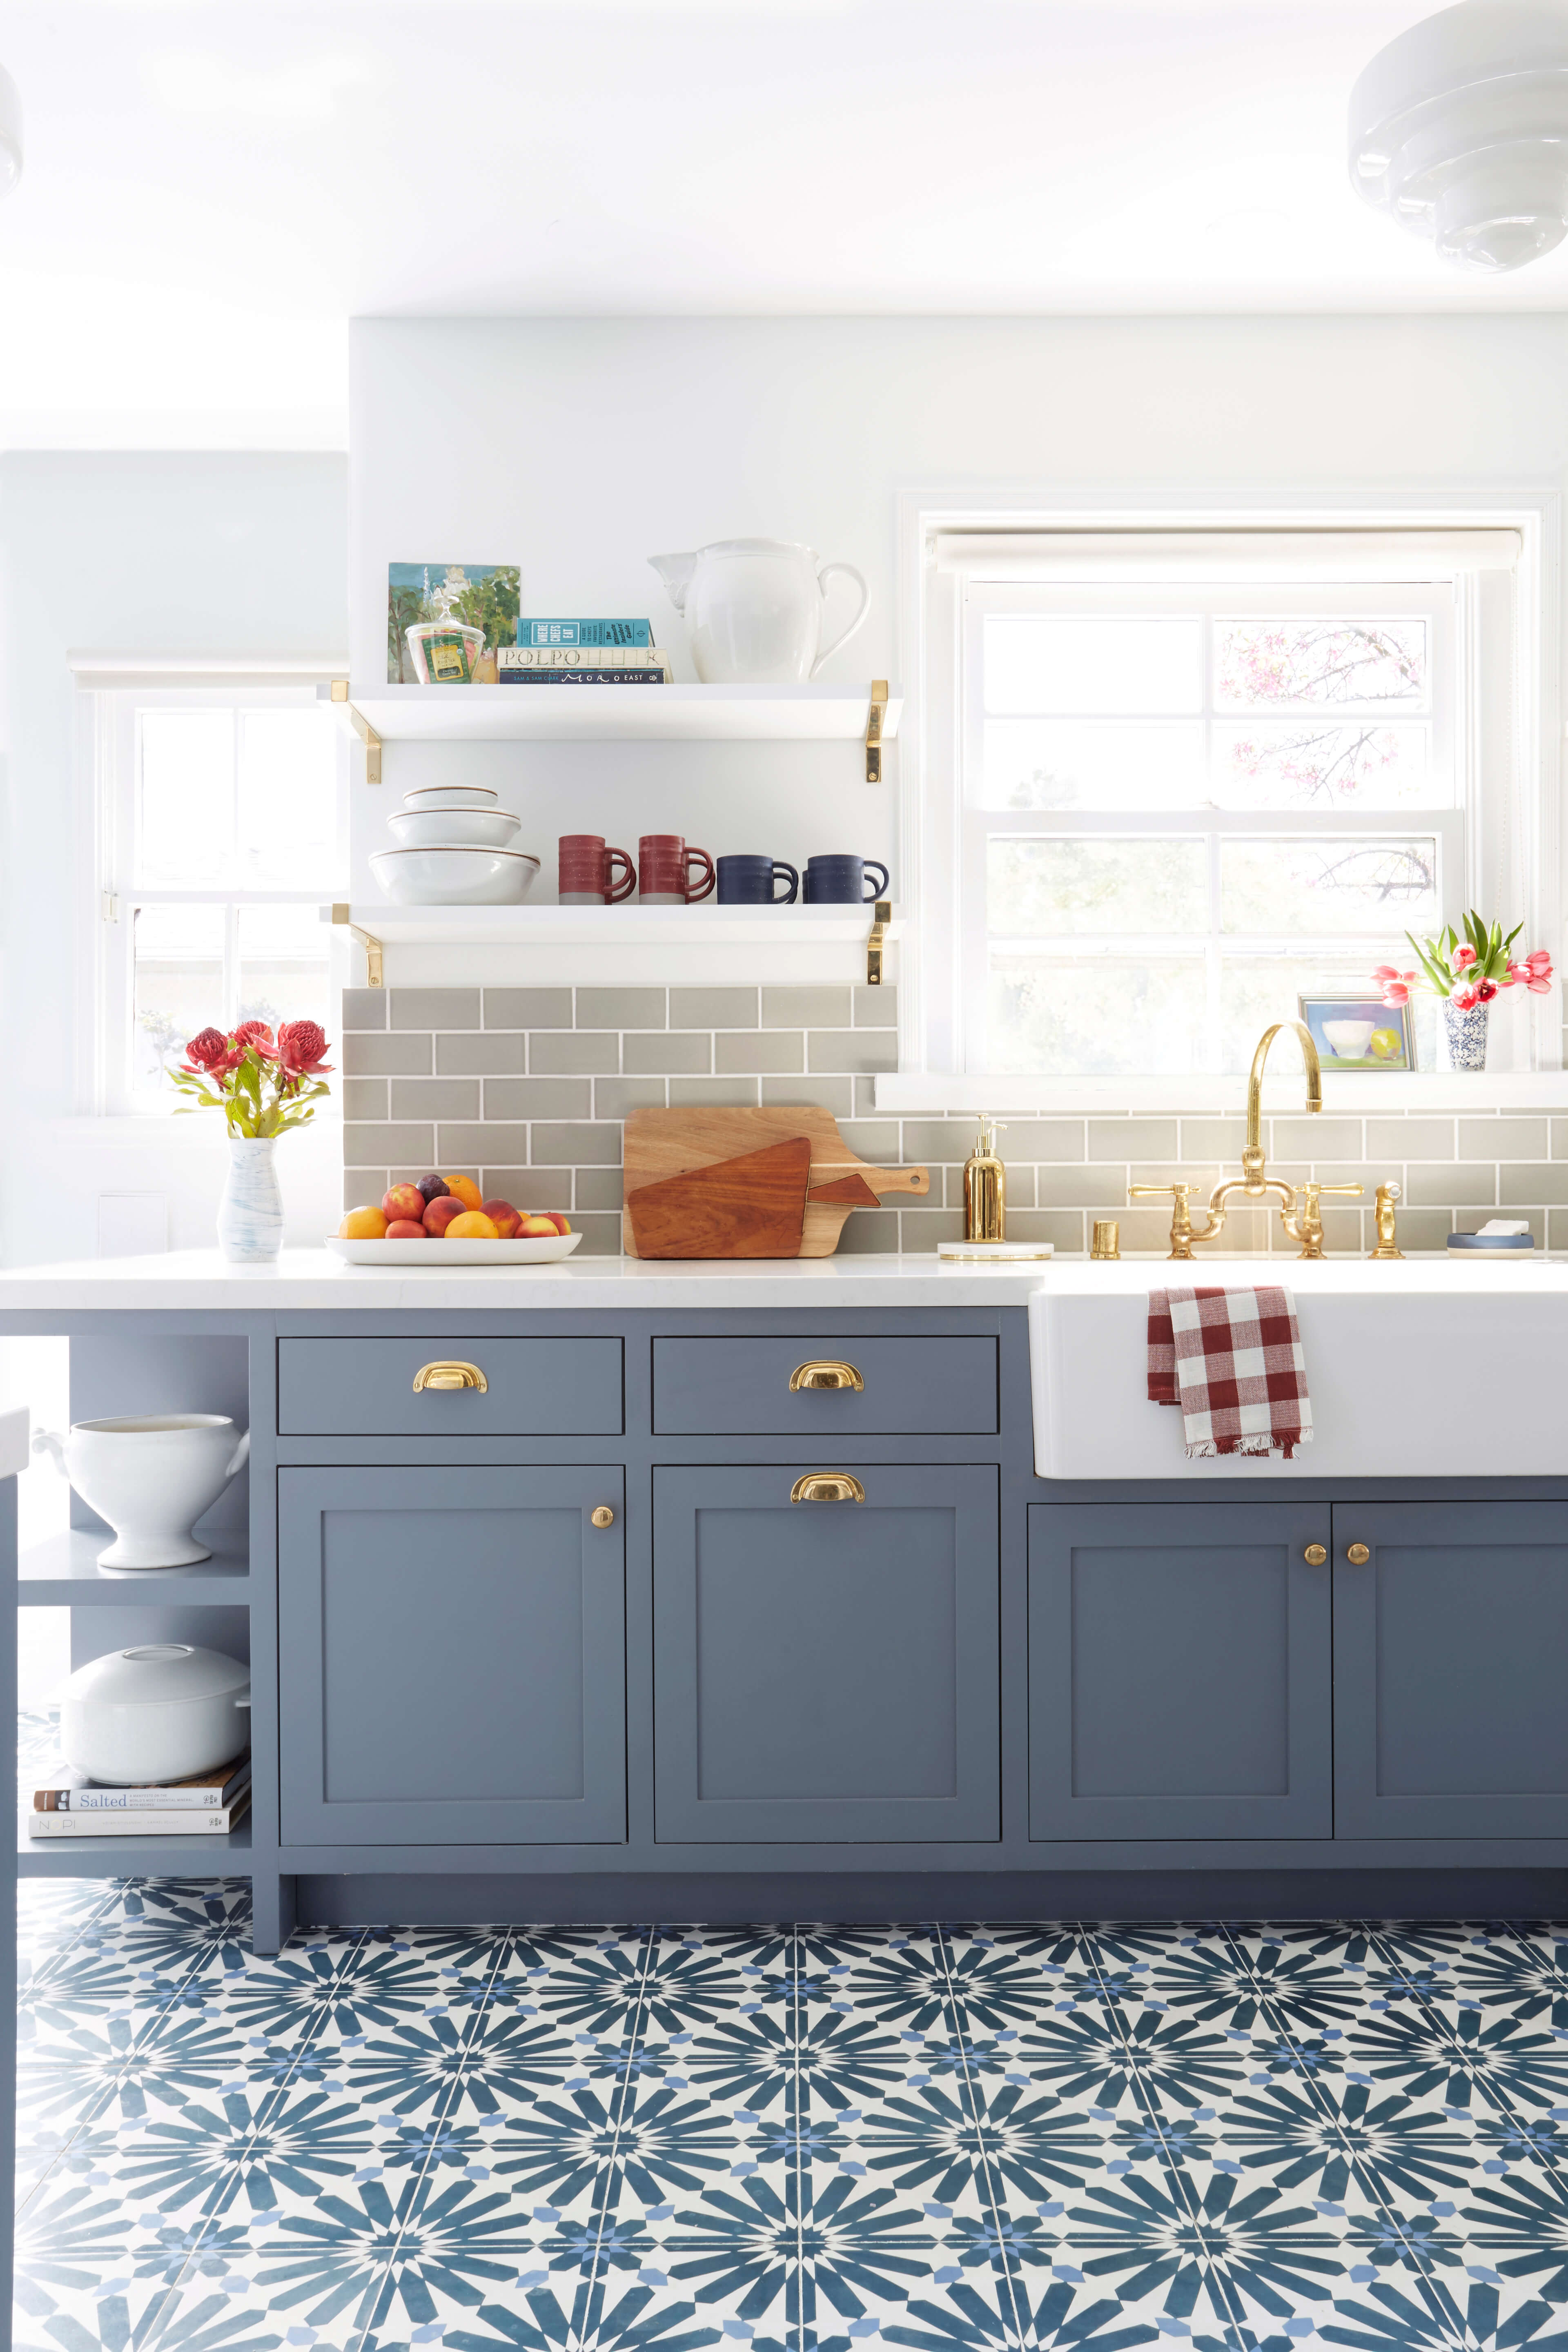
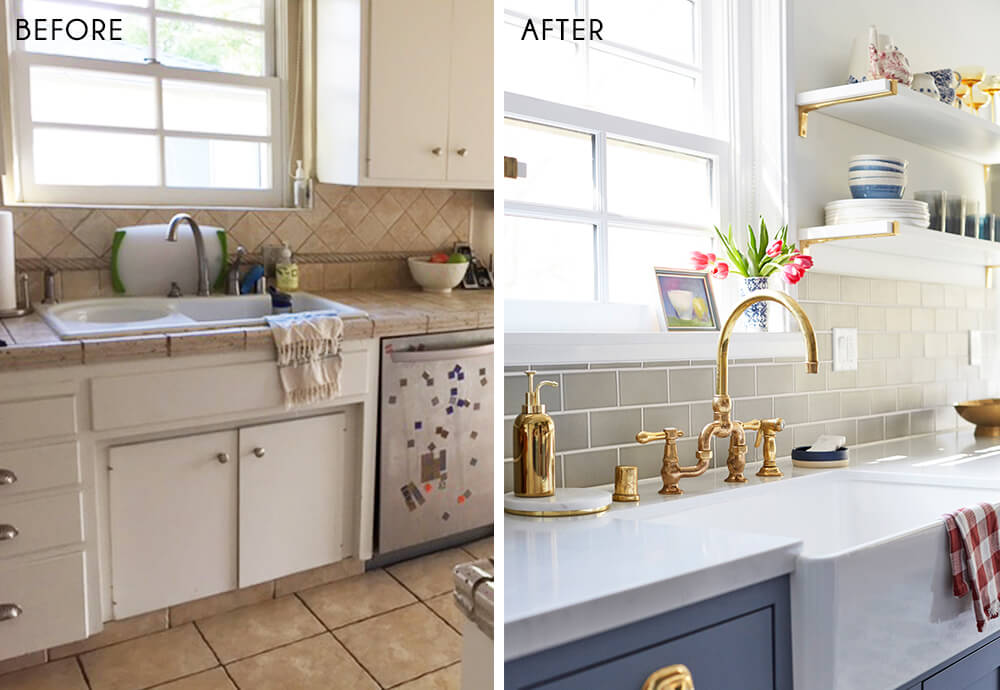
We always wanted to bring in a neutral gray into the kitchen so we did that through the wall tiles. These are the 3 x 6 subway with the glazed edge by Fireclay in the colourway Blue Spruce. I love how matte they are and really pop with the white grout we used. I have to say that the contractor’s tiler was super meticulous when installing which was amazing. I would strongly advise spending time with your tiler checking over the spacing out of your tiles as this can really make all the difference.
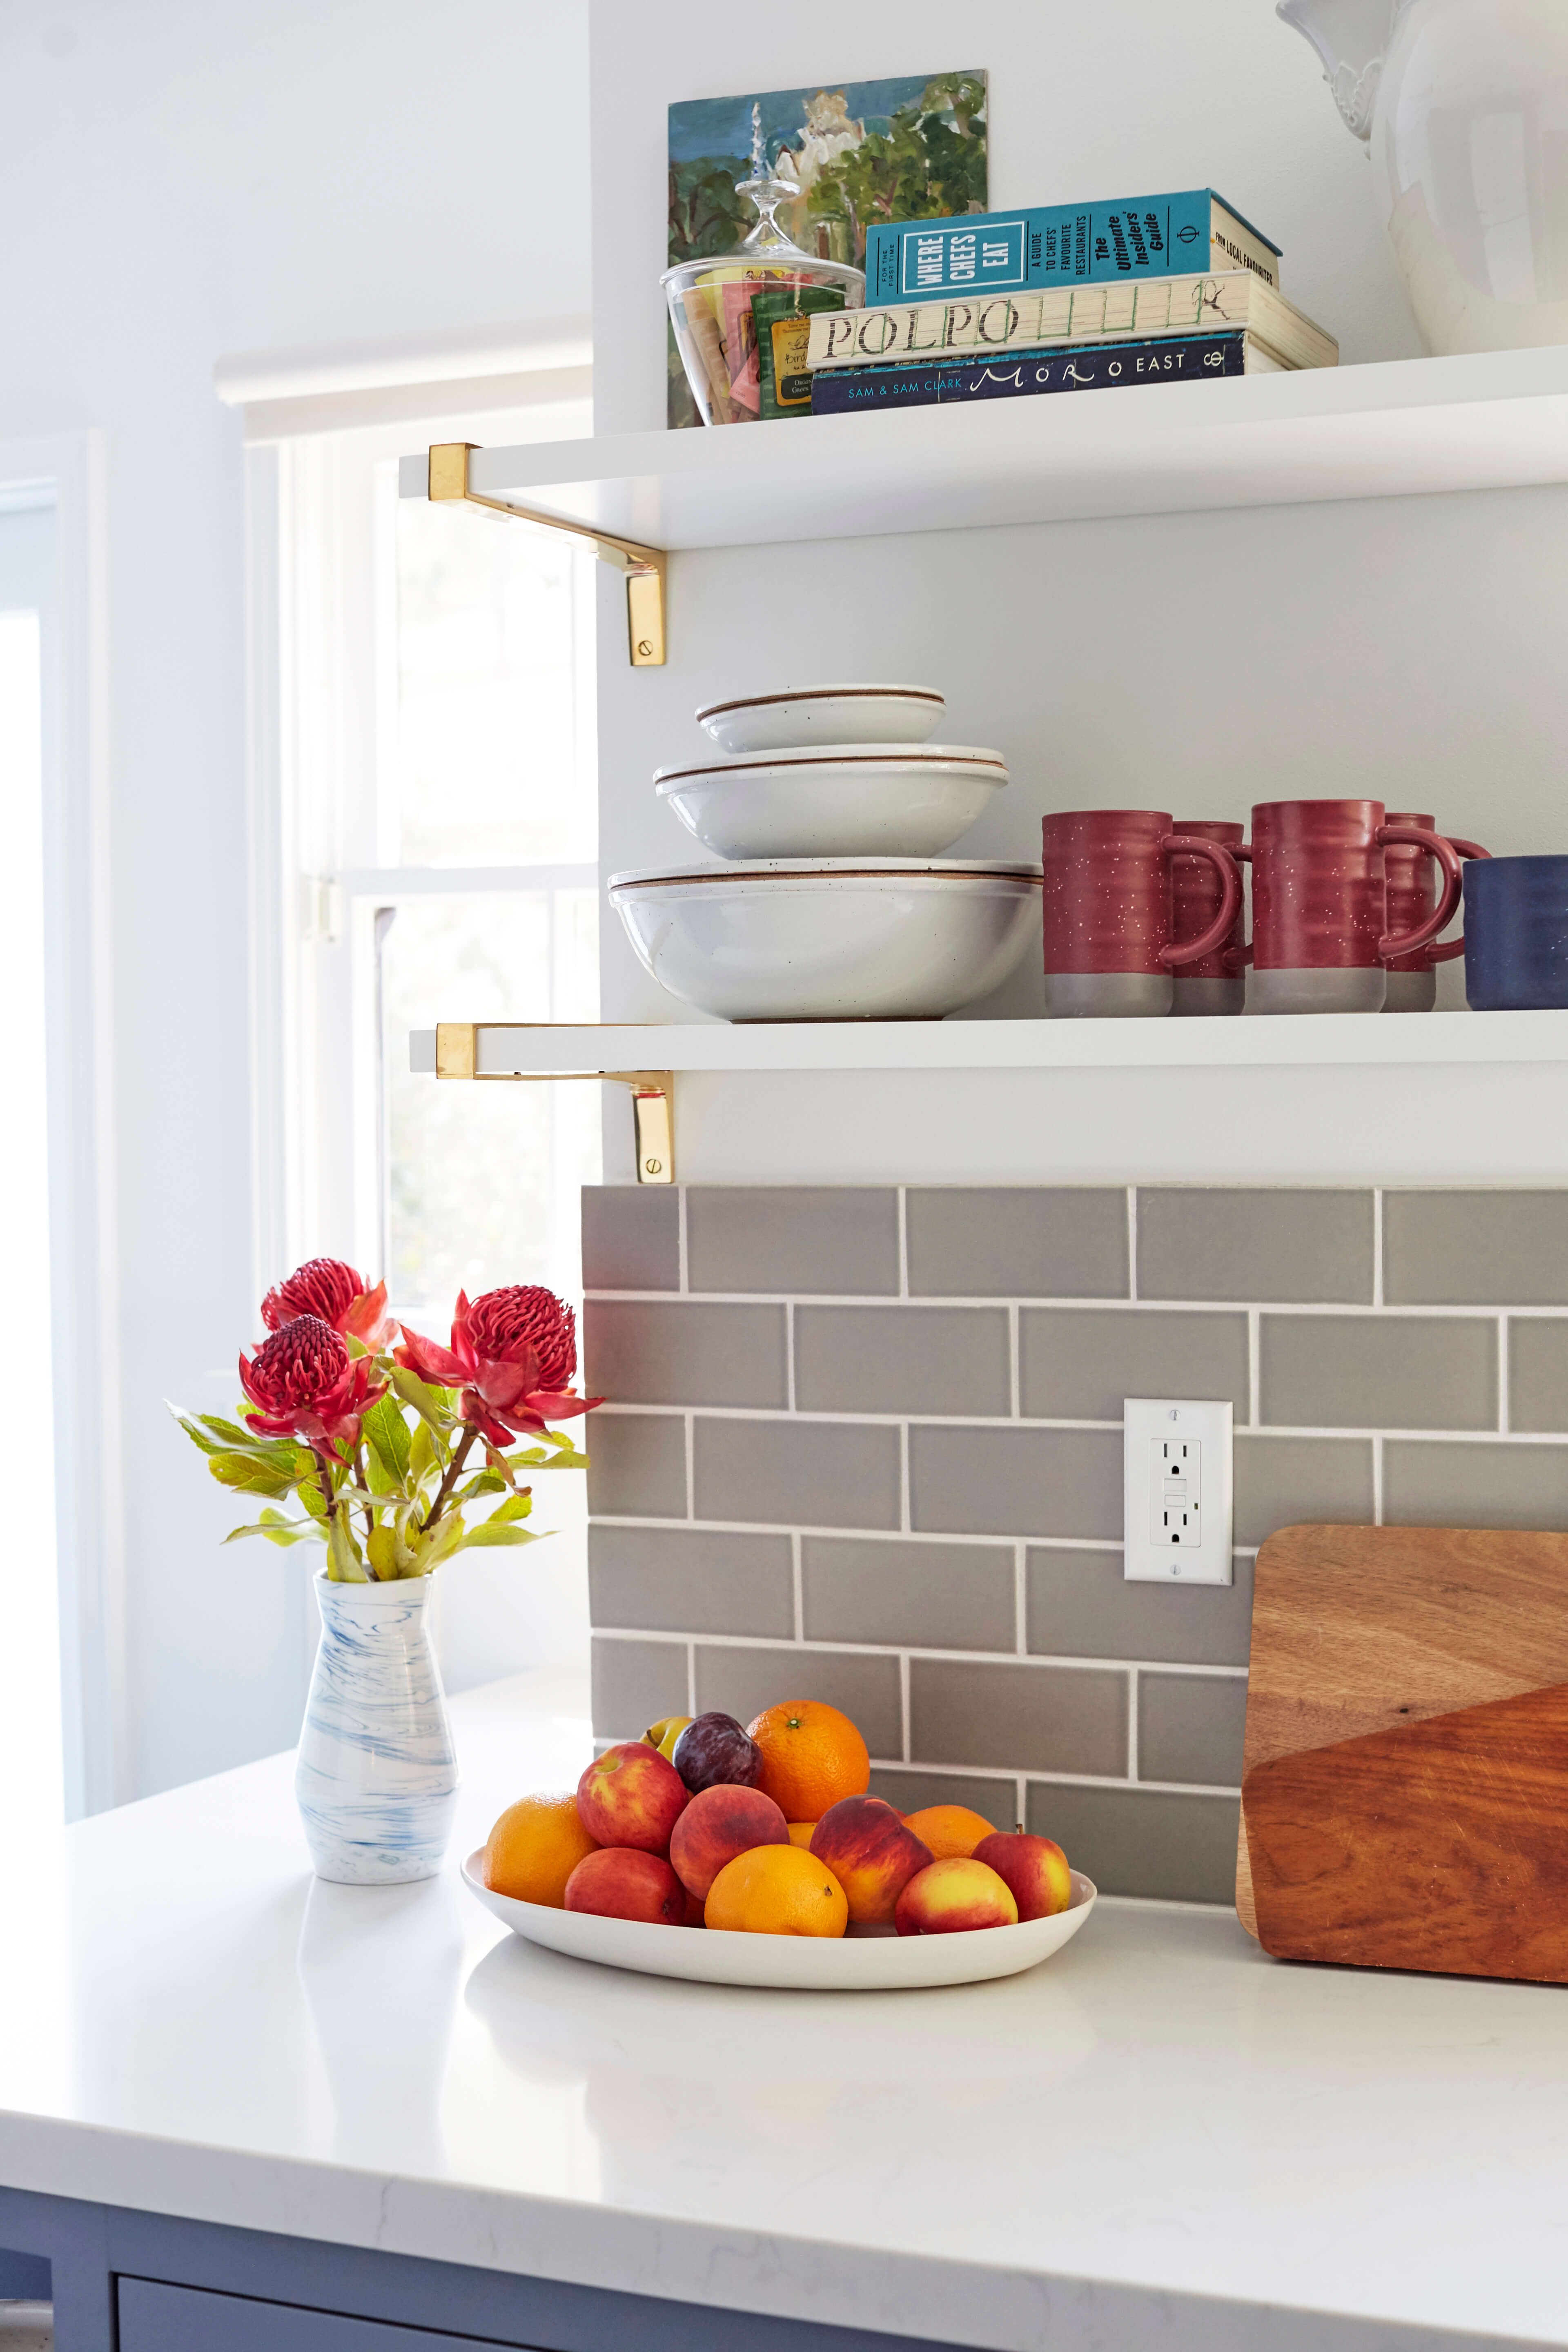
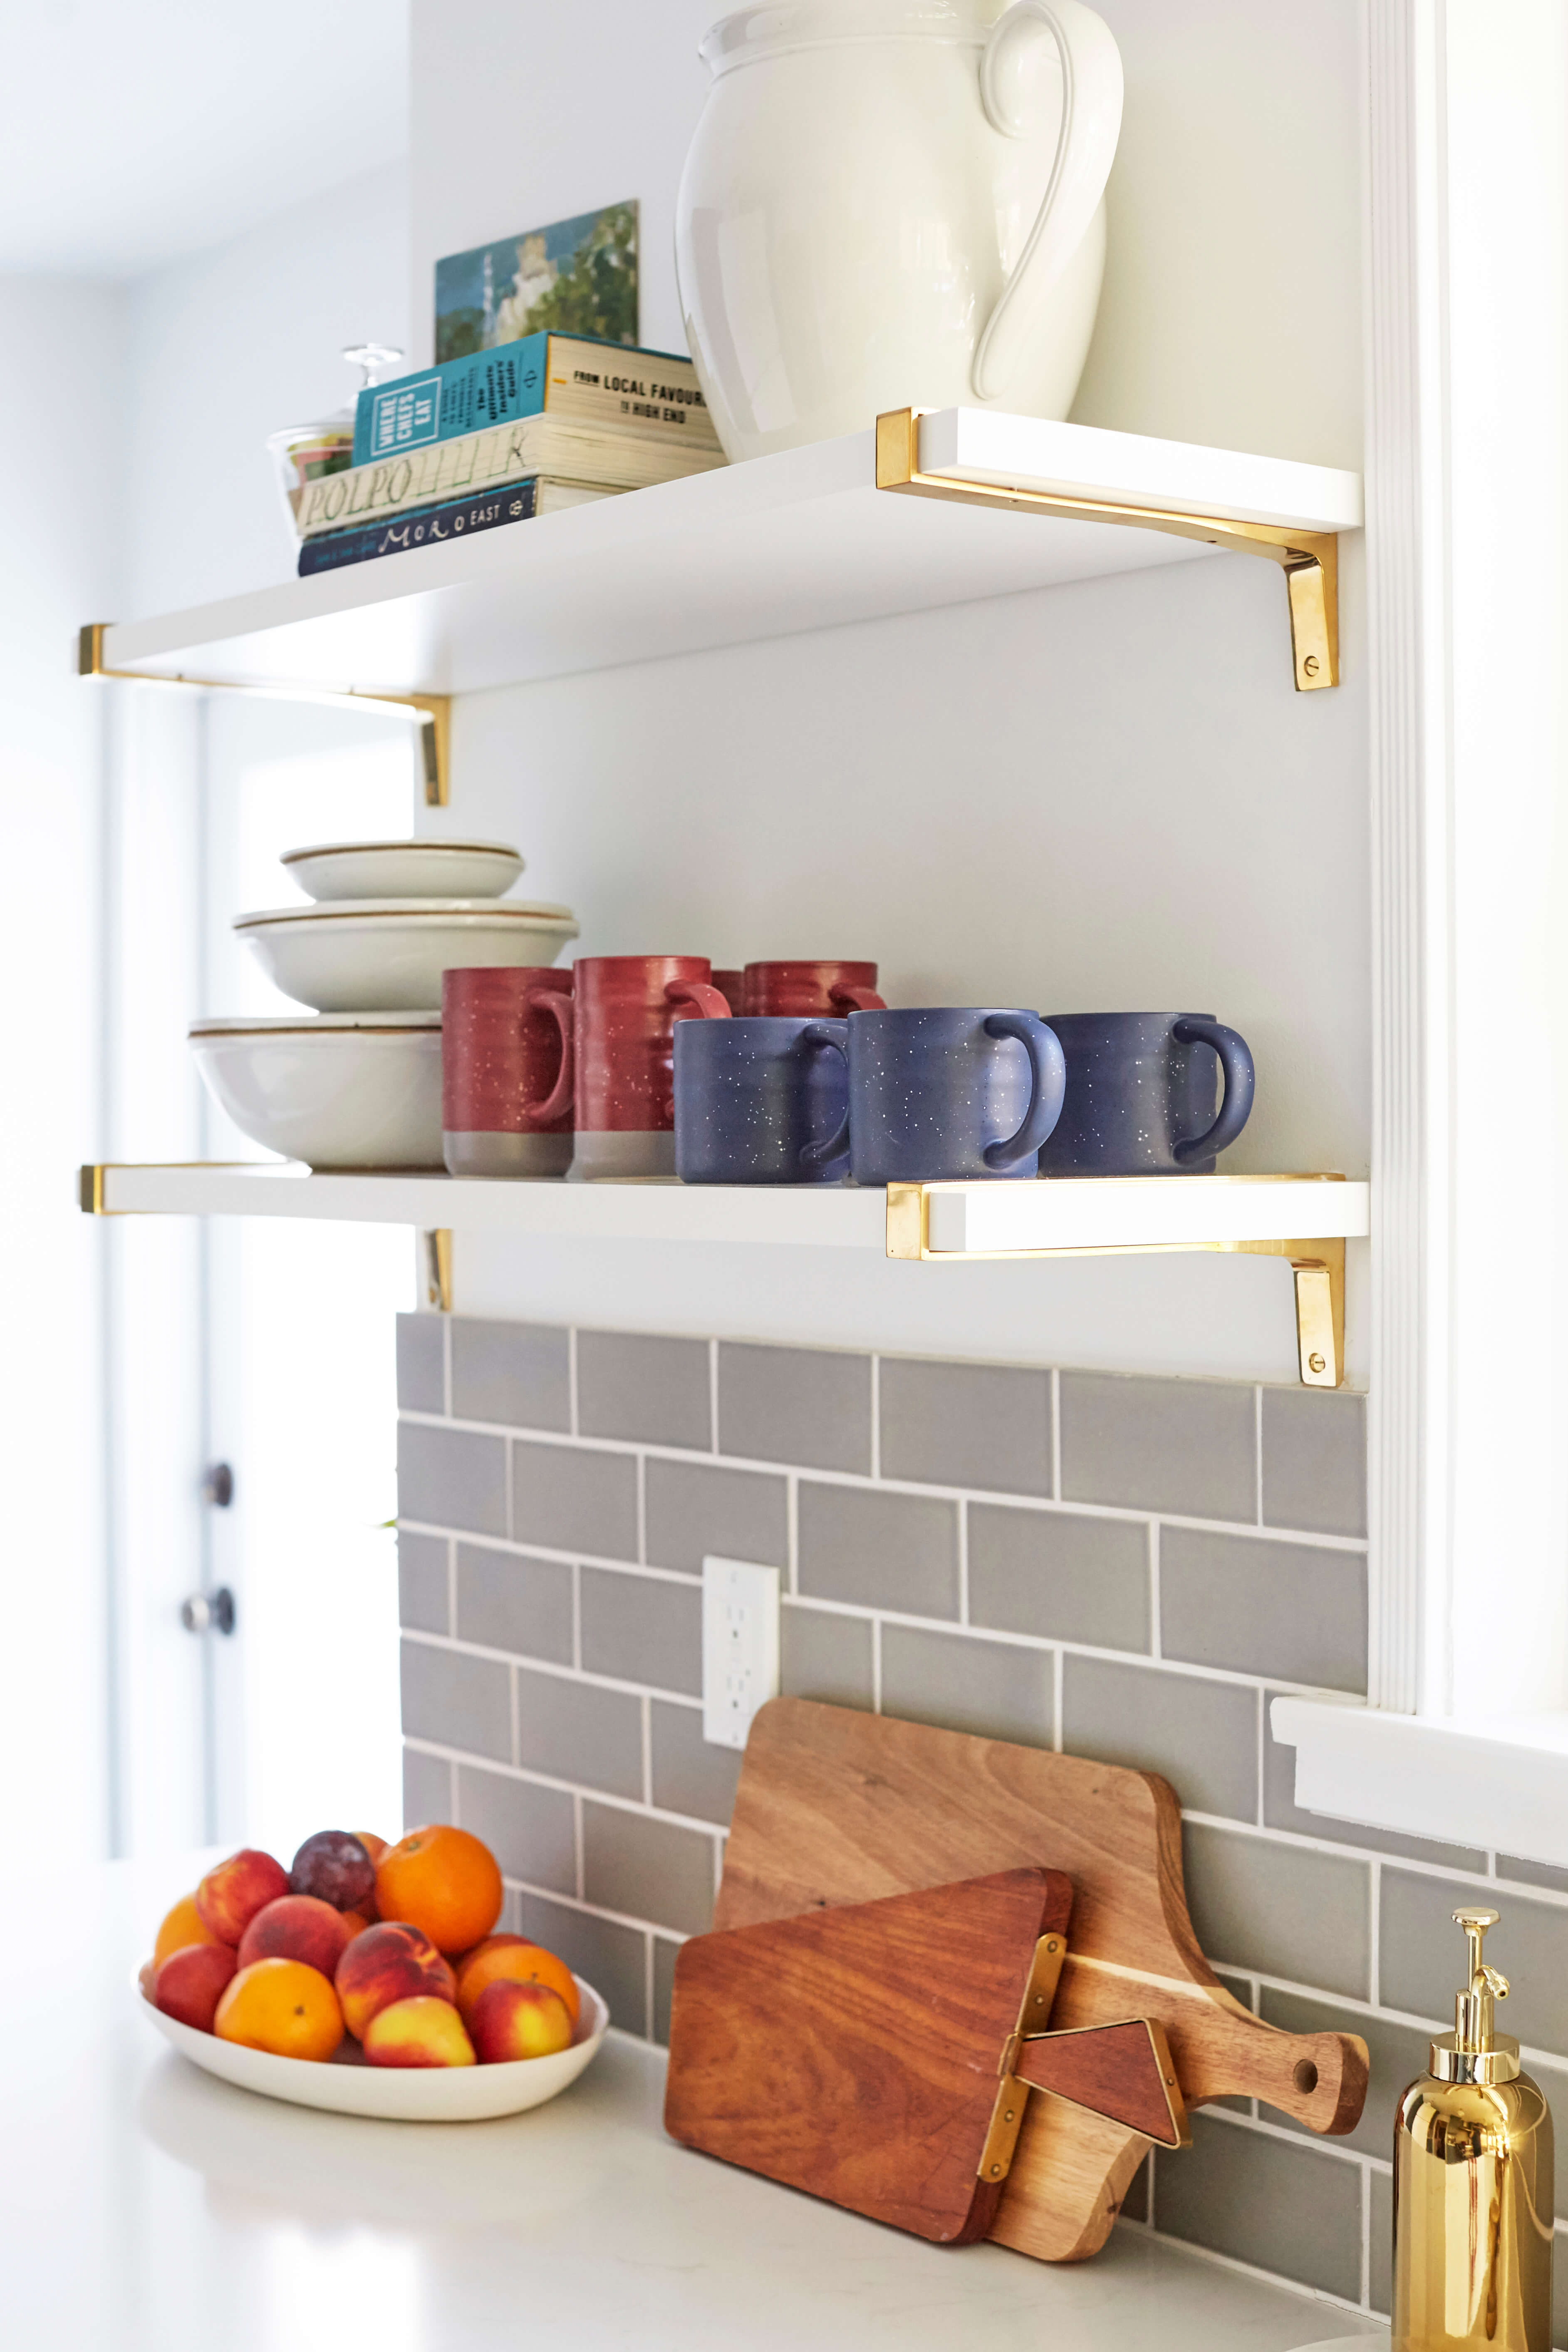
We installed open shelving on either side of the windows as well to make that wall feel more open and light. One of the main concerns was losing storage space but since we were adding cabinets elsewhere in the room it wasn’t too much of an issue. We kept the shelves simple with everyday essentials on the lower shelves. We corralled these into groups so different height cups together, different height and colour glassware together and plates and bowls stacked on top of each other.
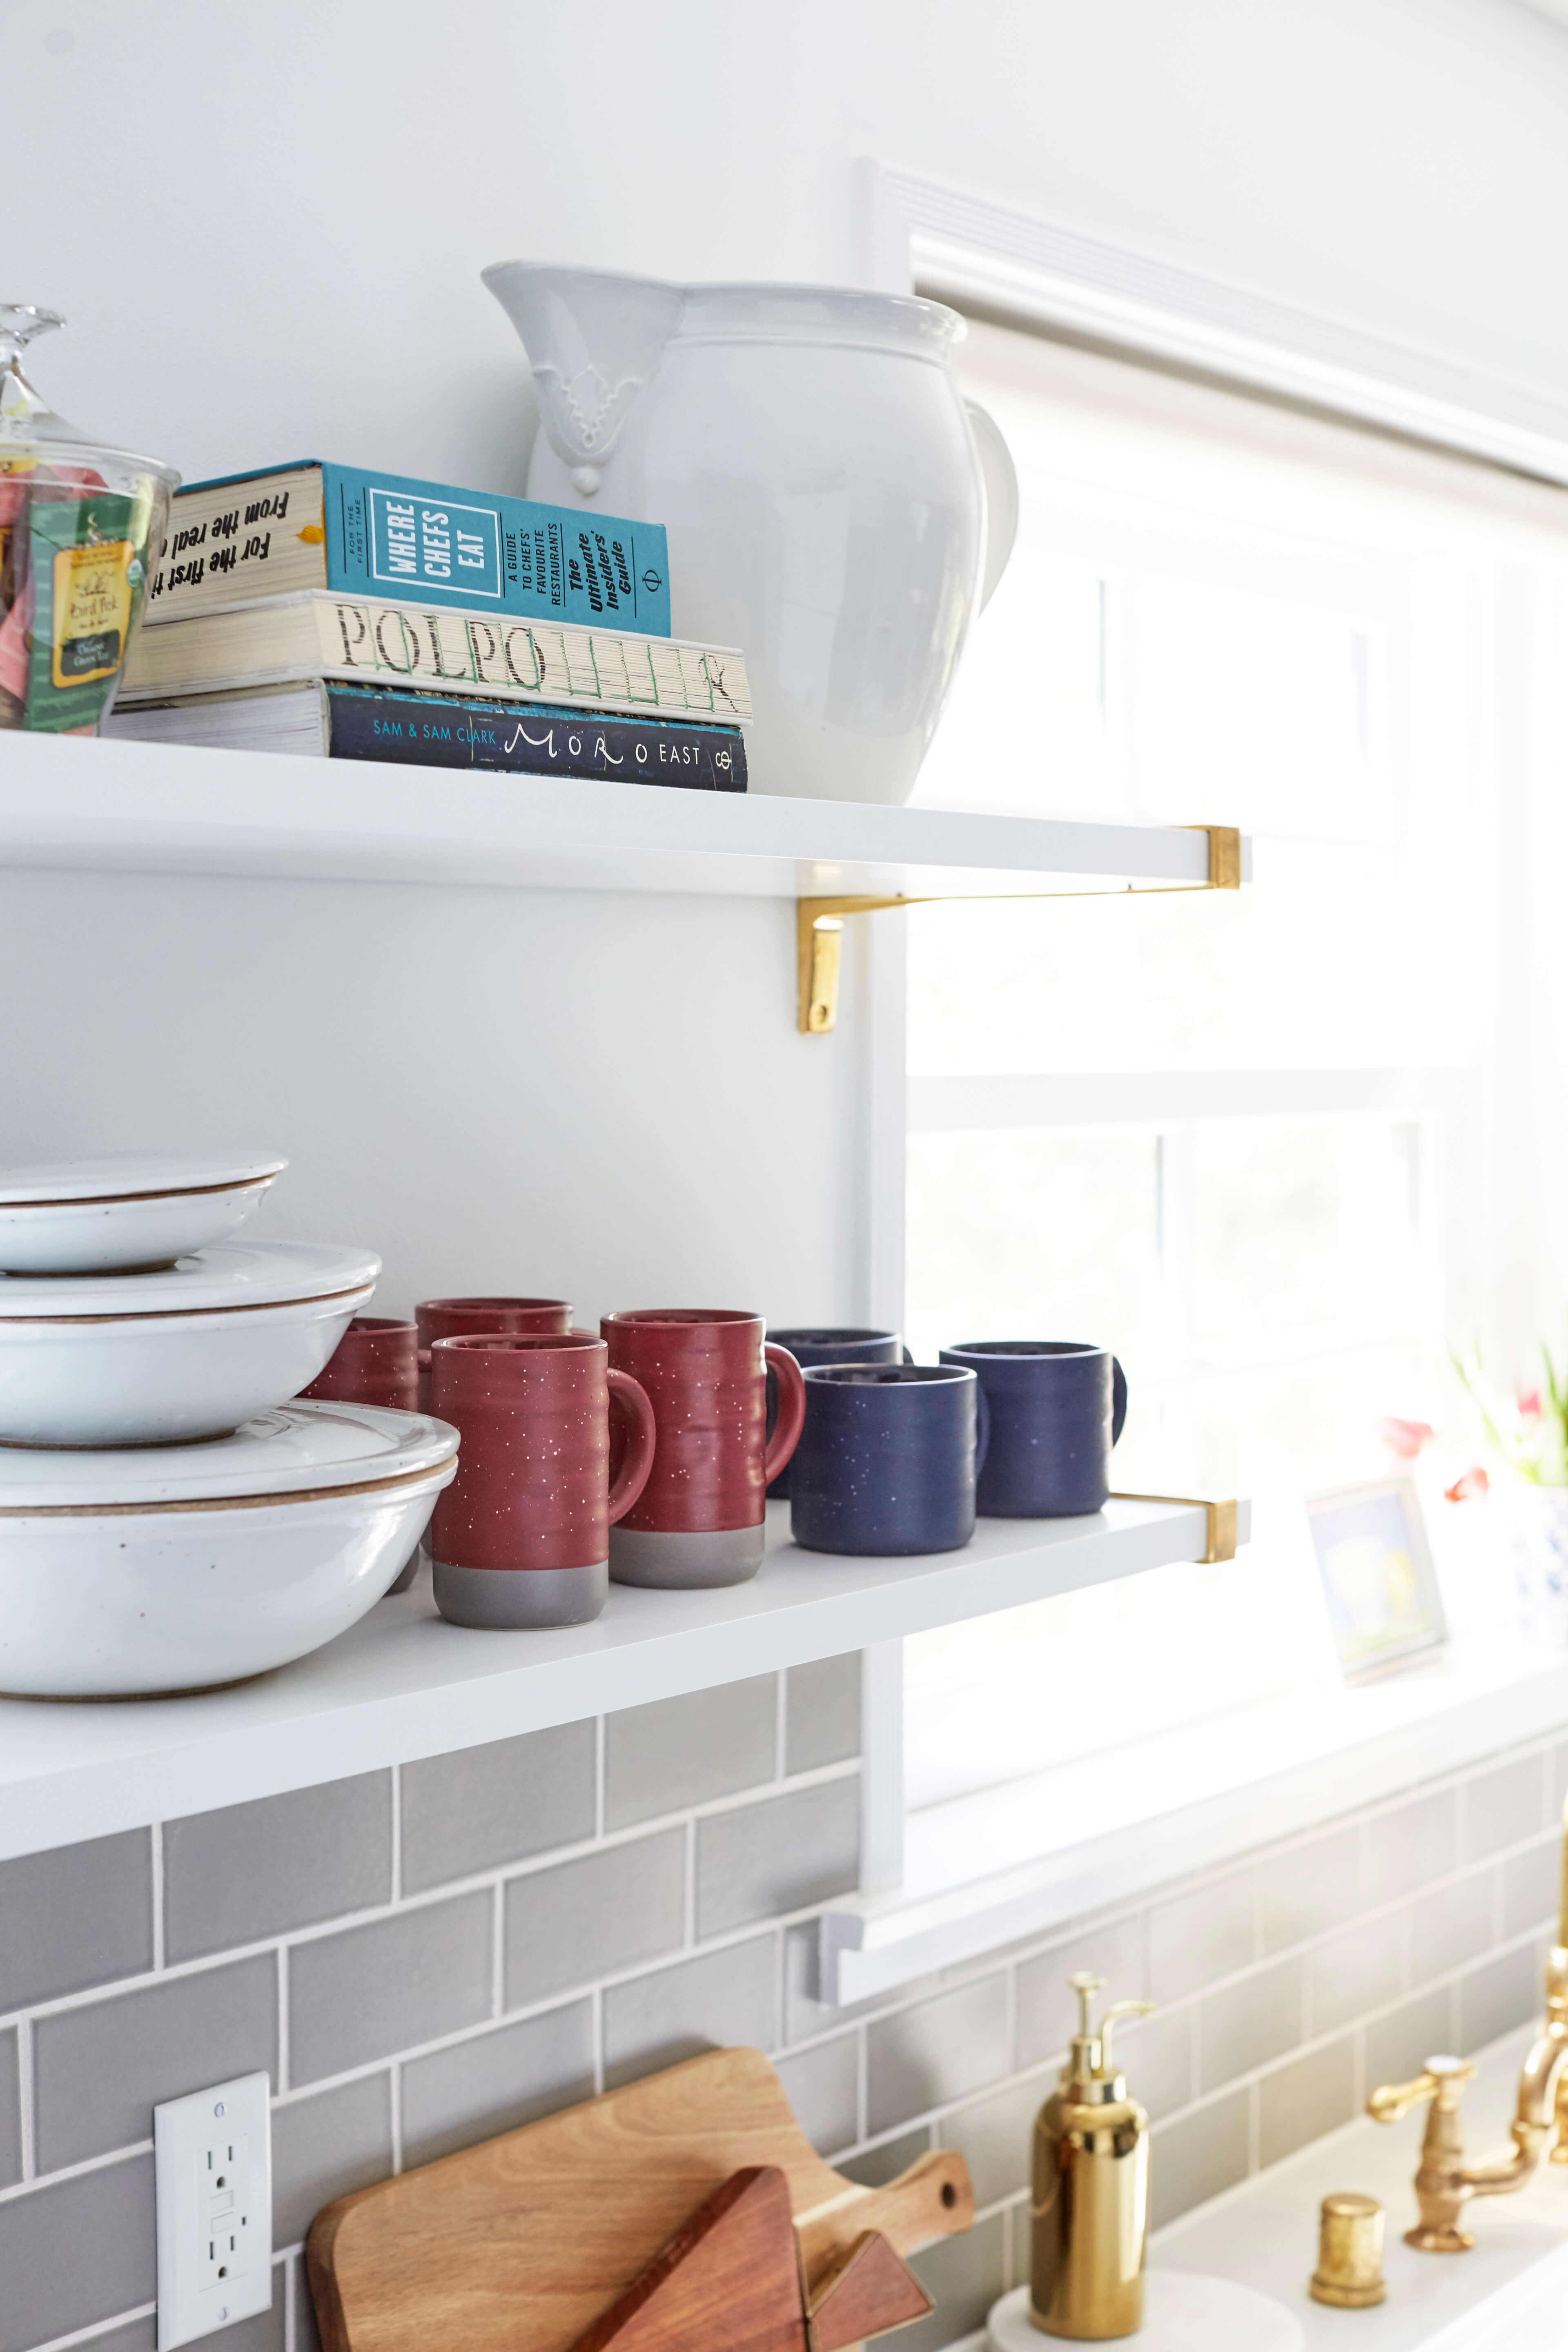
We put items on the upper shelves that don’t need constant grabbing so we put more vintage, delicate pieces like the amber glass champagne coupes, the heirloom pitcher and the collection of teapots. And no shelf is complete without a set of cook books and a cute piece of art.
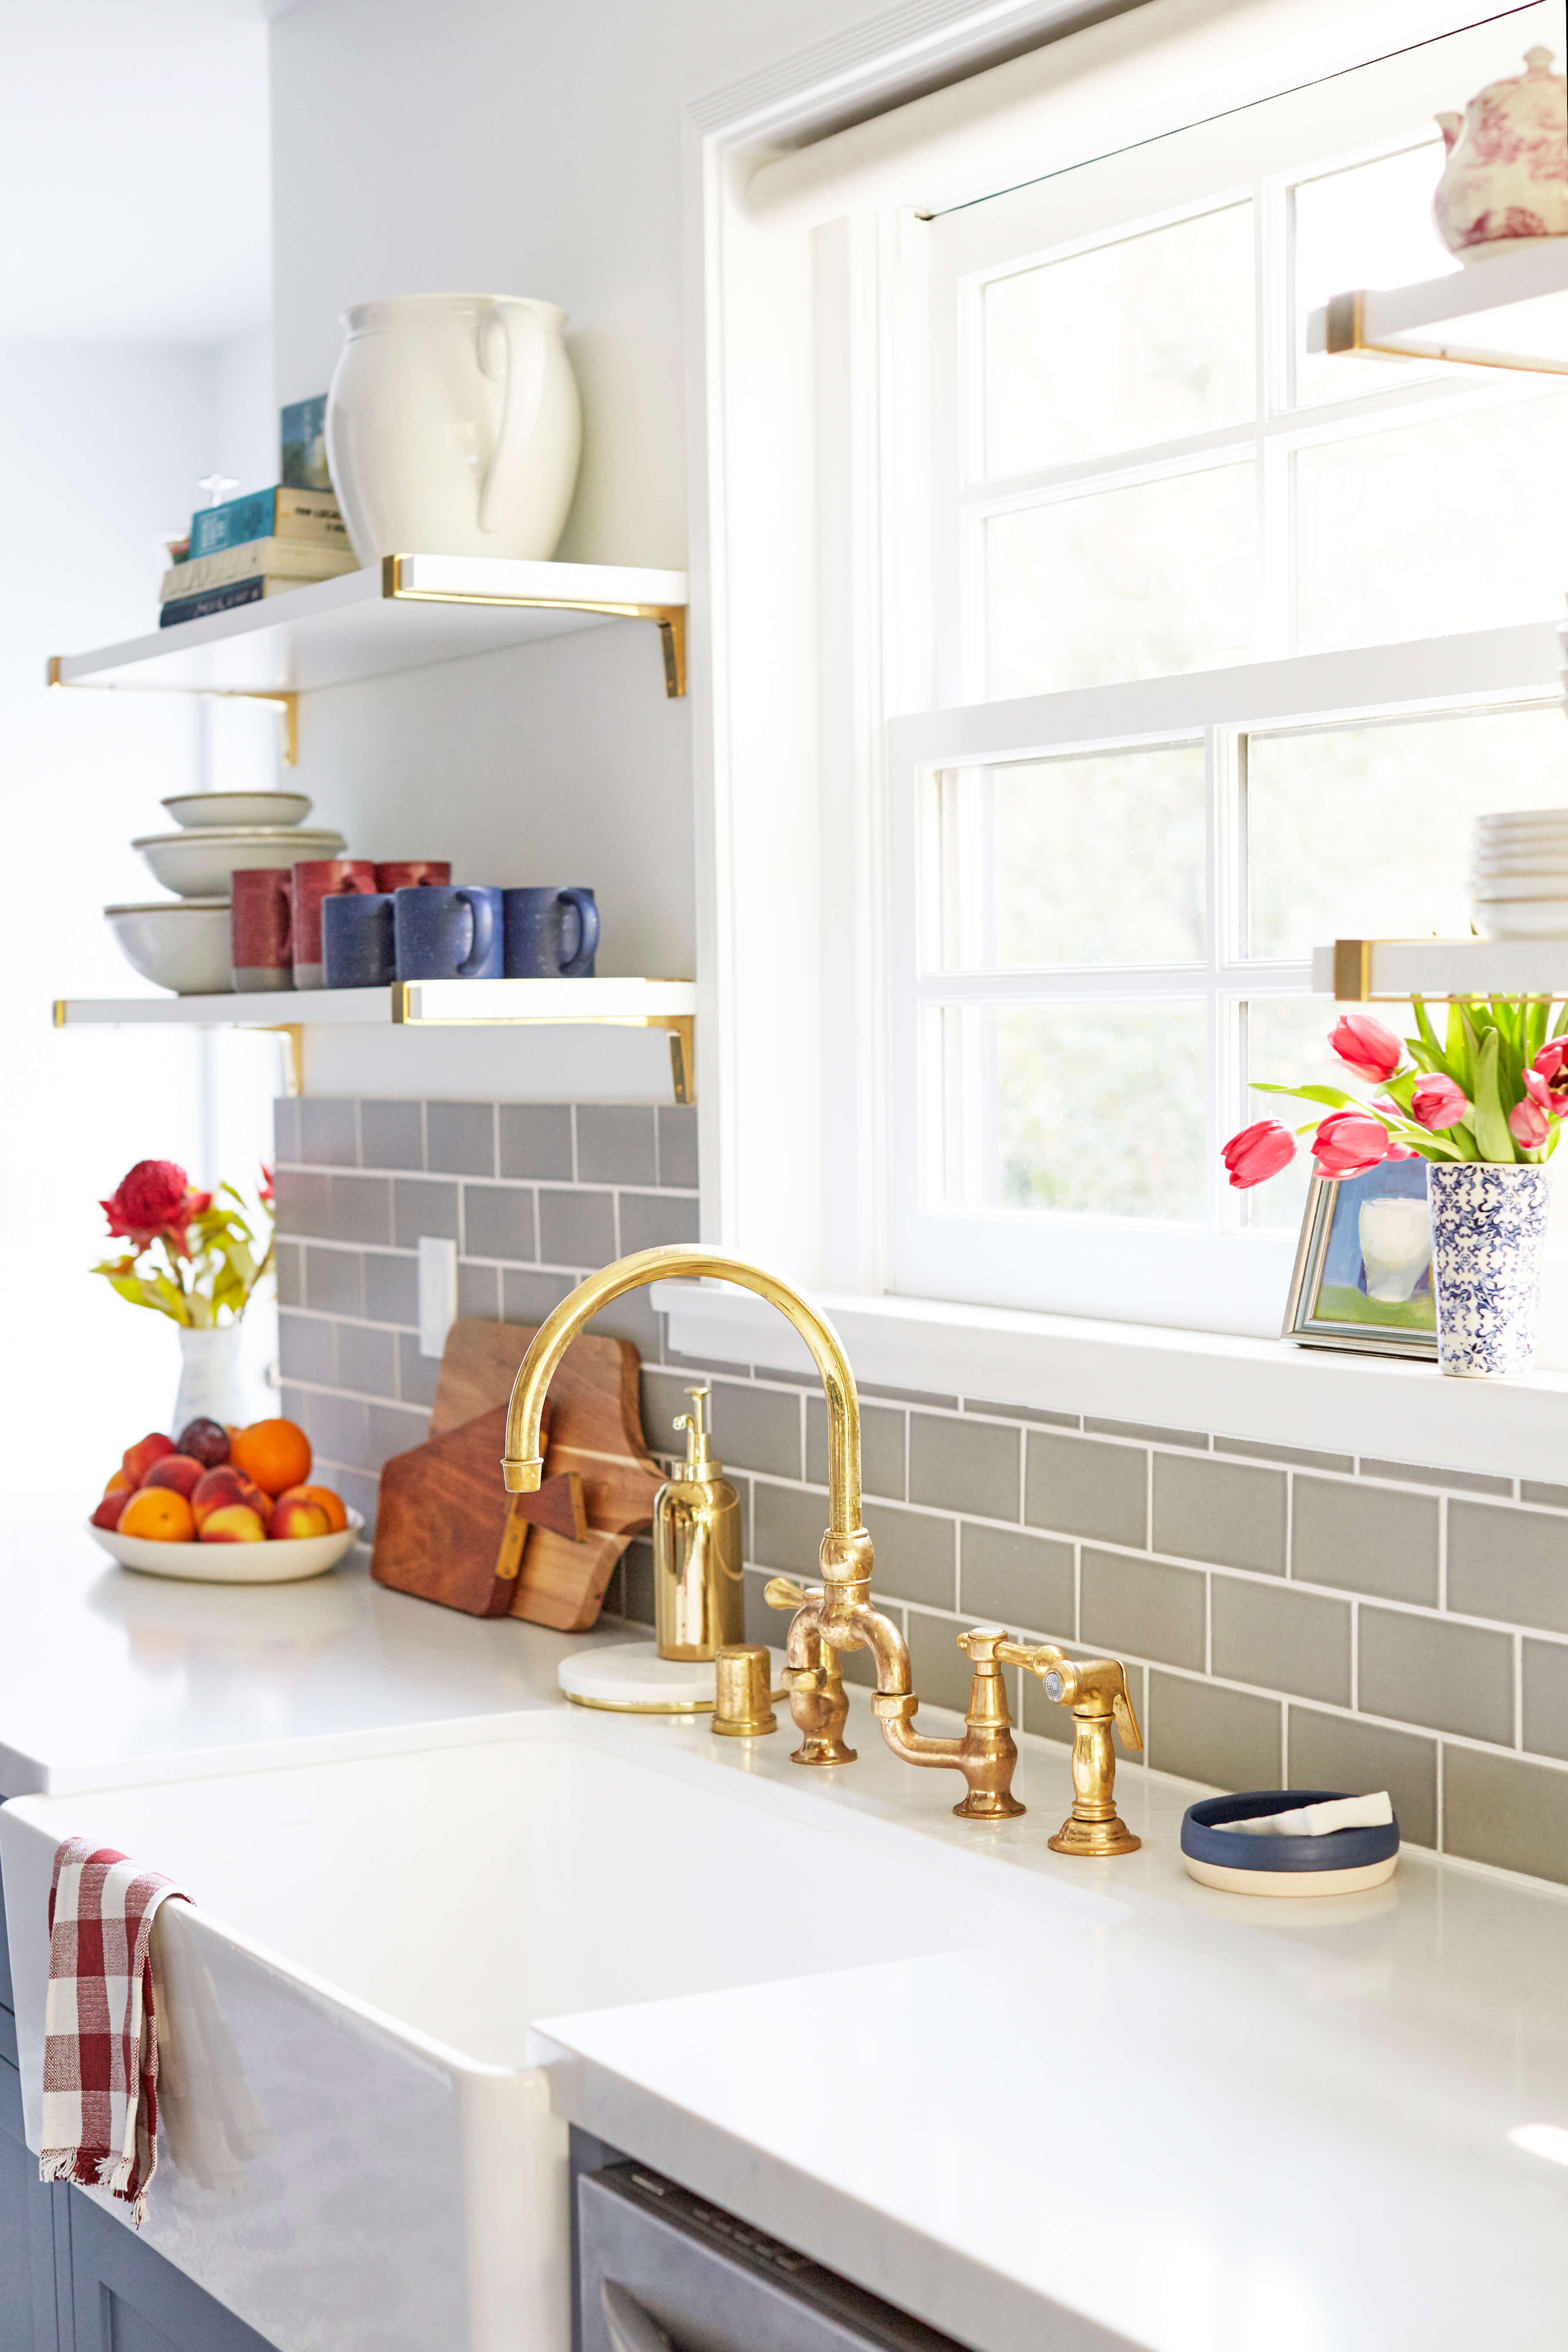
The sink and faucet might be one of my favorite highlights of this room and I long for a large open farm sink like this. That faucet from Newport brass will only get better and patina with age. You do have to be careful with unlacquered metal though because it can tarnish if you don’t look after it since it’s classed as a living metal. The best thing to do is pat it dry to avoid any hard water spots and you can also clean it with a 50/50 water and white vinegar solution – just don’t let that solution sit on the faucet for too long and def don’t soak it either. It takes a bit more care than your average faucet but that’s the price you pay for an insanely beautiful piece of kitchen jewelry.

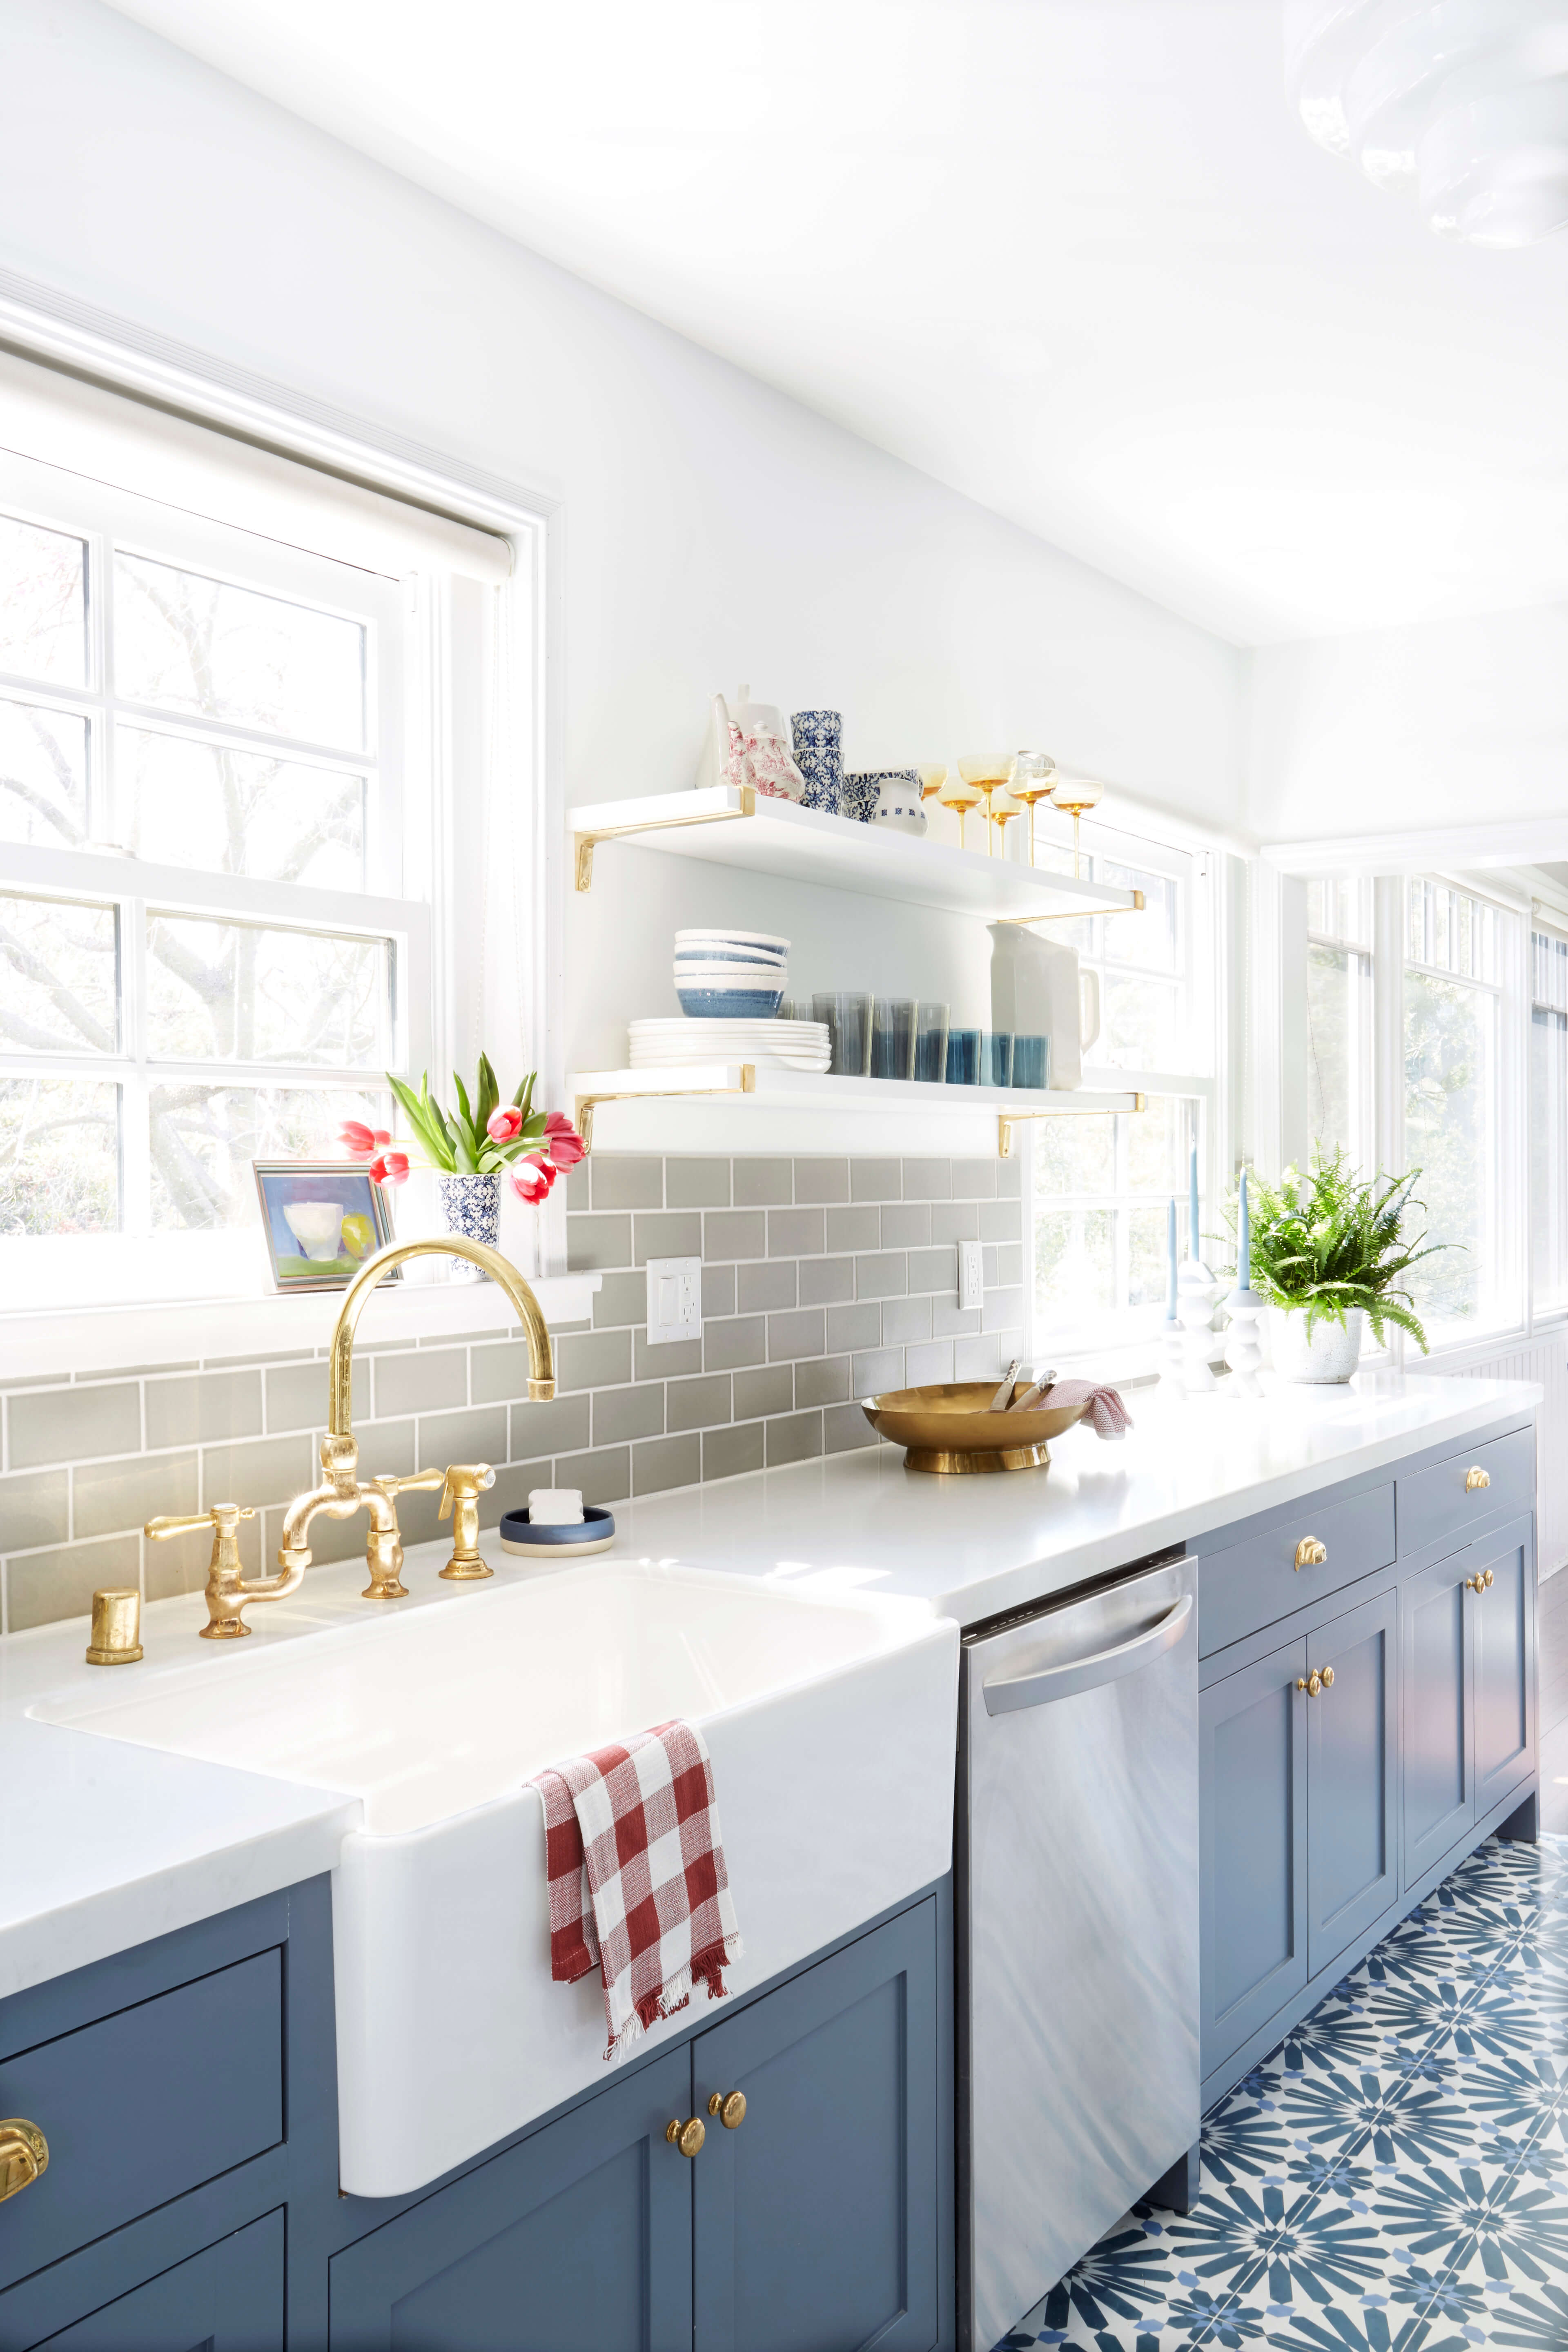
We extended the lower cabinets at the end of the room to give additional storage and countertop space. For the countertop we went with Pental Quartz for it’s durability. They initially wanted to do a white counter but we love the idea of having something with a slight vein in it. We definitely didn’t want for it to appear like a marble alternative but the solid white felt pretty stark and contemporary with the rest of the palette.
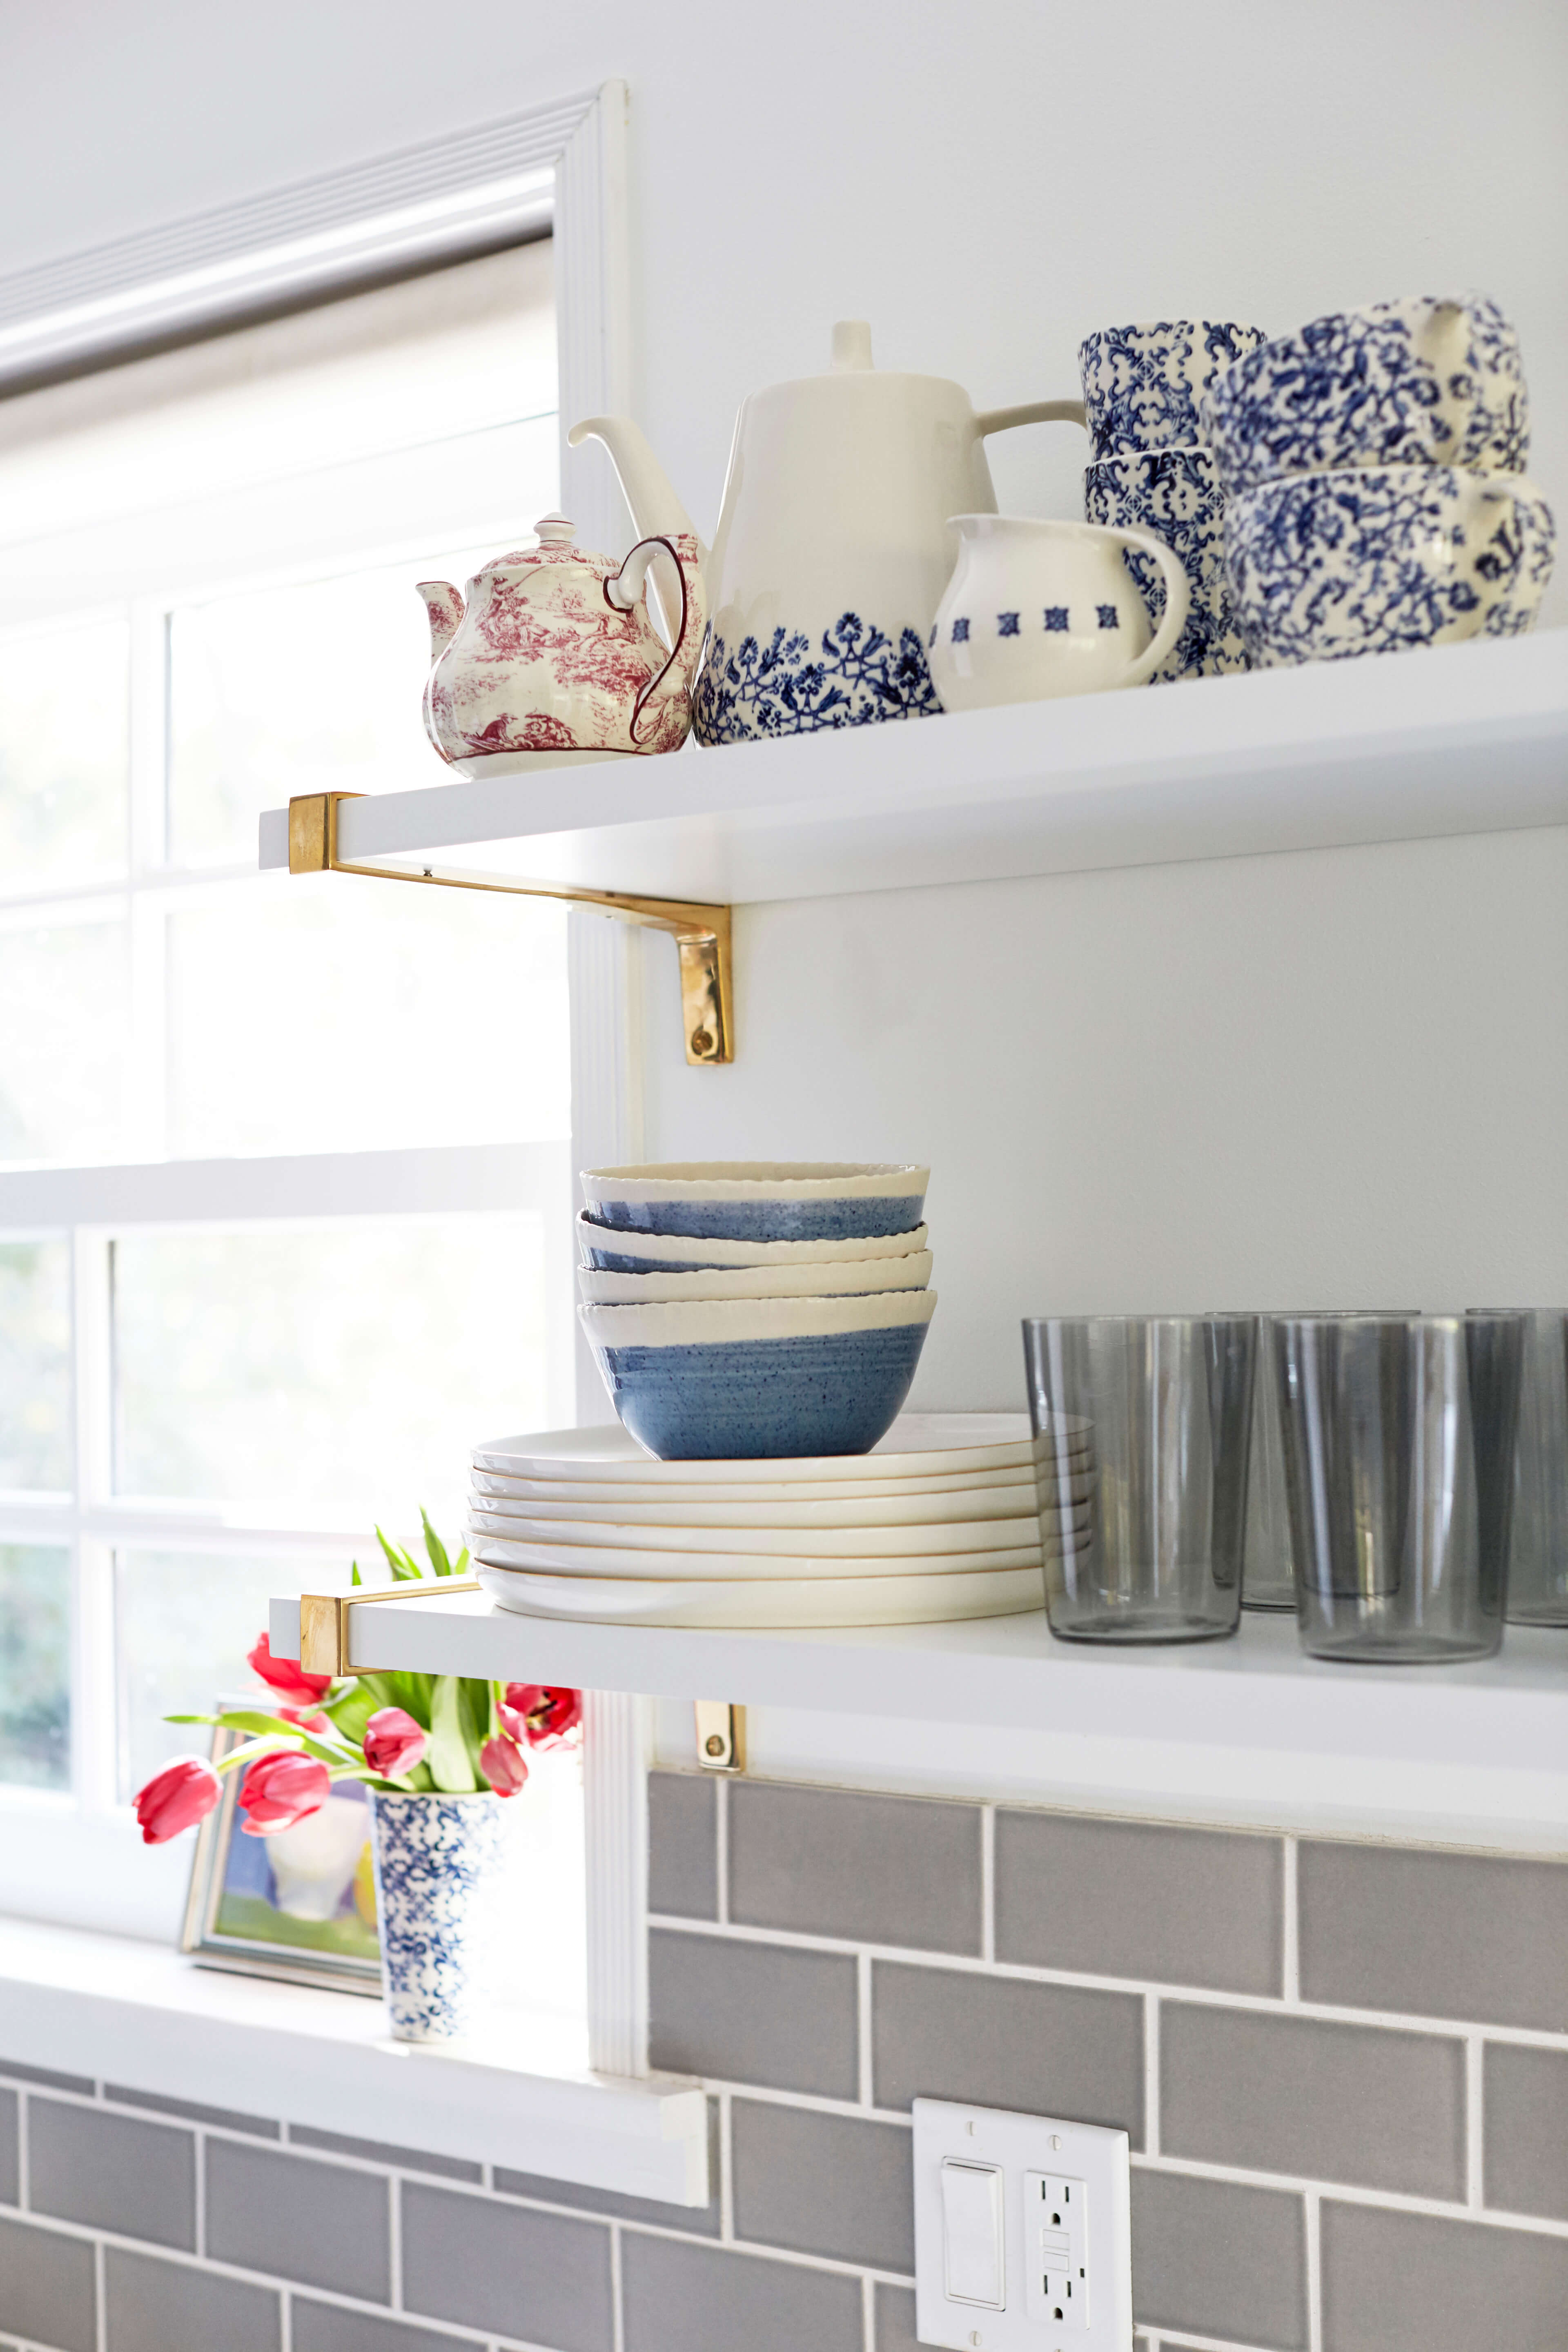
You can never have enough flowers in your life so we brought a bit of colour in here with these tulips. You also don’t always have to use a vase, this is actually a tall mug set from Food52 that we have stacked on the top shelf.

Since we have lots of gold in here the amber glass really stands out in and is reminder that we don’t always have to go with clear glass. Colourful glass can bring an extra layer as long as the tone is right with everything else.
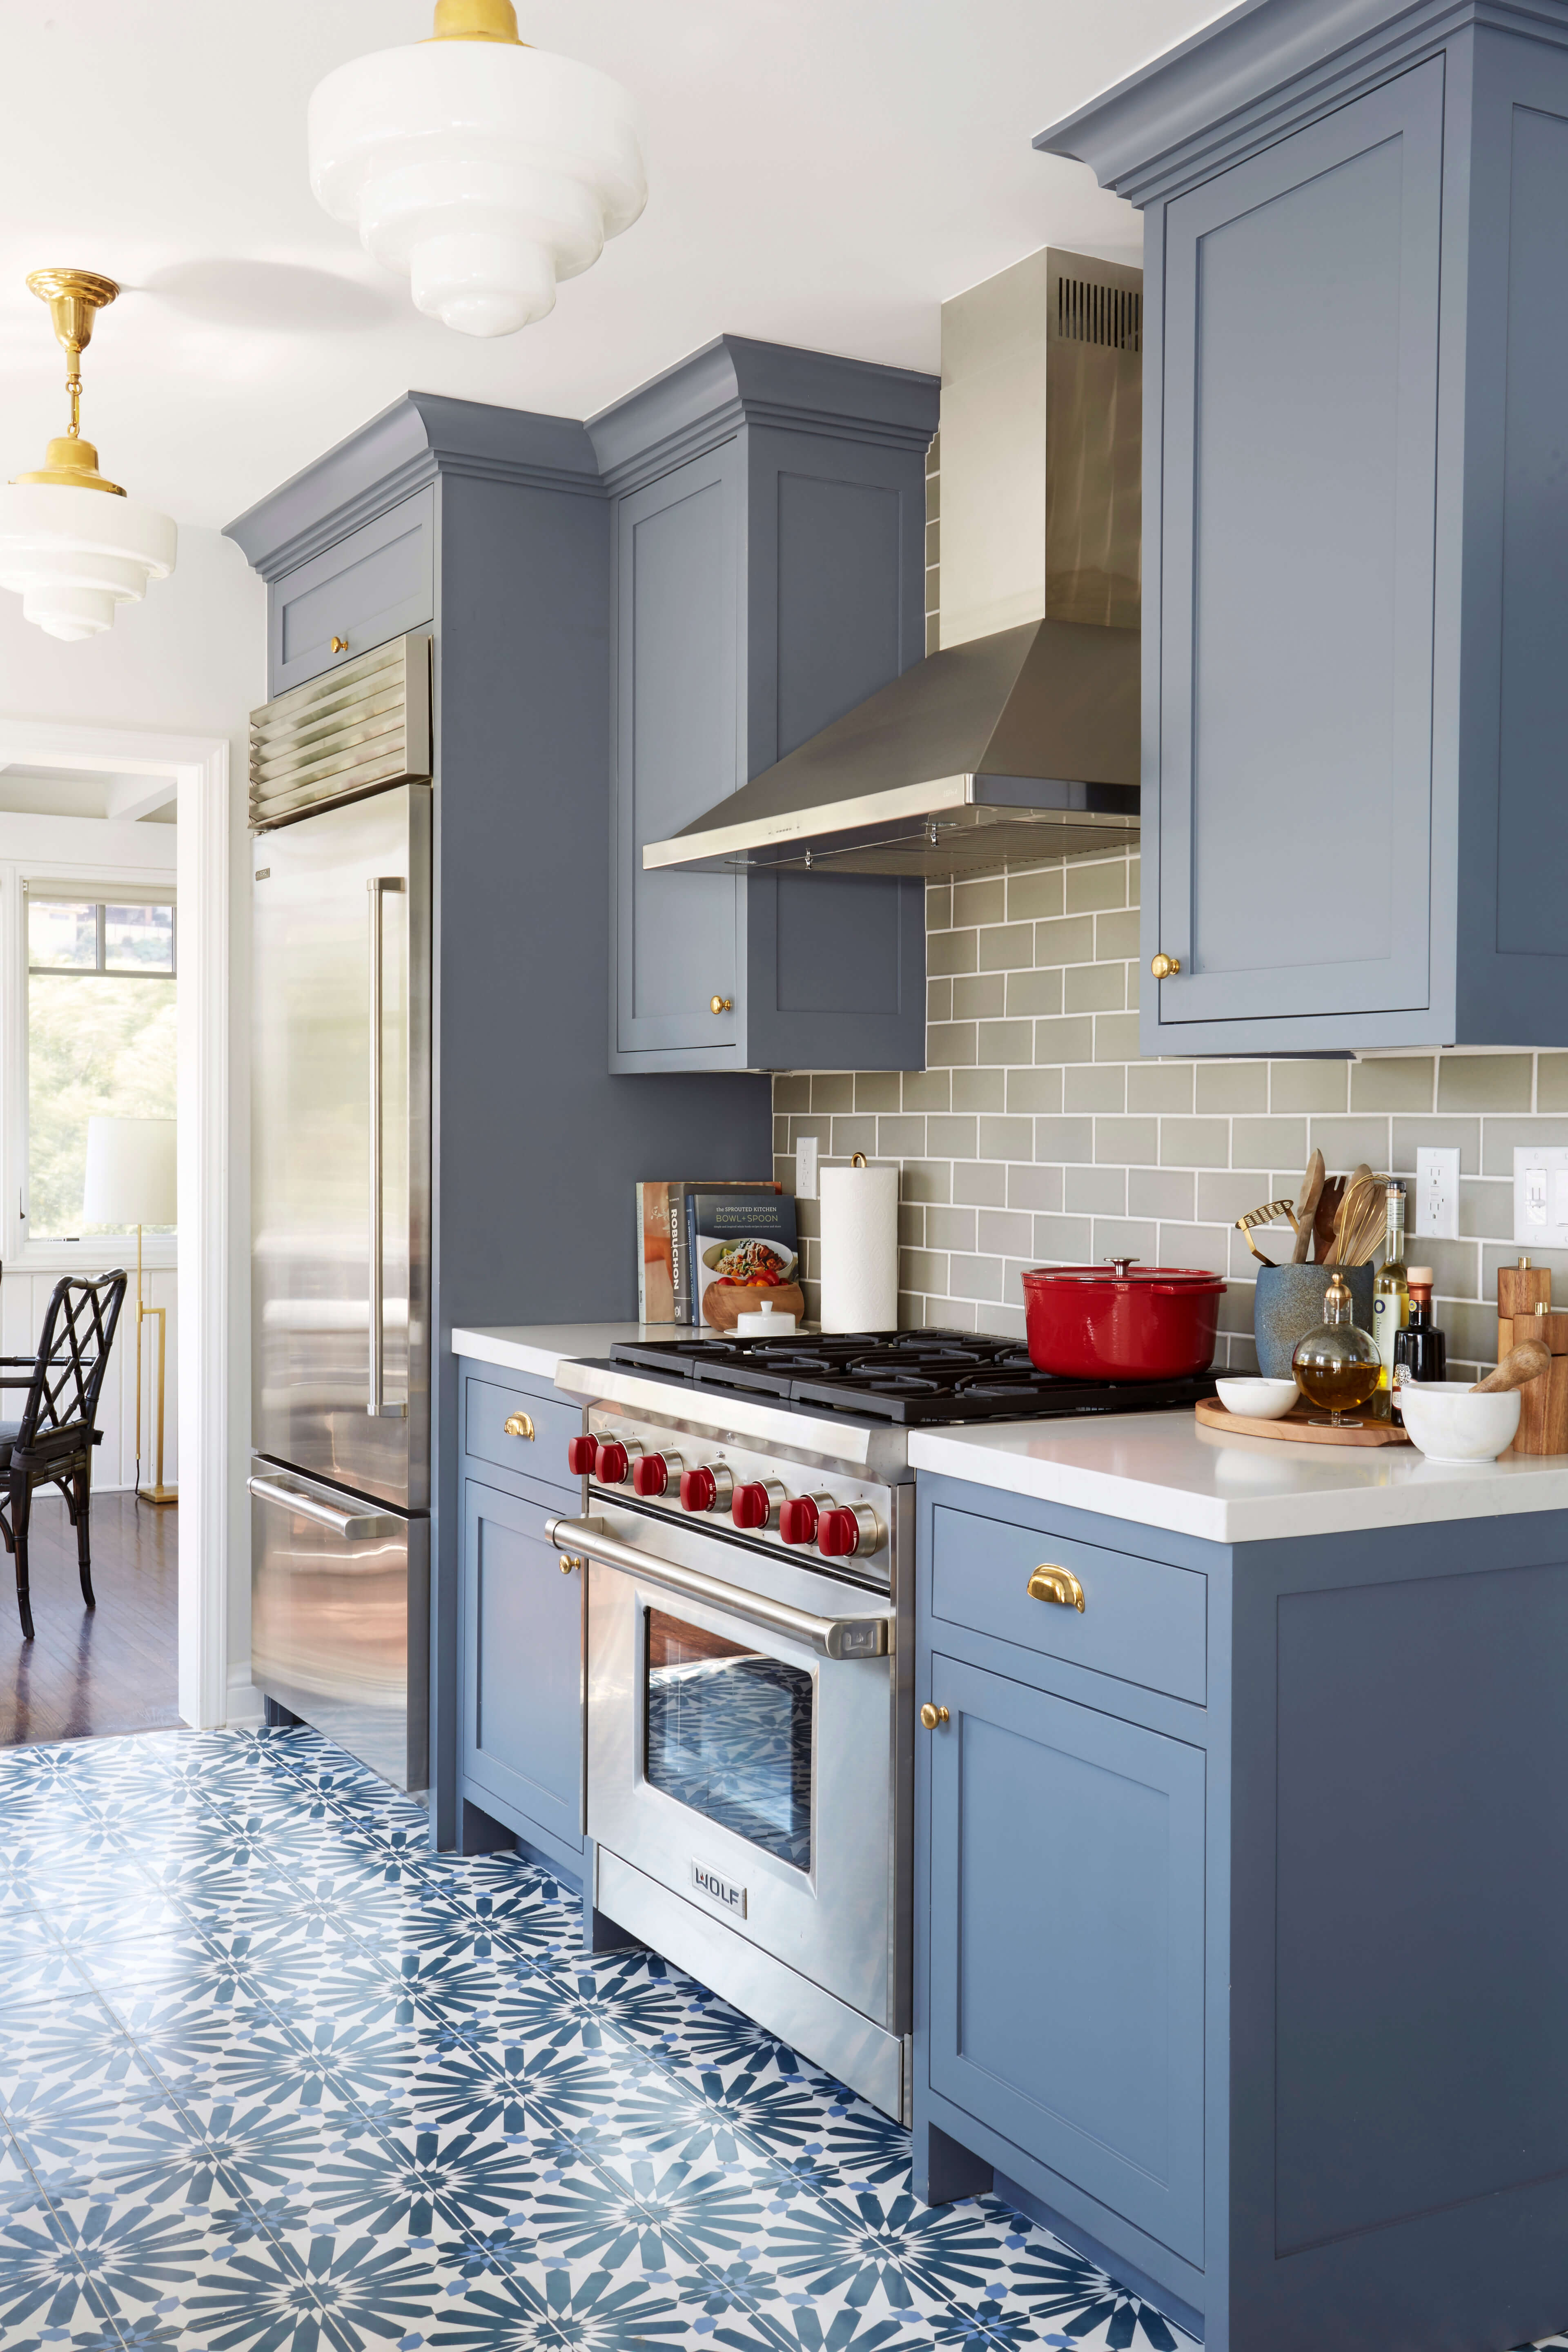
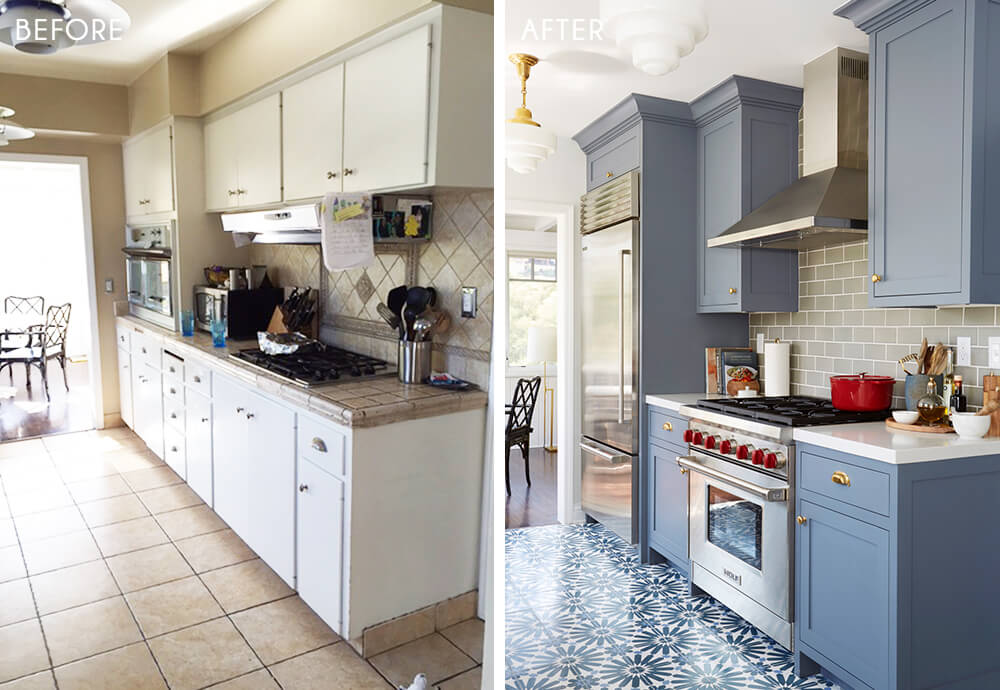
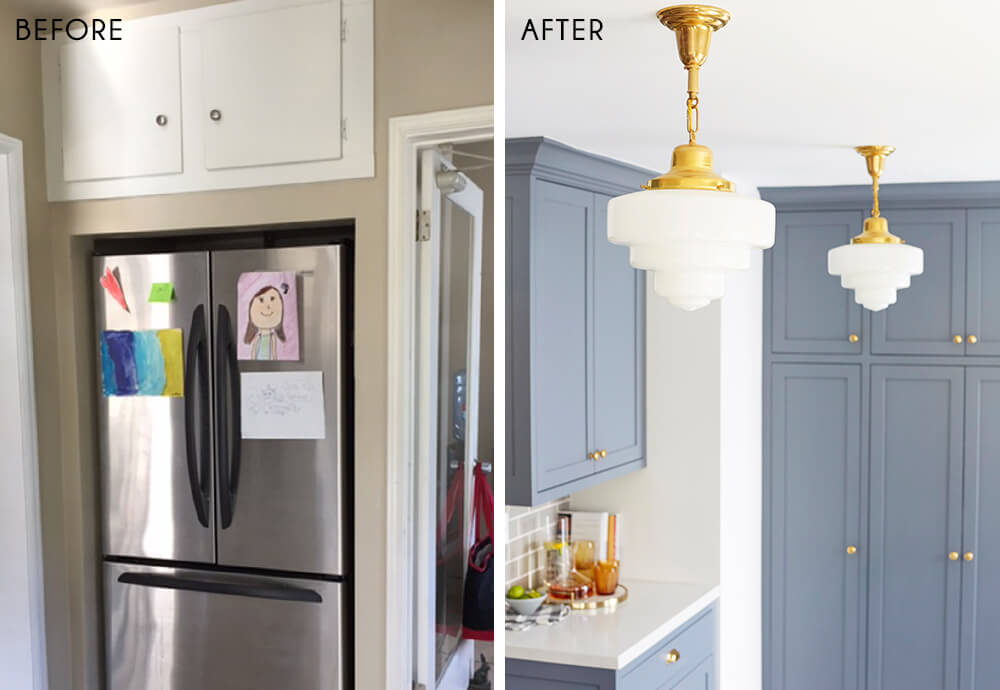
Onto the other side of the kitchen is where the majority of the appliances are. We relocated the fridge to this new spot which sits neatly tucked away behind the wall, we also opted for a counter depth so that it didn’t protrude into the kitchen too much. Howard (the homeowner) was particularly excited about his appliance upgrade and spent quite some time sourcing these and I just love the pops of red on the stove dials.
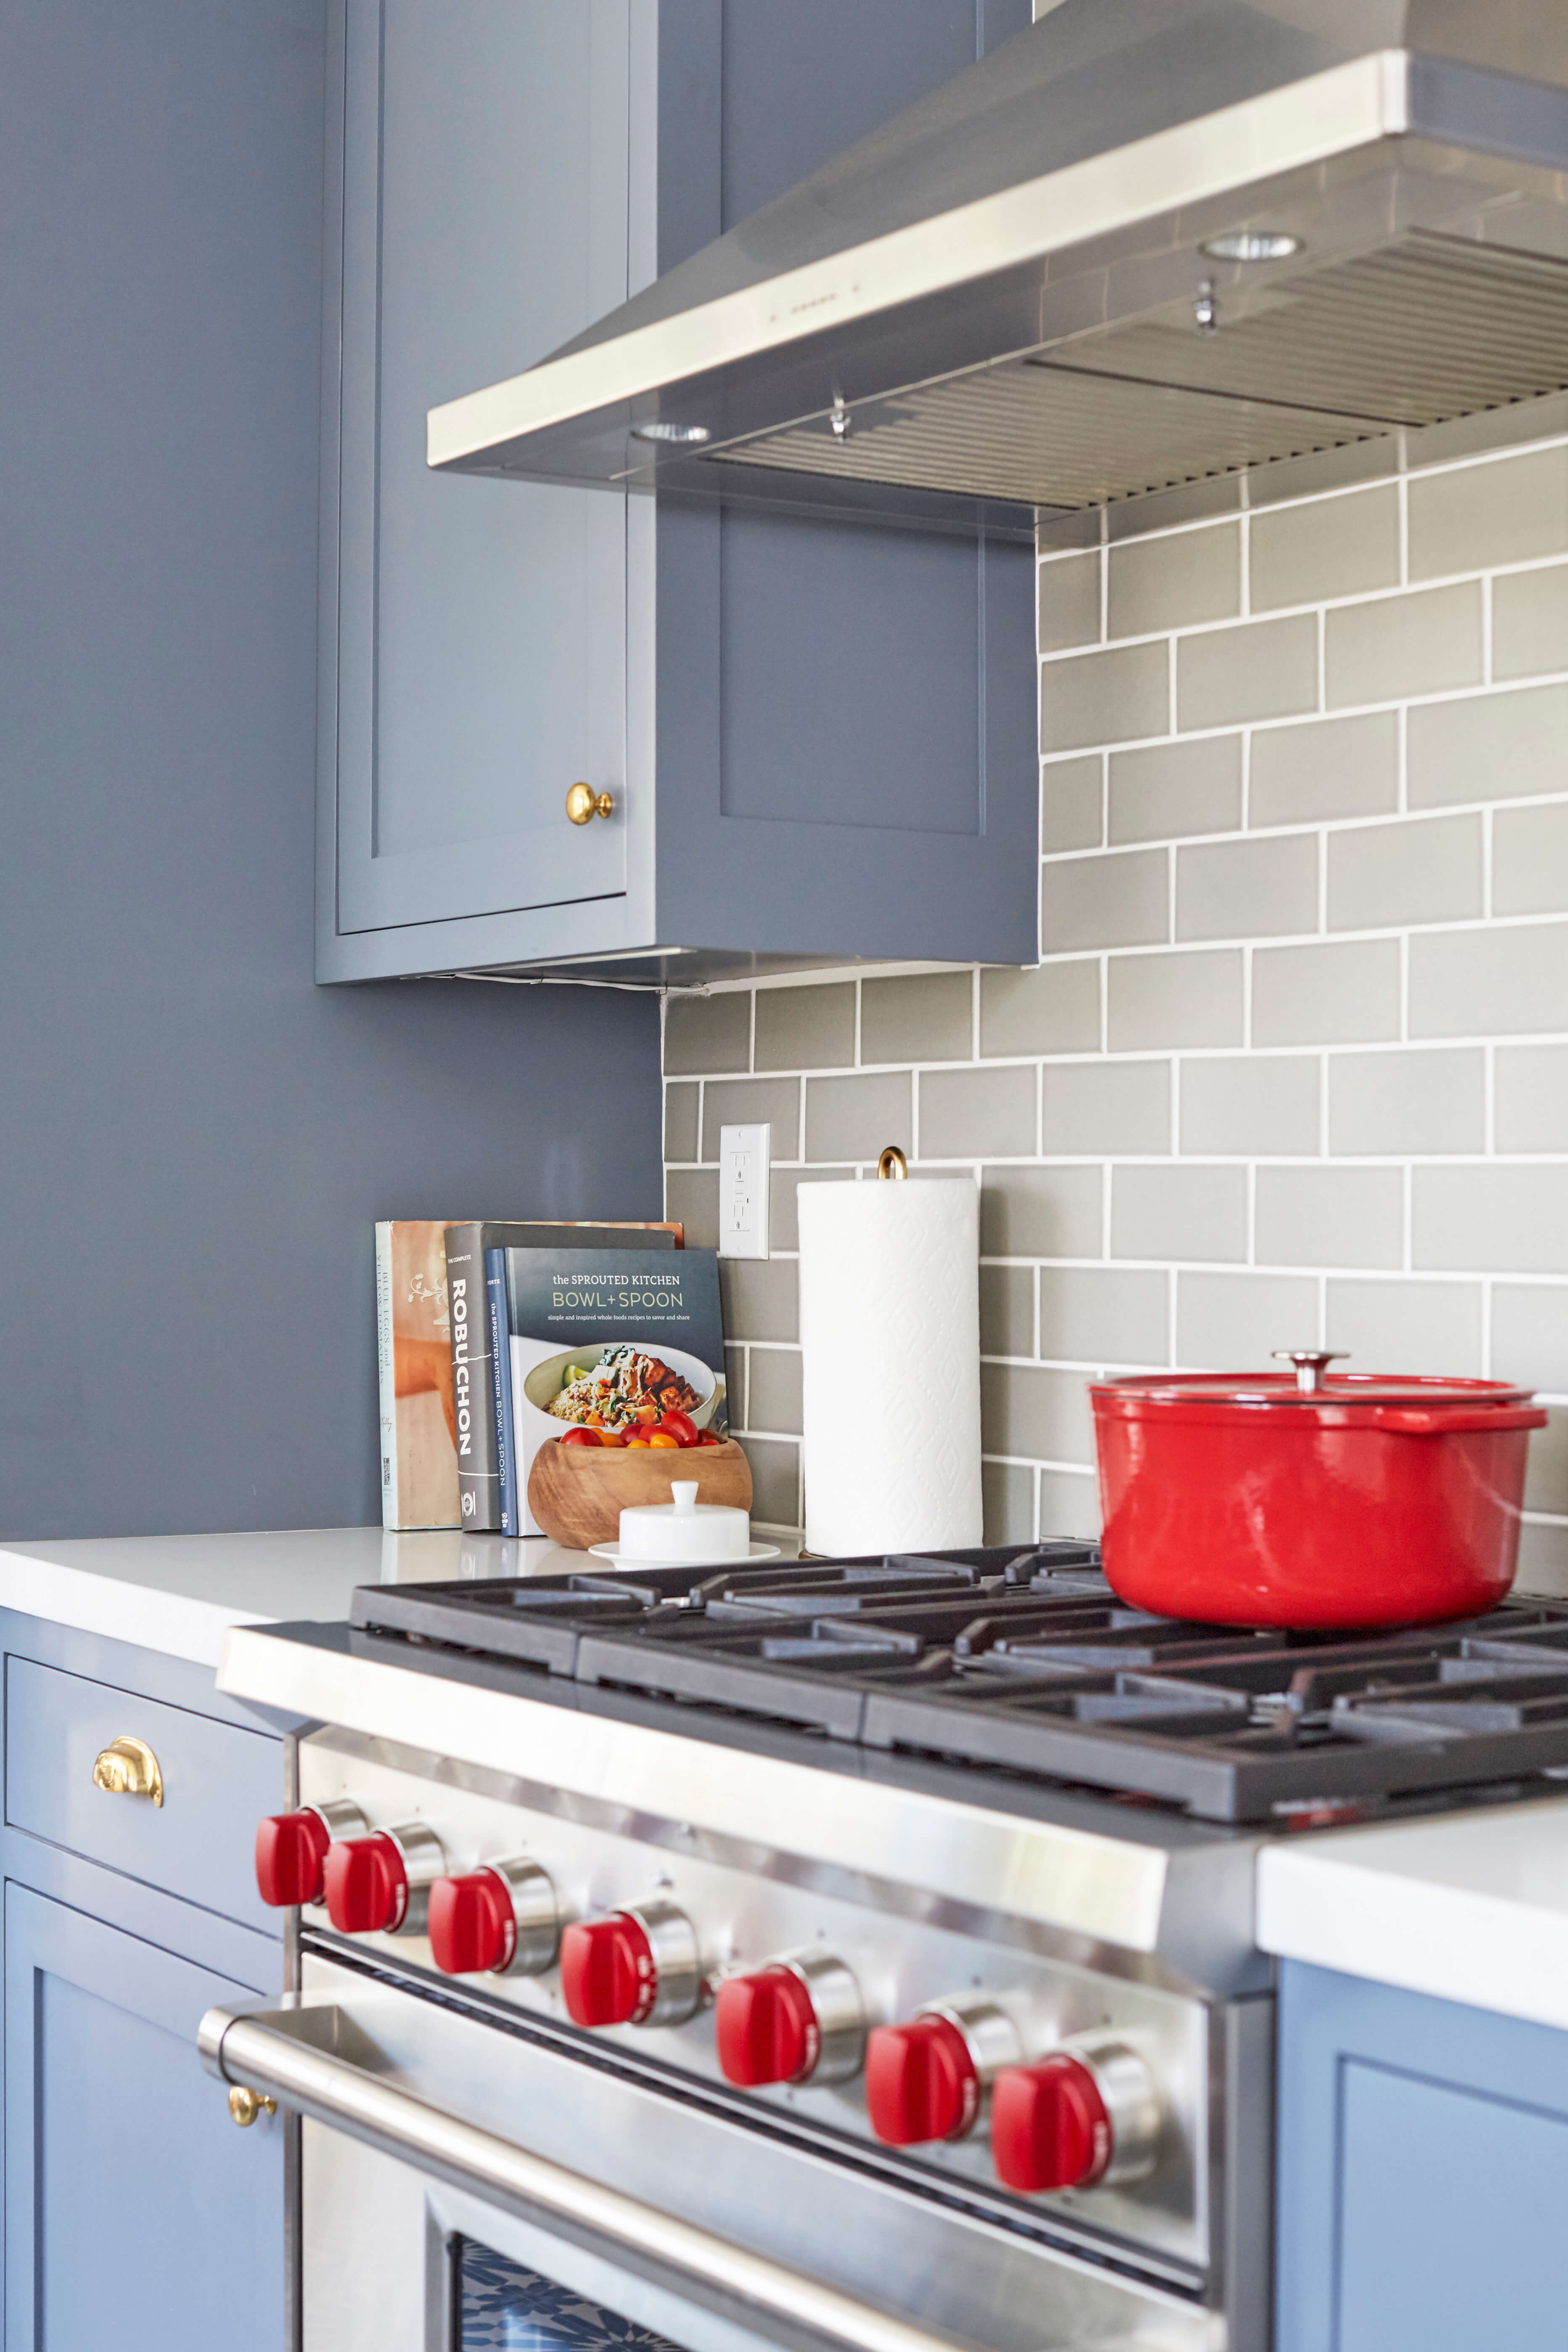
Keeping with our everyday essentials, we styled this area out with a stack of books leant against the side of the fridge enclosure, a wood bowl of fresh tomatoes (also brings in colour) a vintage butter dish and a roll of kitchen towel. All these items are of varying heights and sizes which gives this corner some depth.

The opposite side of the stove we corralled our cooking essentials. We used a pretty vintage vase (Emily’s of course) for the wooden spoons and other utensils, added salt into a cute marble dish and decanted oil into this amazing bottle. Our rule of thought is if it ain’t pretty then pop it away. But that doesn’t mean you can’t leave out bottles of vinegar like we did, just as long as they’re cute. I’m forever popping away the spray oil that my hubs leaves out, someone needs to invent a stylist spray bottle ? The wood tray and grinders really warm up the surface.
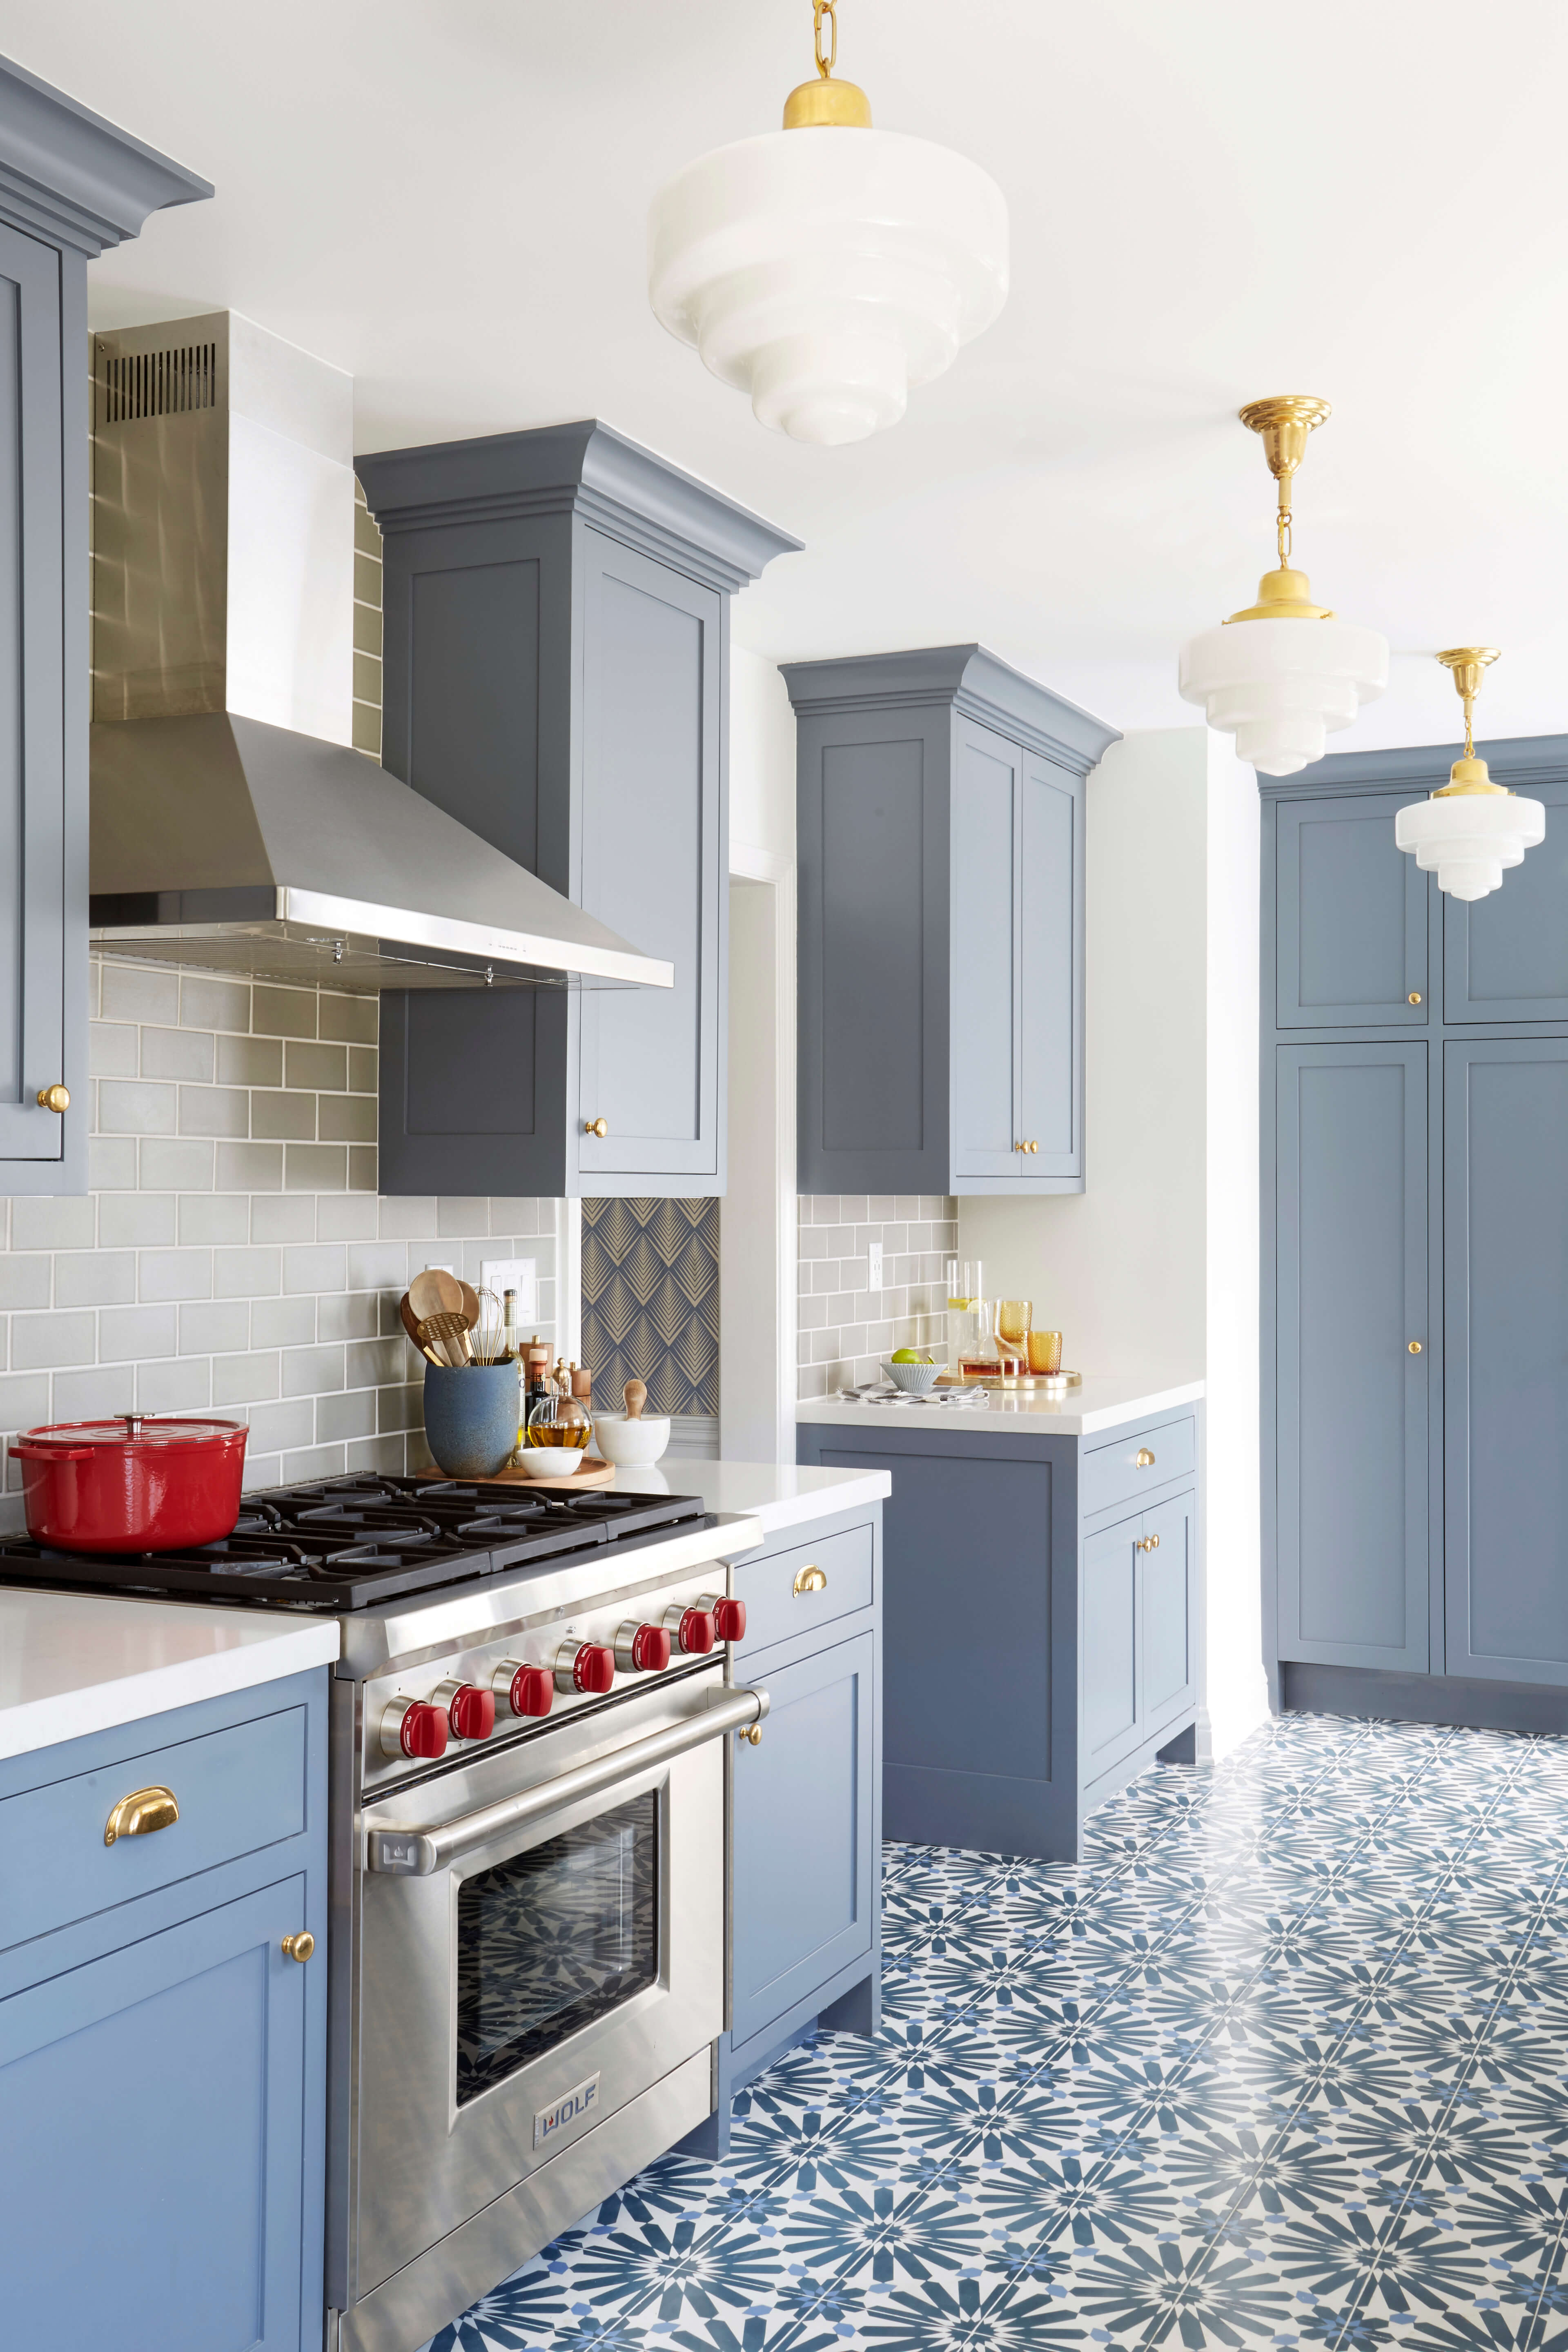
You can see at the end we added a full height pantry and additional counter space with uppers and lowers where the fridge used to be.
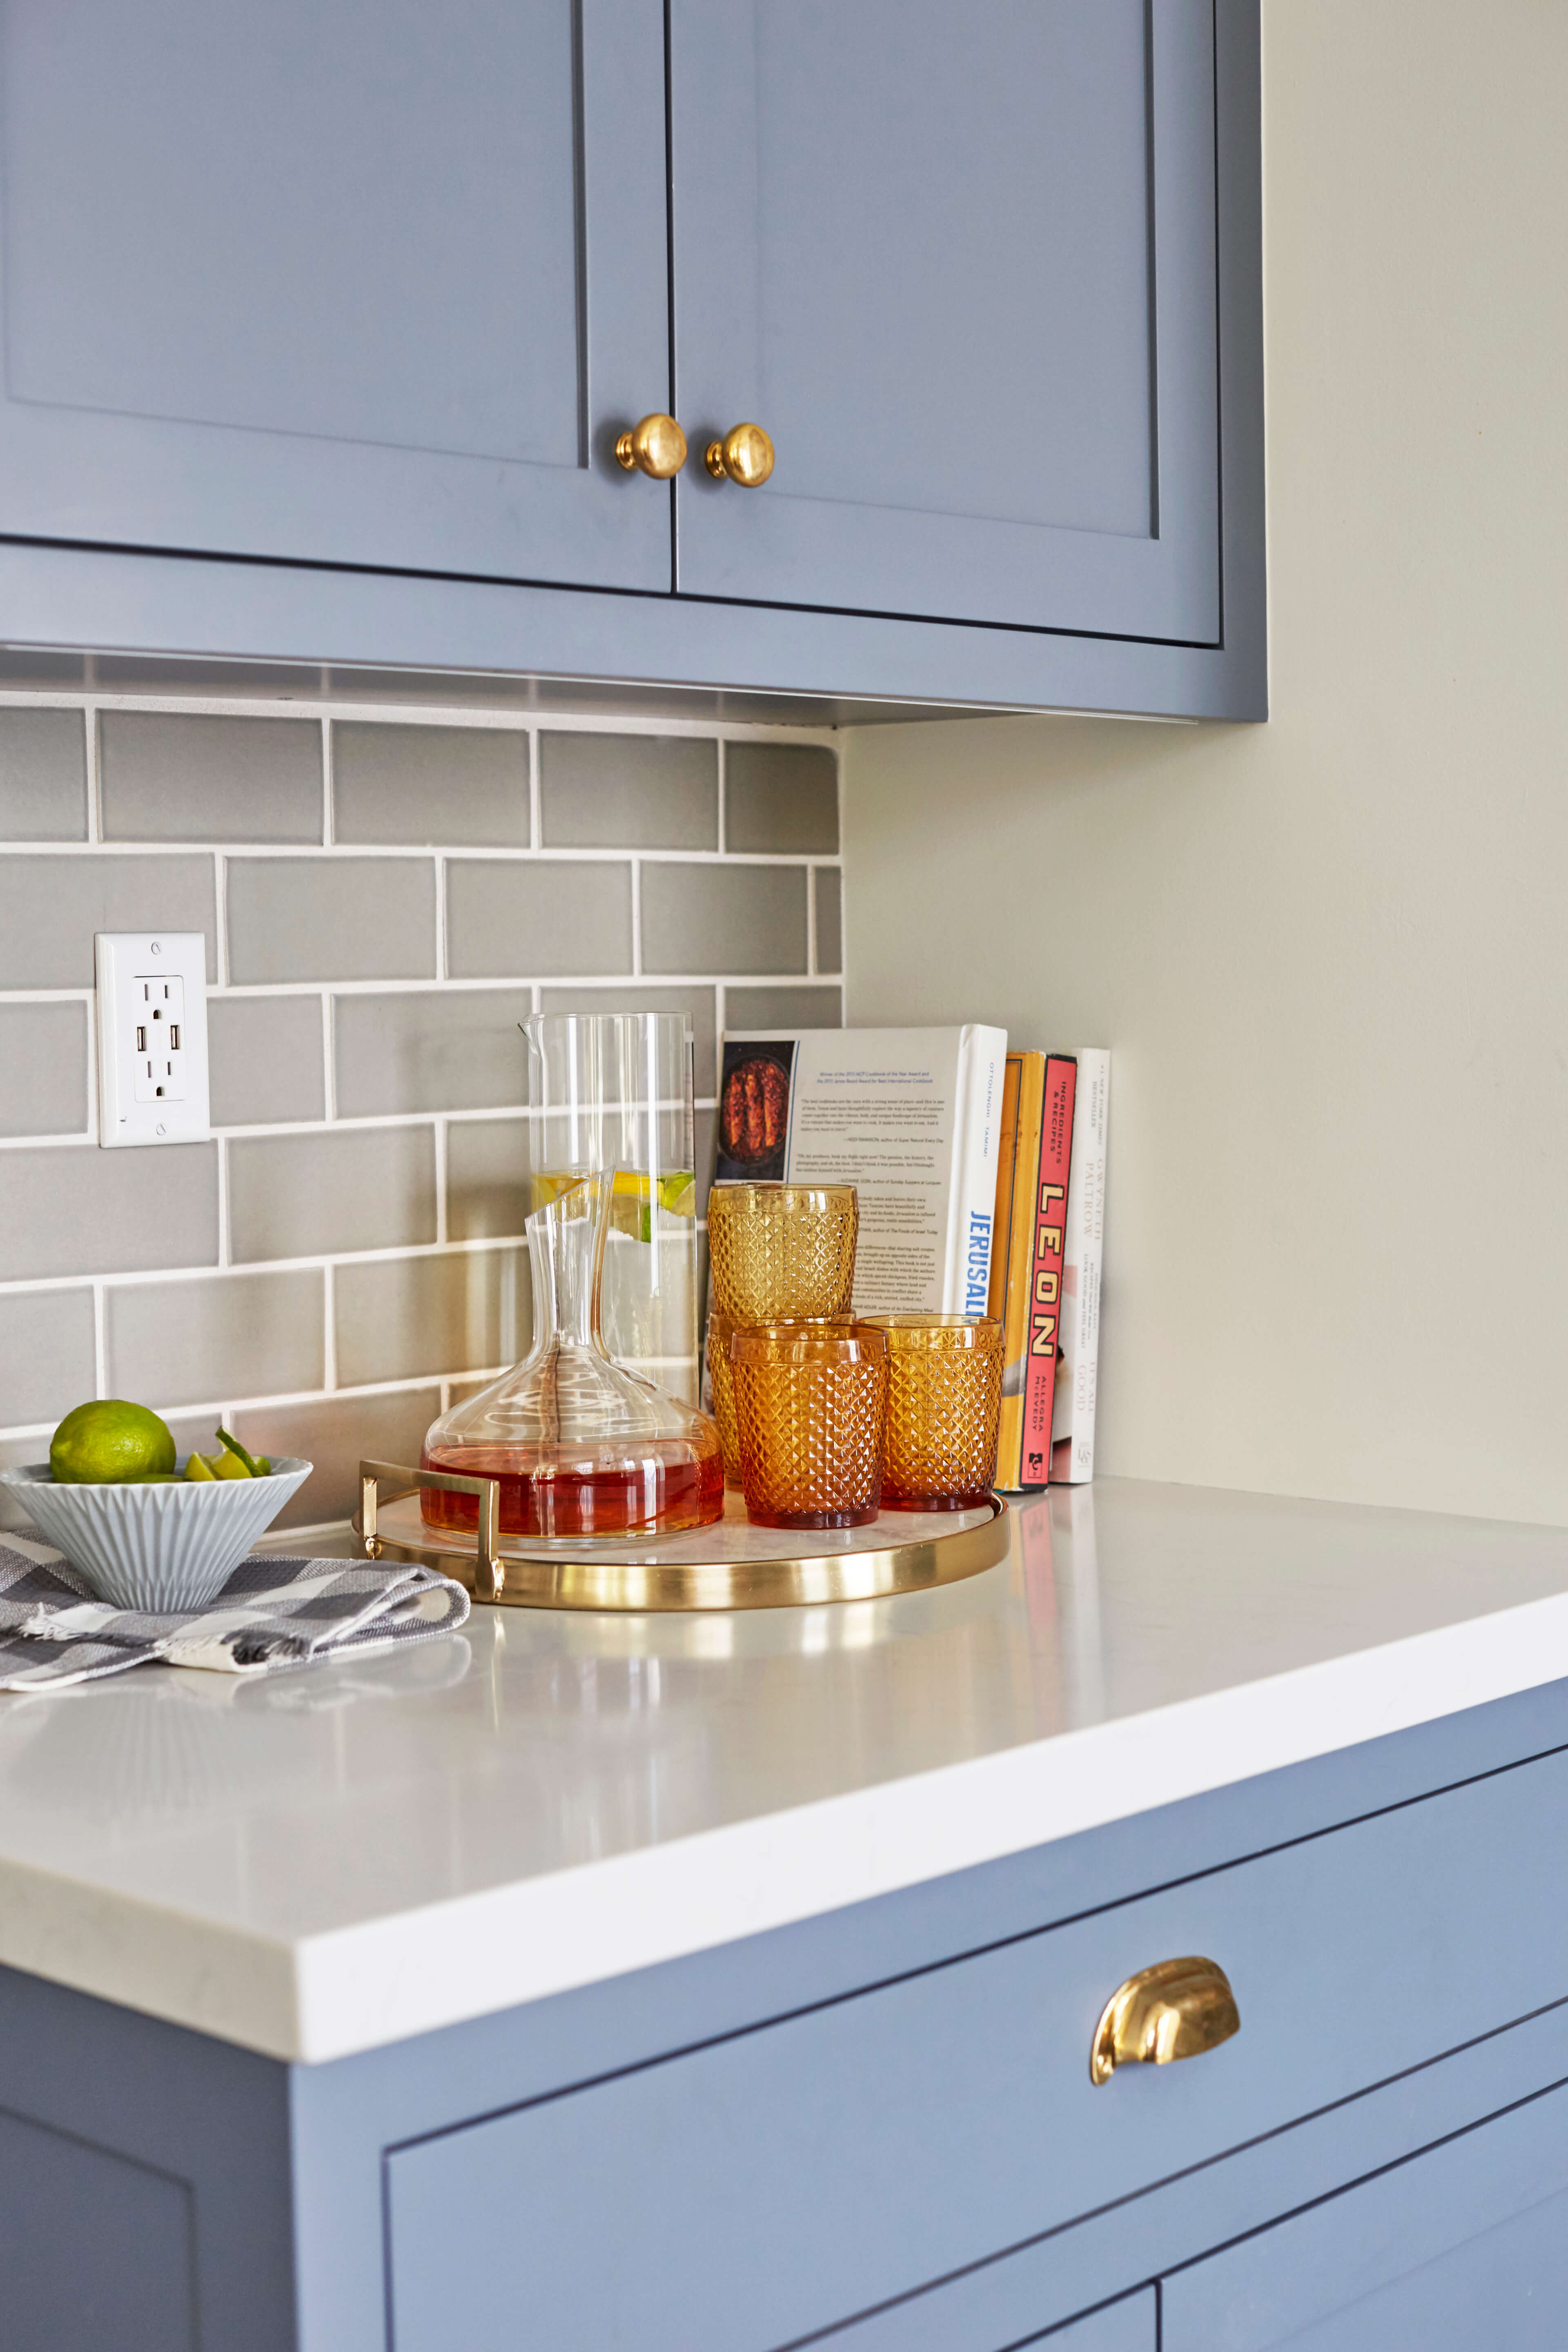
For the shoot we made this into a bar area using the amber glass again. It really does pull in your eye from the brass hardware from Rejuvenation.
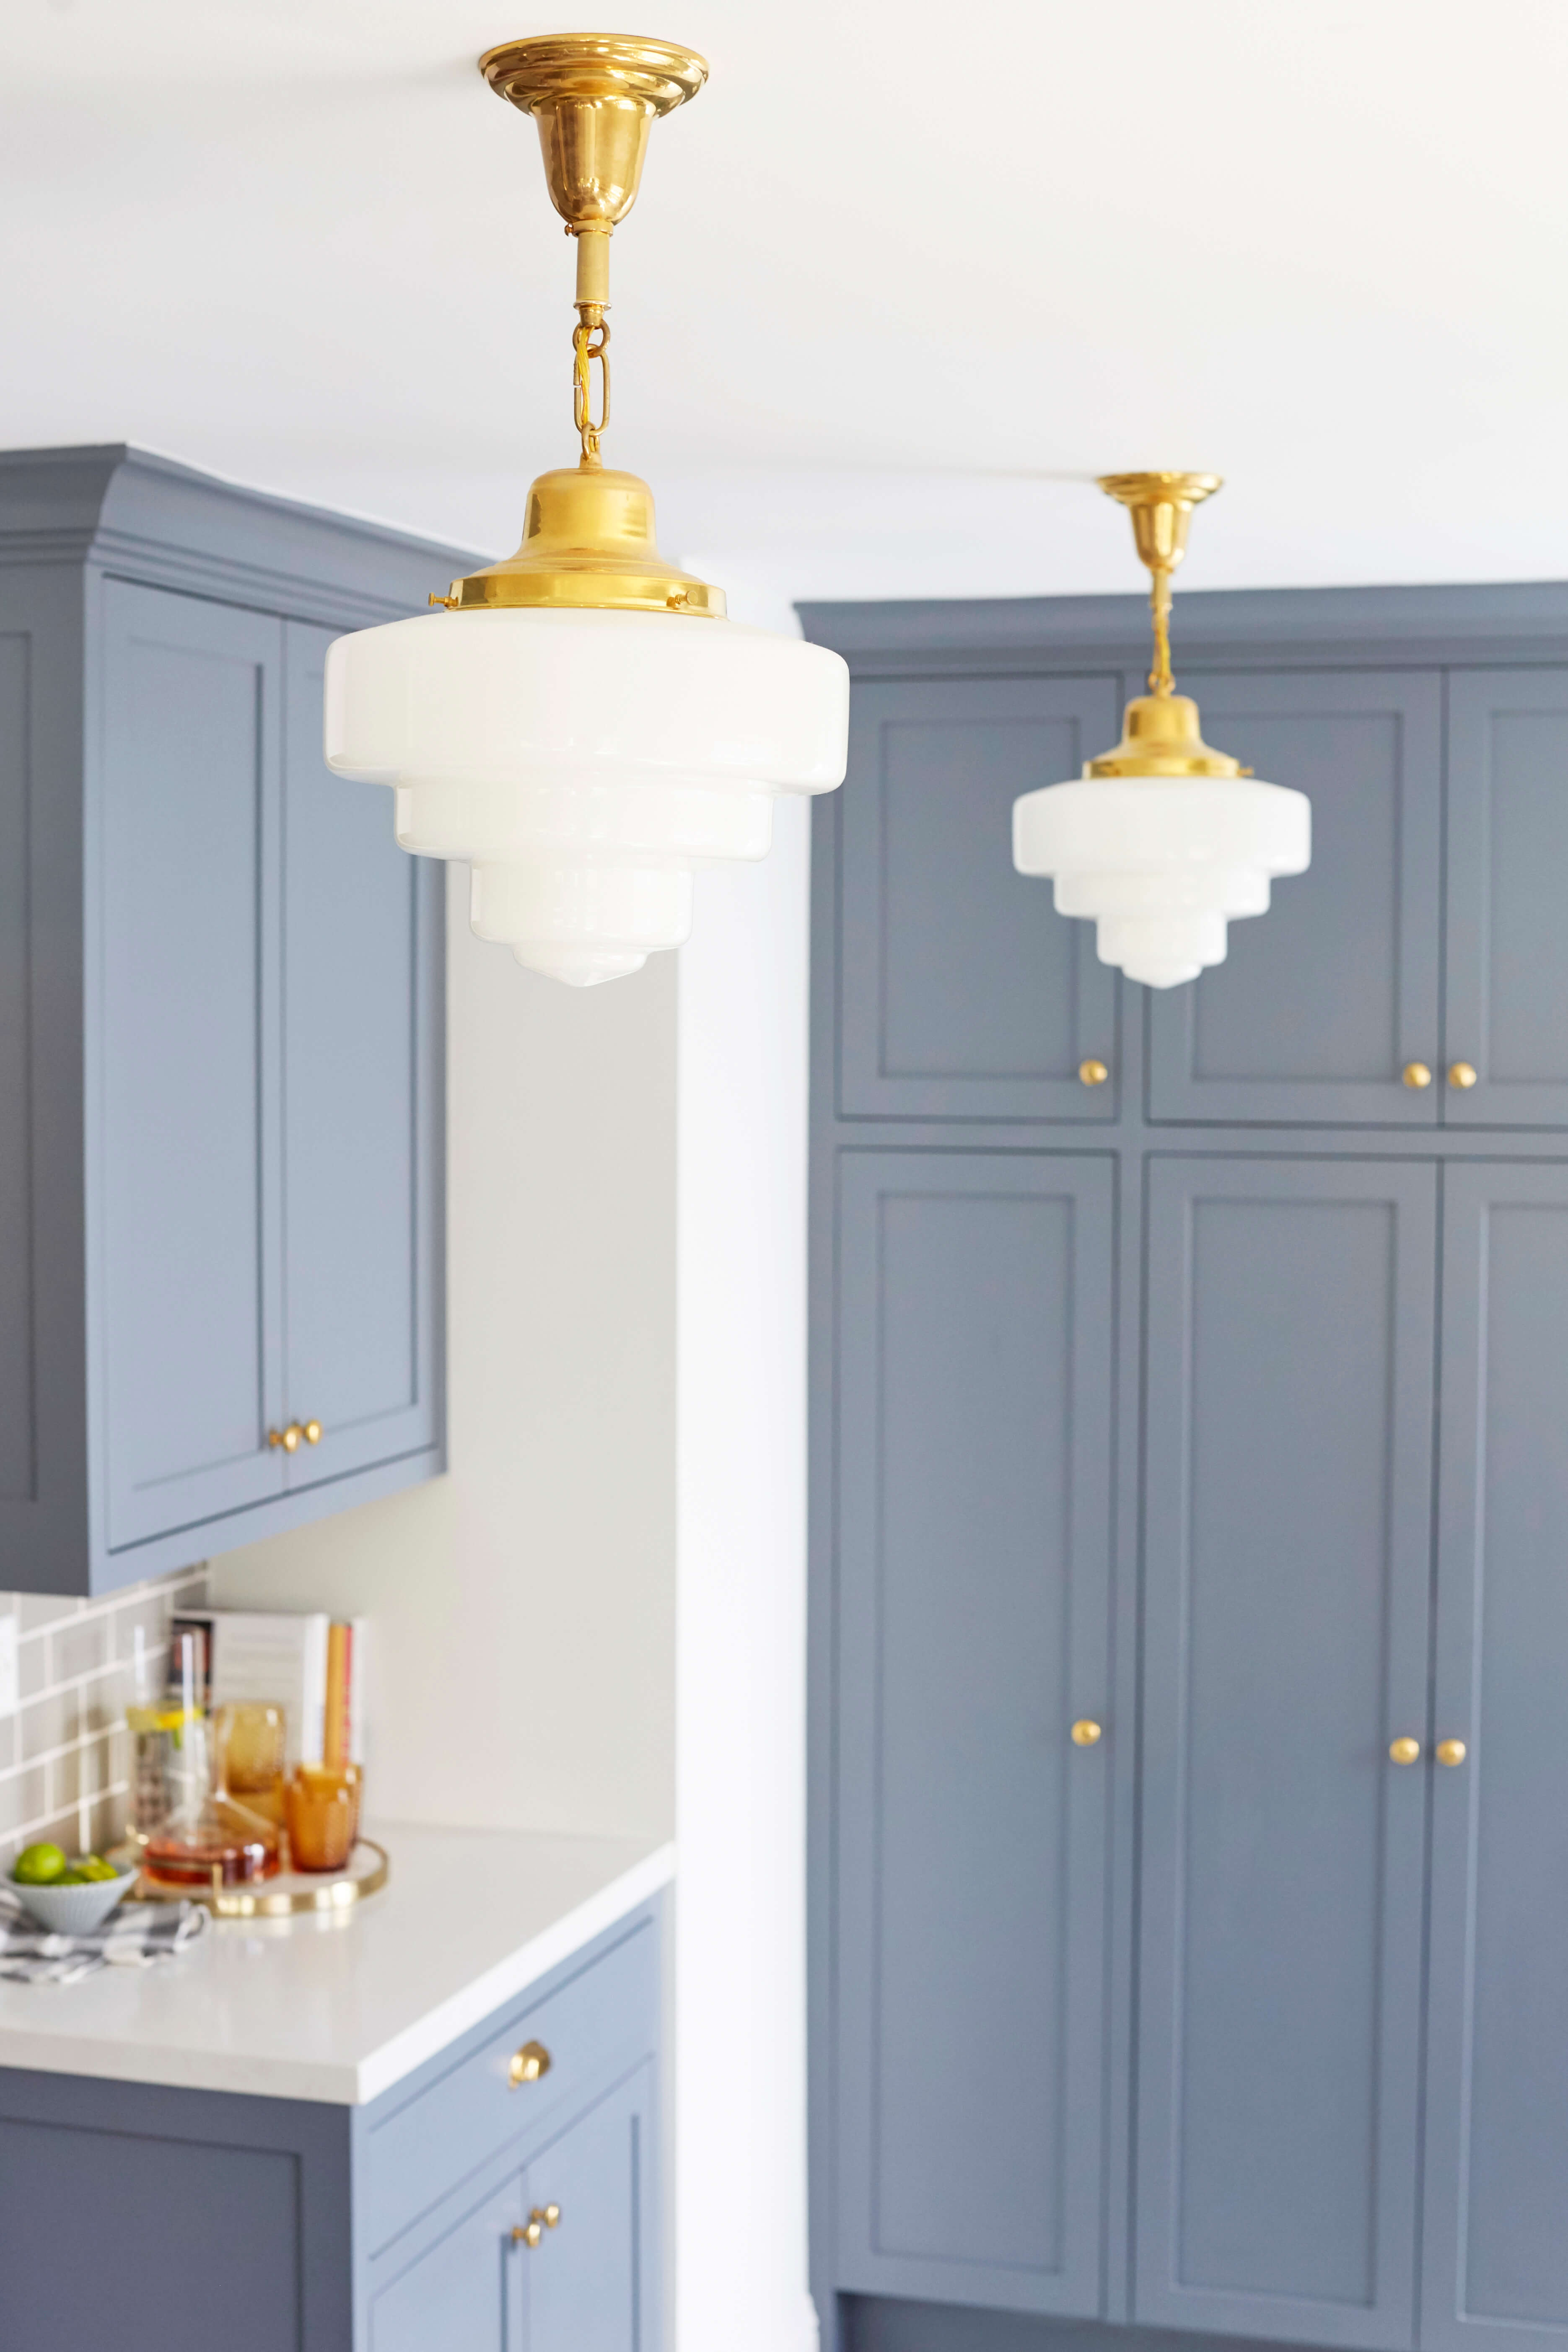

The lights are also from Rejuvenation. Since the house was built in the 30’s we wanted to add a touch of deco in here and these fit the bill perfectly.
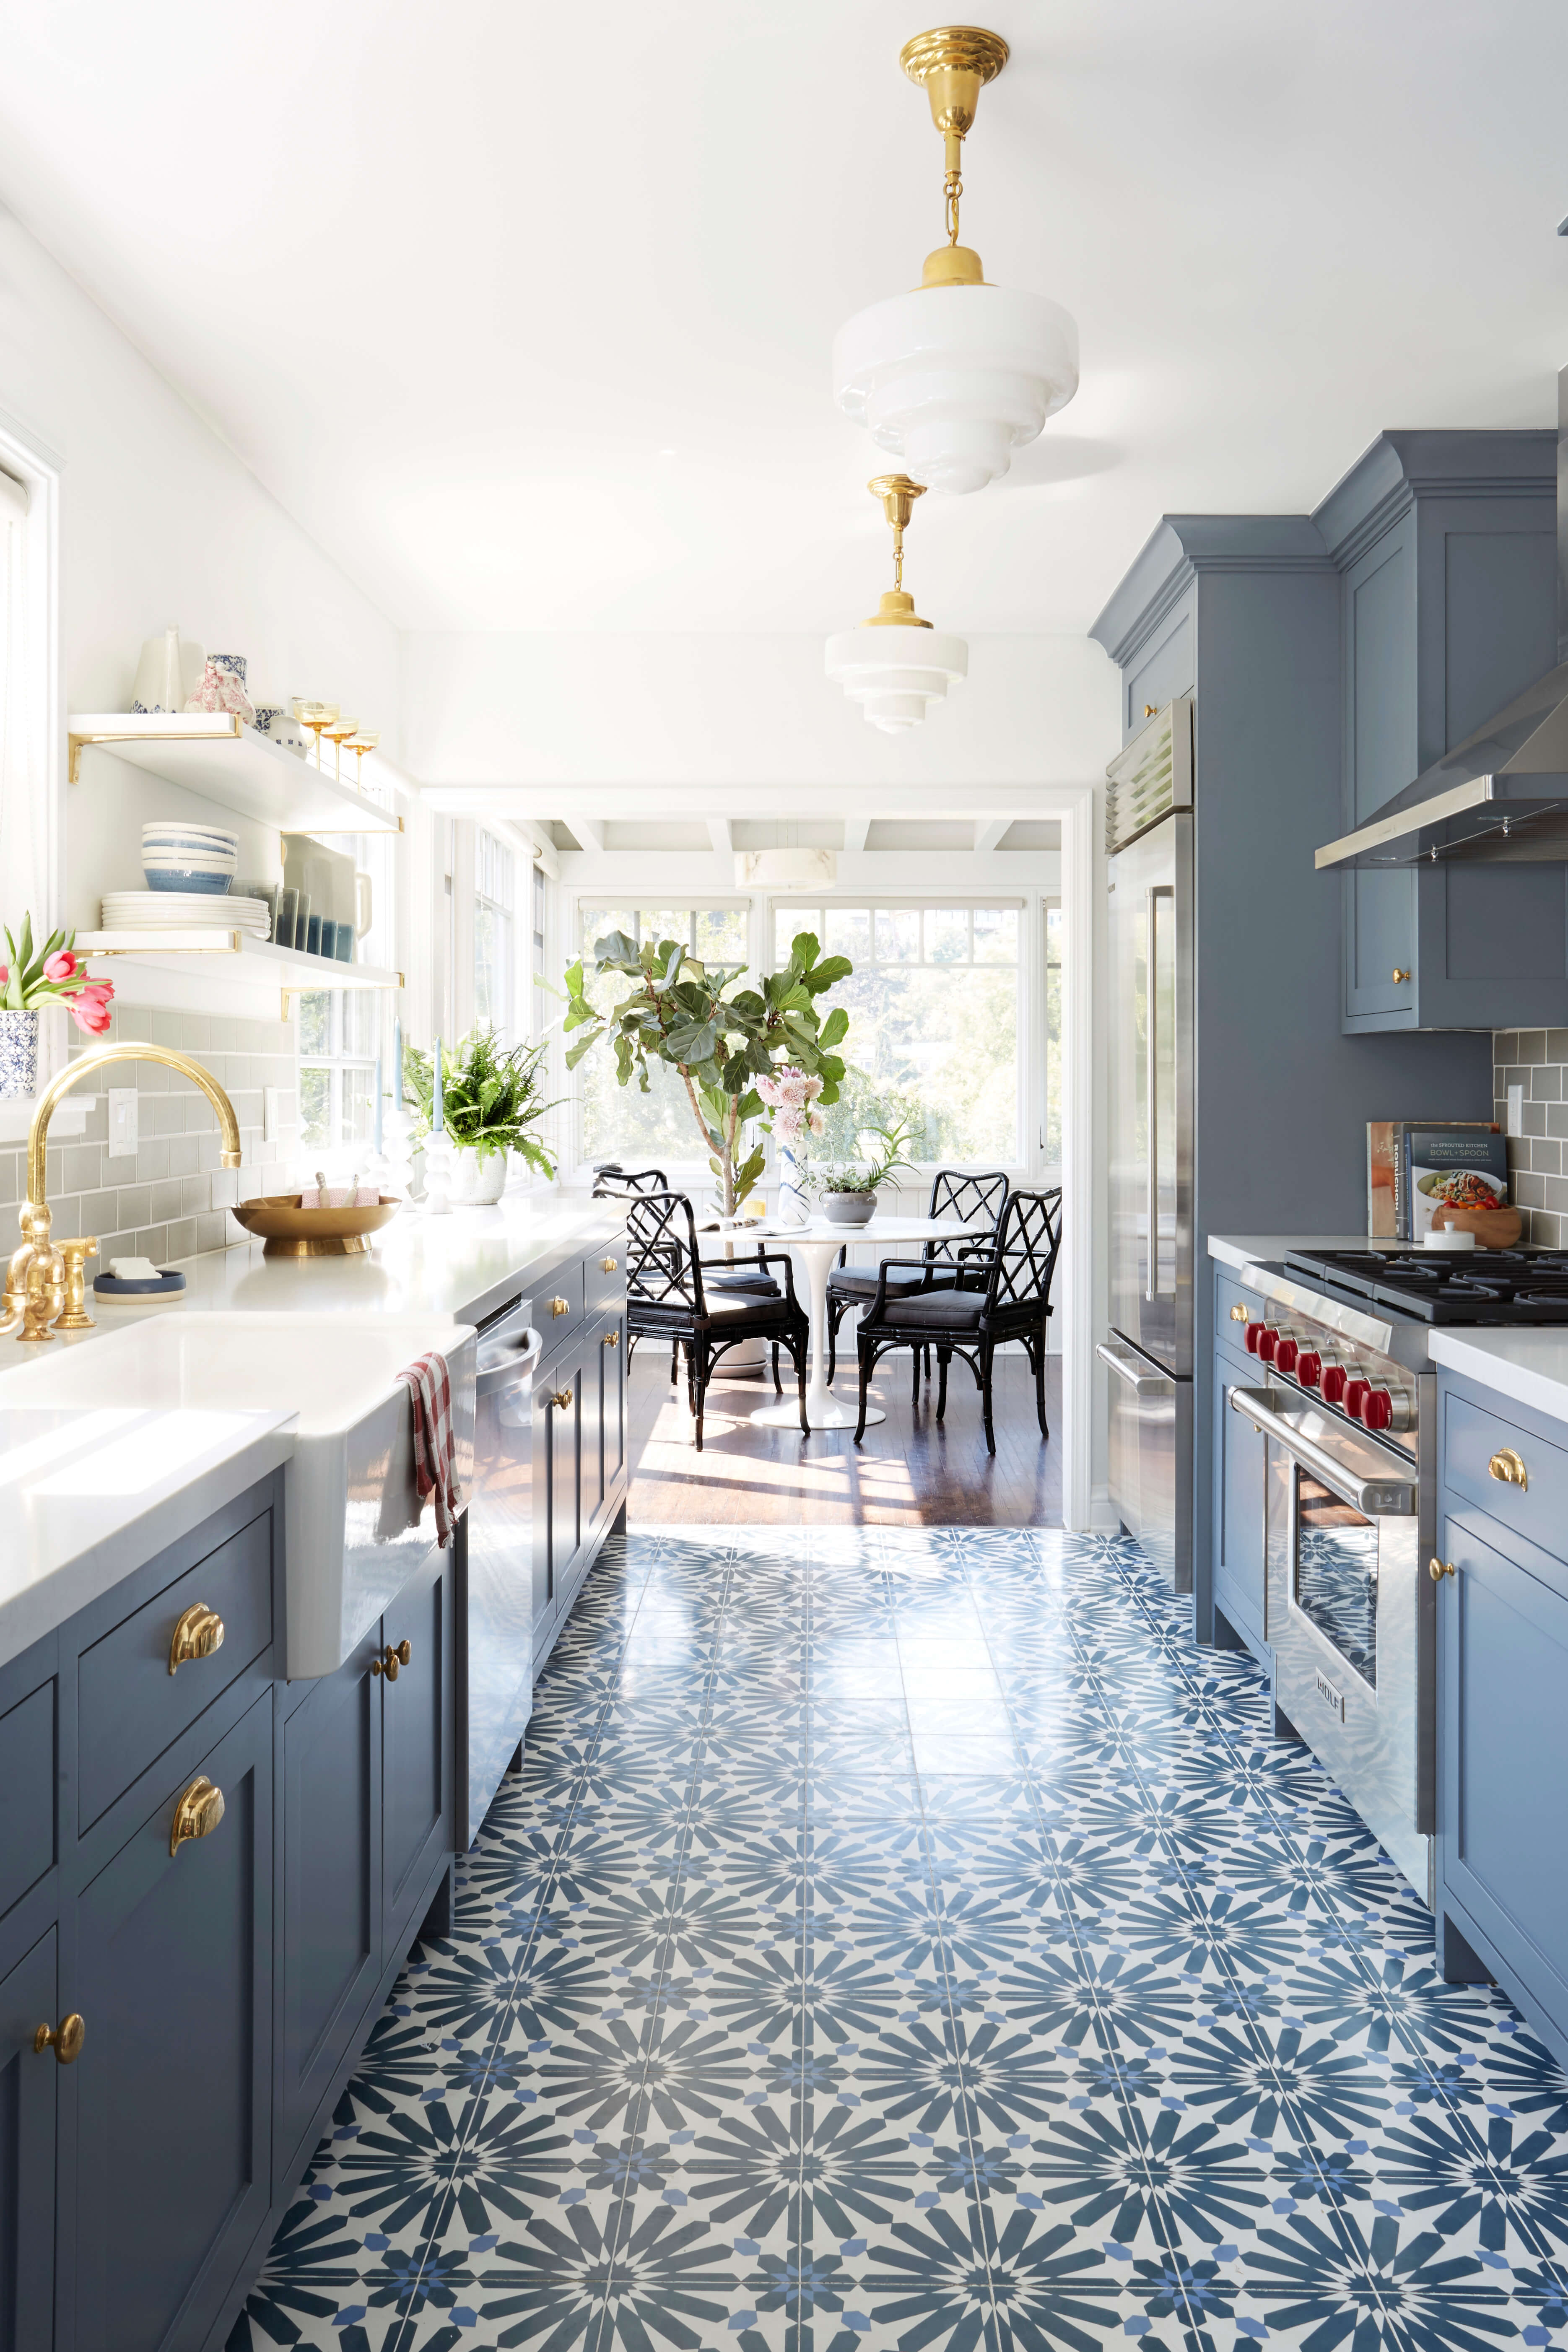
The kitchen leads onto the the cute dining nook in the family room that Emily designed a few years back so we added a few flower and plants on there to give it some life.
So there you have it, Modern Deco kitchen. Tell us what you think, do you like how we opened up the space?

And if you want to recreate it then see the Get The Look below.

1. Floor Tile | 2. Wall Paint | 3. Shelf Brackets | 4. Backsplash Tile | 5. Gas Range Stove | 6. Brass Pulls | 7. Brass Knobs | 8. Countertop | 9. Pendant Lights | 10. Porcelain Teapot | 11. Short Round Vessel | 12. Medium Vessel | 13. Tall Vessel | 14. Grey Plaid Kitchen Towel | 15. Red Plaid Kitchen Towel | 16. Marble & Brass Tray | 17. Blue & White Vase | 18. Nesting Bowl Set | 19. Blue & White Soup Bowl | 20. Red Tall Mug | 21. Blue Short Mug | 22. Wood Paddle Board | 23. Bowl Set | 24. Blue & White Marbled Vase | 25. Gold Soap Dispenser | 26. Grey Drinking Glass | 27. Amber Old Fashion Glass | 28. Brass Faucet | 29. Farmhouse Sink | 30. Round Wooden Serving Tray | 31. Red Crock Pot | 32. Paper Towel Holder | 33. Pepper Mill | 34. Glass Decanter | 35. Short Blue Old Fashion Glass | 36. Clear Pitcher | 37. Marble Dip Bowl | 38. Pestle & Mortar | 39. Marble Serving Trays | 40. Wooden Whisk | 41. Wooden Spoon | 42. Tall Concrete Candle Holder | 43. Medium Concrete Candle Holder | 44. Short Concrete Candle Holder | 45. Ceramic Pitcher | 46. Blue & White Tumbler | 47. Blue & White Mugs
*After photos by Zeke Ruelas
** A big thanks to our contractor, Belin from Mega Builders, and Mike & Yudah from 4Carpenters for making the whole process so seamless.
Article source: https://stylebyemilyhenderson.com/blog/modern-deco-kitchen-reveal


